|
12370| 9
|
[高级教程] openMV机器视觉模块与麦昆小车(1)追球的麦昆 |
|
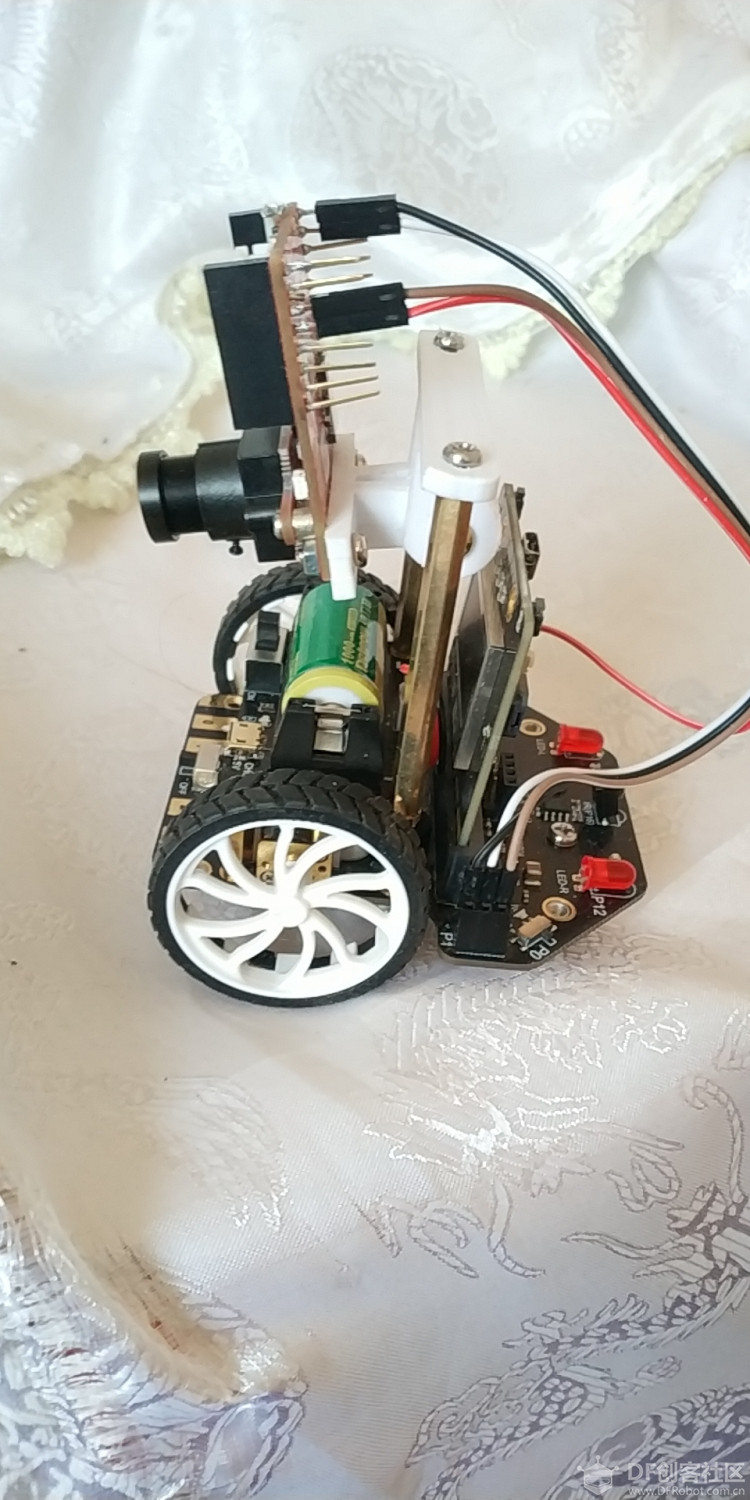
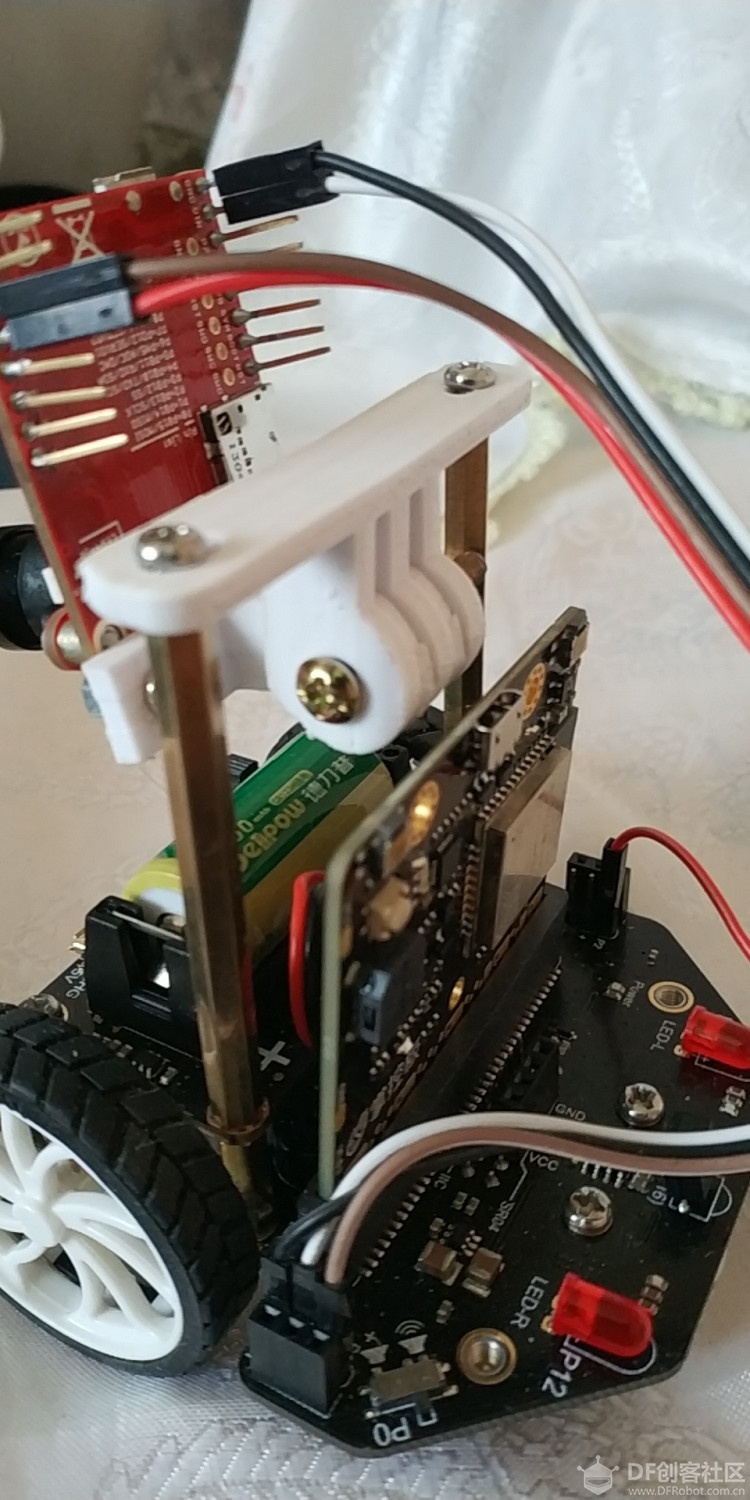
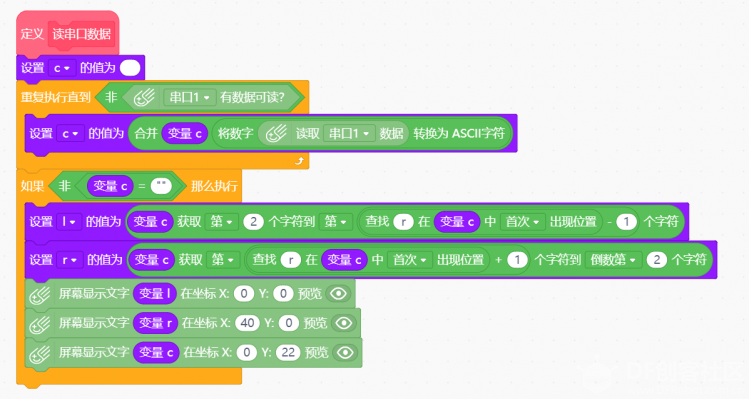
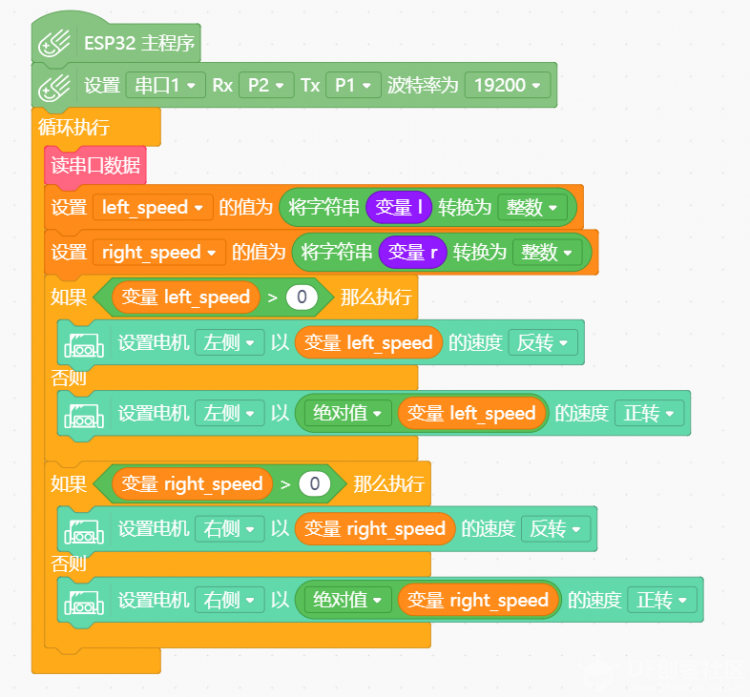
本帖最后由 潘虹辉 于 2019-9-7 18:34 编辑 首先,了解一下openMV机器视觉模块。OpenMV是什么? 简单的来说,它是一个可编程的摄像头,通过MicroPython语言,可以实现你的逻辑。 而且摄像头本身内置了一些图像处理算法,很容易使用。 具体介绍可以看以下网址: 网站 https://singtown.com/openmv/ 文档 https://book.openmv.cc/ openMV加上一些扩展板可以实现追球小车,追踪人脸的云台,视觉巡线小车等等,我这次做的就是把openMV模块与麦昆小车结合起来,实现自动追球的麦昆 1、组装与结构我使用了openMV模块+掌控板+麦昆小车+锂电板(DF创客商城都有买的) 为了把模块装在小车上,我参考了下面这篇文章的架子,底部的架子是直接用原来的STL文件打印的,上面做了一个可以接openMV板的架子,安装完成后如下图(为了让摄像头能装在较低的位置,我的摄像头是向麦昆小车的后面,所以程序里左右和前后是反的,小车是向后开的。 人工智能(障)——麦昆人体识别与追踪(一) https://mc.dfrobot.com.cn/thread-296584-1-1.html     2、接线openMV模块与小车使用串口模块通讯,具体的接线如下: 小车 openMV GND GND + VIN p1(TX) p5(RX) p2(RX) p4(TX) 3、编程 首先是openMV模块的程序部分 openMV使用openMV IDE进行编程,使用的是python语言,自带机器视觉处理库 具体使用参见openMV网站 openMV有现成的追球程序,程序的流程是由摄像头采集图像,使用openMV机器视觉库找到相应的颜色色块的中心点与大小,与图像中心点X轴比较得到x_error,与预设色块大小比较得到远近的误差h_error 由PID算法函数计算出相应的x_output和h_output然后计算出两边车轮的速度(我的小车是向后开,所以与原程序里的左右是反着的) left_speed=-h_output+x_output right_speed=-h_output-x_output openMV定义的3个串口,其中uart3使用的是P4(TX)\P5(RX) 主程序findblob.py如下: [mw_shl_code=python,true]# Blob Detection Example # # This example shows off how to use the find_blobs function to find color # blobs in the image. This example in particular looks for dark green objects. import sensor, image, time from pyb import UART from pid import PID # You may need to tweak the above settings for tracking green things... # Select an area in the Framebuffer to copy the color settings. sensor.reset() # Initialize the camera sensor. sensor.set_pixformat(sensor.RGB565) # use RGB565. sensor.set_framesize(sensor.QQVGA) # use QQVGA for speed. sensor.skip_frames(10) # Let new settings take affect. sensor.set_auto_whitebal(False) # turn this off. clock = time.clock() # Tracks FPS. uart = UART(3, 19200, timeout_char=1000) # For color tracking to work really well you should ideally be in a very, very, # very, controlled enviroment where the lighting is constant... green_threshold = (15, 95, -128, -23, -43, 59) size_threshold = 2000 x_pid = PID(p=1, i=2, imax=250) h_pid = PID(p=0.1, i=0.2, imax=100) def find_max(blobs): max_size=0 for blob in blobs: if blob[2]*blob[3] > max_size: max_blob=blob max_size = blob[2]*blob[3] return max_blob while(True): clock.tick() # Track elapsed milliseconds between snapshots(). img = sensor.snapshot() # Take a picture and return the image. blobs = img.find_blobs([green_threshold]) if blobs: max_blob = find_max(blobs) x_error = max_blob[5]-img.width()/2 h_error = max_blob[2]*max_blob[3]-size_threshold print("x error: ", x_error,"h error: ", h_error) img.draw_rectangle(max_blob[0:4]) # rect img.draw_cross(max_blob[5], max_blob[6]) # cx, cy x_output=x_pid.get_pid(x_error,1) h_output=h_pid.get_pid(h_error,1) print("x_output:", x_output, "h_output",h_output) uart.write("l"+str(int(-h_output+x_output))+"r"+str(int(-h_output-x_output))+"\r") time.sleep(60) else: uart.write("l35r-35\r") time.sleep(60) [/mw_shl_code] PID函数pid.py代码如下: [mw_shl_code=python,true]from pyb import millis from math import pi, isnan class PID: _kp = _ki = _kd = _integrator = _imax = 0 _last_error = _last_derivative = _last_t = 0 _RC = 1/(2 * pi * 20) def __init__(self, p=0, i=0, d=0, imax=0): self._kp = float(p) self._ki = float(i) self._kd = float(d) self._imax = abs(imax) self._last_derivative = float('nan') def get_pid(self, error, scaler): tnow = millis() dt = tnow - self._last_t output = 0 if self._last_t == 0 or dt > 1000: dt = 0 self.reset_I() self._last_t = tnow delta_time = float(dt) / float(1000) output += error * self._kp if abs(self._kd) > 0 and dt > 0: if isnan(self._last_derivative): derivative = 0 self._last_derivative = 0 else: derivative = (error - self._last_error) / delta_time derivative = self._last_derivative + \ ((delta_time / (self._RC + delta_time)) * \ (derivative - self._last_derivative)) self._last_error = error self._last_derivative = derivative output += self._kd * derivative output *= scaler if abs(self._ki) > 0 and dt > 0: self._integrator += (error * self._ki) * scaler * delta_time if self._integrator < -self._imax: self._integrator = -self._imax elif self._integrator > self._imax: self._integrator = self._imax output += self._integrator return output def reset_I(self): self._integrator = 0 self._last_derivative = float('nan') [/mw_shl_code]详细的说明,如怎么设置色块参数,怎么调整PID系数等等,可以看以下网址的视频教程 https://singtown.com/learn/49239/ 以上程序的功能就是找到小球并把小车的左右车轮速度通过串口发到小车的掌控板 发来的数据格式是 l35r-35\r 左轮35右轮-35 l100r-35\r 左轮100右轮-35 \r是回车 每60毫秒发送一次 然后是麦昆小车的MIND+程序串口读取数据子程序  主程序  小车的程序就是查询串口是否有数据 有数据就读取到字符串变量c中 然后通过字符串函数取出左右速度 在主程序中将字符串变量转换成整数,驱动小车追球 4、要调整根据实际情况调整的参数有这几处 a、色块的阈值 在findblob.py的这句 green_threshold = (15, 95, -128, -23, -43, 59) 原程序是找绿球,找其它的颜色方法看openMV的视频教程 b、最后定位球的远近 size_threshold = 2000 c、PID参数 x_pid = PID(p=1, i=2, imax=250) h_pid = PID(p=0.1, i=0.2, imax=100) 网上有很多调整pid的文章,请自己参考调整 |
 沪公网安备31011502402448
© 2013-2026 Comsenz Inc. Powered by Discuz! X3.4 Licensed