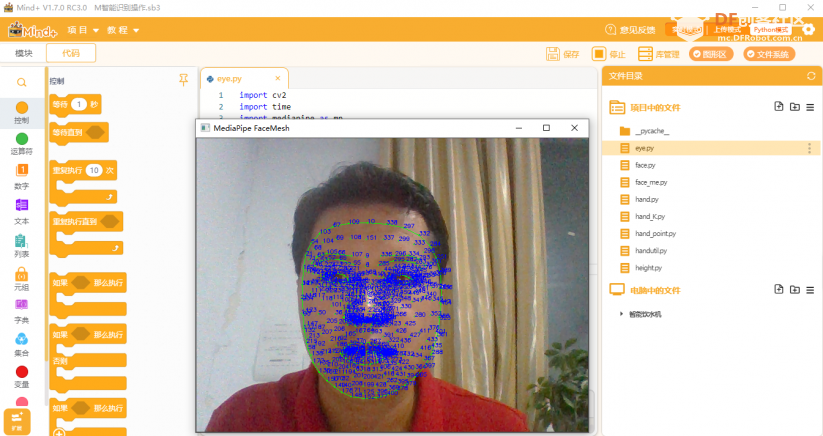
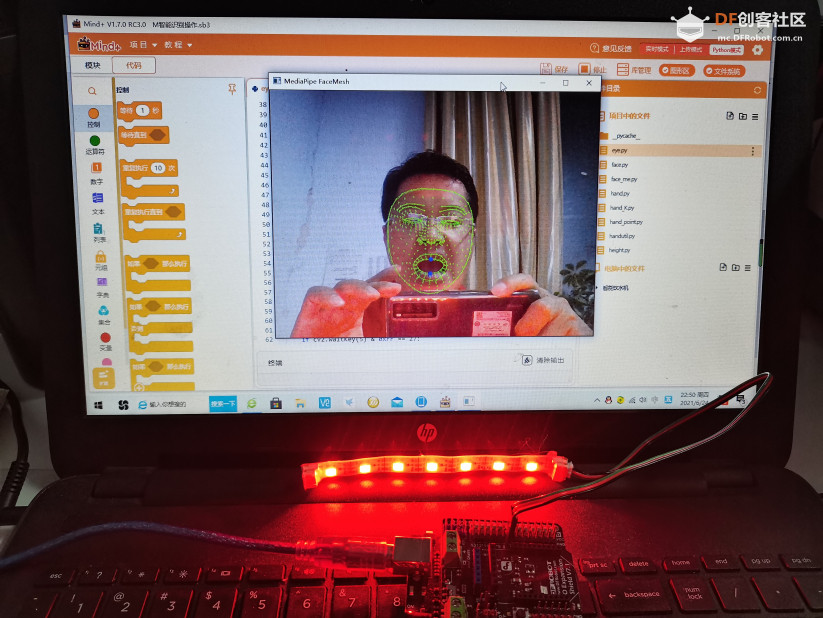
本帖最后由 云天 于 2021-6-25 07:23 编辑 mediapipe.dev/ Arduino 板上RGB灯带。【MediaPipe 面网格】【Mind+MediaPipe 面网格】 mediapipe “【标识468个面部标志】
import cv2
import time
import mediapipe as mp
mp_drawing = mp.solutions.drawing_utils
mp_face_mesh = mp.solutions.face_mesh
from pinpong.board import Board,Pin,NeoPixel
NEOPIXEL_PIN = Pin.D7
PIXELS_NUM = 7 #灯数
Board("uno").begin()  #初始化,选择板型和端口号,不输入端口号则进行自动识别
np = NeoPixel(Pin(NEOPIXEL_PIN), PIXELS_NUM)
# For webcam input:
drawing_spec = mp_drawing.DrawingSpec(thickness=1, circle_radius=1)
cap = cv2.VideoCapture(0)
Width=cap.get(3)
Height=cap.get(4)
i=1
with mp_face_mesh.FaceMesh(
    min_detection_confidence=0.5,
    min_tracking_confidence=0.5) as face_mesh:
  while cap.isOpened():
    success, image = cap.read()
    if not success:
      print("Ignoring empty camera frame.")
      # If loading a video, use 'break' instead of 'continue'.
      continue

    # Flip the image horizontally for a later selfie-view display, and convert
    # the BGR image to RGB.
    image = cv2.cvtColor(cv2.flip(image, 1), cv2.COLOR_BGR2RGB)
    # To improve performance, optionally mark the image as not writeable to
    # pass by reference.
    image.flags.writeable = False
    results = face_mesh.process(image)

    # Draw the face mesh annotations on the image.
    image.flags.writeable = True
    image = cv2.cvtColor(image, cv2.COLOR_RGB2BGR)
    if results.multi_face_landmarks:
      for face_landmarks in results.multi_face_landmarks:
        mp_drawing.draw_landmarks(
            image=image,
            landmark_list=face_landmarks,
            connections=mp_face_mesh.FACE_CONNECTIONS,
            landmark_drawing_spec=drawing_spec,
            connection_drawing_spec=drawing_spec)

      up=results.multi_face_landmarks[0].landmark[13]
      down=results.multi_face_landmarks[0].landmark[14]
      cv2.circle(image,(int(up.x*Width),int(up.y*Height)),4,(255,0,0),-1)
      cv2.circle(image,(int(down.x*Width),int(down.y*Height)),4,(255,0,0),-1)
      for i in range(0,468):#标记468个3D 面部标志。
       text=results.multi_face_landmarks[0].landmark[i]
       cv2.putText(image, str(i), (int(text.x*Width),int(text.y*Height)),cv2.FONT_HERSHEY_SIMPLEX, 0.3, (255, 0, 0), 1)
      print(abs(down.y-up.y)*Height)
      if(abs(down.y-up.y)*Height)>20:
          for num in range(0,7):
                np[num]=(255,0,0)
      else:
          for num in range(0,7):
                np[num]=(0,0,0)
    cv2.imshow('MediaPipe FaceMesh', image)
    if cv2.waitKey(5) & 0xFF == 27:
      break
cap.release()
复制代码
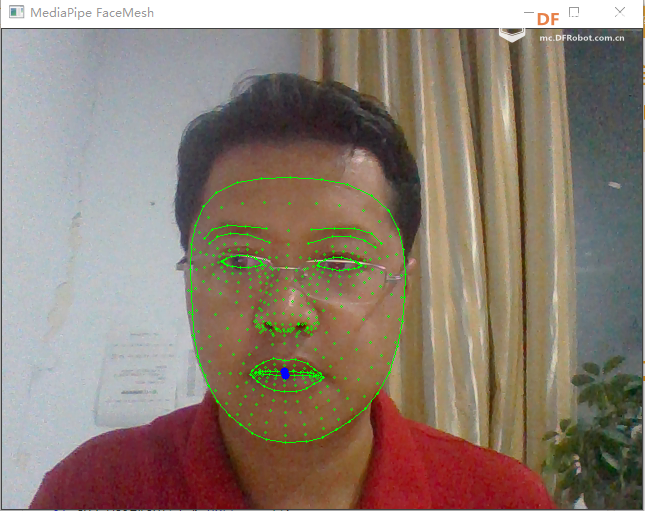
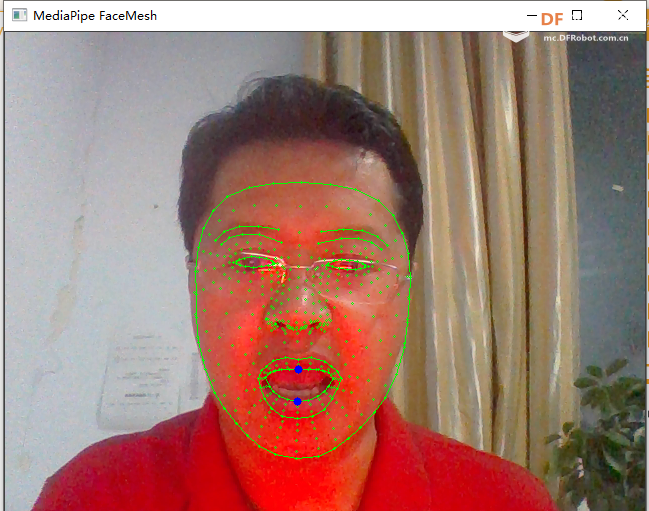
【张嘴请开灯】
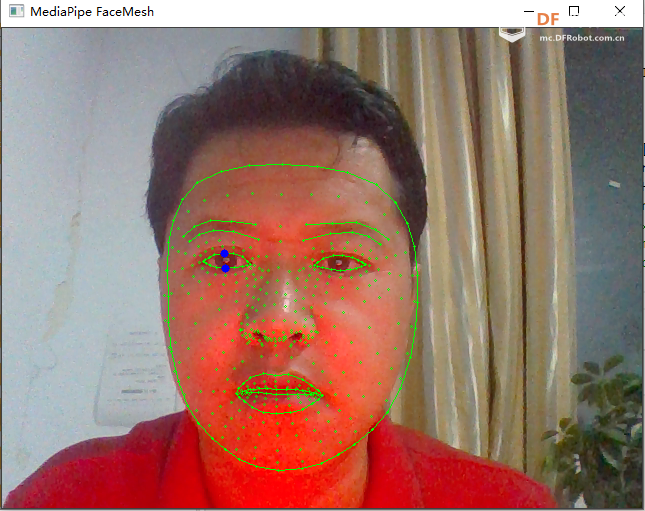
【睁眼请开灯】 up=results.multi_face_landmarks[0 ].landmark[159 ]0 ].landmark[145 ]
import cv2
import time
import mediapipe as mp
mp_drawing = mp.solutions.drawing_utils
mp_face_mesh = mp.solutions.face_mesh
from pinpong.board import Board,Pin,NeoPixel
NEOPIXEL_PIN = Pin.D7
PIXELS_NUM = 7 #灯数
Board("uno").begin()  #初始化,选择板型和端口号,不输入端口号则进行自动识别
np = NeoPixel(Pin(NEOPIXEL_PIN), PIXELS_NUM)
# For webcam input:
drawing_spec = mp_drawing.DrawingSpec(thickness=1, circle_radius=1)
cap = cv2.VideoCapture(0)
Width=cap.get(3)
Height=cap.get(4)
i=1
with mp_face_mesh.FaceMesh(
    min_detection_confidence=0.5,
    min_tracking_confidence=0.5) as face_mesh:
  while cap.isOpened():
    success, image = cap.read()
    if not success:
      print("Ignoring empty camera frame.")
      # If loading a video, use 'break' instead of 'continue'.
      continue

    # Flip the image horizontally for a later selfie-view display, and convert
    # the BGR image to RGB.
    image = cv2.cvtColor(cv2.flip(image, 1), cv2.COLOR_BGR2RGB)
    # To improve performance, optionally mark the image as not writeable to
    # pass by reference.
    image.flags.writeable = False
    results = face_mesh.process(image)

    # Draw the face mesh annotations on the image.
    image.flags.writeable = True
    image = cv2.cvtColor(image, cv2.COLOR_RGB2BGR)
    if results.multi_face_landmarks:
      for face_landmarks in results.multi_face_landmarks:
        mp_drawing.draw_landmarks(
            image=image,
            landmark_list=face_landmarks,
            connections=mp_face_mesh.FACE_CONNECTIONS,
            landmark_drawing_spec=drawing_spec,
            connection_drawing_spec=drawing_spec)

      up=results.multi_face_landmarks[0].landmark[159]
      down=results.multi_face_landmarks[0].landmark[145]
      cv2.circle(image,(int(up.x*Width),int(up.y*Height)),4,(255,0,0),-1)
      cv2.circle(image,(int(down.x*Width),int(down.y*Height)),4,(255,0,0),-1)
      #for i in range(0,468):#标记468个3D 面部标志。
       #text=results.multi_face_landmarks[0].landmark[i]
       #cv2.putText(image, str(i), (int(text.x*Width),int(text.y*Height)),cv2.FONT_HERSHEY_SIMPLEX, 0.3, (255, 0, 0), 1)
      print(abs(down.y-up.y)*Height)
      if(abs(down.y-up.y)*Height)>8:
          for num in range(0,7):
                np[num]=(255,0,0)
      else:
          for num in range(0,7):
                np[num]=(0,0,0)
    cv2.imshow('MediaPipe FaceMesh', image)
    if cv2.waitKey(5) & 0xFF == 27:
      break
cap.release()
复制代码
【演示视频】
 沪公网安备31011502402448