驴友花雕 发表于 2022-9-19 20:18:20

【花雕动手做】有趣好玩的音乐可视化系列项目(24)--无限LED镜子灯
项目程序之一:点亮ws2812灯带LED


/*
【花雕动手做】有趣好玩的音乐可视化系列项目(24)--无限LED镜子灯
项目程序之一:点亮ws2812灯带LED
*/

#include <Adafruit_NeoPixel.h>

#define PIN 6
#define MAX_LED 62

#define ADD true
#define SUB false

int val = 0;
boolean stat = ADD;

Adafruit_NeoPixel strip = Adafruit_NeoPixel( MAX_LED, PIN, NEO_RGB + NEO_KHZ800 );

void setup()
{
strip.begin();         
strip.show();         
}

void loop()
{
uint8_t i,a=0;                                       
uint32_t color = strip.Color(255, 0, 0);         
while(a<63)
{
      for(i=0;i<62;i++)
      {
      if(i==a) strip.setPixelColor(i, color);   
      else strip.setPixelColor(i, 0);            
      }
       strip.show();                              
       delay(3);                                 
       a++;                                       
}
}


驴友花雕 发表于 2022-9-19 20:20:58

实验场景图动态图


驴友花雕 发表于 2022-9-19 21:16:41

【花雕动手做】有趣好玩的音乐可视化系列项目(24)--无限LED镜子灯
项目程序之二:NeoPixel Ring 绿色灯


/*
【花雕动手做】有趣好玩的音乐可视化系列项目(24)--无限LED镜子灯
项目程序之二:NeoPixel Ring 绿色灯
*/

#include <Adafruit_NeoPixel.h>
#ifdef __AVR__
#include <avr/power.h> // Required for 16 MHz Adafruit Trinket
#endif

// Which pin on the Arduino is connected to the NeoPixels?
#define PIN      6 // On Trinket or Gemma, suggest changing this to 1

// How many NeoPixels are attached to the Arduino?
#define NUMPIXELS 62 // Popular NeoPixel ring size

// When setting up the NeoPixel library, we tell it how many pixels,
// and which pin to use to send signals. Note that for older NeoPixel
// strips you might need to change the third parameter -- see the
// strandtest example for more information on possible values.
Adafruit_NeoPixel pixels(NUMPIXELS, PIN, NEO_GRB + NEO_KHZ800);

#define DELAYVAL 500 // Time (in milliseconds) to pause between pixels

void setup() {
// These lines are specifically to support the Adafruit Trinket 5V 16 MHz.
// Any other board, you can remove this part (but no harm leaving it):
#if defined(__AVR_ATtiny85__) && (F_CPU == 16000000)
clock_prescale_set(clock_div_1);
#endif
// END of Trinket-specific code.
pixels.begin(); // INITIALIZE NeoPixel strip object (REQUIRED)
}

void loop() {
pixels.clear(); // Set all pixel colors to 'off'

// The first NeoPixel in a strand is #0, second is 1, all the way up
// to the count of pixels minus one.
for (int i = 0; i < NUMPIXELS; i++) { // For each pixel...

    // pixels.Color() takes RGB values, from 0,0,0 up to 255,255,255
    // Here we're using a moderately bright green color:
    pixels.setPixelColor(i, pixels.Color(250, 250, 250));

    pixels.show();   // Send the updated pixel colors to the hardware.

    delay(6); // Pause before next pass through loop
}
}


驴友花雕 发表于 2022-9-19 21:18:09

实验场景图


驴友花雕 发表于 2022-9-19 21:22:44

实验的视频记录

https://v.youku.com/v_show/id_XNTkwMzQ1MjkxMg==.html?spm=a2hcb.playlsit.page.1

https://v.youku.com/v_show/id_XNTkwMzQ1MjkxMg==.html?spm=a2hcb.playlsit.page.1

驴友花雕 发表于 2022-9-20 15:03:58

【花雕动手做】有趣好玩的音乐可视化系列项目(24)--无限LED镜子灯
项目程序之三:NeoPixel 环形灯条测试程序


/*
【花雕动手做】有趣好玩的音乐可视化系列项目(24)--无限LED镜子灯
项目程序之三:NeoPixel 环形灯条测试程序
*/

#include <Adafruit_NeoPixel.h>
#ifdef __AVR__
#include <avr/power.h> // Required for 16 MHz Adafruit Trinket
#endif

// Which pin on the Arduino is connected to the NeoPixels?
// On a Trinket or Gemma we suggest changing this to 1:
#define LED_PIN    6

// How many NeoPixels are attached to the Arduino?
#define LED_COUNT 62

// Declare our NeoPixel strip object:
Adafruit_NeoPixel strip(LED_COUNT, LED_PIN, NEO_GRB + NEO_KHZ800);
// Argument 1 = Number of pixels in NeoPixel strip
// Argument 2 = Arduino pin number (most are valid)
// Argument 3 = Pixel type flags, add together as needed:
//   NEO_KHZ800800 KHz bitstream (most NeoPixel products w/WS2812 LEDs)
//   NEO_KHZ400400 KHz (classic 'v1' (not v2) FLORA pixels, WS2811 drivers)
//   NEO_GRB   Pixels are wired for GRB bitstream (most NeoPixel products)
//   NEO_RGB   Pixels are wired for RGB bitstream (v1 FLORA pixels, not v2)
//   NEO_RGBW    Pixels are wired for RGBW bitstream (NeoPixel RGBW products)


// setup() function -- runs once at startup --------------------------------

void setup() {
// These lines are specifically to support the Adafruit Trinket 5V 16 MHz.
// Any other board, you can remove this part (but no harm leaving it):
#if defined(__AVR_ATtiny85__) && (F_CPU == 16000000)
clock_prescale_set(clock_div_1);
#endif
// END of Trinket-specific code.

strip.begin();         // INITIALIZE NeoPixel strip object (REQUIRED)
strip.show();            // Turn OFF all pixels ASAP
strip.setBrightness(250); // Set BRIGHTNESS to about 1/5 (max = 255)
}


// loop() function -- runs repeatedly as long as board is on ---------------

void loop() {
// Fill along the length of the strip in various colors...
colorWipe(strip.Color(255,   0,   0), 250); // Red
colorWipe(strip.Color(0, 255,   0), 250); // Green
colorWipe(strip.Color(0,   0, 255), 250); // Blue

// Do a theater marquee effect in various colors...
theaterChase(strip.Color(127, 127, 127), 250); // White, half brightness
theaterChase(strip.Color(127,   0,   0), 250); // Red, half brightness
theaterChase(strip.Color(0,   0, 127), 250); // Blue, half brightness

rainbow(10);             // Flowing rainbow cycle along the whole strip
theaterChaseRainbow(50); // Rainbow-enhanced theaterChase variant
}


// Some functions of our own for creating animated effects -----------------

// Fill strip pixels one after another with a color. Strip is NOT cleared
// first; anything there will be covered pixel by pixel. Pass in color
// (as a single 'packed' 32-bit value, which you can get by calling
// strip.Color(red, green, blue) as shown in the loop() function above),
// and a delay time (in milliseconds) between pixels.
void colorWipe(uint32_t color, int wait) {
for (int i = 0; i < strip.numPixels(); i++) { // For each pixel in strip...
    strip.setPixelColor(i, color);         //Set pixel's color (in RAM)
    strip.show();                        //Update strip to match
    delay(30);                           //Pause for a moment
}
}

// Theater-marquee-style chasing lights. Pass in a color (32-bit value,
// a la strip.Color(r,g,b) as mentioned above), and a delay time (in ms)
// between frames.
void theaterChase(uint32_t color, int wait) {
for (int a = 0; a < 20; a++) { // Repeat 10 times...
    for (int b = 0; b < 3; b++) { //'b' counts from 0 to 2...
      strip.clear();         //   Set all pixels in RAM to 0 (off)
      // 'c' counts up from 'b' to end of strip in steps of 3...
      for (int c = b; c < strip.numPixels(); c += 3) {
      strip.setPixelColor(c, color); // Set pixel 'c' to value 'color'
      }
      strip.show(); // Update strip with new contents
      delay(30);// Pause for a moment
    }
}
}

// Rainbow cycle along whole strip. Pass delay time (in ms) between frames.
void rainbow(int wait) {
// Hue of first pixel runs 5 complete loops through the color wheel.
// Color wheel has a range of 65536 but it's OK if we roll over, so
// just count from 0 to 5*65536. Adding 256 to firstPixelHue each time
// means we'll make 5*65536/256 = 1280 passes through this outer loop:
for (long firstPixelHue = 0; firstPixelHue < 2 * 65536; firstPixelHue += 256) {
    for (int i = 0; i < strip.numPixels(); i++) { // For each pixel in strip...
      // Offset pixel hue by an amount to make one full revolution of the
      // color wheel (range of 65536) along the length of the strip
      // (strip.numPixels() steps):
      int pixelHue = firstPixelHue + (i * 65536L / strip.numPixels());
      // strip.ColorHSV() can take 1 or 3 arguments: a hue (0 to 65535) or
      // optionally add saturation and value (brightness) (each 0 to 255).
      // Here we're using just the single-argument hue variant. The result
      // is passed through strip.gamma32() to provide 'truer' colors
      // before assigning to each pixel:
      strip.setPixelColor(i, strip.gamma32(strip.ColorHSV(pixelHue)));
    }
    strip.show(); // Update strip with new contents
    delay(2);// Pause for a moment
}
}

// Rainbow-enhanced theater marquee. Pass delay time (in ms) between frames.
void theaterChaseRainbow(int wait) {
int firstPixelHue = 0;   // First pixel starts at red (hue 0)
for (int a = 0; a < 30; a++) { // Repeat 30 times...
    for (int b = 0; b < 3; b++) { //'b' counts from 0 to 2...
      strip.clear();         //   Set all pixels in RAM to 0 (off)
      // 'c' counts up from 'b' to end of strip in increments of 3...
      for (int c = b; c < strip.numPixels(); c += 3) {
      // hue of pixel 'c' is offset by an amount to make one full
      // revolution of the color wheel (range 65536) along the length
      // of the strip (strip.numPixels() steps):
      int      hue   = firstPixelHue + c * 65536L / strip.numPixels();
      uint32_t color = strip.gamma32(strip.ColorHSV(hue)); // hue -> RGB
      strip.setPixelColor(c, color); // Set pixel 'c' to value 'color'
      }
      strip.show();                // Update strip with new contents
      delay(50);               // Pause for a moment
      firstPixelHue += 65536 / 90; // One cycle of color wheel over 90 frames
    }
}
}


驴友花雕 发表于 2022-9-20 16:11:18

实验的视频记录

优酷:https://v.youku.com/v_show/id_XNTkwNTEyNjIwMA==.html?spm=a2hcb.playlsit.page.1

B站:https://www.bilibili.com/video/BV1ng41127VE/?vd_source=98c6b1fc23b2787403d97f8d3cc0b7e5


https://v.youku.com/v_show/id_XNTkwNTEyNjIwMA==.html?spm=a2hcb.playlsit.page.1

驴友花雕 发表于 2022-9-20 16:13:05

实验场景图


驴友花雕 发表于 2022-9-21 06:55:08

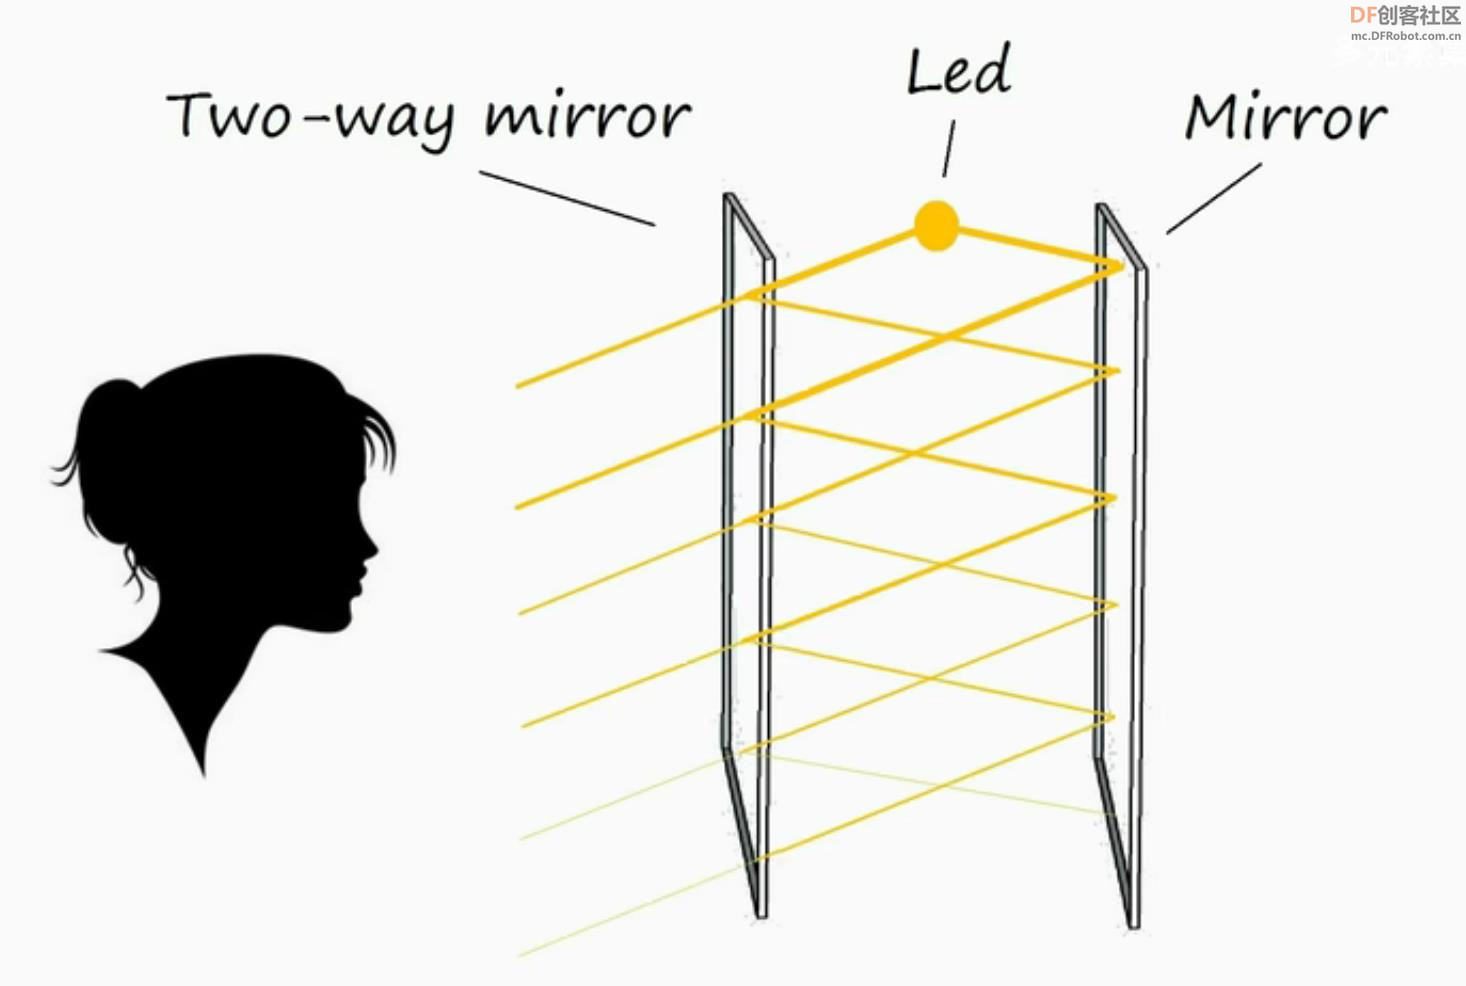
找到一张无限镜子的原理图,多次反射的效果


驴友花雕 发表于 2022-9-21 07:16:49


驴友花雕 发表于 2022-9-21 10:10:09

拆开吊顶平板灯开始改造


驴友花雕 发表于 2022-9-21 10:16:16

底面装个有机软镜子


驴友花雕 发表于 2022-9-21 10:19:26

找到一种小规格的装修角条


驴友花雕 发表于 2022-9-21 10:25:34

制成灯带底座


驴友花雕 发表于 2022-9-21 10:29:11

玻璃贴膜改为银灰色,透光效果好一些


驴友花雕 发表于 2022-9-21 10:34:20

贴膜后简单的镜子,有点像了


驴友花雕 发表于 2022-9-21 15:11:55

安装灯带


驴友花雕 发表于 2022-9-21 15:15:28

实验场景图


驴友花雕 发表于 2022-9-21 15:19:36

实验场景图动态图


驴友花雕 发表于 2022-9-21 15:43:55

实验的视频记录
优酷:https://v.youku.com/v_show/id_XNTkwNTQyMzYxNg==.html?spm=a2hcb.playlsit.page.1
B站: https://www.bilibili.com/video/BV1bW4y1v73A/?spm_id_from=333.999.0.0&vd_source=98c6b1fc23b2787403d97f8d3cc0b7e5

https://v.youku.com/v_show/id_XNTkwNTQyMzYxNg==.html?spm=a2hcb.playlsit.page.1

驴友花雕 发表于 2022-9-21 17:19:49

一个小规格的相框


页: 1 [2] 3
查看完整版本: 【花雕动手做】有趣好玩的音乐可视化(24)--无限LED镜子灯