通过定点亮灭实现下雨效果
2024-02-04463
AI 快速预览详细
本文介绍了如何使用Micro:bit通过定点亮灭实现下雨效果。首先,我们知道了x轴表示左右方向,y轴表示高度,雨滴从上往下落。通过逐行点亮和熄灭LED灯,可以模拟雨滴下落的过程。具体代码示例展示了如何在Micro:bit上实现这一效果。这种方法不仅简单易懂,还能激发孩子们对编程的兴趣。
多人喜欢下雨效果
但-----在任何模块中下雨效果都没有
怎么办?定点亮灭可以帮助我们
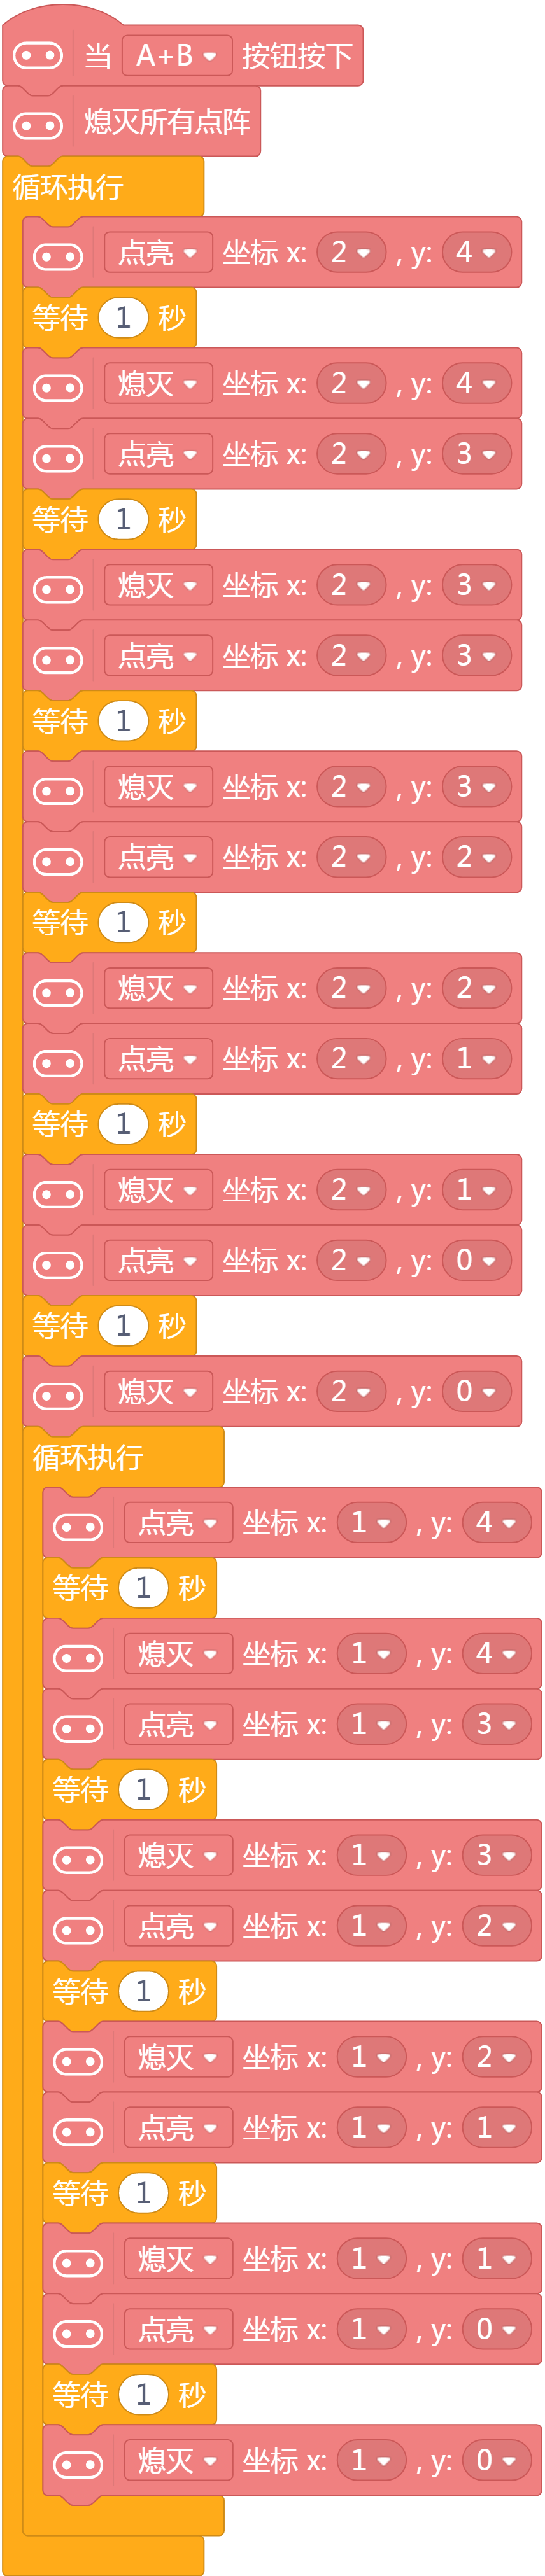
我们已知:x=左右 y=高度 雨是从上往下落的所以y轴最重要
雨是从上往下落于是高度要最高
雨有了该做下落效果了将雨下落一格就可以了吗? 不,如果这样过一会就会变身一条线
我们得灭了上一个灯下一个灯才能亮
这样我们以此类推就可以做出来了
代码
/*!
 * MindPlus
 * microbit
 *
 */
#include <Microbit_Matrix.h>


// 主程序开始
void setup() {
	MMatrix.clear();
}
void loop() {
	MMatrix.drawPixel(2, 4, LED_ON);
	delay(1000);
	MMatrix.drawPixel(2, 4, LED_OFF);
	MMatrix.drawPixel(2, 3, LED_ON);
	delay(1000);
	MMatrix.drawPixel(2, 3, LED_OFF);
	MMatrix.drawPixel(2, 3, LED_ON);
	delay(1000);
	MMatrix.drawPixel(2, 3, LED_OFF);
	MMatrix.drawPixel(2, 2, LED_ON);
	delay(1000);
	MMatrix.drawPixel(2, 2, LED_OFF);
	MMatrix.drawPixel(2, 1, LED_ON);
	delay(1000);
	MMatrix.drawPixel(2, 1, LED_OFF);
	MMatrix.drawPixel(2, 0, LED_ON);
	delay(1000);
	MMatrix.drawPixel(2, 0, LED_OFF);
	while (1) {
		MMatrix.drawPixel(1, 4, LED_ON);
		delay(1000);
		MMatrix.drawPixel(1, 4, LED_OFF);
		MMatrix.drawPixel(1, 3, LED_ON);
		delay(1000);
		MMatrix.drawPixel(1, 3, LED_OFF);
		MMatrix.drawPixel(1, 2, LED_ON);
		delay(1000);
		MMatrix.drawPixel(1, 2, LED_OFF);
		MMatrix.drawPixel(1, 1, LED_ON);
		delay(1000);
		MMatrix.drawPixel(1, 1, LED_OFF);
		MMatrix.drawPixel(1, 0, LED_ON);
		delay(1000);
		MMatrix.drawPixel(1, 0, LED_OFF);
		yield();
	}
}