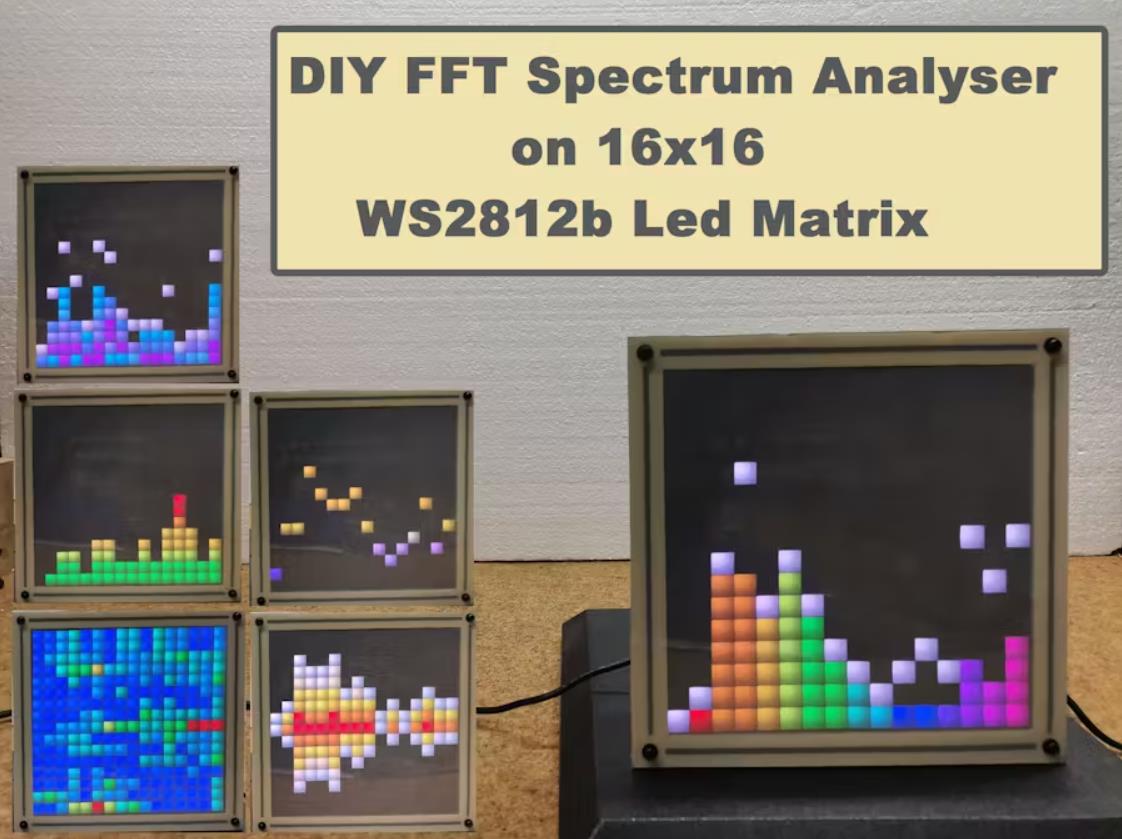
【Arduino 动手做】DIY 简单 FFT 频谱分析仪 16x16 LED 矩阵
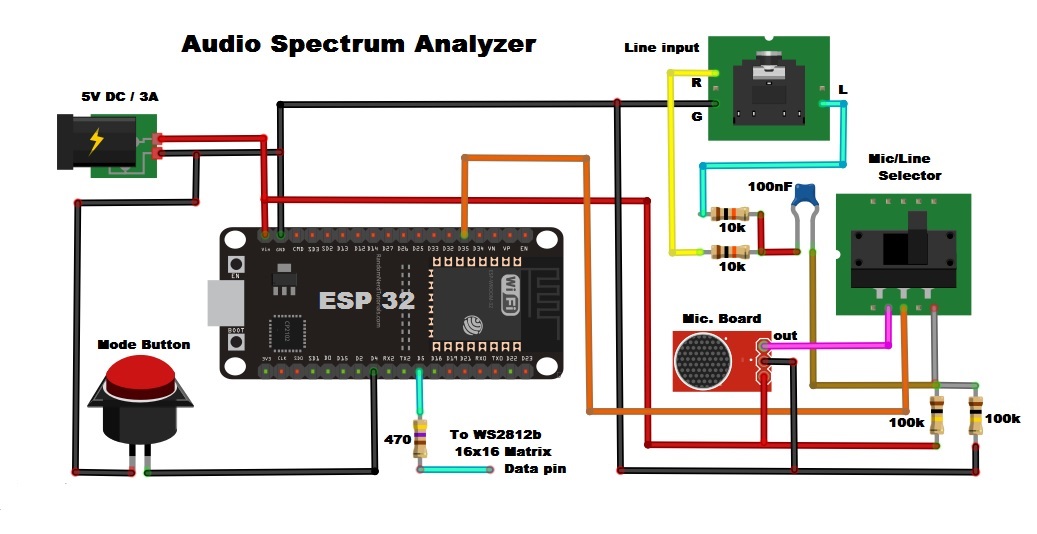
这次,我将向您展示如何制作一个视觉上美观的频谱分析仪,它也可以用作音频 VU 表和瀑布分析仪。该设备由 16x16 LED 矩阵制成,二极管上带有 WS2812 芯片,成本约为 12 美元。当我们使用 Line input(线路输入)时,输入的立体声信号首先使用两个 10K 电阻器转换为单声道,然后通过一个 100nF 电容器来阻断直流。然后,信号由两个 100k 电阻器偏置到 3.3V / 2 = 1.65V,以便 ADC 读取。使用 Microfon 板比线路输入方法简单得多,但您将受限于麦克风灵敏度可以检测到的频率。矩阵通过单个按钮进行控制。有五种作模式,其中三种是频谱分析仪、一种音频 VU 表和一种瀑布分析仪。
按钮功能包括:
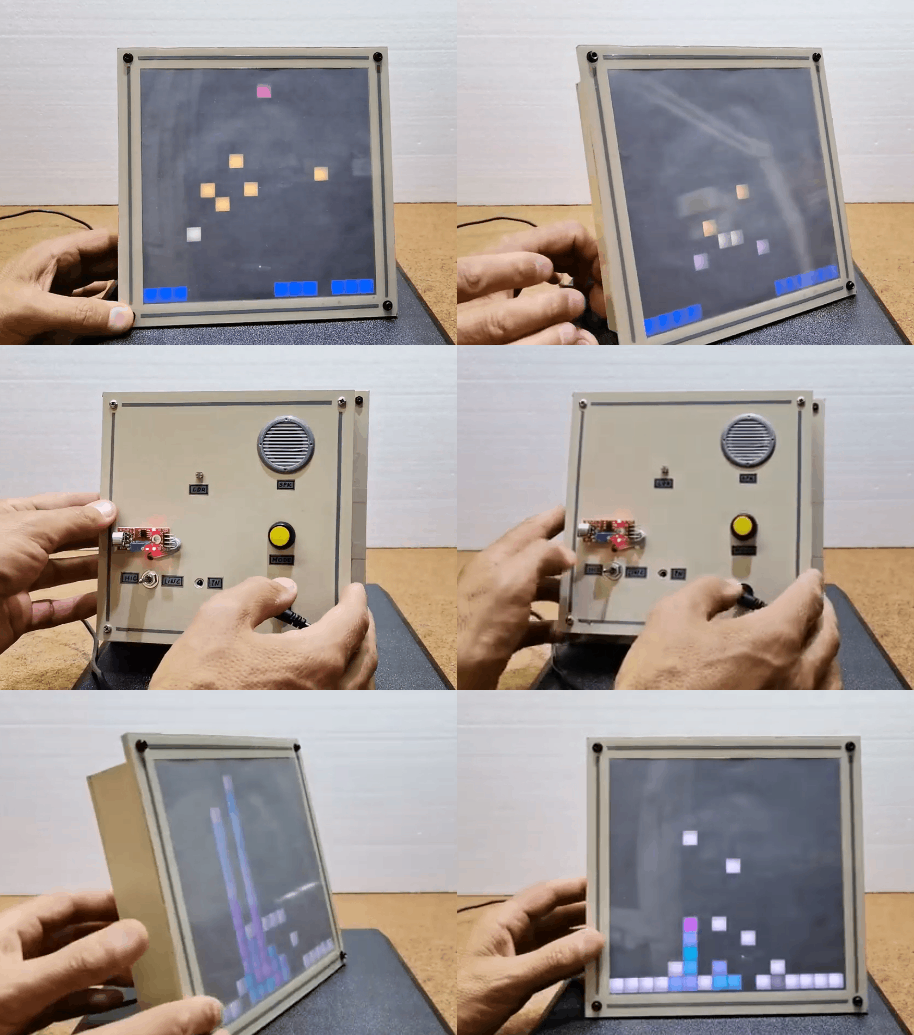
• 单击:更改模式
• 长按:更改亮度
• 2 秒内按下 3 个按钮:设置为自动更改模式
• 2 秒内按下 5 个按钮:关闭显示屏
原始代码由 Scott Marley 在 GitHub 上编写,正如作者所说,它与 G6EJD 最初编写的示例进行了大量修改。我在现成的 16x16 矩阵上制作了这个项目,这简化了制作方法,我还针对这种情况对代码进行了非常小的调整,您可以在下面下载它。
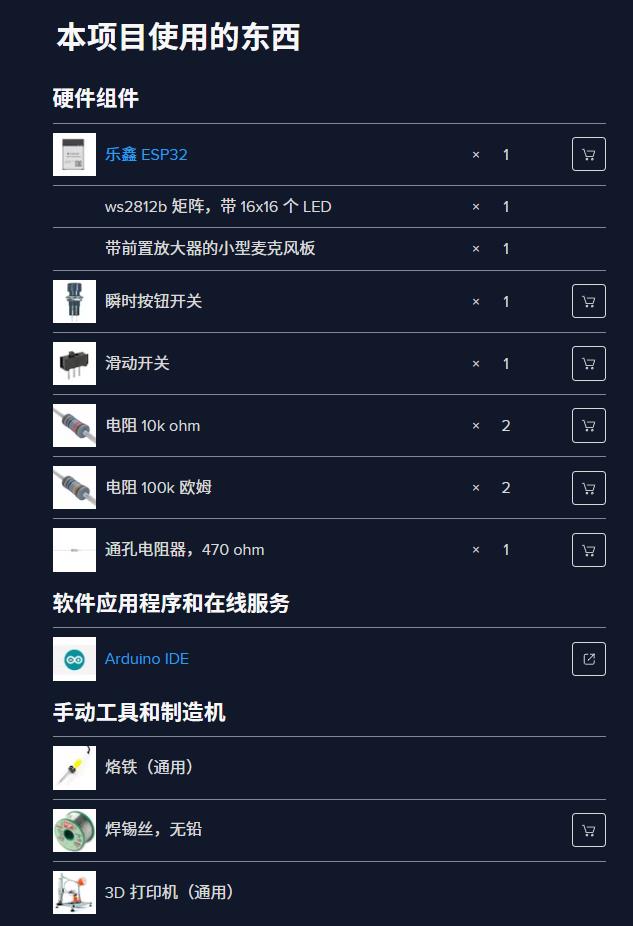
该设备制作简单,包含多个组件:
• ESP32 微控制器
• 16x16 WS2812 LED 矩阵
• 包含前置放大器芯片的小型麦克风板
• 5 个电阻
• 1 个电容器
• 和 One button
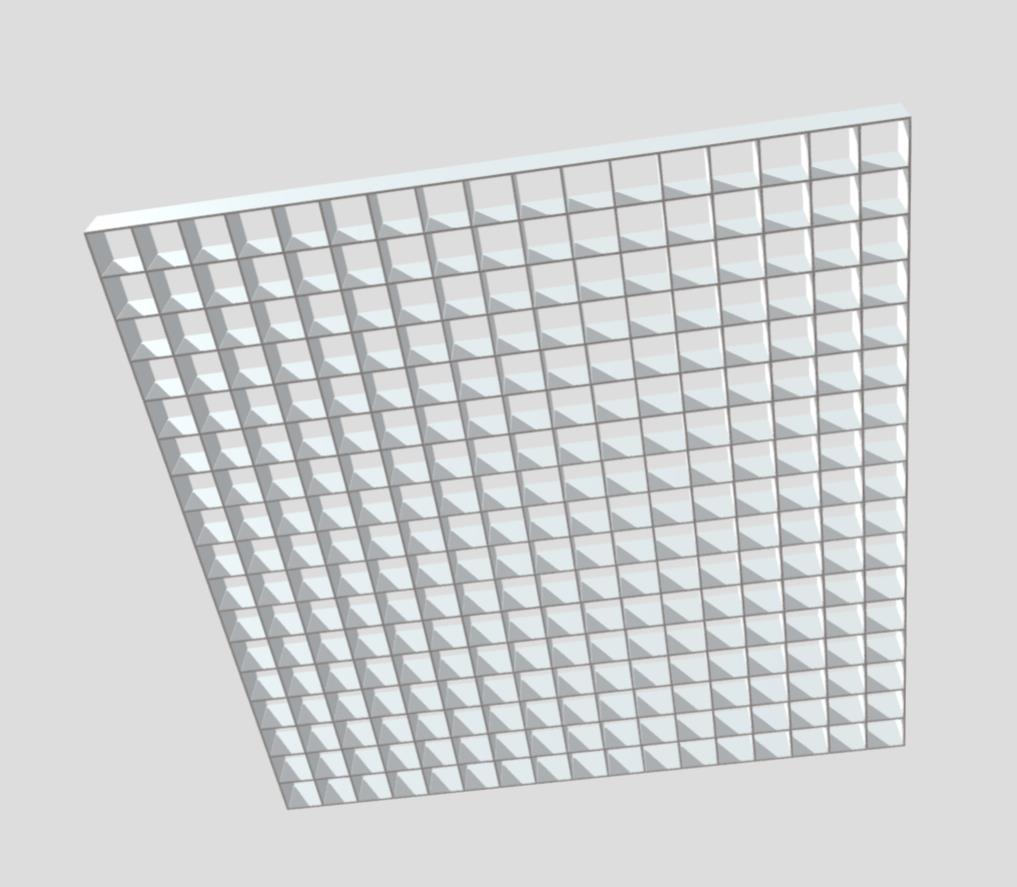
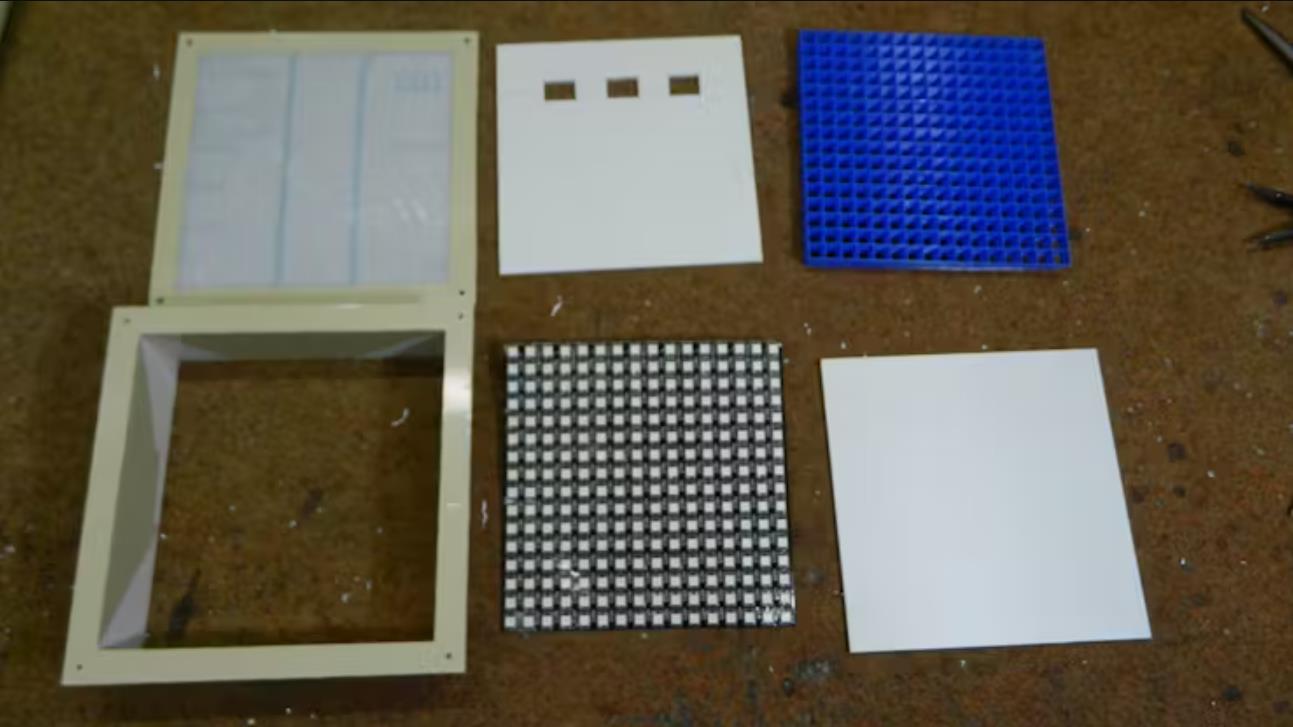
如果您希望设备看起来与此相同,那么您还需要一台 3D 打印机。为了获得更好的视觉效果,矩阵二极管应用隔板分隔。为此,在 3D 打印机上打印网格。我创建了一个自定义网格,它需要更少的材料和打印时间。您可以通过下面的链接下载 STL 文件。应在网格上放置描图纸以散射光线。
在设备描述期间,设备在麦克风模式下运行。要通过线路输入运行 Analyzer,我们需要插入音频信号。我们可以根据源信号的强度来更改代码中的灵敏度。只需按一下按钮,我们就可以改变模式。长按用于更改亮度。亮度分为三个级别。在 2 秒内按下 3 个按钮,我们将设备设置为自动更改模式。在 5 秒内按下 2 个按钮将关闭显示。一个有趣的情况是,当我们输入具有特定频率的正弦信号时。为此,我使用了 Tone Generator。可以看出,这是一款用于频域分析的频谱分析仪仪器。通过这种方式,该设备可以用作实验室频率分析的简单工具,主要用于学习。
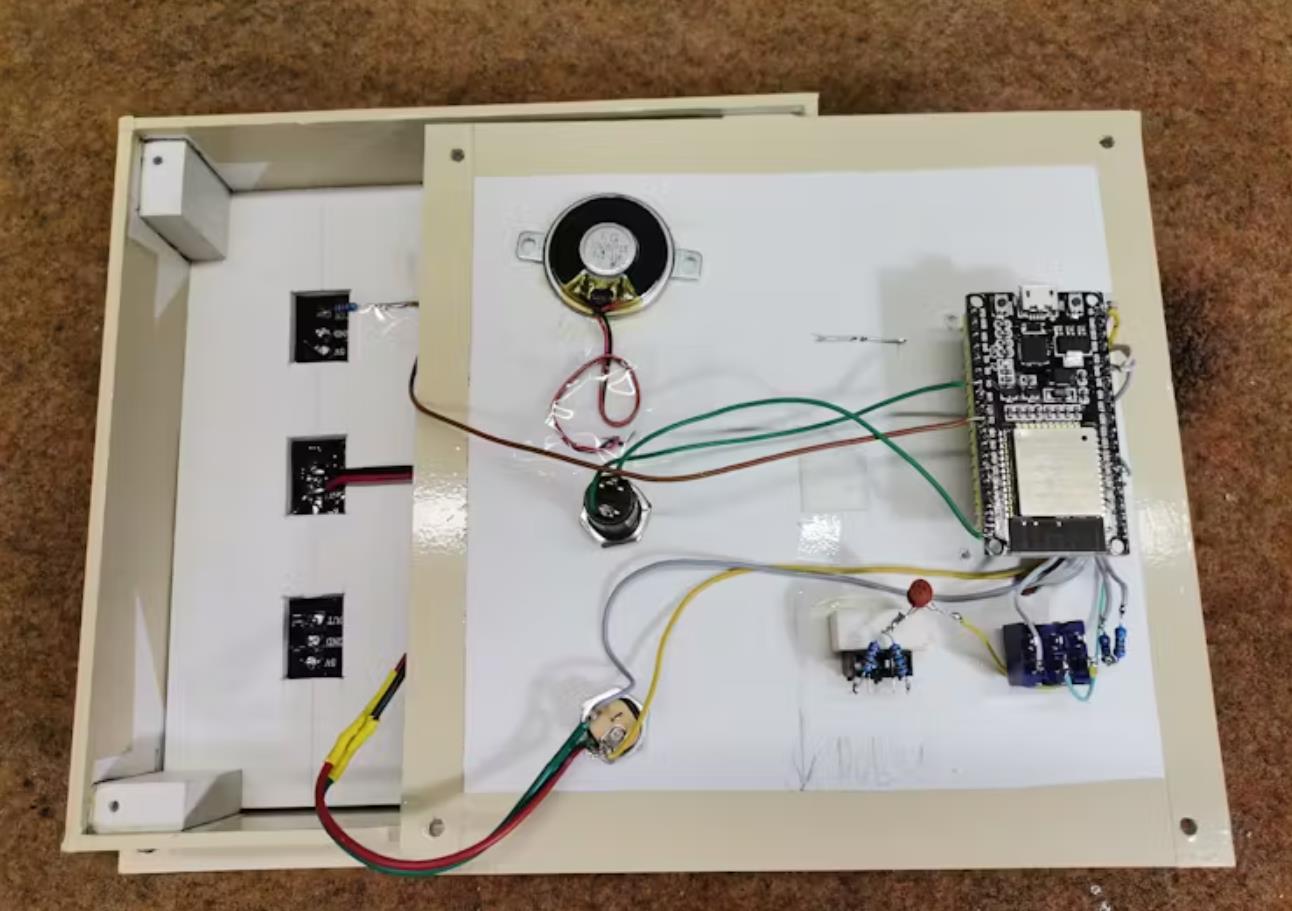
最后,将设备内置在一个合适的 PVC 板盒子中,并涂有自粘彩色标签。
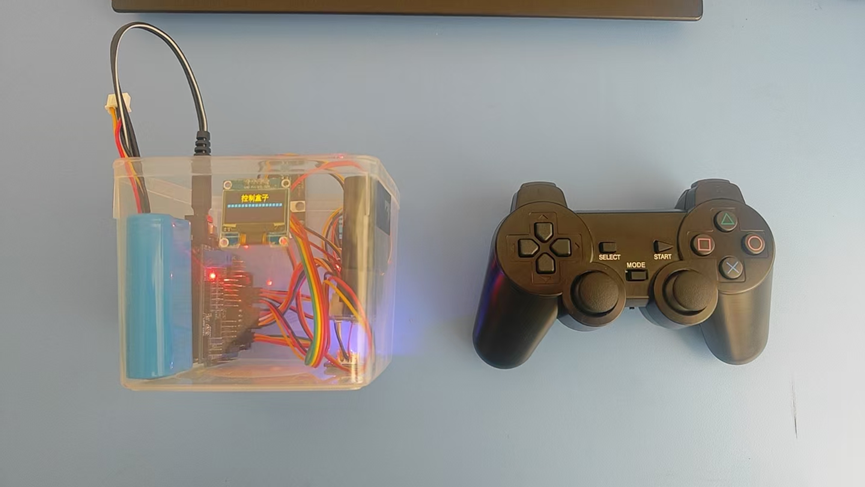
项目代码
// (Heavily) adapted from https://github.com/G6EJD/ESP32-8266-Audio-Spectrum-Display/blob/master/ESP32_Spectrum_Display_02.ino
// Adjusted to allow brightness changes on press+hold, Auto-cycle for 3 button presses within 2 seconds
// Edited to add Neomatrix support for easier compatibility with different layouts.

#include <FastLED_NeoMatrix.h>
#include <arduinoFFT.h>
#include <EasyButton.h>

#define SAMPLES         1024          // Must be a power of 2
#define SAMPLING_FREQ   40000         // Hz, must be 40000 or less due to ADC conversion time. Determines maximum frequency that can be analysed by the FFT Fmax=sampleF/2.
#define AMPLITUDE       300          // Depending on your audio source level, you may need to alter this value. Can be used as a 'sensitivity' control.
#define AUDIO_IN_PIN    35            // Signal in on this pin
#define LED_PIN         5             // LED strip data
#define BTN_PIN         4             // Connect a push button to this pin to change patterns
#define LONG_PRESS_MS   200           // Number of ms to count as a long press
#define COLOR_ORDER     GRB           // If colours look wrong, play with this
#define CHIPSET         WS2812B       // LED strip type
#define MAX_MILLIAMPS   2000          // Careful with the amount of power here if running off USB port
const int BRIGHTNESS_SETTINGS[3] = {5, 70, 200};  // 3 Integer array for 3 brightness settings (based on pressing+holding BTN_PIN)
#define LED_VOLTS       5             // Usually 5 or 12
#define NUM_BANDS       16            // To change this, you will need to change the bunch of if statements describing the mapping from bins to bands
#define NOISE           500           // Used as a crude noise filter, values below this are ignored
const uint8_t kMatrixWidth = 16;                          // Matrix width
const uint8_t kMatrixHeight = 16;                         // Matrix height
#define NUM_LEDS       (kMatrixWidth * kMatrixHeight)     // Total number of LEDs
#define BAR_WIDTH      (kMatrixWidth  / (NUM_BANDS - 1))  // If width >= 8 light 1 LED width per bar, >= 16 light 2 LEDs width bar etc
#define TOP            (kMatrixHeight - 0)                // Don't allow the bars to go offscreen
#define SERPENTINE     true                               // Set to false if you're LEDS are connected end to end, true if serpentine

// Sampling and FFT stuff
unsigned int sampling_period_us;
byte peak[] = {0,0,0,0,0,0,0,0,0,0,0,0,0,0,0,0};              // The length of these arrays must be >= NUM_BANDS
int oldBarHeights[] = {0,0,0,0,0,0,0,0,0,0,0,0,0,0,0,0};
int bandValues[] = {0,0,0,0,0,0,0,0,0,0,0,0,0,0,0,0};
double vReal[SAMPLES];
double vImag[SAMPLES];
unsigned long newTime;
arduinoFFT FFT = arduinoFFT(vReal, vImag, SAMPLES, SAMPLING_FREQ);

// Button stuff
int buttonPushCounter = 0;
bool autoChangePatterns = false;
EasyButton modeBtn(BTN_PIN);

// FastLED stuff
CRGB leds[NUM_LEDS];
DEFINE_GRADIENT_PALETTE( purple_gp ) {
  0,   0, 212, 255,   //blue
255, 179,   0, 255 }; //purple
DEFINE_GRADIENT_PALETTE( outrun_gp ) {
  0, 141,   0, 100,   //purple
127, 255, 192,   0,   //yellow
255,   0,   5, 255 };  //blue
DEFINE_GRADIENT_PALETTE( greenblue_gp ) {
  0,   0, 255,  60,   //green
 64,   0, 236, 255,   //cyan
128,   0,   5, 255,   //blue
192,   0, 236, 255,   //cyan
255,   0, 255,  60 }; //green
DEFINE_GRADIENT_PALETTE( redyellow_gp ) {
  0,   200, 200,  200,   //white
 64,   255, 218,    0,   //yellow
128,   231,   0,    0,   //red
192,   255, 218,    0,   //yellow
255,   200, 200,  200 }; //white
CRGBPalette16 purplePal = purple_gp;
CRGBPalette16 outrunPal = outrun_gp;
CRGBPalette16 greenbluePal = greenblue_gp;
CRGBPalette16 heatPal = redyellow_gp;
uint8_t colorTimer = 0;

// FastLED_NeoMaxtrix - see https://github.com/marcmerlin/FastLED_NeoMatrix for Tiled Matrixes, Zig-Zag and so forth
FastLED_NeoMatrix *matrix = new FastLED_NeoMatrix(leds, kMatrixWidth, kMatrixHeight,
  NEO_MATRIX_TOP        + NEO_MATRIX_RIGHT +
  NEO_MATRIX_ROWS       + NEO_MATRIX_ZIGZAG +
  NEO_TILE_TOP + NEO_TILE_LEFT + NEO_TILE_ROWS);

void setup() {
  Serial.begin(115200);
  FastLED.addLeds<CHIPSET, LED_PIN, COLOR_ORDER>(leds, NUM_LEDS).setCorrection(TypicalSMD5050);
  FastLED.setMaxPowerInVoltsAndMilliamps(LED_VOLTS, MAX_MILLIAMPS);
  FastLED.setBrightness(BRIGHTNESS_SETTINGS[1]);
  FastLED.clear();

  modeBtn.begin();
  modeBtn.onPressed(changeMode);
  modeBtn.onPressedFor(LONG_PRESS_MS, brightnessButton);
  modeBtn.onSequence(3, 2000, startAutoMode);
  modeBtn.onSequence(5, 2000, brightnessOff);
  sampling_period_us = round(1000000 * (1.0 / SAMPLING_FREQ));
}

void changeMode() {
  Serial.println("Button pressed");
  if (FastLED.getBrightness() == 0) FastLED.setBrightness(BRIGHTNESS_SETTINGS[0]);  //Re-enable if lights are "off"
  autoChangePatterns = false;
  buttonPushCounter = (buttonPushCounter + 1) % 6;
}

void startAutoMode() {
  autoChangePatterns = true;
}

void brightnessButton() {
  if (FastLED.getBrightness() == BRIGHTNESS_SETTINGS[2])  FastLED.setBrightness(BRIGHTNESS_SETTINGS[0]);
  else if (FastLED.getBrightness() == BRIGHTNESS_SETTINGS[0]) FastLED.setBrightness(BRIGHTNESS_SETTINGS[1]);
  else if (FastLED.getBrightness() == BRIGHTNESS_SETTINGS[1]) FastLED.setBrightness(BRIGHTNESS_SETTINGS[2]);
  else if (FastLED.getBrightness() == 0) FastLED.setBrightness(BRIGHTNESS_SETTINGS[0]); //Re-enable if lights are "off"
}

void brightnessOff(){
  FastLED.setBrightness(0);  //Lights out
}

void loop() {

  // Don't clear screen if waterfall pattern, be sure to change this is you change the patterns / order
  if (buttonPushCounter != 5) FastLED.clear();

  modeBtn.read();

  // Reset bandValues[]
  for (int i = 0; i<NUM_BANDS; i++){
    bandValues[i] = 0;
  }

  // Sample the audio pin
  for (int i = 0; i < SAMPLES; i++) {
    newTime = micros();
    vReal[i] = analogRead(AUDIO_IN_PIN); // A conversion takes about 9.7uS on an ESP32
    vImag[i] = 0;
    while ((micros() - newTime) < sampling_period_us) { /* chill */ }
  }

  // Compute FFT
  FFT.DCRemoval();
  FFT.Windowing(FFT_WIN_TYP_HAMMING, FFT_FORWARD);
  FFT.Compute(FFT_FORWARD);
  FFT.ComplexToMagnitude();

  // Analyse FFT results
  for (int i = 2; i < (SAMPLES/2); i++){       // Don't use sample 0 and only first SAMPLES/2 are usable. Each array element represents a frequency bin and its value the amplitude.
    if (vReal[i] > NOISE) {                    // Add a crude noise filter

    /*8 bands, 12kHz top band
      if (i<=3 )           bandValues[0]  += (int)vReal[i];
      if (i>3   && i<=6  ) bandValues[1]  += (int)vReal[i];
      if (i>6   && i<=13 ) bandValues[2]  += (int)vReal[i];
      if (i>13  && i<=27 ) bandValues[3]  += (int)vReal[i];
      if (i>27  && i<=55 ) bandValues[4]  += (int)vReal[i];
      if (i>55  && i<=112) bandValues[5]  += (int)vReal[i];
      if (i>112 && i<=229) bandValues[6]  += (int)vReal[i];
      if (i>229          ) bandValues[7]  += (int)vReal[i];*/

    //16 bands, 12kHz top band
      if (i<=2 )           bandValues[0]  += (int)vReal[i];
      if (i>2   && i<=3  ) bandValues[1]  += (int)vReal[i];
      if (i>3   && i<=5  ) bandValues[2]  += (int)vReal[i];
      if (i>5   && i<=7  ) bandValues[3]  += (int)vReal[i];
      if (i>7   && i<=9  ) bandValues[4]  += (int)vReal[i];
      if (i>9   && i<=13 ) bandValues[5]  += (int)vReal[i];
      if (i>13  && i<=18 ) bandValues[6]  += (int)vReal[i];
      if (i>18  && i<=25 ) bandValues[7]  += (int)vReal[i];
      if (i>25  && i<=36 ) bandValues[8]  += (int)vReal[i];
      if (i>36  && i<=50 ) bandValues[9]  += (int)vReal[i];
      if (i>50  && i<=69 ) bandValues[10] += (int)vReal[i];
      if (i>69  && i<=97 ) bandValues[11] += (int)vReal[i];
      if (i>97  && i<=135) bandValues[12] += (int)vReal[i];
      if (i>135 && i<=189) bandValues[13] += (int)vReal[i];
      if (i>189 && i<=264) bandValues[14] += (int)vReal[i];
      if (i>264          ) bandValues[15] += (int)vReal[i];
    }
  }

  // Process the FFT data into bar heights
  for (byte band = 0; band < NUM_BANDS; band++) {

    // Scale the bars for the display
    int barHeight = bandValues[band] / AMPLITUDE;
    if (barHeight > TOP) barHeight = TOP;

    // Small amount of averaging between frames
    barHeight = ((oldBarHeights[band] * 1) + barHeight) / 2;

    // Move peak up
    if (barHeight > peak[band]) {
      peak[band] = min(TOP, barHeight);
    }

    // Draw bars
    switch (buttonPushCounter) {
      case 0:
        rainbowBars(band, barHeight);
        break;
      case 1:
        // No bars on this one
        break;
      case 2:
        purpleBars(band, barHeight);
        break;
      case 3:
        centerBars(band, barHeight);
        break;
      case 4:
        changingBars(band, barHeight);
        break;
      case 5:
        waterfall(band);
        break;
    }

    // Draw peaks
    switch (buttonPushCounter) {
      case 0:
        whitePeak(band);
        break;
      case 1:
        outrunPeak(band);
        break;
      case 2:
        whitePeak(band);
        break;
      case 3:
        // No peaks
        break;
      case 4:
        // No peaks
        break;
      case 5:
        // No peaks
        break;
    }

    // Save oldBarHeights for averaging later
    oldBarHeights[band] = barHeight;
  }

  // Decay peak
  EVERY_N_MILLISECONDS(60) {
    for (byte band = 0; band < NUM_BANDS; band++)
      if (peak[band] > 0) peak[band] -= 1;
    colorTimer++;
  }

  // Used in some of the patterns
  EVERY_N_MILLISECONDS(10) {
    colorTimer++;
  }

  EVERY_N_SECONDS(10) {
    if (autoChangePatterns) buttonPushCounter = (buttonPushCounter + 1) % 6;
  }

  FastLED.show();
}

// PATTERNS BELOW //

void rainbowBars(int band, int barHeight) {
  int xStart = BAR_WIDTH * band;
  for (int x = xStart; x < xStart + BAR_WIDTH; x++) {
    for (int y = TOP; y >= TOP - barHeight; y--) {
      matrix->drawPixel(x, y, CHSV((x / BAR_WIDTH) * (255 / NUM_BANDS), 255, 255));
    }
  }
}

void purpleBars(int band, int barHeight) {
  int xStart = BAR_WIDTH * band;
  for (int x = xStart; x < xStart + BAR_WIDTH; x++) {
    for (int y = TOP; y >= TOP - barHeight; y--) {
      matrix->drawPixel(x, y, ColorFromPalette(purplePal, y * (255 / (barHeight + 1))));
    }
  }
}

void changingBars(int band, int barHeight) {
  int xStart = BAR_WIDTH * band;
  for (int x = xStart; x < xStart + BAR_WIDTH; x++) {
    for (int y = TOP; y >= TOP - barHeight; y--) {
      matrix->drawPixel(x, y, CHSV(y * (255 / kMatrixHeight) + colorTimer, 255, 255));
    }
  }
}

void centerBars(int band, int barHeight) {
  int xStart = BAR_WIDTH * band;
  for (int x = xStart; x < xStart + BAR_WIDTH; x++) {
    if (barHeight % 2 == 0) barHeight--;
    int yStart = ((kMatrixHeight - barHeight) / 2 );
    for (int y = yStart; y <= (yStart + barHeight); y++) {
      int colorIndex = constrain((y - yStart) * (255 / barHeight), 0, 255);
      matrix->drawPixel(x, y, ColorFromPalette(heatPal, colorIndex));
    }
  }
}

void whitePeak(int band) {
  int xStart = BAR_WIDTH * band;
  int peakHeight = TOP - peak[band] - 1;
  for (int x = xStart; x < xStart + BAR_WIDTH; x++) {
    matrix->drawPixel(x, peakHeight, CHSV(0,0,255));
  }
}

void outrunPeak(int band) {
  int xStart = BAR_WIDTH * band;
  int peakHeight = TOP - peak[band] - 1;
  for (int x = xStart; x < xStart + BAR_WIDTH; x++) {
    matrix->drawPixel(x, peakHeight, ColorFromPalette(outrunPal, peakHeight * (255 / kMatrixHeight)));
  }
}

void waterfall(int band) {
  int xStart = BAR_WIDTH * band;
  double highestBandValue = 40000;        // Set this to calibrate your waterfall

  // Draw bottom line
  for (int x = xStart; x < xStart + BAR_WIDTH; x++) {
    matrix->drawPixel(x, 0, CHSV(constrain(map(bandValues[band],0,highestBandValue,160,0),0,160), 255, 255));
  }

  // Move screen up starting at 2nd row from top
  if (band == NUM_BANDS - 1){
    for (int y = kMatrixHeight - 2; y >= 0; y--) {
      for (int x = 0; x < kMatrixWidth; x++) {
        int pixelIndexY = matrix->XY(x, y + 1);
        int pixelIndex = matrix->XY(x, y);
        leds[pixelIndexY] = leds[pixelIndex];
      }
    }
  }
}
【Arduino 动手做】DIY 简单 FFT 频谱分析仪 16x16 LED 矩阵
项目链接:https://www.hackster.io/mircemk/diy-simple-fft-spectrum-analyzer-on-16x16-led-matrix-ae3374
项目作者:北马其顿 米尔塞姆克(Mirko Pavleski)
项目视频 :https://www.youtube.com/watch?v=0flgNrmBseA
项目代码:https://www.hackster.io/code_files/548755/download
3D 文件:https://hacksterio.s3.amazonaws.com/uploads/attachments/1359818/grille_MVE45yJRIo.stl