【FireBeetle 2 ESP32 P4 开发套件】人脸检测的板端推理
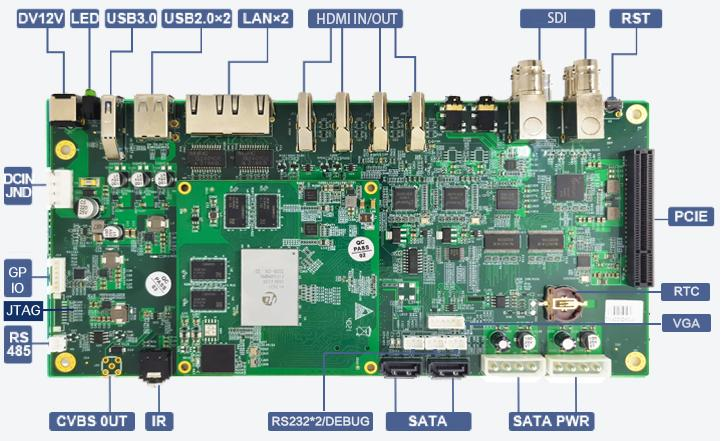
本文介绍了 DFRobot FireBeetle 2 ESP32 P4 开发套件调用固件中预训练的模型实现板端人脸检测推理的项目设计。
包括项目介绍、流程图、工程代码、效果展示等。
项目介绍
摄像头人脸检测;
板端推理测试:流程图、MicroPython 代码、效果展示;
摄像头测试
开发板连接 CSI 摄像头,上传测试代码;
打开HTTP网页,摄像头对准人脸画面,识别结果由红色线框显示出来;
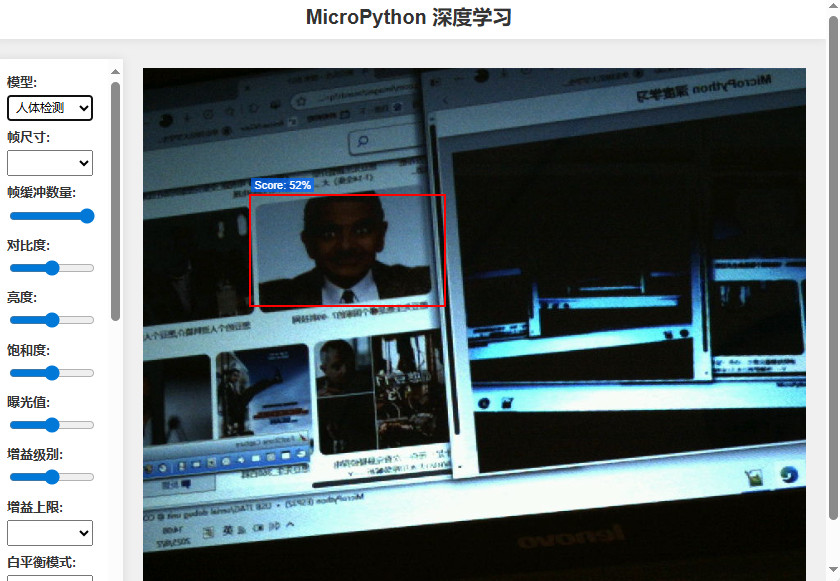
为了提升识别效果和显示效果,这里使用板端推理本地图片的方式。
板端推理
包括流程图、工程代码、测试效果等。
流程图
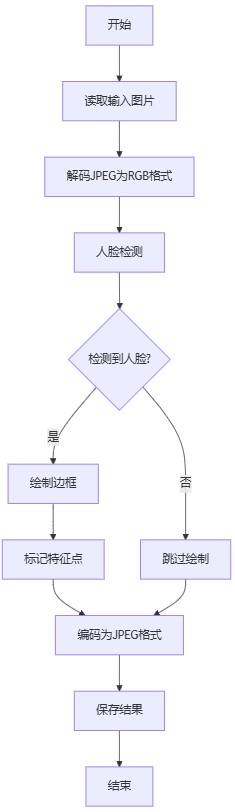
代码
运行 Thonny IDE 软件,配置解释器和设备端口,新建文件并添加如下代码
from espdl import FaceDetector
from jpeg import Decoder, Encoder
# Initialize components
decoder = Decoder()
encoder = Encoder(width=320, height=240, pixel_format="RGB888")
face_detector = FaceDetector()
# Input and output paths
input_filename = "sarah.jpg"
output_dir = "out"
output_filename = output_dir + "/" + input_filename.split(".")[0] + "_out.jpg"
# Read input image
img = open(input_filename, "rb").read()
framebuffer = decoder.decode(img)
framebuffer = bytearray(framebuffer)
# Face detection
results = face_detector.run(framebuffer)
def draw_rectangle(buffer, width, height, x, y, w, h, list1, color=(255, 0, 0), thickness=3):
def set_pixel(buffer, width, x, y, color):
if 0 <= x < width and 0 <= y < height:
offset = (y * width + x) * 3
buffer[offset] = color[0]
buffer[offset + 1] = color[1]
buffer[offset + 2] = color[2]
def draw_large_dot(buffer, width, x, y, color, size=3):
for i in range(x - size, x + size + 1):
for j in range(y - size, y + size + 1):
set_pixel(buffer, width, i, j, color)
# Draw thick borders
for t in range(thickness):
# Top border
for i in range(x - t, x + w + t + 1):
set_pixel(buffer, width, i, y - t, color)
# Bottom border
for i in range(x - t, x + w + t + 1):
set_pixel(buffer, width, i, y + h + t, color)
# Left border
for j in range(y - t, y + h + t + 1):
set_pixel(buffer, width, x - t, j, color)
# Right border
for j in range(y - t, y + h + t + 1):
set_pixel(buffer, width, x + w + t, j, color)
# Draw feature points
if list1:
draw_large_dot(buffer, width, list1[0], list1[1], (0, 0, 255), size=2)
draw_large_dot(buffer, width, list1[2], list1[3], (0, 0, 255), size=2)
draw_large_dot(buffer, width, list1[4], list1[5], (0, 255, 0), size=2)
draw_large_dot(buffer, width, list1[6], list1[7], (255, 0, 0), size=2)
draw_large_dot(buffer, width, list1[8], list1[9], (255, 0, 0), size=2)
# Draw bounding boxes
for face in results:
x1, y1, x2, y2 = face['box']
draw_rectangle(
framebuffer,
320,
240,
x1,
y1,
x2 - x1,
y2 - y1,
face['features'],
color=(255, 0, 0),
thickness=3
)
# Encode and save output
marked_img = encoder.encode(framebuffer)
with open(output_filename, "wb") as f:
f.write(marked_img)
print("Saved processed image to:", output_filename)
保存代码并运行。
效果
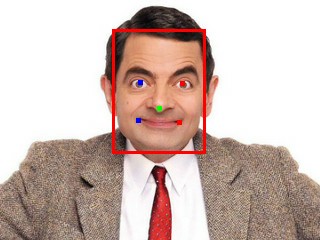
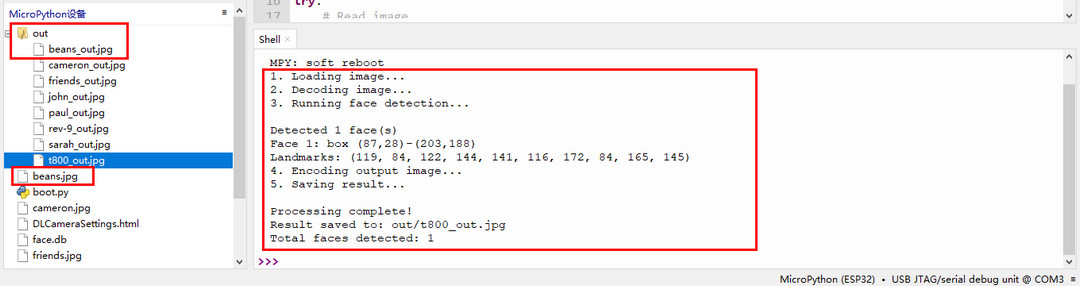
同时终端打印运行状态和识别结果
更多测试结果
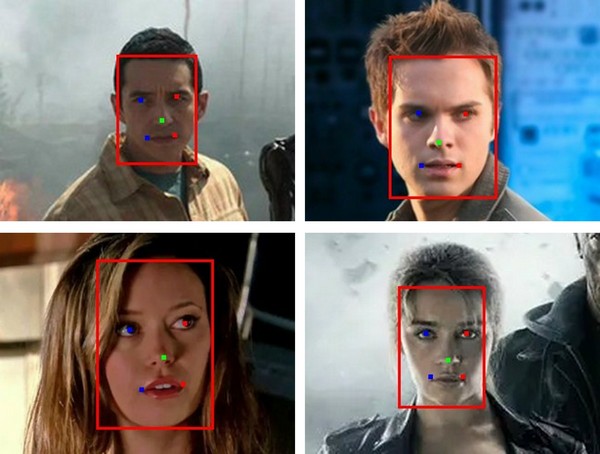
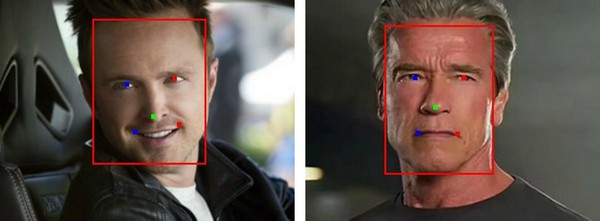
总结
本文介绍了 DFRobot FireBeetle 2 ESP32 P4 开发套件调用固件中预训练的模型实现板端人脸检测推理的项目设计,为该开发板在人工智能和边缘 AI 领域的应用提供了参考。