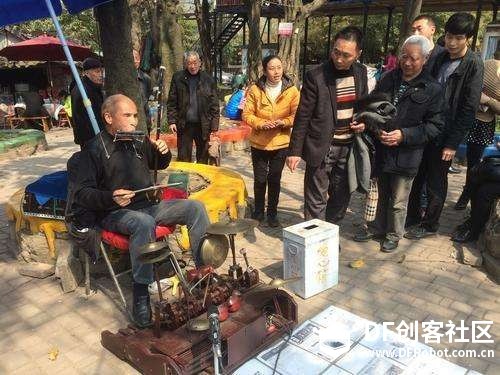
网络上你可以看到很多牛人,用身体的某些部位或是各种物体或演奏出音乐。
你可能看过这个
这个
还有这个
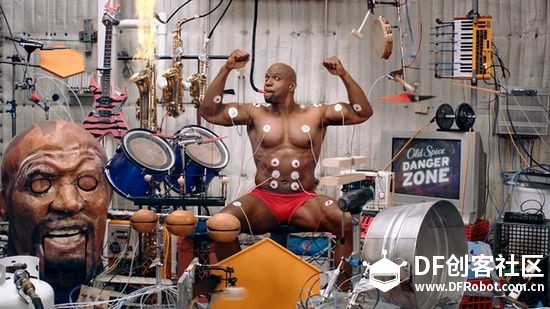
常常让我们感叹:“高he手bi在zhe民me间lei!"
今天我带来的是一种电子乐器通用的制作方法,简单,便宜,拓展性强。有了它,简直就是随身的乐器库。
我之前发过一篇MIDI鼓机的教程,但是,这种设备又常常依赖于音源和编曲软件,如果只是想要一些钢琴,贝斯,或是鼓等等一些常见乐器的音色,又想让设备外型简单点最好是控端和音源,输出端集成在一起。那么就跟我一起造起来吧。let's make some noise!
首先你需要准备的东西:
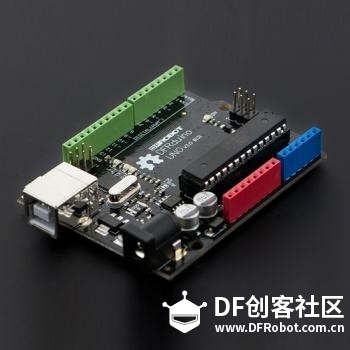
UNO一块
UNO一块
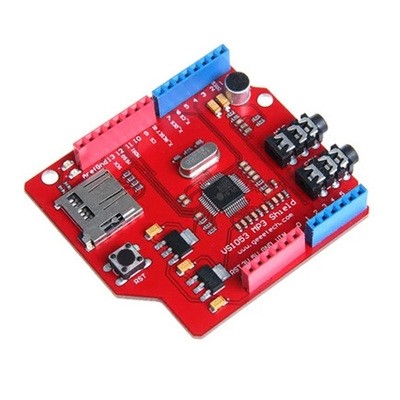
MP3模块一块(VS1053b)扩展板,
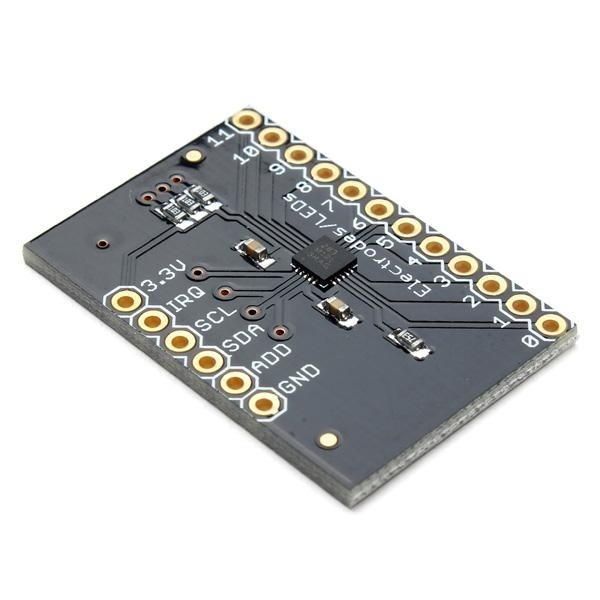
MPR121触摸板一块
还有一个音箱,一个充电宝。
一定猜到了,我用的MP3模块充当的音源,但是材料单里没有用到存储卡,那声音从哪来?其实除了MP3格式的声音素材,VS1053b其实本身就内建了丰富的MIDI音色库GM1+GM2。
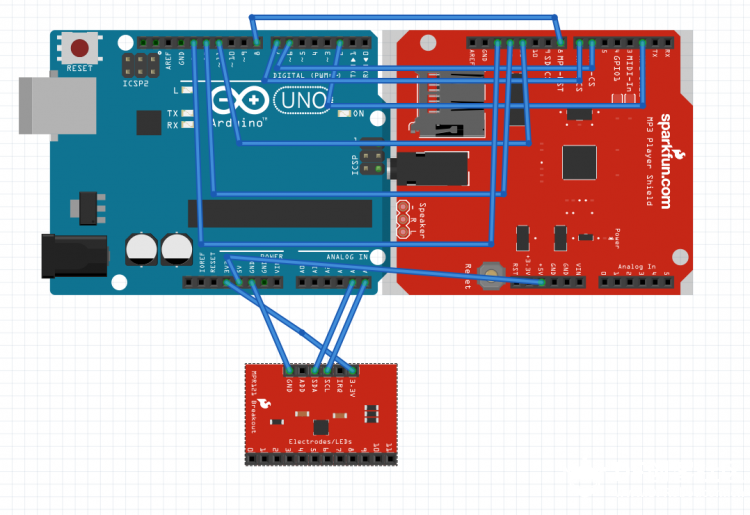
先看看接线:
mp3模块有好几种,如果是扩展板样式的,很简单,直接插UNO,如果是外形小一点的模块。就照着图接接线一样效果。
DREQ--D2
X-CS--D6
X-DCS--D7
X-RESET--D8
MOSI--D11
MISO--D12
SCK--D13
5V
GND
MPR121就接I2C接口,只接四根线,3.3v和GND,SDA,SCL对应UNO的A4,A5.
接好线,插上音箱
下面是代码
-
- #include <Adafruit_MPR121.h>
- #include <Wire.h>
- #include <SPI.h>
- Adafruit_MPR121 cap = Adafruit_MPR121();
-
- uint16_t lasttouched = 0;
- uint16_t currtouched = 0;
-
-
- byte drums[] = {39,40,42,86,54,28,33,31,58,68,67,56};//示例为鼓根据自己的喜好选择鼓的音色
- //byte drums[] = {60,61,62,63,64,65,66,67,68,69,70,71,};//钢琴
- /*在鼓库(0x78)中,没有不同的乐器,只有不同的音符。
- 要播放不同的声音,请选择一个乐器#5,然后播放音符27至87。
-
-
- 27高Q 43高层汤姆59骑Cy 2 75克拉
- 28 Sla 44踏板Hi帽[EXC 1] 60高邦戈76嗨木块
- 29推杆[EXC 7] 45低汤姆61低邦戈77低木块
- 30 Srcatch Pull [EXC 7] 46打开Hi帽[EXC 1] 62静音Hi Conga 78静音Cuica [EXC 4]
- 31棒47低中汤姆63开放嗨康加79开放cuica [EXC 4]
- 32广场点击48高中汤姆64低康加80静音三角[EXC 5]
- 33节拍器单击49撞击Cy 1 65高Tim 81 81开放三角[EXC 5]
-
- 34节拍器响铃50高汤姆66低Timbale 82振动器
- 35声贝斯鼓51骑Cy 1 67高阿戈戈83叮当铃
- 36低音鼓1 52中国Cy 68低音琴84铃铛树
- 37侧杆53 Ride Bell 69 Casbasa 85响板
- 38 Acoustic Snare 54 Tambourine 70 Maracas 86 Mute Surdo [EXC 6]
- 39手拍55飞溅Cy 71短哨[EXC 2] 87打开Surdo [EXC 6]
- 40电圈套56牛铃72长笛[EXC 2]
- 41低地板汤姆57坠毁Cy 2 73短Guiro [EXC 3]
- 42闭Hi [EXC 1] 58 Vibra-slap 74 Long Guiro [EXC 3]
-
- */
- //MP3板需要接线的引脚,当然除此之外还有11,12,13号的ICSP通信引脚。
- #define VS_XCS 6
- #define VS_XDCS 7
- #define VS_DREQ 4
- #define VS_RESET 8
-
-
- void setup() {
-
- if (!cap.begin(0x5A)) //MPR121 地址
- {
- while (1);
- }
- pinMode(VS_DREQ, INPUT);
- pinMode(VS_XCS, OUTPUT);
- pinMode(VS_XDCS, OUTPUT);
- digitalWrite(VS_XCS, HIGH);
- digitalWrite(VS_XDCS, HIGH);
- pinMode(VS_RESET, OUTPUT);
-
-
- digitalWrite(VS_RESET, LOW);
-
-
- SPI.begin();
- SPI.setBitOrder(MSBFIRST);
- SPI.setDataMode(SPI_MODE0);
-
-
- SPI.setClockDivider(SPI_CLOCK_DIV64);
- SPI.transfer(0xFF);
- delayMicroseconds(20);
- digitalWrite(VS_RESET, HIGH);
-
-
- //加载实时MIDI插件
- VSLoadUserCode();
- delay(50);
- /* MIDI INSTRUMENT LIBRARY:
- MELODIC INSTRUMENTS(GM1)
- 当使用旋律银行(0x79 - 与默认相同)时,打开选择一个乐器和八度来映射
- 要使用下面的这些工具,请在setupMidi()中的talkMIDI(0xC0,number,0)中更改“number”
-
- 1声大钢琴 33声低音 65女高音萨克斯 97雨(FX 1)
- 2明亮的声学钢琴 34电子低音(手指)66 Alto Sax 98音轨(FX 2)
- 3电钢琴 35电贝司(选) 67男高音萨克斯 99水晶(FX 3)
- 4 Honky-tonk钢琴 36 Fretless贝司 68 Baritone Sax 100大气(FX 4)
- 5电钢琴1 37巴掌贝斯1 69双簧管 101(Brigthness)(FX 5)
- 6电钢琴2 38巴掌贝斯2 70英式号角 102哥布林(FX 6)
- 7大键琴 39合成贝司1 71巴松管 103回声(FX 7)
- 8 Clavi 40 Synth Bass 2 72 Clarinet 104科幻(FX 8)
- 9 Celesta 41小提琴 73 Piccolo 105 Sitar
- 10钟琴 42中提琴 74长笛 106班卓琴
- 11音乐盒 43大提琴 75录音机 107三味线
- 12 Vibraphone 44 Contrabass 76 Pan Flute 108 Koto
- 13 Marimba 45 Tremolo Strings 77吹瓶 109 Kalimba
- 14木琴 46咀嚼弦 78尺八 110袋
- 15管状铃 47管弦竖琴 79哨 111小提琴
- 16扬琴 48 Trimpani 80 Ocarina 112 Shanai
- 17拉杆风琴 49弦乐组合1 81方形导线(导线1) 113叮当铃
- 18打击乐器 50弦合奏2 82锯铅(铅) 114 Agogo
- 19 Rock Organ 51合成弦1 83 Calliope(Lead 3) 115倾斜的打击乐器
- 20教堂管风琴 52合成弦2 84辛弗铅(铅4) 116木刻版
- 21芦苇器官 53合唱团 85 Charang铅(Lead 5 ) 117 Taiko
- 22手风琴 54声音 86声线(主角) 118旋律汤姆
- 23口琴 55合成音色 87五分之一铅(Lead 7) 119合成鼓
- 24探戈手风琴 56管弦乐队打 88低音+铅(铅8) 120反Cy
- 25吉他(尼龙) 57小号 89新时代(垫1) 121吉他噪音
- 26 Acoutstic吉他(钢)58 Trombone 90暖垫(垫2) 122呼吸噪音
- 27电吉他(爵士) 59图巴 91 Polysynth(垫3) 123海滨
- 28电吉他(清洁) 60静音小号 92合唱团(垫4) 124鸟鸣叫
- 29电吉他(静音) 61法国号角 93鞠躬(Pad 5) 125电话铃声
- 30过度驱动吉他 62黄铜部分 94金属(垫6 ) 126直升机
- 31失真吉他 63合成器黄铜1 95光晕(垫7) 127掌声
- 32吉他和声 64合成器黄铜2 96扫描(Pad 8) 128枪声
-
-
- */
-
- //===============================
- // 设置乐器的库talkMIDI(0xB0, 0, 0x00 or 0x78);
- talkMIDI(0xB0,0, 0x78); //鼓
- //talkMIDI(0xB0, 0, 0x00); //电钢
- //============================================
- // 选择乐器talkMIDI(0xC0, number, 0)
- talkMIDI(0xC0, 0, 0);//鼓
- //talkMIDI(0xC0, 5, 0); //电钢
- //=========================
- // 音量0-127
- talkMIDI(0xB0, 0x07, 100);
- }
- void loop() {
-
-
- currtouched = cap.touched();
-
- for (uint8_t i=0; i<12; i++) {
-
- if ((currtouched & _BV(i)) && !(lasttouched & _BV(i)) ) {
-
- noteOn(0, drums</font></font><font face="微软雅黑"><font size="3">, 127);
- delay(5);
- }
-
- if (!(currtouched & _BV(i)) && (lasttouched & _BV(i)) ) {
-
- }
- }
-
-
- lasttouched = currtouched;
-
- }
-
- /*********************************************************
- * VS1053 functions
- * ******************************************************/
-
- //写入VS10xx寄存器
- // SCI:数据传输总是16位。当新的SCI操作进入时
- // DREQ变低。那么我们必须等待DREQ再次走高。
- // XCS在整个操作过程中应该是低的。
- void VSWriteRegister(unsigned char addressbyte, unsigned char highbyte, unsigned char lowbyte) {
- while (!digitalRead(VS_DREQ)) ;
- //等待DREQ变高表明IC可用
- digitalWrite(VS_XCS, LOW);
- SPI.transfer(0x02);
- SPI.transfer(addressbyte);
- SPI.transfer(highbyte);
- SPI.transfer(lowbyte);
- while (!digitalRead(VS_DREQ)) ;
- digitalWrite(VS_XCS, HIGH);
- }
-
-
- //将VS10XX放入实时内置MIDI模式的插件
-
- const unsigned short sVS1053b_Realtime_MIDI_Plugin[28] = { /* Compressed plugin */
- 0x0007, 0x0001, 0x8050, 0x0006, 0x0014, 0x0030, 0x0715, 0xb080, /* 0 */
- 0x3400, 0x0007, 0x9255, 0x3d00, 0x0024, 0x0030, 0x0295, 0x6890, /* 8 */
- 0x3400, 0x0030, 0x0495, 0x3d00, 0x0024, 0x2908, 0x4d40, 0x0030, /* 10 */
- 0x0200, 0x000a, 0x0001, 0x0050,
- };
-
-
- void VSLoadUserCode(void) {
- int i = 0;
-
- while (i < sizeof(sVS1053b_Realtime_MIDI_Plugin) / sizeof(sVS1053b_Realtime_MIDI_Plugin[0])) {
- unsigned short addr, n, val;
- addr = sVS1053b_Realtime_MIDI_Plugin[i++];
- n = sVS1053b_Realtime_MIDI_Plugin[i++];
- while (n--) {
- val = sVS1053b_Realtime_MIDI_Plugin[i++];
- VSWriteRegister(addr, val >> 8, val & 0xFF);
- }
- }
- }
-
-
- void sendMIDI(byte data)
- {
- SPI.transfer(0);
- </font></font><font face="微软雅黑"><font size="3"> SPI.transfer(data);
- }
-
-
-
- void talkMIDI(byte cmd, byte data1, byte data2) {
-
-
- while (!digitalRead(VS_DREQ));
- digitalWrite(VS_XDCS, LOW);
- sendMIDI(cmd);
-
-
-
- if ( (cmd & 0xF0) <= 0xB0 || (cmd & 0xF0) >= 0xE0) {
- sendMIDI(data1);
- sendMIDI(data2);
- } else {
- sendMIDI(data1);
- }
- }
-
- //发送MIDI音符消息。就像按下钢琴键
- //通道范围从0-15
- void noteOn(byte channel, byte note, byte attack_velocity) {
- talkMIDI( (0x90 | channel), note, attack_velocity);
- //talkMIDI( (0xA0 | channel), note, 127);
- }
-
- //发送一个MIDI音符消息。就像释放钢琴键一样
- void noteOff(byte channel, byte note, byte release_velocity) {
- talkMIDI( (0x80 | channel), note, release_velocity);
- }
-
Ada的mpr121库下载https://github.com/adafruit/Adafruit_MPR121
上传完代码后,摸一摸MPR121的12个电极。是不是来声了?
一直没有说用MPR121触摸模块的原因,相信你一定知道MakeyMakey,BareconductiveTouchboard,这两块板,让我们感受到了水果钢琴,导电墨水画的神奇。刚才我们实现了引出12个触摸点并能够赋予它们反馈出不同乐器的声音的能力。接下来了就可以发挥出你的想象力了。
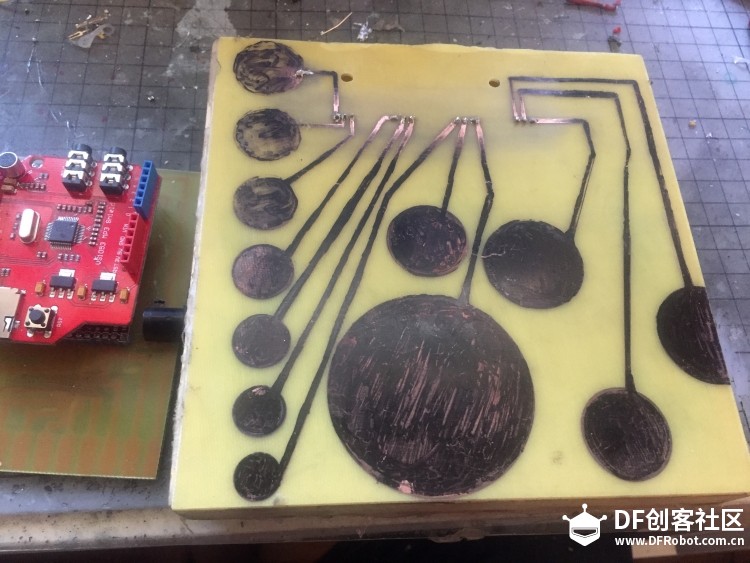
你可以蚀刻一个专属的鼓面贴在木盒上变成随身带着的手指鼓。
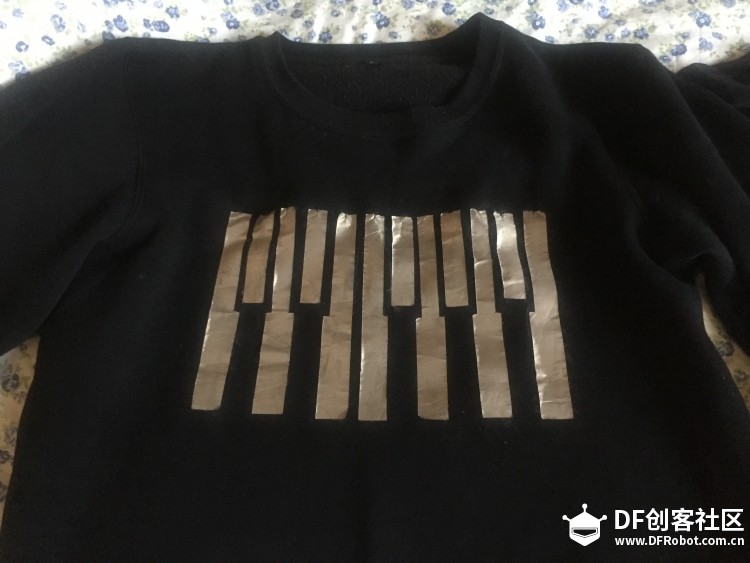
还可以用导电丝线和布料缝一个钢琴卫衣或T恤。
就介绍到这,如果你也正在制作这个小项目,过程中如果有任何问题请及时指出,同时,也希望大家分享更有趣的点子。感谢! |




The sketch name had to be modified.
Sketch names must start with a letter or number, followed by letters,
numbers, dashes, dots and underscores. Maximum length is 63 characters.
arduino_mp3:135:7: error: stray '\345' in program
noteOn(0, drums, 127);
^
arduino_mp3:135:7: error: stray '\276' in program
arduino_mp3:135:7: error: stray '\256' in program
arduino_mp3:135:7: error: stray '\350' in program
arduino_mp3:135:7: error: stray '\275' in program
arduino_mp3:135:7: error: stray '\257' in program
arduino_mp3:135:7: error: stray '\351' in program
arduino_mp3:135:7: error: stray '\233' in program
arduino_mp3:135:7: error: stray '\205' in program
arduino_mp3:135:7: error: stray '\351' in program
arduino_mp3:135:7: error: stray '\273' in program
arduino_mp3:135:7: error: stray '\221' in program
arduino_mp3:198:1: error: stray '\345' in program
SPI.transfer(data);
^
arduino_mp3:198:1: error: stray '\276' in program
arduino_mp3:198:1: error: stray '\256' in program
arduino_mp3:198:1: error: stray '\350' in program
arduino_mp3:198:1: error: stray '\275' in program
arduino_mp3:198:1: error: stray '\257' in program
arduino_mp3:198:1: error: stray '\351' in program
arduino_mp3:198:1: error: stray '\233' in program
arduino_mp3:198:1: error: stray '\205' in program
arduino_mp3:198:1: error: stray '\351' in program
arduino_mp3:198:1: error: stray '\273' in program
arduino_mp3:198:1: error: stray '\221' in program
C:\Users\Administrator\Desktop\arduino_mp3\arduino_mp3.ino: In function 'void loop()':
arduino_mp3:135:23: error: expected primary-expression before '/' token
noteOn(0, drums, 127);
^
arduino_mp3:135:24: error: 'size' was not declared in this scope
noteOn(0, drums, 127);
^
arduino_mp3:135:30: error: expected primary-expression before '/' token
noteOn(0, drums, 127);
^
arduino_mp3:135:31: error: 'font' was not declared in this scope
noteOn(0, drums, 127);
^
arduino_mp3:135:54: error: expected primary-expression before ']' token
noteOn(0, drums, 127);
^
C:\Users\Administrator\Desktop\arduino_mp3\arduino_mp3.ino: In function 'void sendMIDI(byte)':
arduino_mp3:198:2: error: expected identifier before '/' token
SPI.transfer(data);
^
C:\Users\Administrator\Desktop\arduino_mp3\arduino_mp3.ino: In lambda function:
arduino_mp3:198:8: error: expected '{' before '[' token
SPI.transfer(data);
^
C:\Users\Administrator\Desktop\arduino_mp3\arduino_mp3.ino: In function 'void sendMIDI(byte)':
arduino_mp3:198:9: error: expected primary-expression before '/' token
SPI.transfer(data);
^
arduino_mp3:198:10: error: 'font' was not declared in this scope
SPI.transfer(data);
^
arduino_mp3:198:33: error: expected primary-expression before ']' token
SPI.transfer(data);
^
arduino_mp3:198:35: error: 'size' was not declared in this scope
SPI.transfer(data);
^
exit status 1
stray '\345' in program[/code]
[font=微软雅黑]
在文件 -> 首选项开启
“编译过程中显示详细输出”选项
这份报告会包含更多信息。
[/font]
1)硬件:图上的vs1053b根本没有引出midi脚,怎么可能midi解码;
2)软件:代码开头没引用midi库文件;
请问为什么我烧完代码没有声音?
这样,你试试把库文件Adafruit_MPR121.cpp中最后那段代码中的括号里加个ture.
由[code]/**************************************************************************/
void Adafruit_MPR121::writeRegister(uint8_t reg, uint8_t value) {
Wire.beginTransmission(_i2caddr);
Wire.write((uint8_t)reg);
Wire.write((uint8_t)(value));
Wire.endTransmission();
}[/code]
改为
[code]/**************************************************************************/
void Adafruit_MPR121::writeRegister(uint8_t reg, uint8_t value) {
Wire.beginTransmission(_i2caddr);
Wire.write((uint8_t)reg);
Wire.write((uint8_t)(value));
Wire.endTransmission(true);
}[/code]
再试试,如果成功记得回来告诉我.