【模型下载】首先,我们需要下载模型文件。进入 models , 选择下载 ssd_mobilenet_v2_coco 模型文件。

【tensorflow】
一般我们恢复模型都是要用到tensorflow,大致代码如下所示:
- import numpy as np
- import tensorflow as tf
- import cv2 as cv
-
- # Read the graph.
- with tf.gfile.FastGFile('frozen_inference_graph.pb', 'rb') as f:
- graph_def = tf.GraphDef()
- graph_def.ParseFromString(f.read())
-
- with tf.Session() as sess:
- # Restore session
- sess.graph.as_default()
- tf.import_graph_def(graph_def, name='')
-
- # Read and preprocess an image.
- img = cv.imread('example.jpg')
- rows = img.shape[0]
- cols = img.shape[1]
- inp = cv.resize(img, (300, 300))
- inp = inp[:, :, [2, 1, 0]] # BGR2RGB
-
- # Run the model
- out = sess.run([sess.graph.get_tensor_by_name('num_detections:0'),
- sess.graph.get_tensor_by_name('detection_scores:0'),
- sess.graph.get_tensor_by_name('detection_boxes:0'),
- sess.graph.get_tensor_by_name('detection_classes:0')],
- feed_dict={'image_tensor:0': inp.reshape(1, inp.shape[0], inp.shape[1], 3)})
-
- # Visualize detected bounding boxes.
- num_detections = int(out[0][0])
- for i in range(num_detections):
- classId = int(out[3][0])
- score = float(out[1][0])
- bbox = [float(v) for v in out[2][0]]
- if score > 0.3:
- x = bbox[1] * cols
- y = bbox[0] * rows
- right = bbox[3] * cols
- bottom = bbox[2] * rows
- cv.rectangle(img, (int(x), int(y)), (int(right), int(bottom)), (125, 255, 51), thickness=2)
-
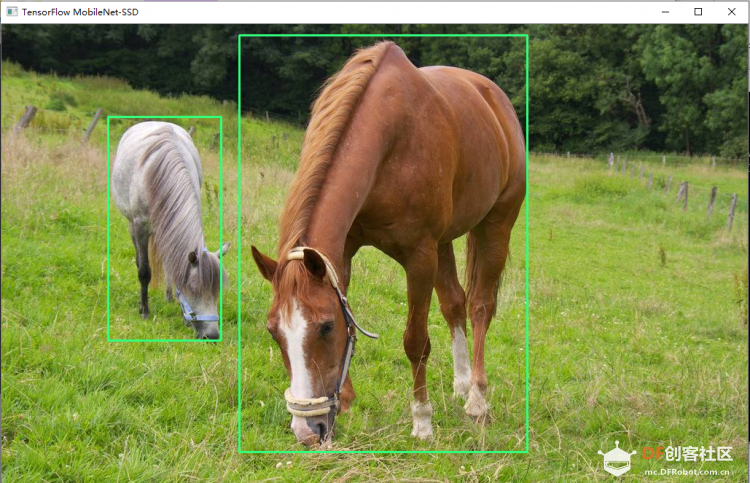
- cv.imshow('TensorFlow MobileNet-SSD', img)
- cv.waitKey()
【opencv】
如果电脑没有tensorflow想要恢复模型怎么办?那就可以考虑下opencv了,opencv加载tensorflow模型需要pb文件和pbtxt文件,pbtxt是可以根据pb文件生成的,在opencv的源代码中进入sample/dnn 文件夹中,由于我们的模型是ssd因此找到以下两个文件
tf_text_graph_ssd.py
tf_text_graph_common.py
在https://github.com/opencv/opencv,中的 opencv-master\samples\dnn中找到
在命令行执行
python tf_text_graph_ssd.py --input C:\Users\zlzx\Downloads\ssd_mobilenet_v2_coco_2018_03_29\frozen_inference_graph.pb --config C:\Users\zlzx\Downloads\ssd_mobilenet_v2_coco_2018_03_29\pipeline.config --output frozen_inference_graph.pbtxt
frozen_inference_graph.pb是下载的训练pb模型,pipeline是训练时的配置文件,生成pb时会有,frozen_inference_graph.pbtxt就是生成的文件用于opencv恢复模型
然后用opencv恢复模型 net = cv2.dnn.readNetFromTensorflow(weightsPath,configPath)大致代码如下: - import cv2 as cv
-
- cvNet = cv.dnn.readNetFromTensorflow('frozen_inference_graph.pb', 'frozen_inference_graph.pbtxt')
-
- img = cv.imread('example.jpg')
- rows = img.shape[0]
- cols = img.shape[1]
- cvNet.setInput(cv.dnn.blobFromImage(img, size=(300, 300), swapRB=True, crop=False))
- cvOut = cvNet.forward()
-
- for detection in cvOut[0,0,:,:]:
- score = float(detection[2])
- if score > 0.3:
- left = detection[3] * cols
- top = detection[4] * rows
- right = detection[5] * cols
- bottom = detection[6] * rows
- cv.rectangle(img, (int(left), int(top)), (int(right), int(bottom)), (23, 230, 210), thickness=2)
-
- cv.imshow('img', img)
- cv.waitKey()
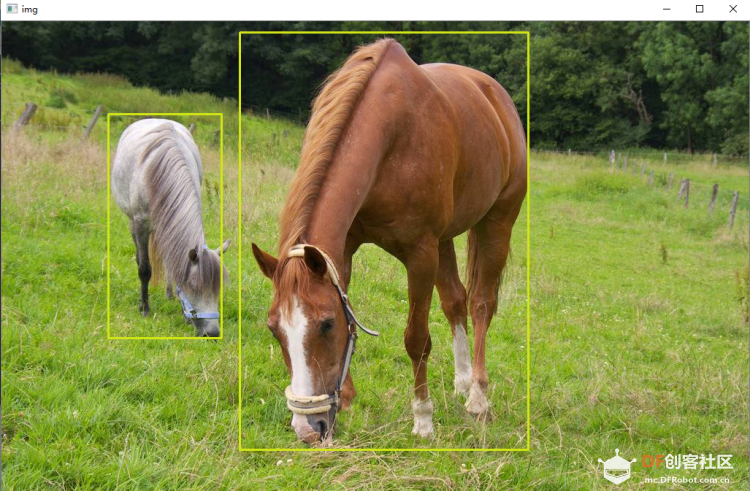
注:Tensorflow模型的graph结构可以保存为.pb文件或者.pbtxt文件,或者.meta文件,其中只有.pbtxt文件是可读的。在OpenCV中,每个模型.pb文件,原则上应有一个对应的文本图形定义的.pbtxt文件,当然也可能没有,在opencv_extra\testdata\dnn有些.pbtxt文件是可以对应找到,这个要看opencv会不会提供。 |