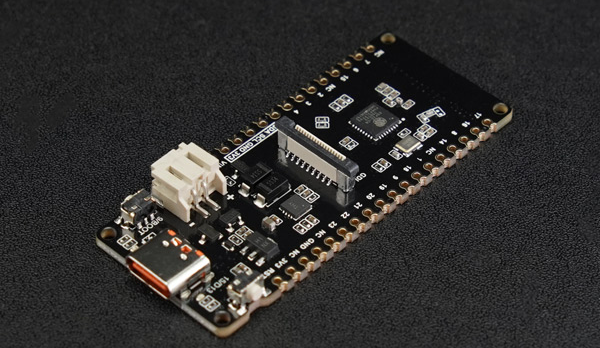
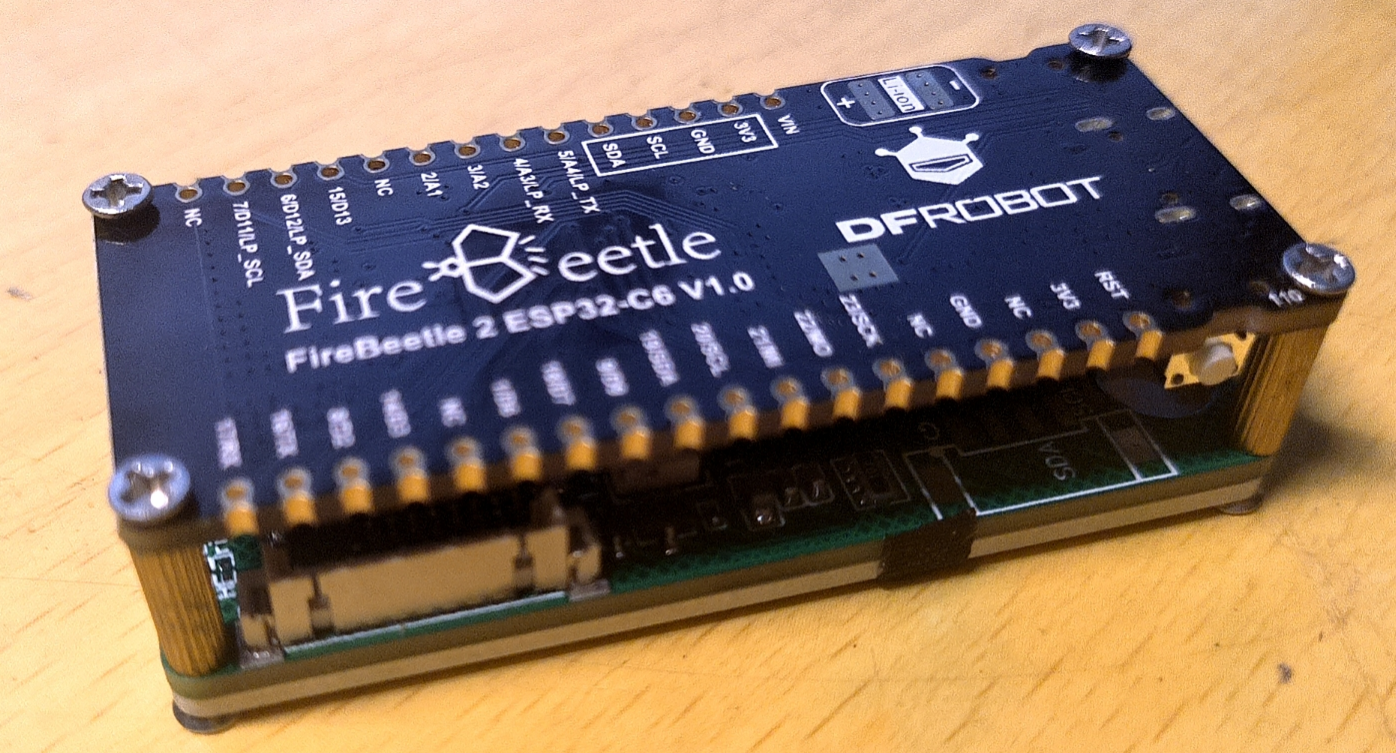
很开心收到了试用产品:FireBeetle 2 ESP32 C6开发板。这个板子支持 Wi-Fi 6,蓝牙 5,Zigbee 3.0,Thread 1.3通讯协议,太阳能充电。
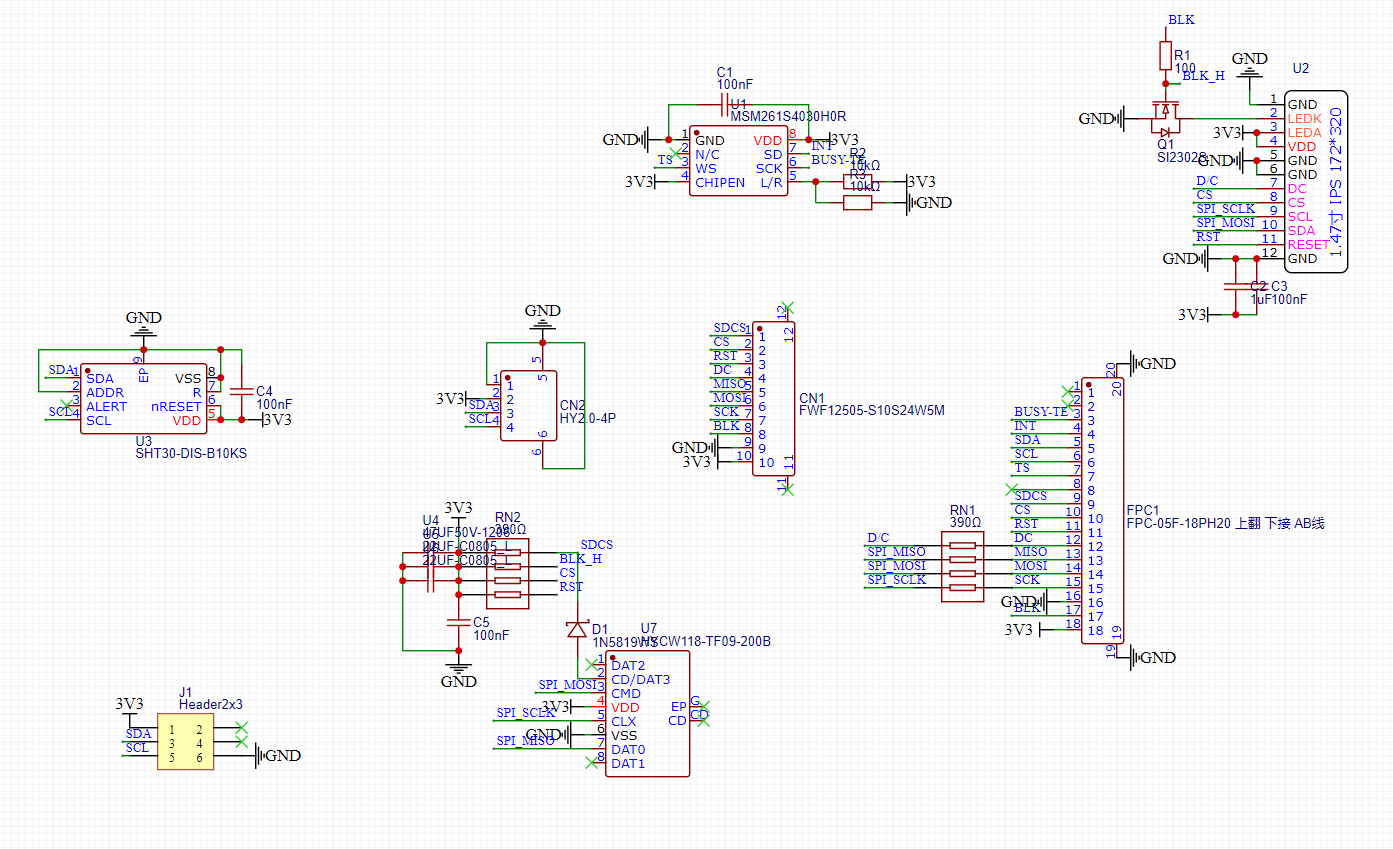
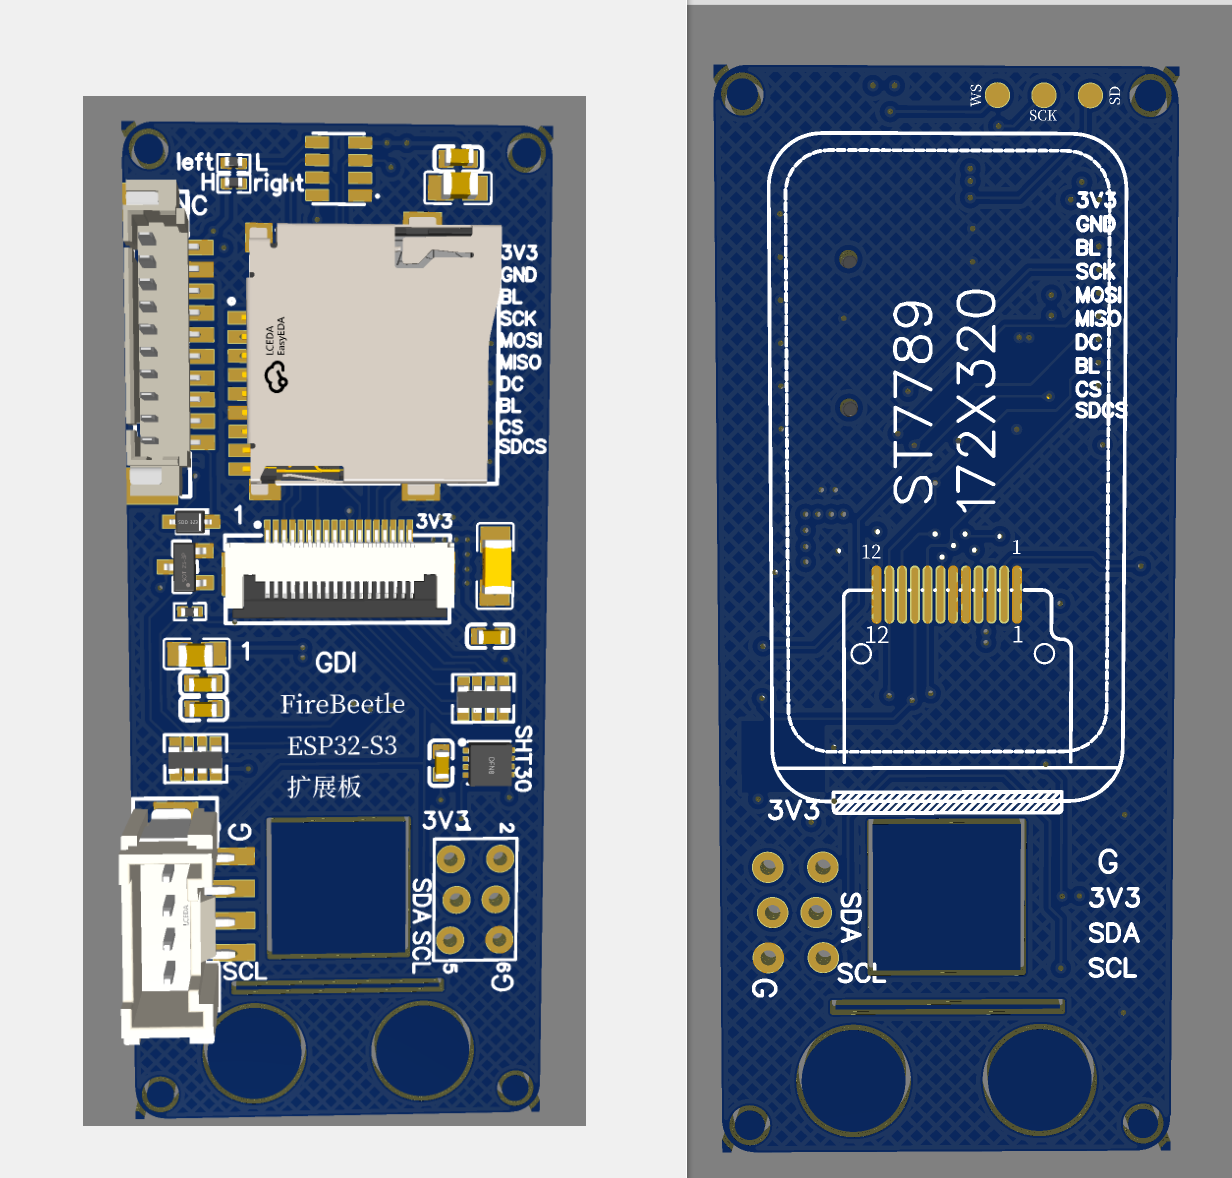
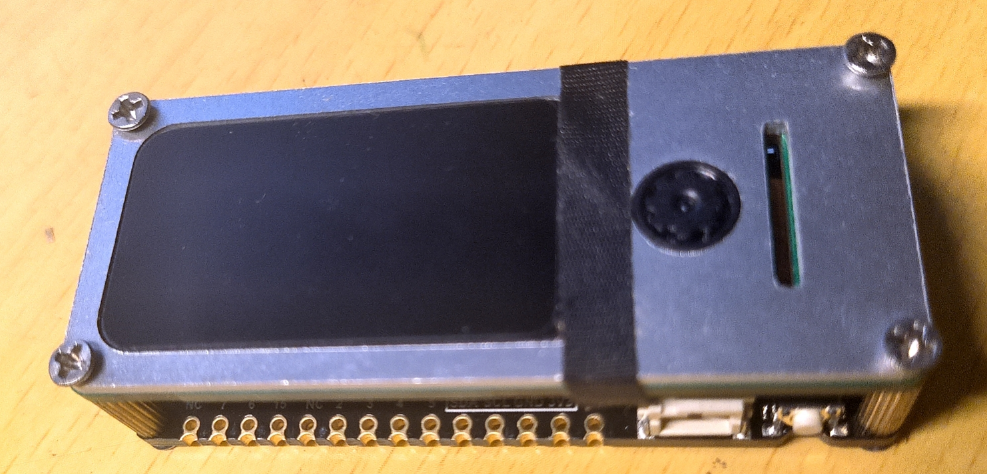
这个开发板是属于FireBeetle 2系列的开发板,板子上有个GDI接口。手上有一个自制的FireBeetle 2的扩展板。扩展板上有SHT30、SD卡和一个1.47寸TFT显示屏,屏幕是IPS屏,172*320 SPI接口ST7789驱动。这里将扩展板装上,扩展板上有个摄像头,这里暂时不用。先用这个板子点亮屏幕玩一下。
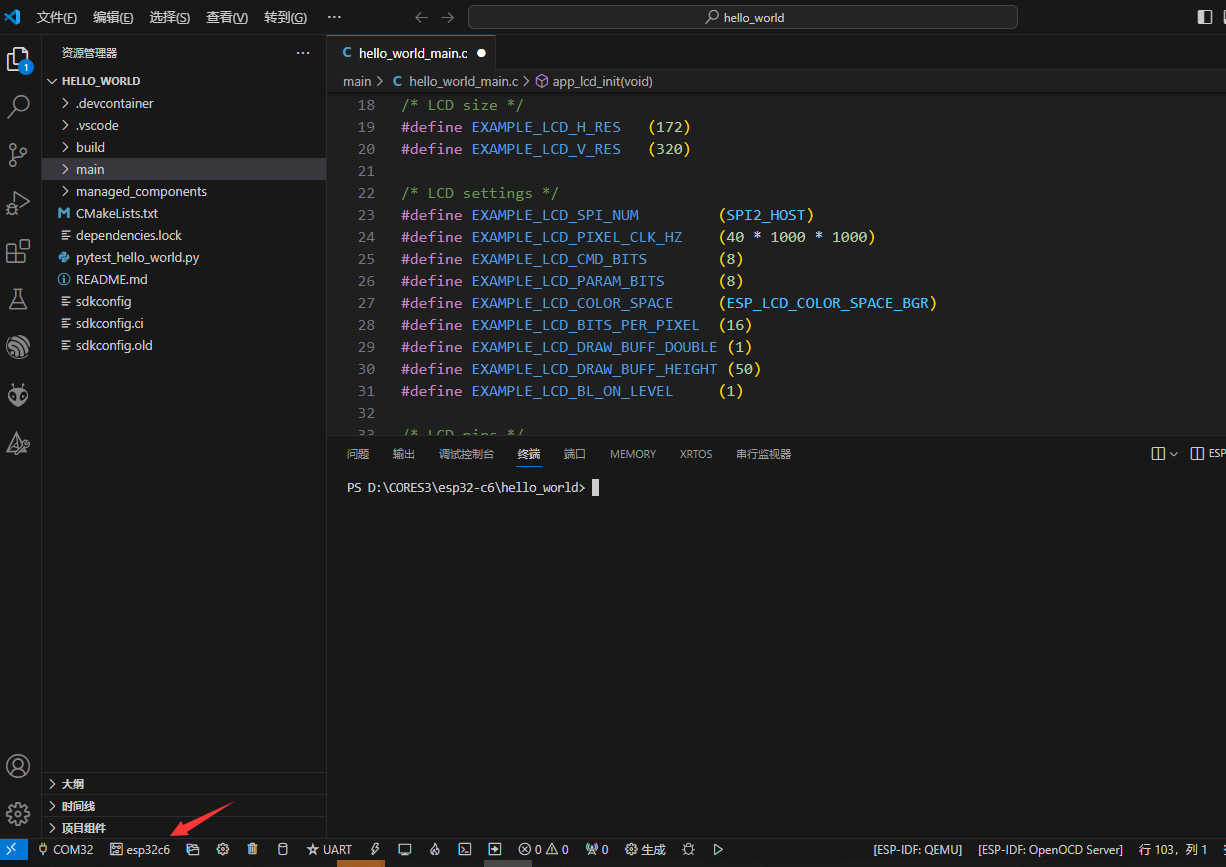
电脑上安装有ESP-IDF4.4.6环境,但是在Vscode里选择硬件,居然没有esp32-c6,看来是芯片太新了,重新安装esp-idf5.1.2版本,然后就有esp32-c6芯片选择了。 选择例程,使用HELLO_WORLD例程。esp-idf5以后开始使用组件了,修改芯片类型,然后在main文件夹里创建 idf_component.yml文件。
- dependencies:
- espressif/esp_lvgl_port: "^1.4.0"
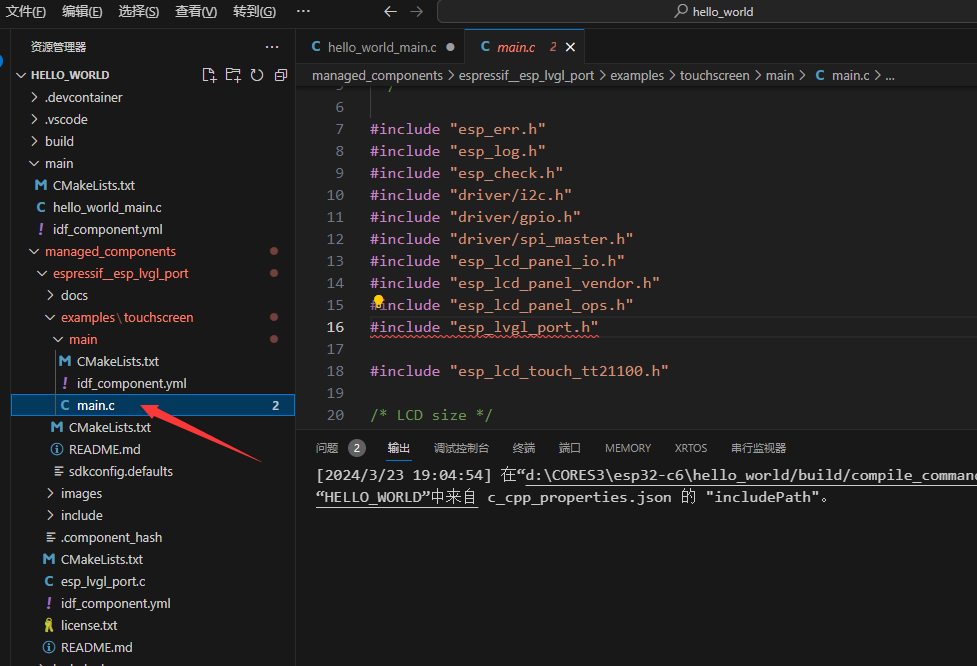
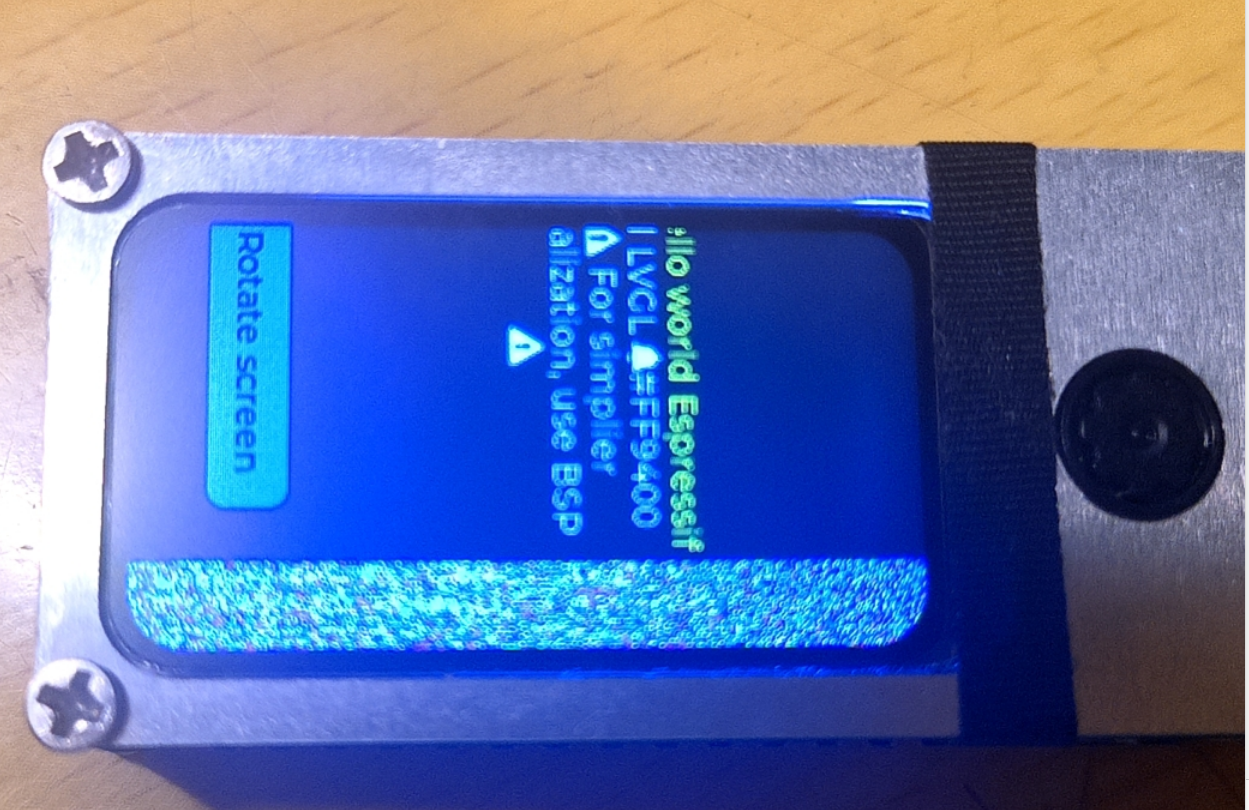
使用这个配置,自动加载lvgl。将加载的组件里例程中的main.c整个复制到hello_world_main.c文件里。系统默认的就是使用st7789的驱动。 修改几个地方:1、删掉触摸屏部分的代码。2、修改SPI驱动,使用SPI2_HOST。3、修改管脚,使用FireBeetle的管脚对应。 - #include "esp_err.h"
- #include "esp_log.h"
- #include "esp_check.h"
- #include "driver/i2c.h"
- #include "driver/gpio.h"
- #include "driver/spi_master.h"
- #include "esp_lcd_panel_io.h"
- #include "esp_lcd_panel_vendor.h"
- #include "esp_lcd_panel_ops.h"
- #include "esp_lvgl_port.h"
-
- /* LCD size */
- #define EXAMPLE_LCD_H_RES (172)
- #define EXAMPLE_LCD_V_RES (320)
-
- /* LCD settings */
- #define EXAMPLE_LCD_SPI_NUM (SPI2_HOST)
- #define EXAMPLE_LCD_PIXEL_CLK_HZ (40 * 1000 * 1000)
- #define EXAMPLE_LCD_CMD_BITS (8)
- #define EXAMPLE_LCD_PARAM_BITS (8)
- #define EXAMPLE_LCD_COLOR_SPACE (ESP_LCD_COLOR_SPACE_BGR)
- #define EXAMPLE_LCD_BITS_PER_PIXEL (16)
- #define EXAMPLE_LCD_DRAW_BUFF_DOUBLE (1)
- #define EXAMPLE_LCD_DRAW_BUFF_HEIGHT (50)
- #define EXAMPLE_LCD_BL_ON_LEVEL (1)
-
- /* LCD pins */
- #define EXAMPLE_LCD_GPIO_SCLK (GPIO_NUM_23)
- #define EXAMPLE_LCD_GPIO_MOSI (GPIO_NUM_22)
- #define EXAMPLE_LCD_GPIO_RST (GPIO_NUM_14)
- #define EXAMPLE_LCD_GPIO_DC (GPIO_NUM_8)
- #define EXAMPLE_LCD_GPIO_CS (GPIO_NUM_1)
- #define EXAMPLE_LCD_GPIO_BL (GPIO_NUM_15)
-
- /* Touch settings */
- #define EXAMPLE_TOUCH_I2C_NUM (0)
- #define EXAMPLE_TOUCH_I2C_CLK_HZ (400000)
-
- /* LCD touch pins */
- #define EXAMPLE_TOUCH_I2C_SCL (GPIO_NUM_18)
- #define EXAMPLE_TOUCH_I2C_SDA (GPIO_NUM_8)
- #define EXAMPLE_TOUCH_GPIO_INT (GPIO_NUM_3)
-
- static const char *TAG = "EXAMPLE";
-
- /* LCD IO and panel */
- static esp_lcd_panel_io_handle_t lcd_io = NULL;
- static esp_lcd_panel_handle_t lcd_panel = NULL;
-
-
- /* LVGL display and touch */
- static lv_disp_t *lvgl_disp = NULL;
-
-
- static esp_err_t app_lcd_init(void)
- {
- esp_err_t ret = ESP_OK;
-
- /* LCD backlight */
- gpio_config_t bk_gpio_config = {
- .mode = GPIO_MODE_OUTPUT,
- .pin_bit_mask = 1ULL << EXAMPLE_LCD_GPIO_BL
- };
- ESP_ERROR_CHECK(gpio_config(&bk_gpio_config));
-
- /* LCD initialization */
- ESP_LOGD(TAG, "Initialize SPI bus");
- const spi_bus_config_t buscfg = {
- .sclk_io_num = EXAMPLE_LCD_GPIO_SCLK,
- .mosi_io_num = EXAMPLE_LCD_GPIO_MOSI,
- .miso_io_num = GPIO_NUM_NC,
- .quadwp_io_num = GPIO_NUM_NC,
- .quadhd_io_num = GPIO_NUM_NC,
- .max_transfer_sz = EXAMPLE_LCD_H_RES * EXAMPLE_LCD_DRAW_BUFF_HEIGHT * sizeof(uint16_t),
- };
- ESP_RETURN_ON_ERROR(spi_bus_initialize(EXAMPLE_LCD_SPI_NUM, &buscfg, SPI_DMA_CH_AUTO), TAG, "SPI init failed");
-
- ESP_LOGD(TAG, "Install panel IO");
- const esp_lcd_panel_io_spi_config_t io_config = {
- .dc_gpio_num = EXAMPLE_LCD_GPIO_DC,
- .cs_gpio_num = EXAMPLE_LCD_GPIO_CS,
- .pclk_hz = EXAMPLE_LCD_PIXEL_CLK_HZ,
- .lcd_cmd_bits = EXAMPLE_LCD_CMD_BITS,
- .lcd_param_bits = EXAMPLE_LCD_PARAM_BITS,
- .spi_mode = 0,
- .trans_queue_depth = 10,
- };
- ESP_GOTO_ON_ERROR(esp_lcd_new_panel_io_spi((esp_lcd_spi_bus_handle_t)EXAMPLE_LCD_SPI_NUM, &io_config, &lcd_io), err, TAG, "New panel IO failed");
-
- ESP_LOGD(TAG, "Install LCD driver");
- const esp_lcd_panel_dev_config_t panel_config = {
- .reset_gpio_num = EXAMPLE_LCD_GPIO_RST,
- .color_space = EXAMPLE_LCD_COLOR_SPACE,
- .bits_per_pixel = EXAMPLE_LCD_BITS_PER_PIXEL,
- };
- ESP_GOTO_ON_ERROR(esp_lcd_new_panel_st7789(lcd_io, &panel_config, &lcd_panel), err, TAG, "New panel failed");
-
- esp_lcd_panel_reset(lcd_panel);
- esp_lcd_panel_init(lcd_panel);
- esp_lcd_panel_mirror(lcd_panel, true, true);
- esp_lcd_panel_disp_on_off(lcd_panel, true);
-
- /* LCD backlight on */
- ESP_ERROR_CHECK(gpio_set_level(EXAMPLE_LCD_GPIO_BL, EXAMPLE_LCD_BL_ON_LEVEL));
-
- return ret;
-
- err:
- if (lcd_panel) {
- esp_lcd_panel_del(lcd_panel);
- }
- if (lcd_io) {
- esp_lcd_panel_io_del(lcd_io);
- }
- spi_bus_free(EXAMPLE_LCD_SPI_NUM);
- return ret;
- }
-
- static esp_err_t app_lvgl_init(void)
- {
- /* Initialize LVGL */
- const lvgl_port_cfg_t lvgl_cfg = {
- .task_priority = 4, /* LVGL task priority */
- .task_stack = 4096, /* LVGL task stack size */
- .task_affinity = -1, /* LVGL task pinned to core (-1 is no affinity) */
- .task_max_sleep_ms = 500, /* Maximum sleep in LVGL task */
- .timer_period_ms = 5 /* LVGL timer tick period in ms */
- };
- ESP_RETURN_ON_ERROR(lvgl_port_init(&lvgl_cfg), TAG, "LVGL port initialization failed");
-
- /* Add LCD screen */
- ESP_LOGD(TAG, "Add LCD screen");
- const lvgl_port_display_cfg_t disp_cfg = {
- .io_handle = lcd_io,
- .panel_handle = lcd_panel,
- .buffer_size = EXAMPLE_LCD_H_RES * EXAMPLE_LCD_DRAW_BUFF_HEIGHT * sizeof(uint16_t),
- .double_buffer = EXAMPLE_LCD_DRAW_BUFF_DOUBLE,
- .hres = EXAMPLE_LCD_H_RES,
- .vres = EXAMPLE_LCD_V_RES,
- .monochrome = false,
- /* Rotation values must be same as used in esp_lcd for initial settings of the screen */
- .rotation = {
- .swap_xy = false,
- .mirror_x = false,
- .mirror_y = true,
- },
- .flags = {
- .buff_dma = true,
- }
- };
- lvgl_disp = lvgl_port_add_disp(&disp_cfg);
-
- return ESP_OK;
- }
-
- static void _app_button_cb(lv_event_t *e)
- {
- lv_disp_rot_t rotation = lv_disp_get_rotation(lvgl_disp);
- rotation++;
- if (rotation > LV_DISP_ROT_270) {
- rotation = LV_DISP_ROT_NONE;
- }
-
- /* LCD HW rotation */
- lv_disp_set_rotation(lvgl_disp, rotation);
- }
-
- static void app_main_display(void)
- {
- lv_obj_t *scr = lv_scr_act();
-
- /* Task lock */
- lvgl_port_lock(0);
-
- /* Your LVGL objects code here .... */
-
- /* Label */
- lv_obj_t *label = lv_label_create(scr);
- lv_label_set_recolor(label, true);
- lv_obj_set_width(label, EXAMPLE_LCD_H_RES);
- lv_obj_set_style_text_align(label, LV_TEXT_ALIGN_CENTER, 0);
- lv_label_set_text(label, "#FF0000 "LV_SYMBOL_BELL" Hello world Espressif and LVGL "LV_SYMBOL_BELL"#\n#FF9400 "LV_SYMBOL_WARNING" For simplier initialization, use BSP "LV_SYMBOL_WARNING" #");
- lv_obj_align(label, LV_ALIGN_CENTER, 0, -30);
-
- /* Button */
- lv_obj_t *btn = lv_btn_create(scr);
- label = lv_label_create(btn);
- lv_label_set_text_static(label, "Rotate screen");
- lv_obj_align(btn, LV_ALIGN_BOTTOM_MID, 0, -30);
- lv_obj_add_event_cb(btn, _app_button_cb, LV_EVENT_CLICKED, NULL);
-
- /* Task unlock */
- lvgl_port_unlock();
- }
-
- void app_main(void)
- {
- /* LCD HW initialization */
- ESP_ERROR_CHECK(app_lcd_init());
-
- /* LVGL initialization */
- ESP_ERROR_CHECK(app_lvgl_init());
-
- /* Show LVGL objects */
- app_main_display();
- }
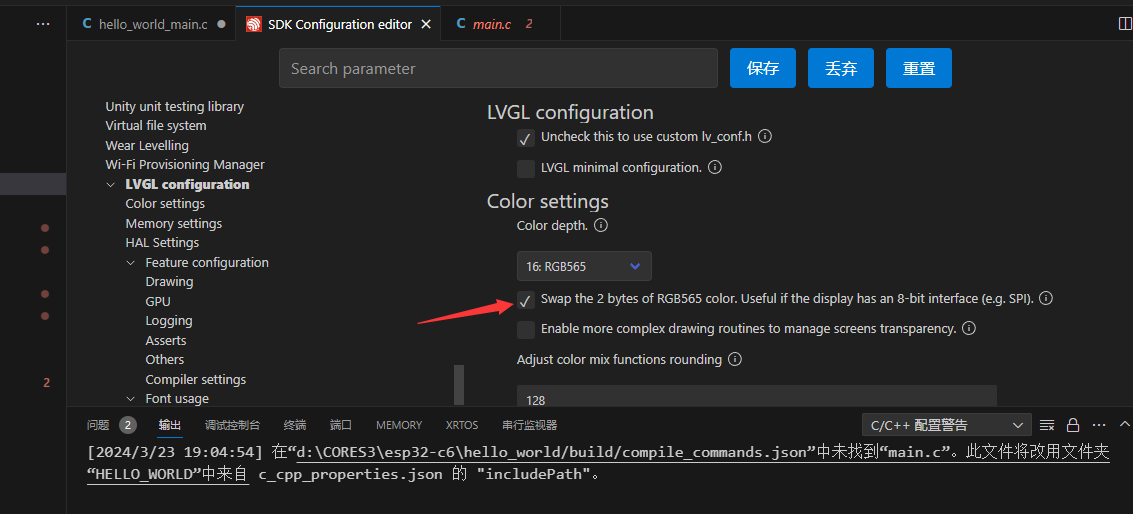
编译、烧写,屏幕能点亮,但是字体恨不清晰,这里修改一下LVGL的高低字节关系。 再次烧写,还是有问题。屏幕颜色还是不对,图形有偏移。 要想修正这些问题,需要修改ST7789的驱动,但是组件文件貌似修改会报错好烦!先这样吧! - #include "DFRobot_GDL.h"
- #define TFT_DC 8
- #define TFT_CS 1
- #define TFT_RST 14
-
- DFRobot_ST7789_172x320_HW_SPI screen(/*dc=*/TFT_DC,/*cs=*/TFT_CS,/*rst=*/TFT_RST);
-
-
- void setup() {
- Serial.begin(115200);
- screen.begin();//生成了screen对象
- }
-
- void loop(){
- testDrawPixel();
- testLine();
- testFastLines(COLOR_RGB565_PURPLE,COLOR_RGB565_YELLOW);
- testRects(COLOR_RGB565_BLACK,COLOR_RGB565_WHITE);
- testRoundRects();
- testCircles(24,COLOR_RGB565_BLUE);
- testTriangles(COLOR_RGB565_YELLOW);
- testPrint();
-
- }
-
- /*测试画像素点*/
- void testDrawPixel() {
- /*
- *@brief 清屏
- *@param c 屏幕颜色
- */
- screen.fillScreen(COLOR_RGB565_BLACK);
- int x = 0;
- int y = screen.height();
- for(int i = 0; i <= screen.width()/2; i += 10){
- for (x = screen.width() - i; x >= i; x-=10 ){
- /*
- *@brief 画像素点
- *@param x 横坐标
- * y 纵坐标
- * c 像素点颜色
- */
- screen.drawPixel(x, y, COLOR_RGB565_ORANGE);
- delay(10);
- }
-
- for (y = screen.height() - i; y >= i; y-=10){
- screen.drawPixel(x, y, COLOR_RGB565_ORANGE);
- delay(10);
- }
-
- for (x = i; x <= screen.width() - i + 1; x+=10 ){
- screen.drawPixel(x, y, COLOR_RGB565_ORANGE);
- delay(10);
- }
-
- for (y = i; y <= screen.height() - i + 1; y+=10){
- screen.drawPixel(x, y, COLOR_RGB565_ORANGE);
- delay(10);
- }
- }
- }
-
- /*测试画线*/
- void testLine(){
- //0x00FF 是格式为RGB565的颜色数据
- uint16_t color = 0x00FF;
- screen.fillScreen(COLOR_RGB565_BLACK);
- for (int16_t x=0; x < screen.width(); x+=6) {
- /*
- *@brief 画线段
- *@param x0 第一个顶点横坐标
- * y0 第一个顶点纵坐标
- * x1 第二个顶点横坐标
- * y1 第二个顶点纵坐标
- * c 线段颜色
- */
- screen.drawLine(/*x0=*/screen.width()/*屏幕宽度*//2, /*y0=*/screen.height()/*屏幕高度*//2, /*x1=*/x, /*y1=*/0, /*c=*/color+=0x0700);
- }
- for (int16_t y=0; y < screen.height(); y+=6) {
- screen.drawLine(screen.width()/2, screen.height()/2, screen.width(), y, color+=0x0700);
- }
-
- for (int16_t x = screen.width(); x >= 0; x-=6) {
- screen.drawLine(screen.width()/2, screen.height()/2, x,screen.height(), color+=0x0700);
- }
-
- for (int16_t y = screen.height(); y >= 0; y-=6) {
- screen.drawLine(screen.width()/2, screen.height()/2, 0, y, color+=0x0700);
- }
- }
-
- /*测试快速画线(需设置延时),只有横线和纵线*/
- void testFastLines(uint16_t color1, uint16_t color2) {
- for (int16_t y=0; y < screen.height(); y+=4) {
- /*
- *@brief 画线段
- *@param x 第一个顶点横坐标
- * y 第一个顶点纵坐标
- * w 线段的长度
- * c 线段颜色
- */
- screen.drawFastHLine(/*x=*/0, /*y=*/y, /*w=*/screen.width(),/*c=*/color2);
- delay(10);
- }
-
- for(int16_t x=0; x < screen.width(); x+=3) {
- /*
- *@brief 画线段
- *@param x 第一个顶点横坐标
- * y 第一个顶点纵坐标
- * h 线段的长度
- * c 线段颜色
- */
- screen.drawFastVLine(/*x=*/x, /*y=*/0, /*h=*/screen.height(), /*c=*/color1);
- delay(10);
- }
- }
-
- /*测试画矩形*/
- void testRects(uint16_t color1, uint16_t color2) {
- screen.fillScreen(COLOR_RGB565_BLACK);
- int16_t x=screen.width()-12;
- for (; x > 100; x-=screen.width()/40) {
- /*
- *@brief 画空心矩形
- *@param x 顶点横坐标
- *@param y 顶点纵坐标
- *@param w 横向边长
- *@param h 纵向边长
- *@param color 填充颜色,565结构的RGB色
- */
- screen.drawRect(/*x=*/screen.width()/2 -x/2, /*y=*/screen.height()/2 -x/2 , /*w=*/x, /*h=*/x, /*color=*/color2+=0x0F00);
- delay(100);
- }
-
- /*
- *@brief 画填充矩形
- *@param x 顶点横坐标
- *@param y 顶点纵坐标
- *@param w 横向边长
- *@param h 纵向边长
- *@param color 填充颜色,565结构的RGB色
- */
- screen.fillRect(/*x=*/screen.width()/2 -x/2, /*y=*/screen.height()/2 -x/2 , /*w=*/x, /*h=*/x, /*color=*/color2);
- delay(100);
- for(; x > 6; x-=screen.width()/40){
- screen.drawRect(screen.width()/2 -x/2, screen.height()/2 -x/2 , x, x, color1);
- delay(100);
- }
- }
-
- /*测试画圆角矩形*/
- void testRoundRects() {
- screen.fillScreen(COLOR_RGB565_BLACK);
- //0xF00F 是格式为RGB565的颜色数据
- int color = 0xF00F;
- int i;
- int x = 0;
- int y = 0;
- int w = screen.width()-3;
- int h = screen.height()-3;
- for(i = 0 ; i <= 16; i+=2) {
- /*
- *@brief 画空心圆角矩形
- *@param x0 起始顶点横坐标
- *@param y0 起始顶点纵坐标
- *@param w 横向边长
- *@param h 纵向边长
- *@param radius 圆角半径
- *@param color 边框颜色,565结构的RGB色
- */
- screen.drawRoundRect(/*x0=*/x, /*y0=*/y, /*w=*/w, /*h=*/h, /*radius=*/20, /*color=*/color);
- x+=5;
- y+=5;
- w-=10;
- h-=10;
- color+=0x0100;
- delay(50);
- }
- for(i = 0 ; i <= 16; i+=2) {
- /*
- *@brief 画填充圆角矩形
- *@param x0 起始顶点横坐标
- *@param y0 起始顶点纵坐标
- *@param w 横向边长
- *@param h 纵向边长
- *@param radius 圆角半径
- *@param color 填充颜色,565结构的RGB色
- */
- screen.fillRoundRect(/*x0=*/x, /*y0=*/y, /*w=*/w, /*h=*/h, /*radius=*/10, /*color=*/color);
- x+=5;
- y+=5;
- w-=10;
- h-=10;
- color+=0x0500;
- delay(50);
- }
- }
-
- /*测试画圆*/
- void testCircles(uint8_t radius, uint16_t color) {
- screen.fillScreen(COLOR_RGB565_BLACK);
- for (int16_t x=radius; x <=screen.width()-radius; x+=radius*2) {
- for (int16_t y=radius; y <=screen.height()-radius; y+=radius*2) {
- /*
- *@brief 画空心圆
- *@param x0 圆心横坐标
- *@param y0 圆心纵坐标
- *@param r 半径
- *@param color 圆周颜色,565结构的RGB色
- */
- screen.drawCircle(/*x0=*/x, /*y0=*/y, /*r=*/radius, /*color=*/color);
- if(x == y ||x == -y ||x == y + 2*radius)
- /*
- *@brief 画填充圆
- *@param x0 圆心横坐标
- *@param y0 圆心纵坐标
- *@param r 半径
- *@param color 填充颜色,565结构的RGB色
- */
- screen.fillCircle(/*x0=*/x, /*y0=*/y, /*r=*/radius, /*color=*/color);
- color += 800;
- delay(100);
- }
- }
- }
-
- /*测试画三角形*/
- void testTriangles(uint16_t color){
- screen.fillScreen(COLOR_RGB565_BLACK);
-
- for (int16_t i=0; i <=screen.width(); i+=24)
- /*
- *@brief 画空心三角形
- *@param x0 起始顶点横坐标
- *@param y0 起始顶点纵坐标
- *@param x1 第二个顶点横坐标
- *@param y1 第二个顶点纵坐标
- *@param x2 第三个顶点横坐标
- *@param y2 第三个顶点纵坐标
- *@param color 边框颜色,565结构的RGB色
- */
- screen.drawTriangle(/*x0=*/i,/*y0=*/0,/*x1=*/0,/*y1=*/screen.height()-i,/*x2=*/screen.width()-i,/*y2=*/screen.height(), /*color=*/color);
-
- for (int16_t i=0; i <screen.width(); i+=24)
- screen.drawTriangle(screen.width(),i*4/3,0,screen.height()-i*4/3,i,0, color);
-
- for (int16_t i=0; i <screen.width(); i+=24)
- screen.drawTriangle(screen.width(),i*4/3,i,0,screen.width()-i,screen.height(), color);
-
- color = COLOR_RGB565_RED;
- for (int16_t i=0; i <=screen.width(); i+=24)
- /*
- *@brief 画填充三角形
- *@param x0 起始顶点横坐标
- *@param y0 起始顶点纵坐标
- *@param x1 第二个顶点横坐标
- *@param y1 第二个顶点纵坐标
- *@param x2 第三个顶点横坐标
- *@param y2 第三个顶点纵坐标
- *@param color 填充颜色,565结构的RGB色
- */
- screen.fillTriangle(/*x0=*/i,/*y0=*/0,/*x1=*/0,/*y1=*/screen.height()-i,/*x2=*/screen.width()-i,/*y2=*/screen.height(), /*color=*/color+=100);
-
- for (int16_t i=0; i <screen.width(); i+=24)
- screen.fillTriangle(screen.width(),i*4/3,0,screen.height()-i*4/3,i,0, color+=100);
-
- for (int16_t i=0; i <screen.width(); i+=24)
- screen.fillTriangle(screen.width(),i*4/3,i,0,screen.width()-i,screen.height(), color+=100);
- }
-
- void testPrint() {
- //0x00FF 是格式为RGB565的颜色数据
- int16_t color = 0x00FF;
- //设置文本自动换行模式
- //true=文本自动换行,false=不自动换行
- screen.setTextWrap(false);
- //填充颜色,565结构的RGB色
- screen.fillScreen(COLOR_RGB565_BLACK);
-
- //设置坐标位置x=0,y=50
- screen.setCursor(0, 50);
- //设置文本颜色;这是变化的值
- screen.setTextColor(color+=0x3000);
- //设置文本大小为0
- screen.setTextSize(0);
- //输出文本
- screen.println("Hello World!");
-
- screen.setTextColor(color+=0x3000);
- //设置文本大小为1
- screen.setTextSize(1);
- screen.println("Hello World!");
-
- screen.setTextColor(color+=0x3000);
- //设置文本大小为2
- screen.setTextSize(2);
- screen.println("Hello World!");
-
- screen.setTextColor(color+=0x3000);
- //设置文本大小为3
- screen.setTextSize(3);
- screen.println("Hello World!");
-
- screen.setTextColor(color+=0x3000);
- //设置文本大小为4
- screen.setTextSize(4);
- screen.println("Hello!");
- //设置文本大小为5
- screen.setTextSize(5);
- screen.print("Hello!");
- delay(2000);
-
- //设置坐标位置x=0,y=0
- screen.setCursor(0, 0);
- //填充颜色,565结构的RGB色
- screen.fillScreen(COLOR_RGB565_BLACK);
- screen.setTextSize(2);
- screen.setTextColor(color+=0x3000);
- screen.print("a = ");
-
- screen.setTextColor(color+=0x3000);
- int a = 1234;
- screen.println(a, 1);
- screen.setTextColor(color+=0x3000);
- screen.print(8675309, HEX);
- screen.println("this is HEX!");
- screen.println("");
-
- screen.setTextColor(color+=0x0F00);
- screen.println("running for: ");
- screen.setTextColor(color+=0x0F00);
- //输出毫秒时间
- screen.print(millis());
- screen.setTextColor(color+=0x0F00);
- screen.println("/1000 seconds.");
-
- char *text = "Hi DFRobot!";
- screen.setTextColor(color+=0x0F00);
- screen.setTextWrap(true);
- screen.setTextSize(3);
- screen.println(text);
- //screen.setFonts((const gdl_Font_t *)SIMKAIFont18ptBitmaps);
- screen.println(text);
- delay(2000);
- }
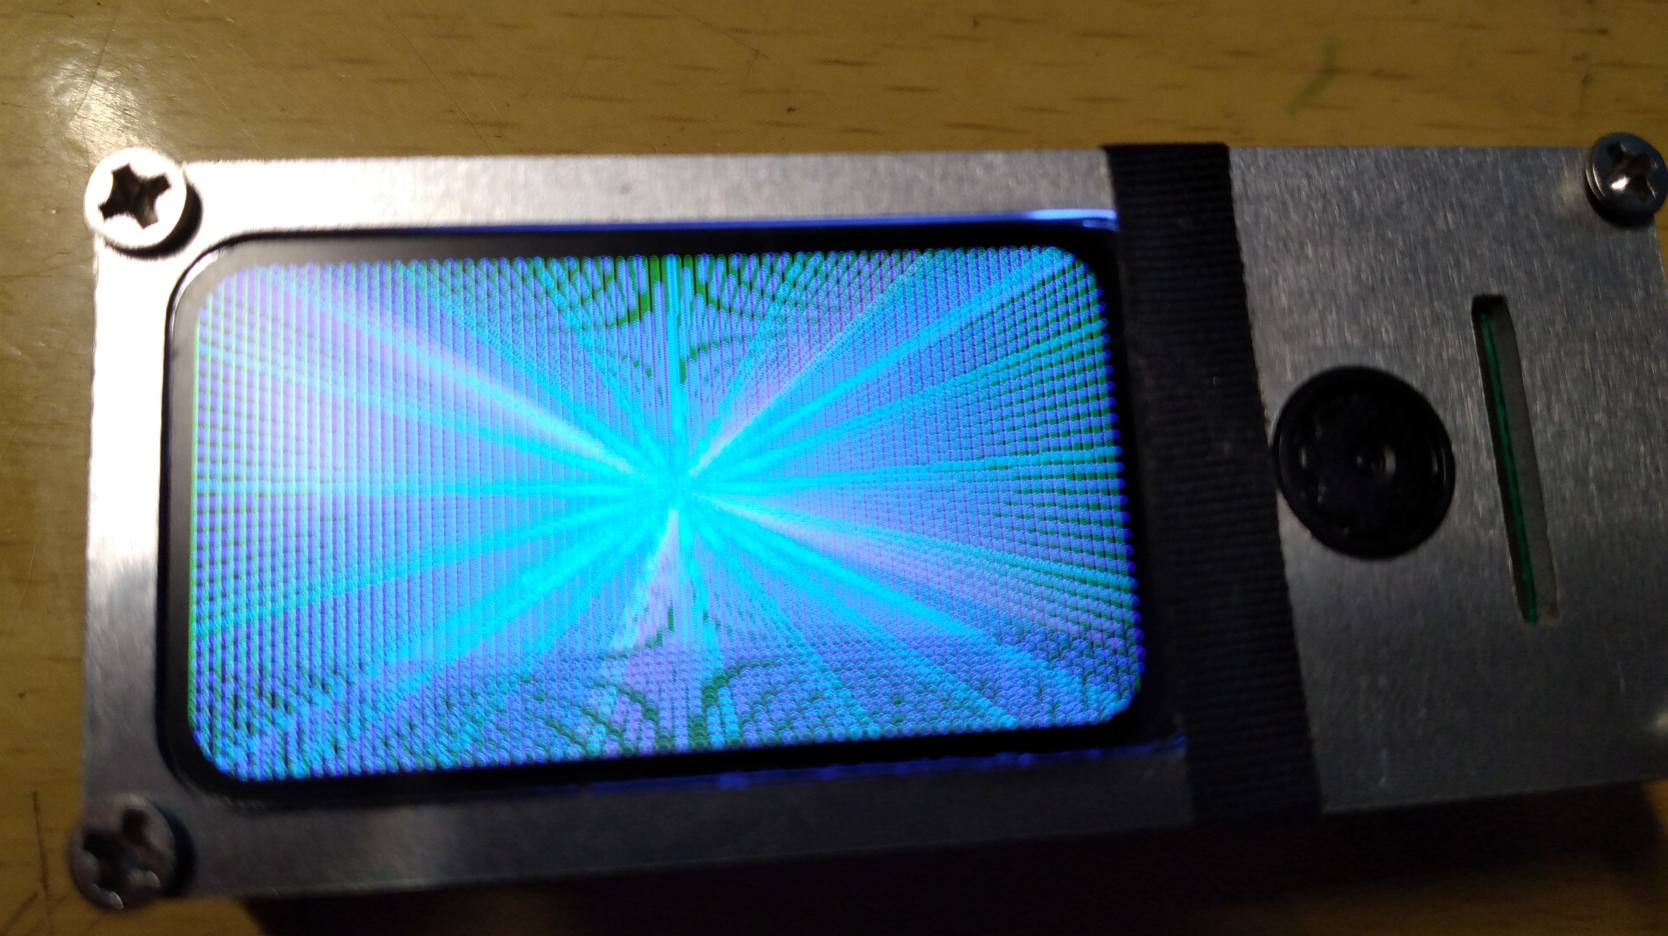
编译、烧写。一次点亮! 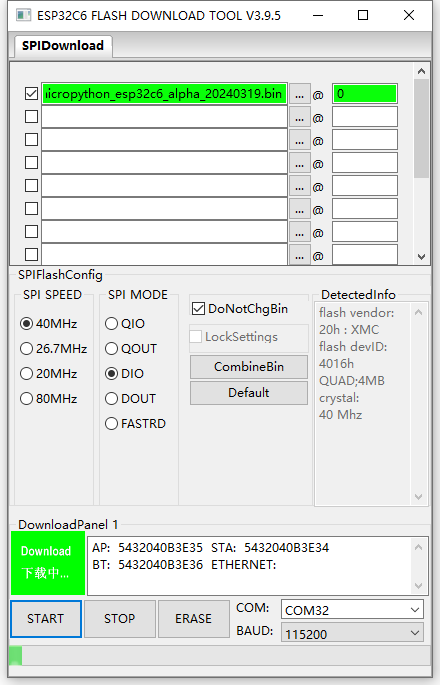
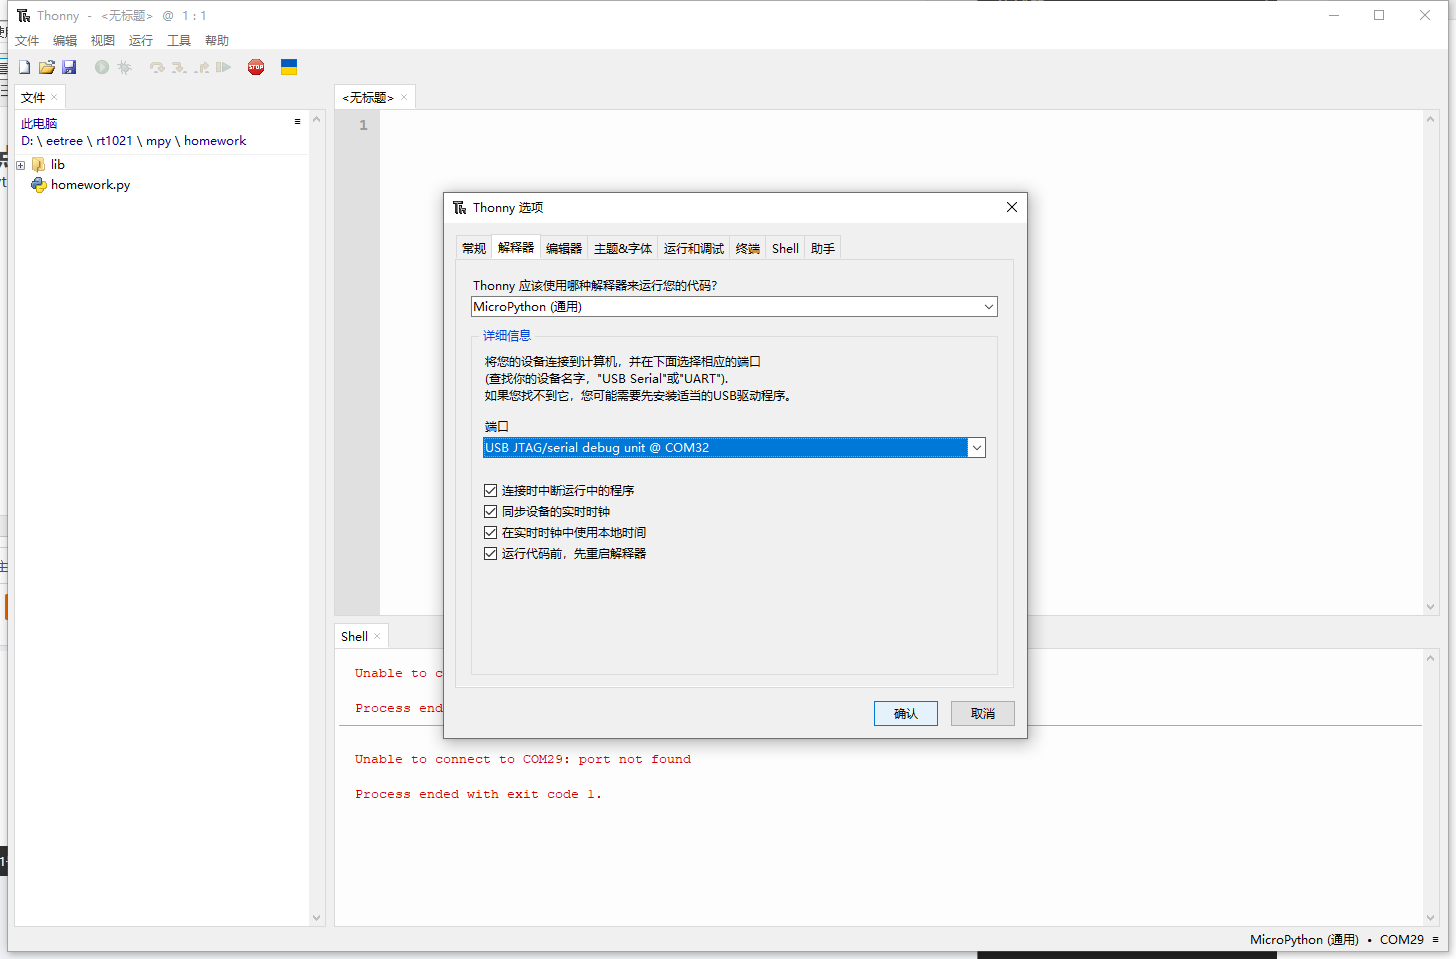
就能顺利地连上mpy了。在 这里找到一个ST7789的驱动。下载下来,放到lib文件夹里。这里略作改动,添加了自己屏幕的分辨率。
最后简简单单地测试一下。图像有点偏,在代码中做一下调整,将图片移动到屏幕中央。搞定收工。
- from machine import Pin, SPI
- import st7789 as st7789
- import vga1_16x32 as font
-
- def main():
- spi = SPI(1, baudrate=40000000, sck=Pin(23), mosi=Pin(22))
- tft = st7789.ST7789(spi,172,320,xstart=33, ystart=0,
- reset=Pin(14, Pin.OUT), cs=Pin(1, Pin.OUT), dc=Pin(8, Pin.OUT), backlight=Pin(15, Pin.OUT), rotation=0)
- tft.fill(st7789.WHITE)
- tft.text(font, "Hello!", 0, 0,color=st7789.RED, background=st7789.BLACK)
- tft.text(font, "DFROBOT", 20, 160,color=st7789.GREEN, background=st7789.WHITE)
- tft.text(font, "today!", 0, 320-32)
-
- main()
简单滴测试了一下,在三种编程环境下点亮屏幕,总有一种方法适合自己!
|