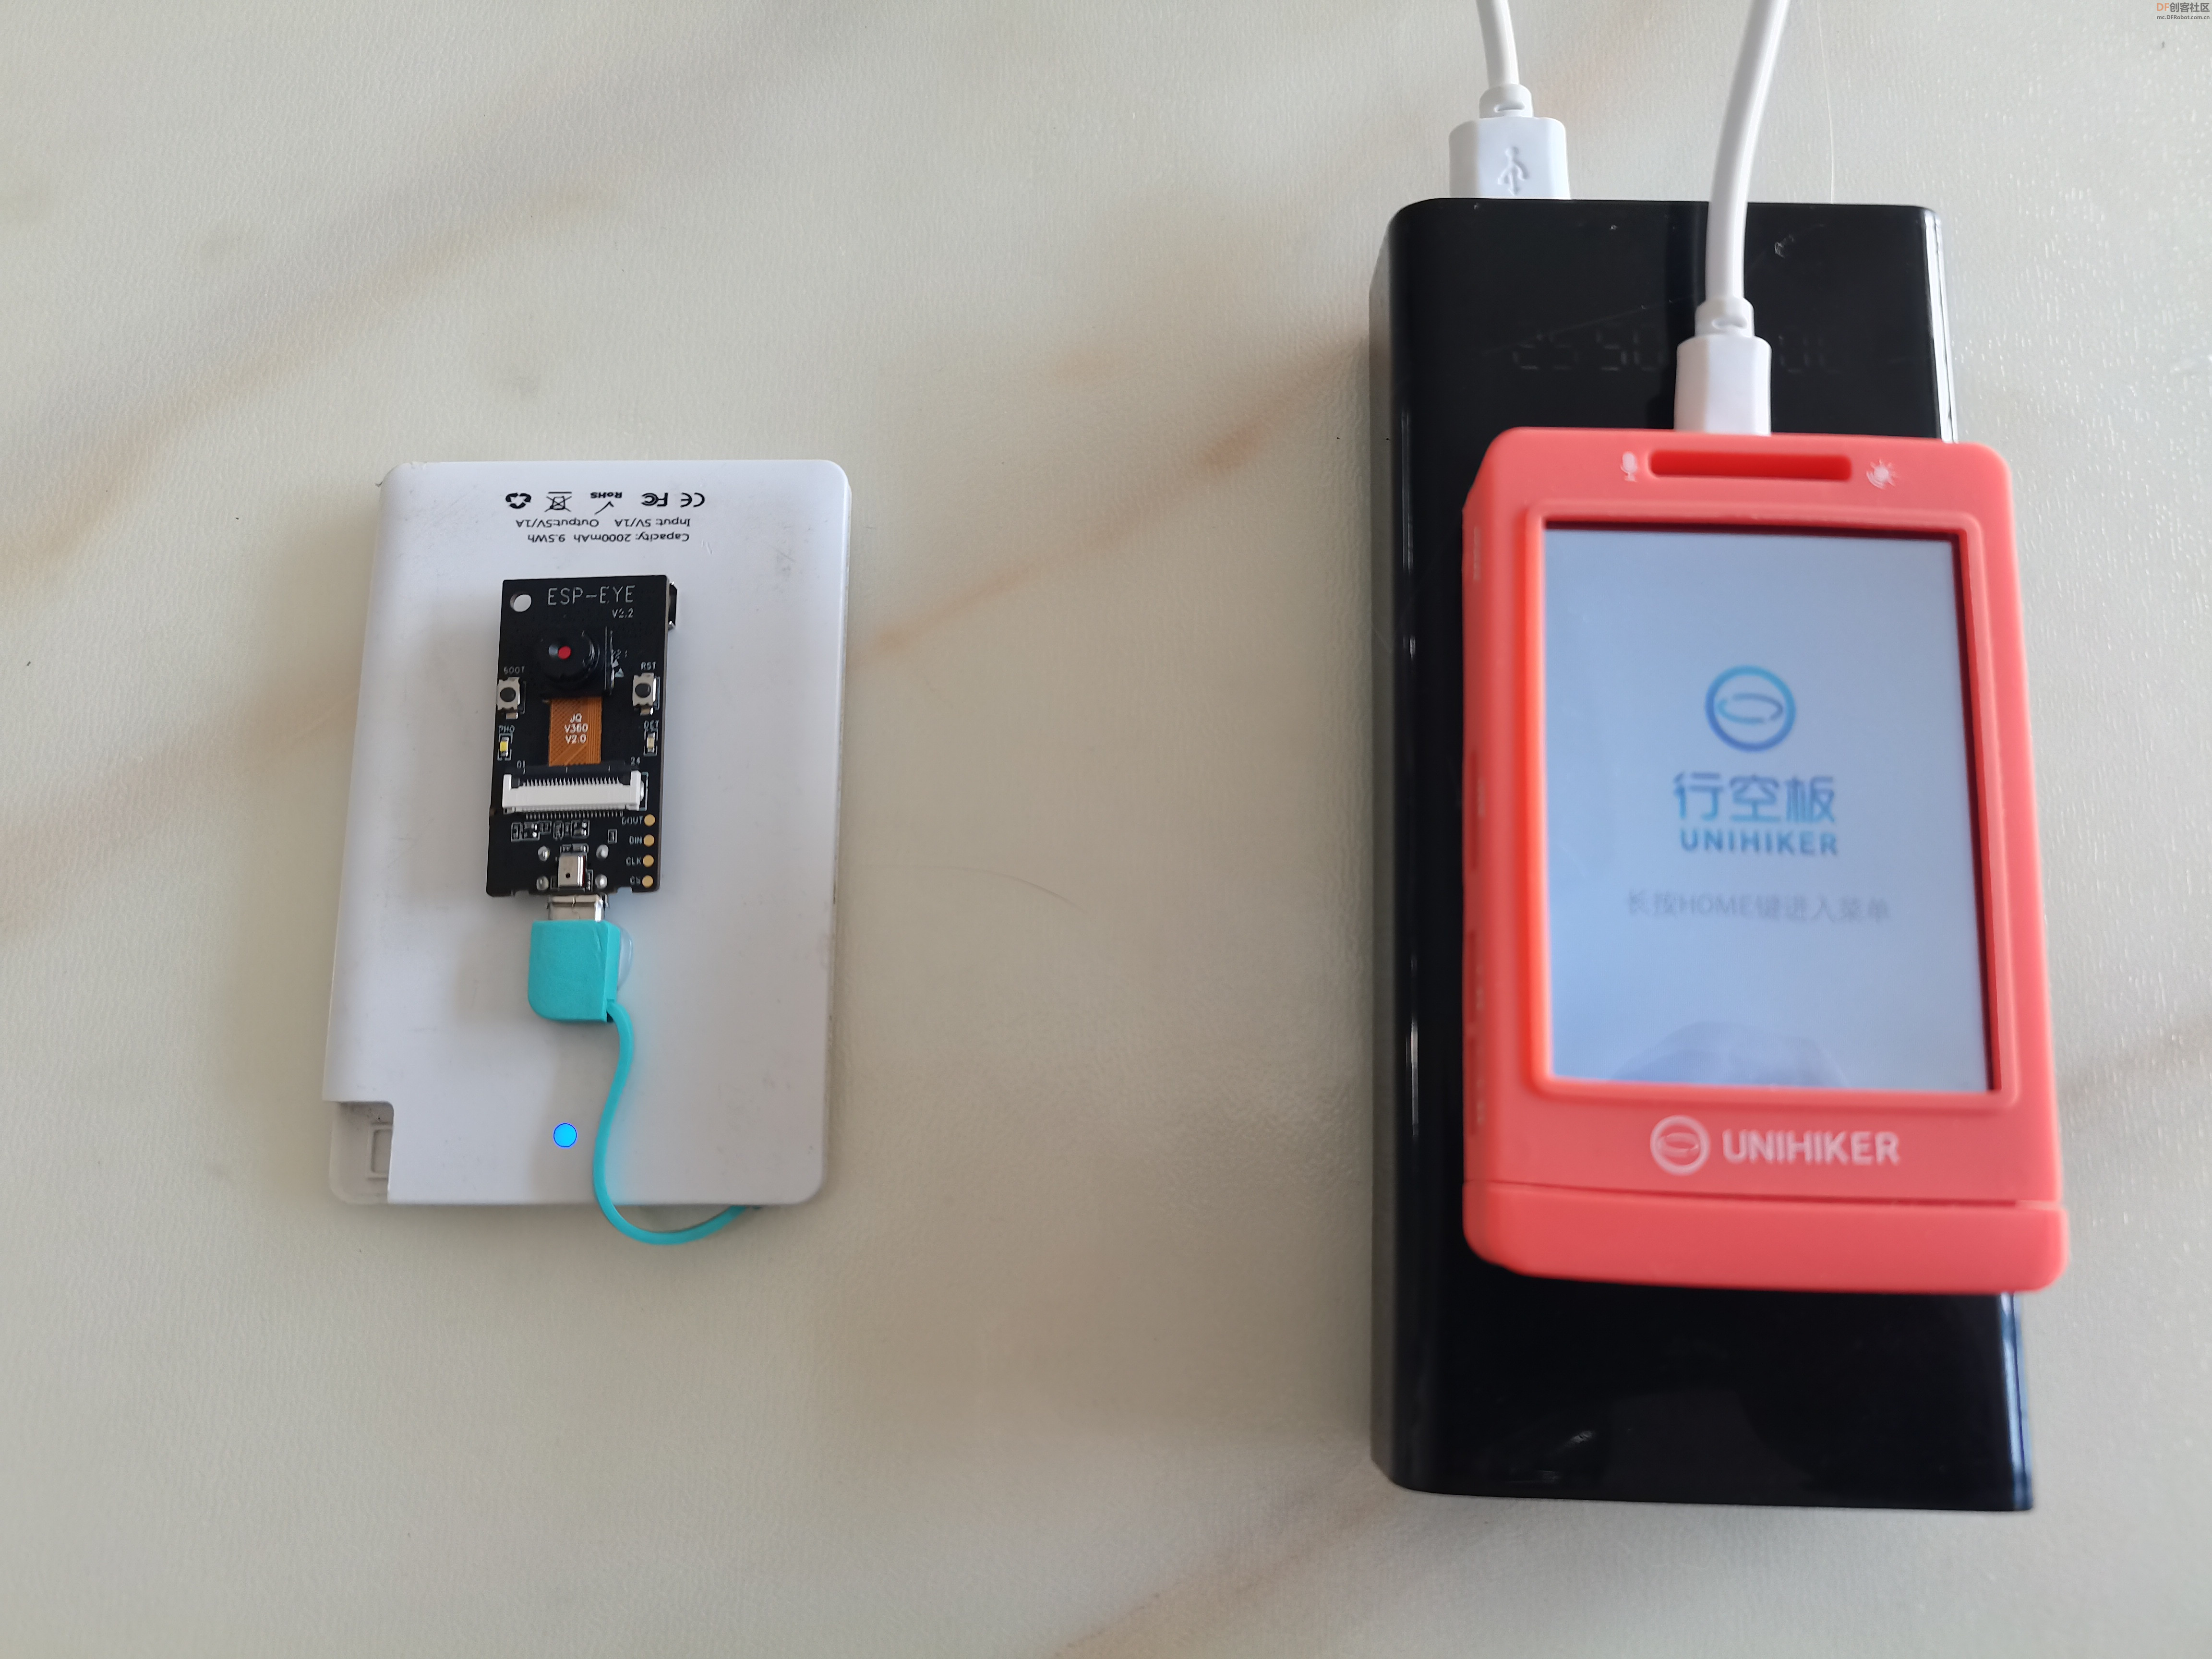
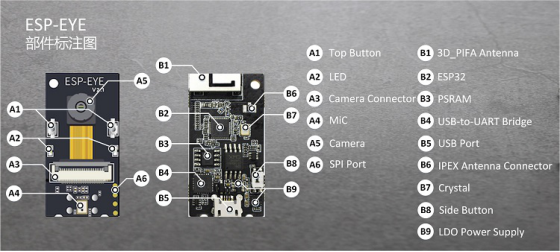
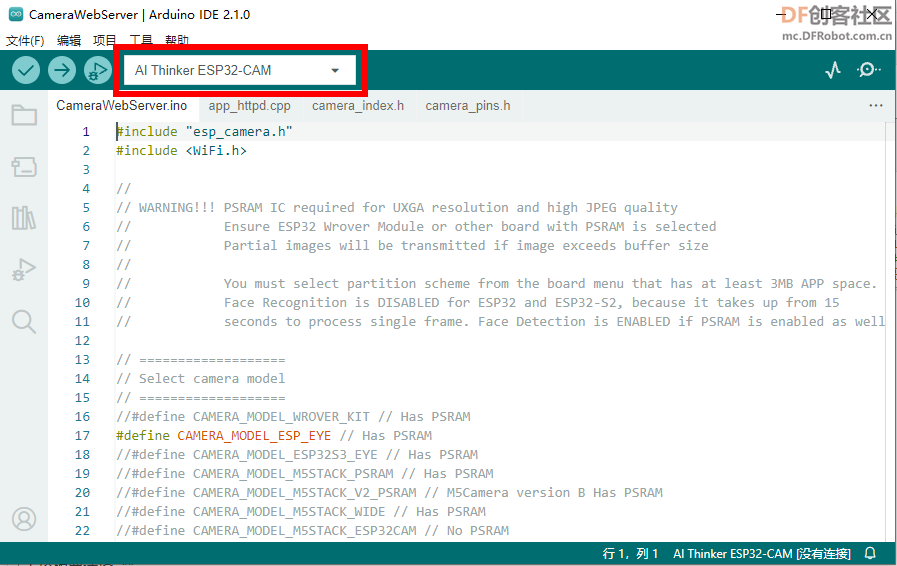
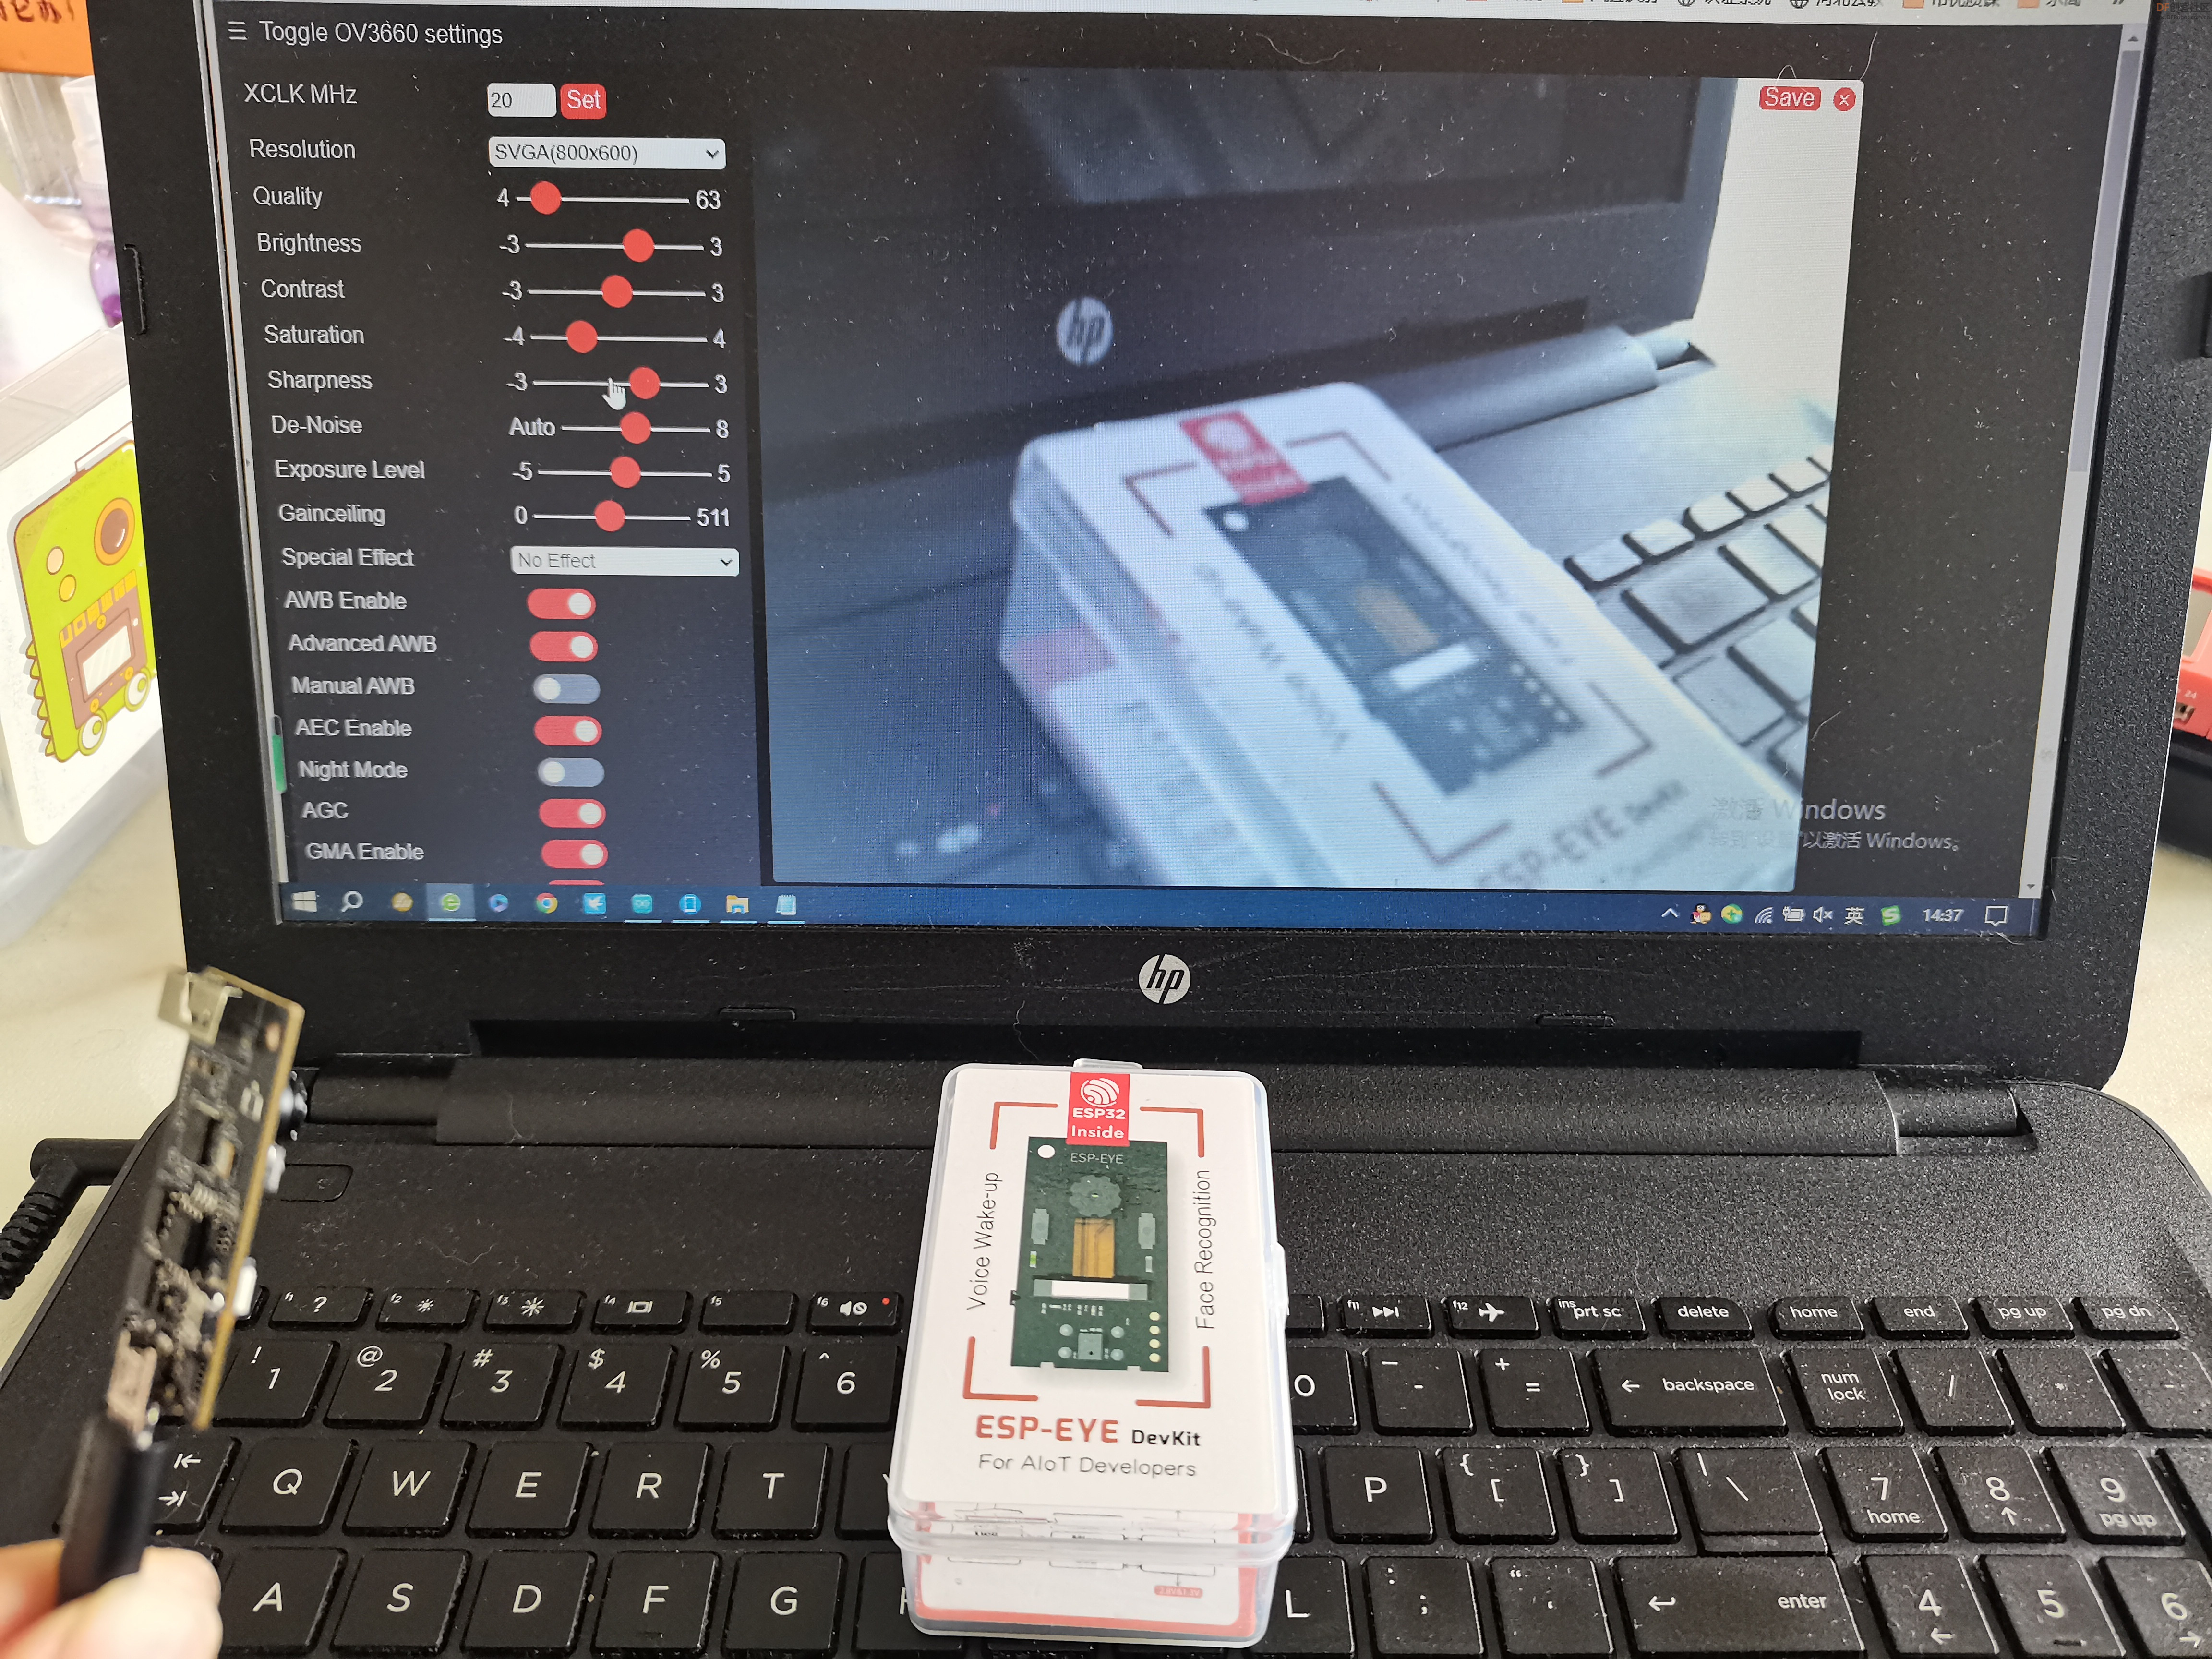
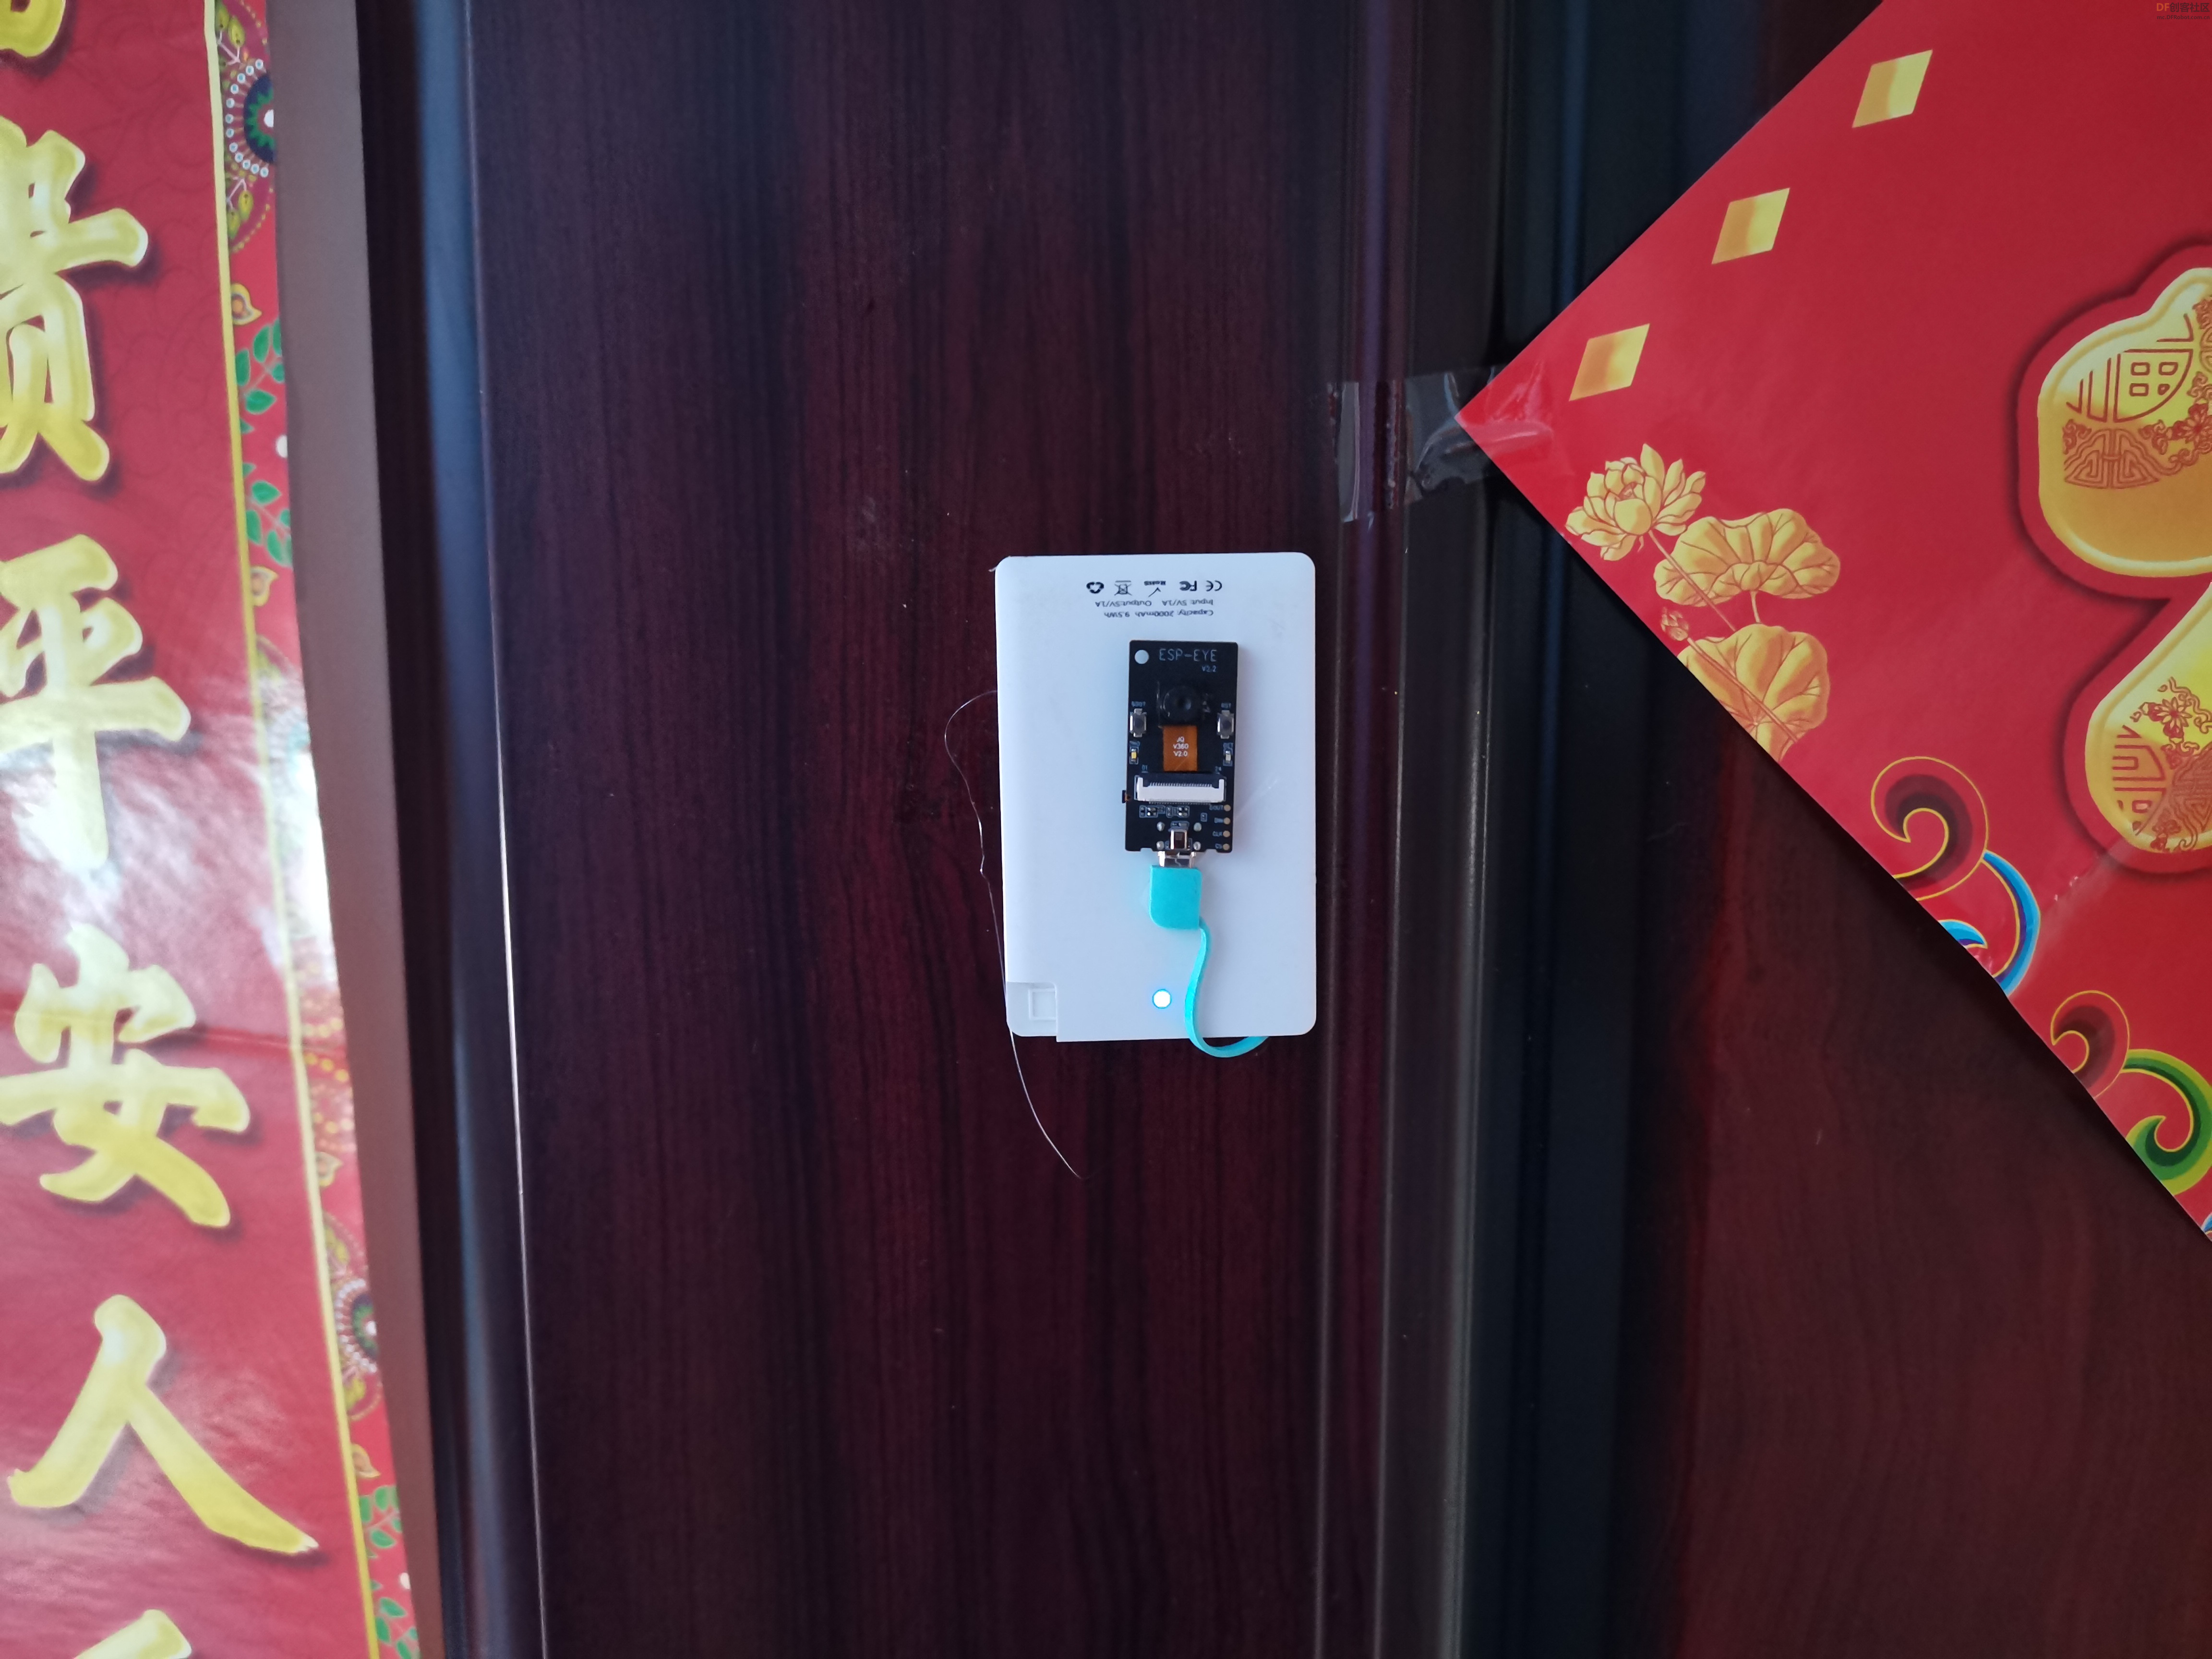
【项目背景】 在DF商城看到一个ESP开发板,ESP-EYE 智能摄像头开发板 板载ESP32芯片,集成200万像素摄像头,支持Wi-Fi图像传输。很小巧,正好这段时间正在学习如何使用ESP32开发板,就用这个ESP-EYE开发板与行空板结合做一个小项目,数字“猫眼”。 【ESP EYE】 2.Arduino IDE 编程 主控板要选择“AI Thinker ESP32-CAM” 3.利用示例“CameraWebServer”测试图传
#include "esp_camera.h"
#include <WiFi.h>

// ===================
// Select camera model
// ===================

#define CAMERA_MODEL_ESP_EYE // Has PSRAM

#include "camera_pins.h"

// ===========================
//输入你的wifi凭据
// ===========================
const char* ssid = "**********";
const char* password = "**********";

void startCameraServer();
void setupLedFlash(int pin);

void setup() {
  Serial.begin(115200);
  Serial.setDebugOutput(true);
  Serial.println();

  camera_config_t config;
  config.ledc_channel = LEDC_CHANNEL_0;
  config.ledc_timer = LEDC_TIMER_0;
  config.pin_d0 = Y2_GPIO_NUM;
  config.pin_d1 = Y3_GPIO_NUM;
  config.pin_d2 = Y4_GPIO_NUM;
  config.pin_d3 = Y5_GPIO_NUM;
  config.pin_d4 = Y6_GPIO_NUM;
  config.pin_d5 = Y7_GPIO_NUM;
  config.pin_d6 = Y8_GPIO_NUM;
  config.pin_d7 = Y9_GPIO_NUM;
  config.pin_xclk = XCLK_GPIO_NUM;
  config.pin_pclk = PCLK_GPIO_NUM;
  config.pin_vsync = VSYNC_GPIO_NUM;
  config.pin_href = HREF_GPIO_NUM;
  config.pin_sccb_sda = SIOD_GPIO_NUM;
  config.pin_sccb_scl = SIOC_GPIO_NUM;
  config.pin_pwdn = PWDN_GPIO_NUM;
  config.pin_reset = RESET_GPIO_NUM;
  config.xclk_freq_hz = 20000000;
  config.frame_size = FRAMESIZE_UXGA;
  config.pixel_format = PIXFORMAT_JPEG; // for streaming
  //config.pixel_format = PIXFORMAT_RGB565; // for face detection/recognition
  config.grab_mode = CAMERA_GRAB_WHEN_EMPTY;
  config.fb_location = CAMERA_FB_IN_PSRAM;
  config.jpeg_quality = 12;
  config.fb_count = 1;

  // if PSRAM IC present, init with UXGA resolution and higher JPEG quality
  //                      for larger pre-allocated frame buffer.
  if(config.pixel_format == PIXFORMAT_JPEG){
    if(psramFound()){
      config.jpeg_quality = 10;
      config.fb_count = 2;
      config.grab_mode = CAMERA_GRAB_LATEST;
    } else {
      // Limit the frame size when PSRAM is not available
      config.frame_size = FRAMESIZE_SVGA;
      config.fb_location = CAMERA_FB_IN_DRAM;
    }
  } else {
    // Best option for face detection/recognition
    config.frame_size = FRAMESIZE_240X240;
#if CONFIG_IDF_TARGET_ESP32S3
    config.fb_count = 2;
#endif
  }
#if defined(CAMERA_MODEL_ESP_EYE)
  pinMode(13, INPUT_PULLUP);
  pinMode(14, INPUT_PULLUP);
#endif

  // camera init
  esp_err_t err = esp_camera_init(&config);
  if (err != ESP_OK) {
    Serial.printf("Camera init failed with error 0x%x", err);
    return;
  }
  sensor_t * s = esp_camera_sensor_get();
  // initial sensors are flipped vertically and colors are a bit saturated
  if (s->id.PID == OV3660_PID) {
    s->set_vflip(s, 1); // flip it back
    s->set_brightness(s, 1); // up the brightness just a bit
    s->set_saturation(s, -2); // lower the saturation
  }
  // drop down frame size for higher initial frame rate
  if(config.pixel_format == PIXFORMAT_JPEG){
    s->set_framesize(s, FRAMESIZE_QVGA);
  }
#if defined(CAMERA_MODEL_M5STACK_WIDE) || defined(CAMERA_MODEL_M5STACK_ESP32CAM)
  s->set_vflip(s, 1);
  s->set_hmirror(s, 1);
#endif
#if defined(CAMERA_MODEL_ESP32S3_EYE)
  s->set_vflip(s, 1);
#endif
// Setup LED FLash if LED pin is defined in camera_pins.h
#if defined(LED_GPIO_NUM)
  setupLedFlash(LED_GPIO_NUM);
#endif
  WiFi.begin(ssid, password);
  WiFi.setSleep(false);
  while (WiFi.status() != WL_CONNECTED) {
    delay(500);
    Serial.print(".");
  }
  Serial.println("");
  Serial.println("WiFi connected");
  startCameraServer();
  Serial.print("Camera Ready! Use 'http://");
  Serial.print(WiFi.localIP());
  Serial.println("' to connect");
}

void loop() {
  // Do nothing. Everything is done in another task by the web server
  delay(10000);
}

复制代码
【TCP图传】
#include "esp_camera.h"
#include <WiFi.h>
#include <HTTPClient.h>
// 用于上传照片的服务器地址,行空板IP地址
const char *serverName = "http://192.168.31.71:9000/upload";
// ===================
// Select camera model
#define CAMERA_MODEL_ESP_EYE // Has PSRAM
#include "camera_pins.h"
// ===========================
// Enter your WiFi credentials
// ===========================
const char* ssid = "**********";
const char* password = "***********";
void setup() {
  Serial.begin(115200);
  Serial.setDebugOutput(true);
  Serial.println();

  camera_config_t config;
  config.ledc_channel = LEDC_CHANNEL_0;
  config.ledc_timer = LEDC_TIMER_0;
  config.pin_d0 = Y2_GPIO_NUM;
  config.pin_d1 = Y3_GPIO_NUM;
  config.pin_d2 = Y4_GPIO_NUM;
  config.pin_d3 = Y5_GPIO_NUM;
  config.pin_d4 = Y6_GPIO_NUM;
  config.pin_d5 = Y7_GPIO_NUM;
  config.pin_d6 = Y8_GPIO_NUM;
  config.pin_d7 = Y9_GPIO_NUM;
  config.pin_xclk = XCLK_GPIO_NUM;
  config.pin_pclk = PCLK_GPIO_NUM;
  config.pin_vsync = VSYNC_GPIO_NUM;
  config.pin_href = HREF_GPIO_NUM;
  config.pin_sccb_sda = SIOD_GPIO_NUM;
  config.pin_sccb_scl = SIOC_GPIO_NUM;
  config.pin_pwdn = PWDN_GPIO_NUM;
  config.pin_reset = RESET_GPIO_NUM;
  config.xclk_freq_hz = 20000000;
  config.frame_size = FRAMESIZE_UXGA;
  config.pixel_format = PIXFORMAT_JPEG; // for streaming
  //config.pixel_format = PIXFORMAT_RGB565; // for face detection/recognition
  config.grab_mode = CAMERA_GRAB_WHEN_EMPTY;
  config.fb_location = CAMERA_FB_IN_PSRAM;
  config.jpeg_quality = 12;
  config.fb_count = 1;

  // if PSRAM IC present, init with UXGA resolution and higher JPEG quality
  //                      for larger pre-allocated frame buffer.
  if(config.pixel_format == PIXFORMAT_JPEG){
    if(psramFound()){
      config.jpeg_quality = 10;
      config.fb_count = 2;
      config.grab_mode = CAMERA_GRAB_LATEST;
    } else {
      // Limit the frame size when PSRAM is not available
      config.frame_size = FRAMESIZE_SVGA;
      config.fb_location = CAMERA_FB_IN_DRAM;
    }
  } else {
    // Best option for face detection/recognition
    config.frame_size = FRAMESIZE_240X240;
#if CONFIG_IDF_TARGET_ESP32S3
    config.fb_count = 2;
#endif
  }

#if defined(CAMERA_MODEL_ESP_EYE)
  pinMode(13, INPUT_PULLUP);
  pinMode(14, INPUT_PULLUP);
#endif

  // camera init
  esp_err_t err = esp_camera_init(&config);
  if (err != ESP_OK) {
    Serial.printf("Camera init failed with error 0x%x", err);
    return;
  }

  sensor_t * s = esp_camera_sensor_get();
  // initial sensors are flipped vertically and colors are a bit saturated
  if (s->id.PID == OV3660_PID) {
    s->set_vflip(s, 1); // flip it back
    s->set_brightness(s, 1); // up the brightness just a bit
    s->set_saturation(s, -2); // lower the saturation
  }
  // drop down frame size for higher initial frame rate
  if(config.pixel_format == PIXFORMAT_JPEG){
    s->set_framesize(s, FRAMESIZE_QVGA);
  }

#if defined(CAMERA_MODEL_M5STACK_WIDE) || defined(CAMERA_MODEL_M5STACK_ESP32CAM)
  s->set_vflip(s, 1);
  s->set_hmirror(s, 1);
#endif

#if defined(CAMERA_MODEL_ESP32S3_EYE)
  s->set_vflip(s, 1);
#endif
  WiFi.begin(ssid, password);
  WiFi.setSleep(false);
  while (WiFi.status() != WL_CONNECTED) {
    delay(500);
    Serial.print(".");
  }
  Serial.println("");
  Serial.println("WiFi connected");
}
void loop() {
 // 拍摄照片
    camera_fb_t *fb = esp_camera_fb_get();
    if (!fb)
    {
      Serial.println("获取摄像头帧缓冲失败");
      return;
    }
    // 建立HTTP客户端
    HTTPClient http;
    // 将照片上传到服务器
    http.begin(serverName);
    http.addHeader("Content-Type", "image/jpeg");
    int httpResponseCode = http.POST(fb->buf, fb->len);
    if (httpResponseCode > 0)
    {
      Serial.printf("照片上传成功,服务器返回代码:%d\n", httpResponseCode);
      // 再闪一下提示上传成功

    }
    else
    {
      Serial.printf("照片上传失败,错误代码:%s\n", http.errorToString(httpResponseCode).c_str());
    }
    http.end();

    // 释放帧缓冲
    esp_camera_fb_return(fb);
}

复制代码
from flask import Flask, request
from unihiker import GUI

u_gui=GUI()


显图=u_gui.draw_image(image="base.png",h=320,x=0,y=0)
app = Flask(__name__)
@app.route('/upload', methods=['POST'])
def upload():

    try:
        image = request.data
        # 保存照片到指定目录

        with open('base.png', 'wb') as f:
            f.write(image)
            f.close()

        显图.config(image="base.png")

        return "照片上传成功", 200
    except Exception as e:
        print("照片上传失败:", str(e))
        return "照片上传失败", 500

if __name__ == '__main__':

    app.run(host='192.168.31.71', port=9000)
复制代码
【物联网开关】
/*
  SimpleMQTTClient.ino
  The purpose of this exemple is to illustrate a simple handling of MQTT and Wifi connection.
  Once it connects successfully to a Wifi network and a MQTT broker, it subscribe to a topic and send a message to it.
  It will also send a message delayed 5 seconds later.
*/

#include "EspMQTTClient.h"

EspMQTTClient client(
  "sxs",
  "smj080823",
  "182.254.130.180",  // MQTT Broker server ip
  "X8jykxFnR",   // Can be omitted if not needed
  "u8jskbFngz",   // Can be omitted if not needed
  "yuntian365",     // Client name that uniquely identify your device
  1883              // The MQTT port, default to 1883. this line can be omitted
);

void setup()
{
  Serial.begin(115200);

  // Optional functionalities of EspMQTTClient
  client.enableDebuggingMessages(); // Enable debugging messages sent to serial output
  client.enableHTTPWebUpdater(); // Enable the web updater. User and password default to values of MQTTUsername and MQTTPassword. These can be overridded with enableHTTPWebUpdater("user", "password").
  client.enableOTA(); // Enable OTA (Over The Air) updates. Password defaults to MQTTPassword. Port is the default OTA port. Can be overridden with enableOTA("password", port).
  client.enableLastWillMessage("MNpA1p_4R", "I am going offline");  // You can activate the retain flag by setting the third parameter to true
}

// This function is called once everything is connected (Wifi and MQTT)
// WARNING : YOU MUST IMPLEMENT IT IF YOU USE EspMQTTClient
void onConnectionEstablished()
{
  // Subscribe to "mytopic/wildcardtest/#" and display received message to Serial
  client.subscribe("1DXAmWJ4g", [](const String & topic, const String & payload) {
    Serial.println("(From wildcard) topic: " + topic + ", payload: " + payload);
  });

  // Publish a message to "mytopic/test"
  client.publish("k_eT7HUVR", "This is a message"); // You can activate the retain flag by setting the third parameter to true

  // Execute delayed instructions
  client.executeDelayed(5 * 1000, []() {
    client.publish("k_eT7HUVR", "This is a message sent 5 seconds later");
  });
}

void loop()
{
  client.loop();
}

复制代码
【行空板完整程序】
from flask import Flask, request
from unihiker import GUI
import siot
import time
u_gui=GUI()
i=0

显图=u_gui.draw_image(image="base.png",h=320,x=0,y=0)
app = Flask(__name__)
@app.route('/upload', methods=['POST'])
def upload():

    try:
        image = request.data
        # 保存照片到指定目录

        with open('base.png', 'wb') as f:
            f.write(image)
            f.close()

        显图.config(image="base.png")

        return "照片上传成功", 200
    except Exception as e:
        print("照片上传失败:", str(e))
        return "照片上传失败", 500
# 事件回调函数
def on_buttona_click_callback():
    global i
    if i==0:
       i=1
       siot.publish(topic="1DXAmWJ4g", data="a")
# 事件回调函数
def on_buttonb_click_callback():
    global i
    if i==1:
       i=0
       siot.publish(topic="1DXAmWJ4g", data="b")
if __name__ == '__main__':
    siot.init(client_id="yuntian367",server="iot.dfrobot.com.cn",port=1883,user="X8jykxFnR",password="u8jskbFngz")
    siot.connect()
    siot.loop()

    u_gui.on_a_click(on_buttona_click_callback)
    u_gui.on_b_click(on_buttonb_click_callback)
    app.run(host='192.168.31.71', port=9000)

复制代码
【ESP EYE完整程序】
#include "esp_camera.h"
#include <WiFi.h>
#include <HTTPClient.h>
// 用于上传照片的服务器地址,行空板IP地址
const char *serverName = "http://192.168.31.71:9000/upload";
// ===================
// Select camera model
#define CAMERA_MODEL_ESP_EYE // Has PSRAM
#include "camera_pins.h"
#include "EspMQTTClient.h"
EspMQTTClient client(
"sxs",
"smj080823",
"182.254.130.180", // MQTT Broker server ip
"X8jykxFnR", // Can be omitted if not needed
"u8jskbFngz", // Can be omitted if not needed
"yuntian365", // Client name that uniquely identify your device
1883 // The MQTT port, default to 1883. this line can be omitted
);
// ===========================
// Enter your WiFi credentials
// ===========================
const char* ssid = "sxs";
const char* password = "smj080823";
int bs;
void setup() {
Serial.begin(115200);
Serial.setDebugOutput(true);
Serial.println();
camera_config_t config;
config.ledc_channel = LEDC_CHANNEL_0;
config.ledc_timer = LEDC_TIMER_0;
config.pin_d0 = Y2_GPIO_NUM;
config.pin_d1 = Y3_GPIO_NUM;
config.pin_d2 = Y4_GPIO_NUM;
config.pin_d3 = Y5_GPIO_NUM;
config.pin_d4 = Y6_GPIO_NUM;
config.pin_d5 = Y7_GPIO_NUM;
config.pin_d6 = Y8_GPIO_NUM;
config.pin_d7 = Y9_GPIO_NUM;
config.pin_xclk = XCLK_GPIO_NUM;
config.pin_pclk = PCLK_GPIO_NUM;
config.pin_vsync = VSYNC_GPIO_NUM;
config.pin_href = HREF_GPIO_NUM;
config.pin_sccb_sda = SIOD_GPIO_NUM;
config.pin_sccb_scl = SIOC_GPIO_NUM;
config.pin_pwdn = PWDN_GPIO_NUM;
config.pin_reset = RESET_GPIO_NUM;
config.xclk_freq_hz = 20000000;
config.frame_size = FRAMESIZE_UXGA;
config.pixel_format = PIXFORMAT_JPEG; // for streaming
//config.pixel_format = PIXFORMAT_RGB565; // for face detection/recognition
config.grab_mode = CAMERA_GRAB_WHEN_EMPTY;
config.fb_location = CAMERA_FB_IN_PSRAM;
config.jpeg_quality = 12;
config.fb_count = 1;
// if PSRAM IC present, init with UXGA resolution and higher JPEG quality
// for larger pre-allocated frame buffer.
if(config.pixel_format == PIXFORMAT_JPEG){
if(psramFound()){
config.jpeg_quality = 10;
config.fb_count = 2;
config.grab_mode = CAMERA_GRAB_LATEST;
} else {
// Limit the frame size when PSRAM is not available
config.frame_size = FRAMESIZE_SVGA;
config.fb_location = CAMERA_FB_IN_DRAM;
}
} else {
// Best option for face detection/recognition
config.frame_size = FRAMESIZE_240X240;
#if CONFIG_IDF_TARGET_ESP32S3
config.fb_count = 2;
#endif
}
#if defined(CAMERA_MODEL_ESP_EYE)
pinMode(13, INPUT_PULLUP);
pinMode(14, INPUT_PULLUP);
#endif
// camera init
esp_err_t err = esp_camera_init(&config);
if (err != ESP_OK) {
Serial.printf("Camera init failed with error 0x%x", err);
return;
}
sensor_t * s = esp_camera_sensor_get();
// initial sensors are flipped vertically and colors are a bit saturated
if (s->id.PID == OV3660_PID) {
s->set_vflip(s, 1); // flip it back
s->set_brightness(s, 1); // up the brightness just a bit
s->set_saturation(s, -2); // lower the saturation
}
// drop down frame size for higher initial frame rate
if(config.pixel_format == PIXFORMAT_JPEG){
s->set_framesize(s, FRAMESIZE_QVGA);
}
#if defined(CAMERA_MODEL_M5STACK_WIDE) || defined(CAMERA_MODEL_M5STACK_ESP32CAM)
s->set_vflip(s, 1);
s->set_hmirror(s, 1);
#endif
#if defined(CAMERA_MODEL_ESP32S3_EYE)
s->set_vflip(s, 1);
#endif
WiFi.begin(ssid, password);
WiFi.setSleep(false);
while (WiFi.status() != WL_CONNECTED) {
delay(500);
Serial.print(".");
}
Serial.println("");
Serial.println("WiFi connected");
bs=0;
client.enableDebuggingMessages(); // Enable debugging messages sent to serial output
client.enableHTTPWebUpdater(); // Enable the web updater. User and password default to values of MQTTUsername and MQTTPassword. These can be overridded with enableHTTPWebUpdater("user", "password").
client.enableOTA(); // Enable OTA (Over The Air) updates. Password defaults to MQTTPassword. Port is the default OTA port. Can be overridden with enableOTA("password", port).
client.enableLastWillMessage("MNpA1p_4R", "I am going offline"); // You can activate the retain flag by setting the third parameter to true
}
void onConnectionEstablished()
{
// Subscribe to "mytopic/wildcardtest/#" and display received message to Serial
client.subscribe("1DXAmWJ4g", [](const String & topic, const String & payload) {
Serial.println("(From wildcard) topic: " + topic + ", payload: " + payload);
if(payload=="a"){
bs=1;
}
if(payload=="b"){
bs=0;
}
});
// Publish a message to "mytopic/test"
client.publish("k_eT7HUVR", "This is a message"); // You can activate the retain flag by setting the third parameter to true
// Execute delayed instructions
client.executeDelayed(5 * 1000, []() {
client.publish("k_eT7HUVR", "This is a message sent 5 seconds later");
});
}
void loop() {
if(bs==1){
// 拍摄照片
camera_fb_t *fb = esp_camera_fb_get();
if (!fb)
{
Serial.println("获取摄像头帧缓冲失败");
return;
}
// 建立HTTP客户端
HTTPClient http;
// 将照片上传到服务器
http.begin(serverName);
http.addHeader("Content-Type", "image/jpeg");
int httpResponseCode = http.POST(fb->buf, fb->len);
if (httpResponseCode > 0)
{
Serial.printf("照片上传成功,服务器返回代码:%d\n", httpResponseCode);
// 再闪一下提示上传成功
}
else
{
Serial.printf("照片上传失败,错误代码:%s\n", http.errorToString(httpResponseCode).c_str());
}
http.end();
// 释放帧缓冲
esp_camera_fb_return(fb);
}
client.loop();
}
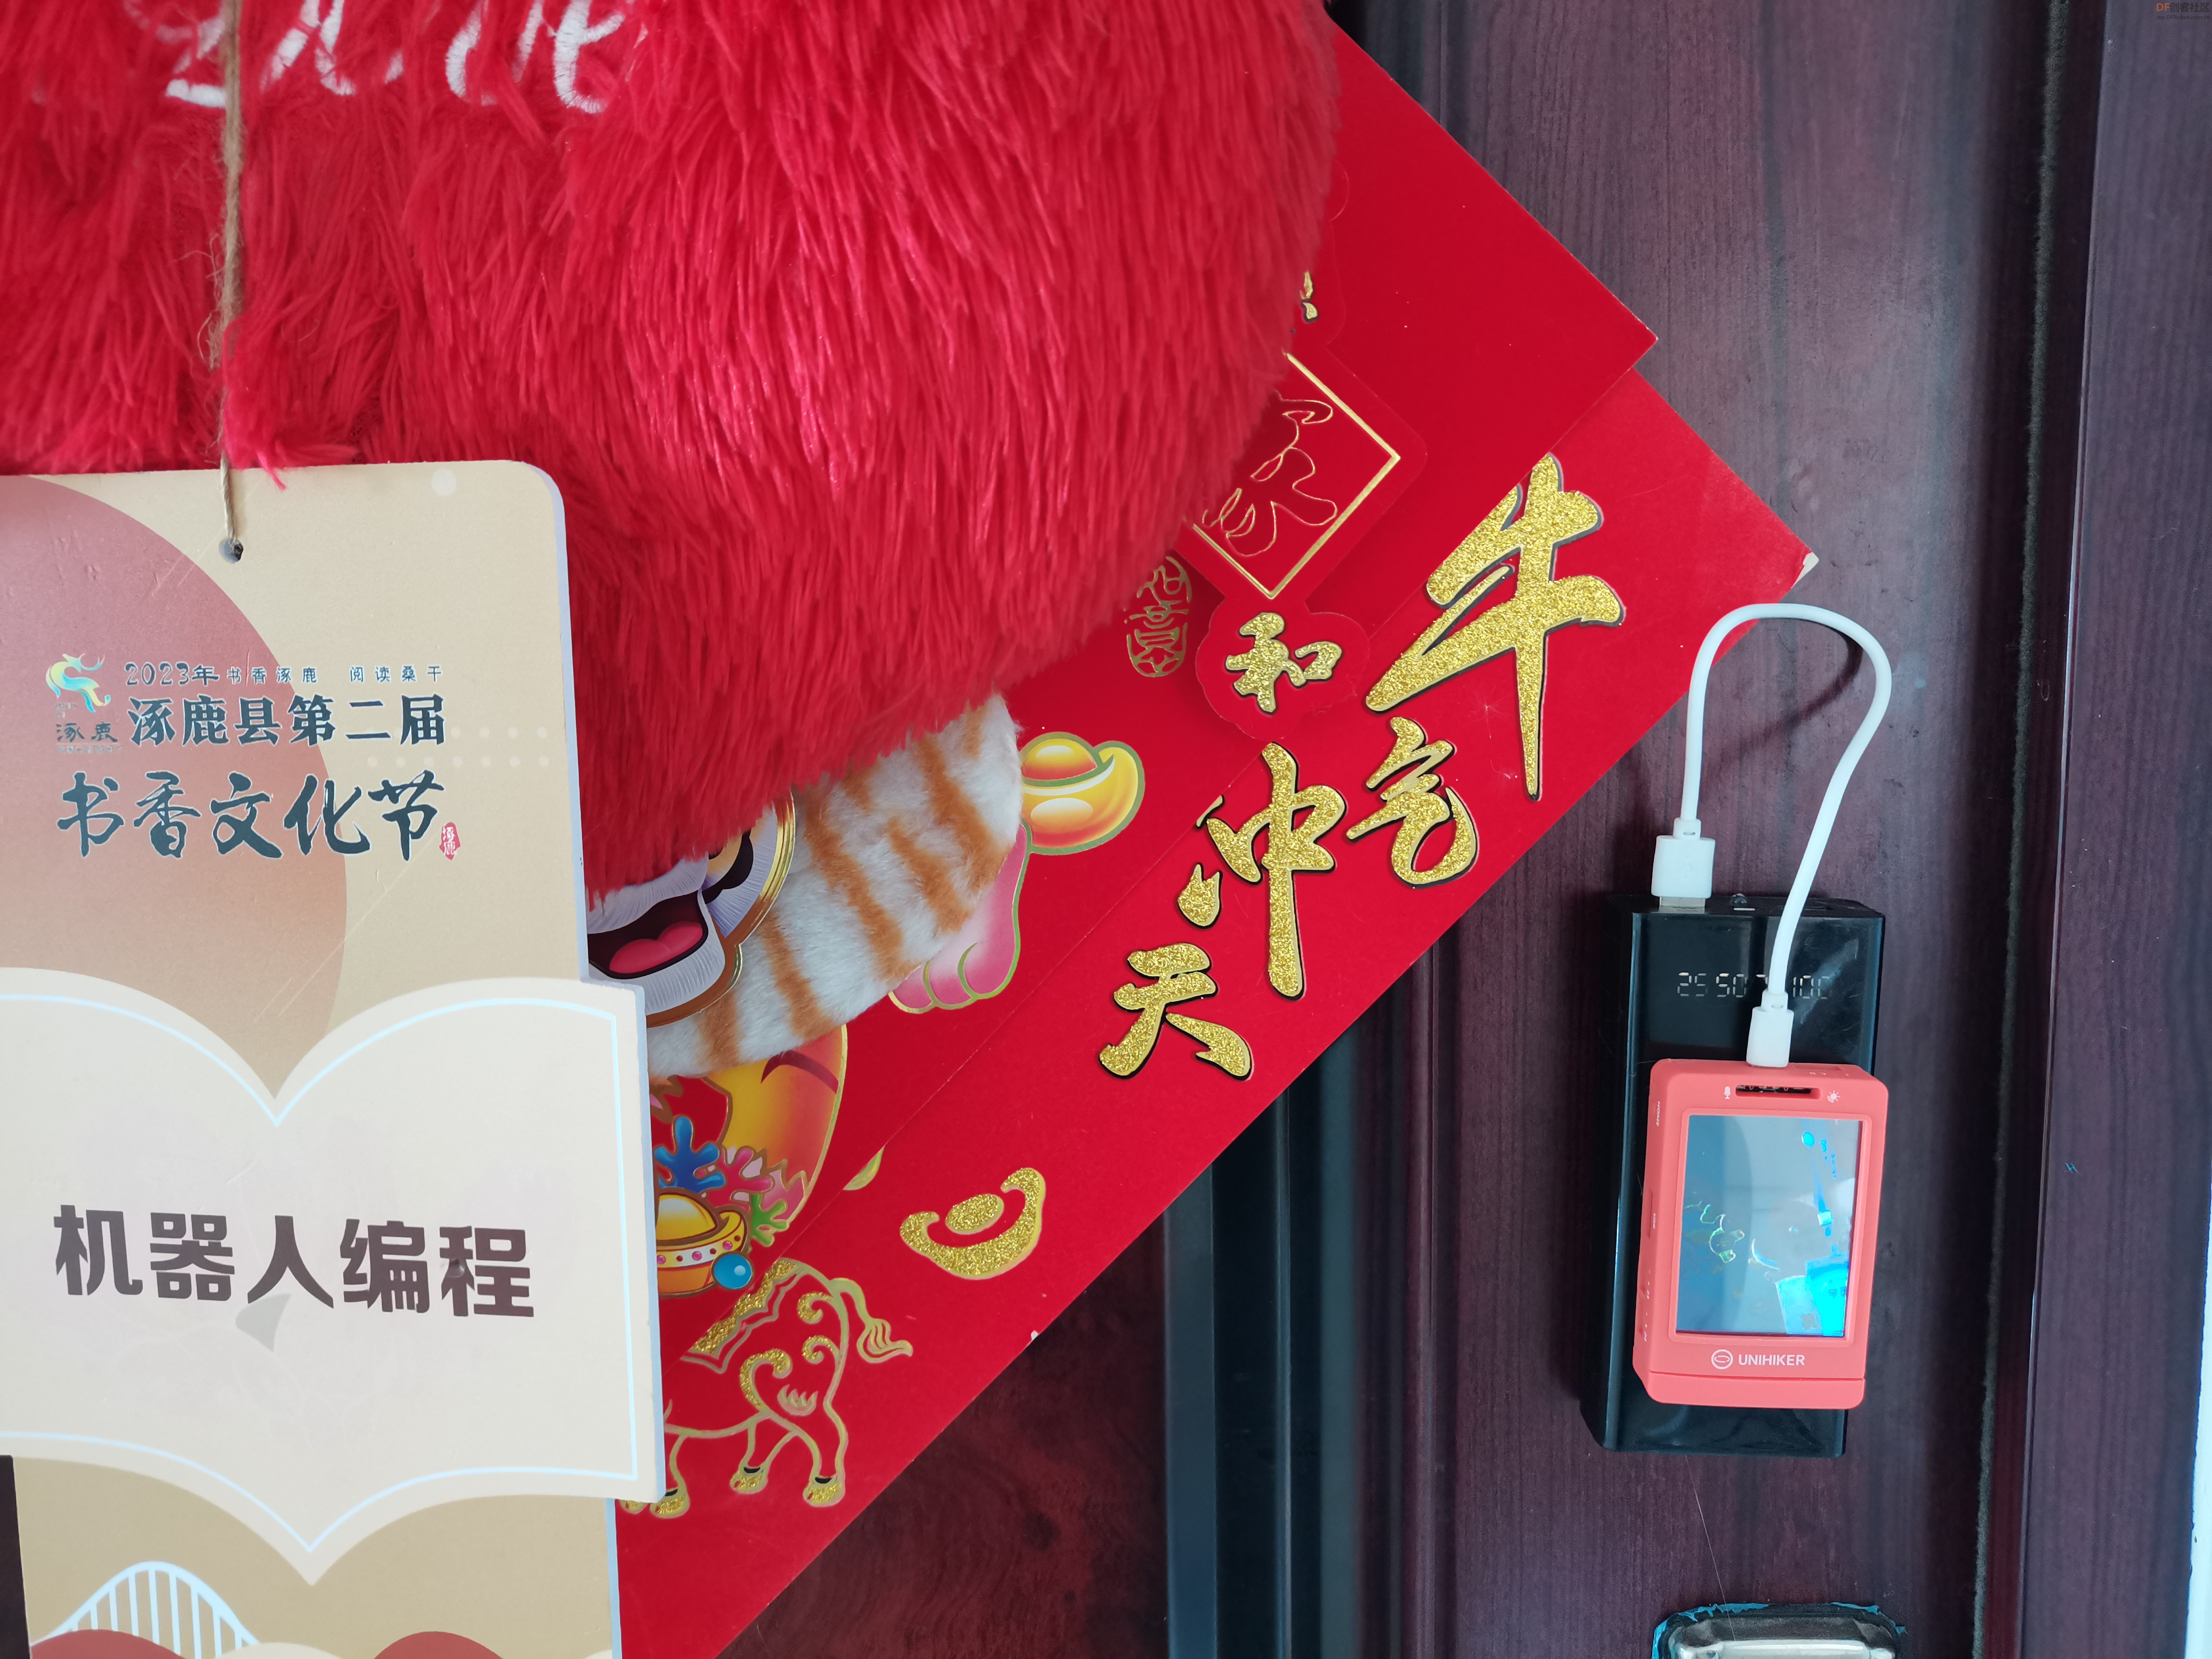
复制代码 【数字“猫眼”】 【演示视频】


 沪公网安备31011502402448
 置顶卡
置顶卡 变色卡
变色卡 千斤顶
千斤顶

 活跃会员
活跃会员
 宣传大使
宣传大使
 牛X认证
牛X认证
 创客造
创客造
 编辑选择奖
编辑选择奖
 志“童”道合
 编辑选择奖
编辑选择奖
 编辑选择奖
编辑选择奖
 编辑选择奖
编辑选择奖
 编辑选择奖
编辑选择奖


