## 步骤6:ESP32的代码
我附上了代码,您可以根据自己的需求进行修改。所有代码均来自 randomnerdtutorials,它们构成了我这里所有代码的基础。我强烈建议您购买他们关于 ESP32 的课程,它会引导您了解使用 ESP32 的许多复杂原理,并提供一些非常好的示例项目。
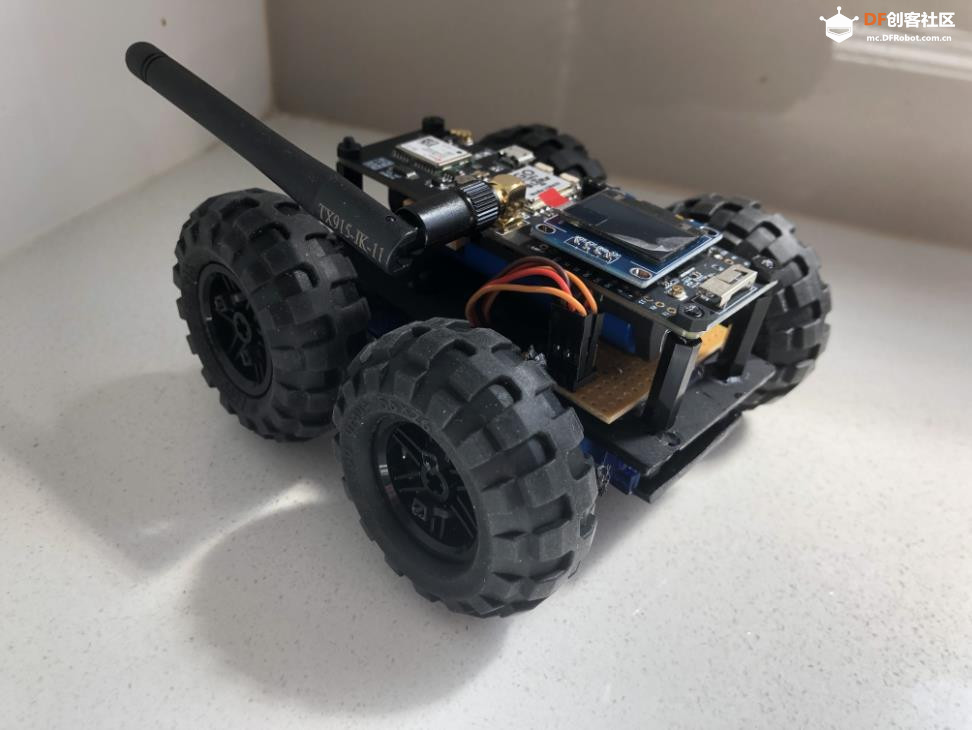
我希望这对其他尝试快速使用 ESP32 进行机器人技术的人有所帮助。
- #include <SPI.h>
- #include <WiFi.h>
- #include <Wire.h>
- #include <Servo.h>
- #include <Adafruit_NeoPixel.h>
- #include "SSD1306.h"
- //#include "images.h"
-
- #ifdef __AVR__
- #include <avr/power.h>
- #endif
- static const int servoPin = 25; // works with TTGO
- static const int servoPin2 = 33; // works with TTGO
-
- #define PIN 14 // Neopixel works with TTGO
- Adafruit_NeoPixel strip = Adafruit_NeoPixel(5, PIN, NEO_GRB + NEO_KHZ800);
-
- SSD1306 display(0x3c, 21, 22);
- Servo servo1;
- Servo servo2;
-
- //network credentials
- const char* ssid = "your ssid here";
- const char* password = "your password here";
-
- // Set web server port number to 80
- WiFiServer server(80);
-
- // Variable to store the HTTP request
- String header;
-
- // Decode HTTP GET value
- String valueString = String(5);
- int pos1 = 0;
- int pos2 = 0;
-
- void setup() {
- Serial.begin(115200);
- servo1.attach(servoPin);
- servo2.attach(servoPin2);
-
- //Display something on Oled if required
- display.init();
- display.flipScreenVertically();
- //display.setFont(ArialMT_Plain_10);
- display.setFont(ArialMT_Plain_16);
- //display.setFont(ArialMT_Plain_24);
- display.clear();
- display.setTextAlignment(TEXT_ALIGN_LEFT);
-
-
- // This is for Trinket 5V 16MHz, you can remove these three lines if you are not using a Trinket
- #if defined (__AVR_ATtiny85__)
- if (F_CPU == 16000000) clock_prescale_set(clock_div_1);
- #endif
- // End of trinket special code
-
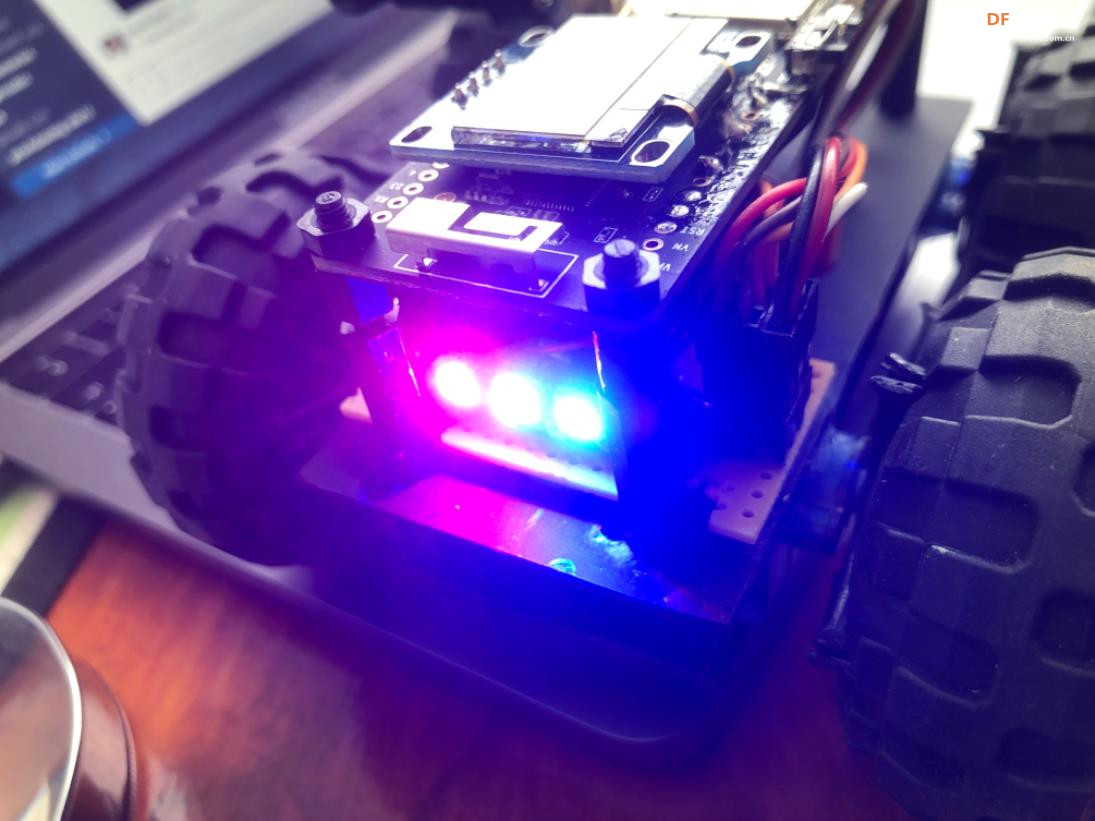
- strip.begin();
- strip.show(); // Initialize all pixels to 'off'
-
- // Connect to Wi-Fi network with SSID and password
- Serial.print("Connecting to ");
- Serial.println(ssid);
- WiFi.begin(ssid, password);
- while (WiFi.status() != WL_CONNECTED) {
- display.drawString(5, 20, "STARTING..");
- delay(500);
- display.clear();
- Serial.print(".");
- }
- // Print local IP address and start web server
- Serial.println("");
- Serial.println("WiFi connected.");
- Serial.println("IP address: ");
- Serial.println(WiFi.localIP());
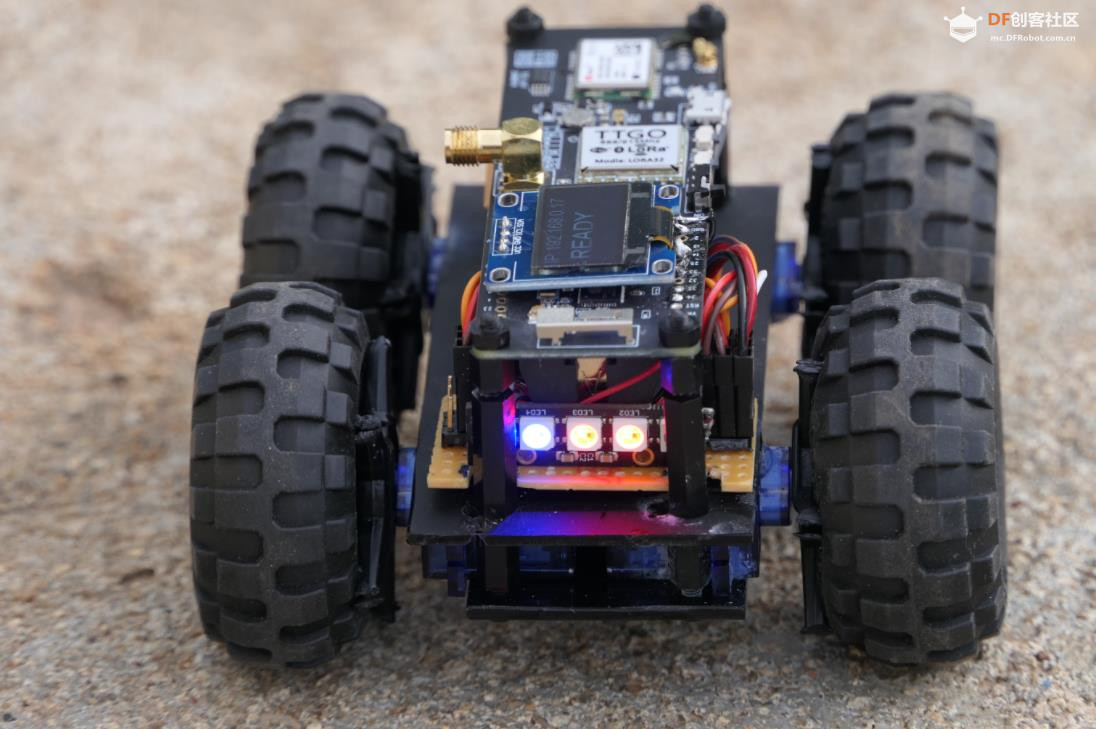
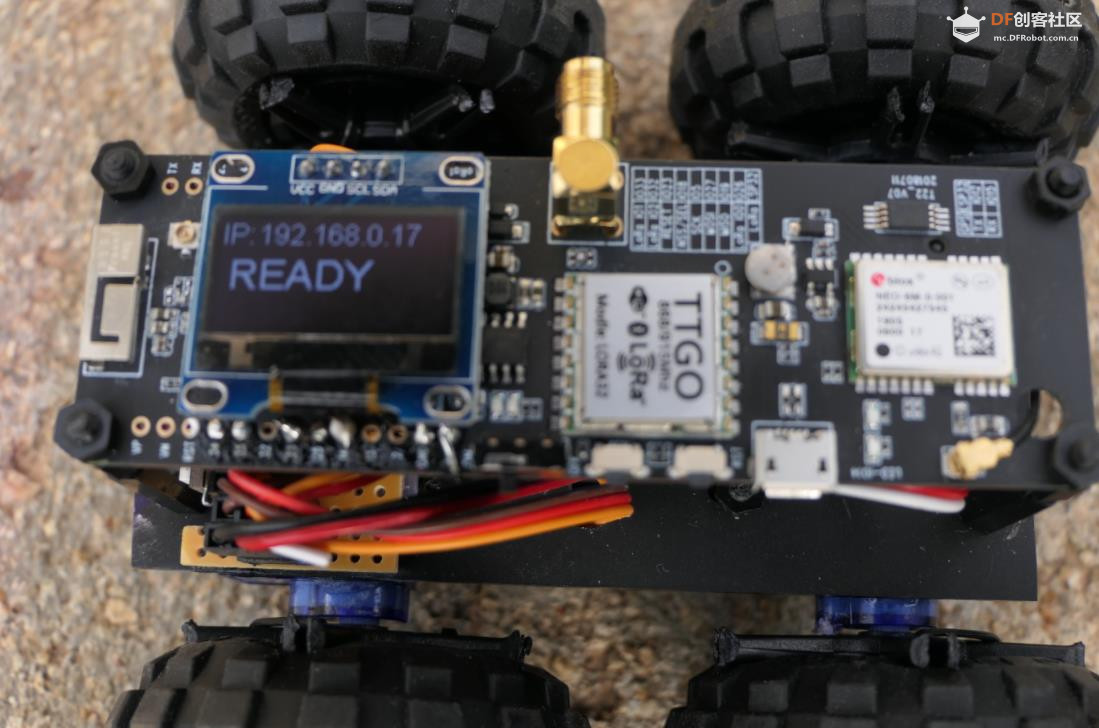
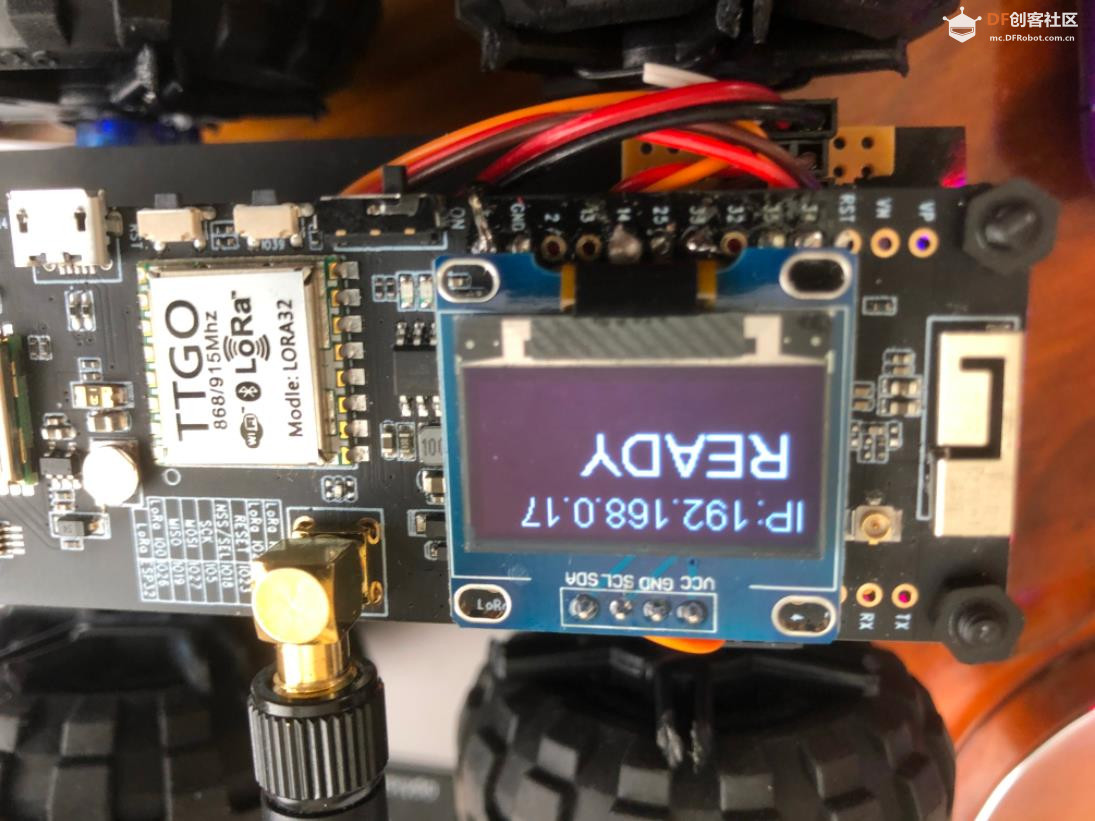
- //Display IP address in Oled
- display.drawString(0, 0, "IP: ");
- display.drawString(20, 0,(WiFi.localIP().toString()));
- display.setFont(ArialMT_Plain_24);
- display.drawString(5, 20, "READY");
- display.display();
-
- server.begin();
- }
-
- void loop(){
- colorWipe(strip.Color(0, 0, 255), 100); // Blue
- colorWipe(strip.Color(255, 0, 0), 100); // Red
- WiFiClient client = server.available(); // Listen for incoming clients
-
- if (client) { // If a new client connects,
- Serial.println("New Client."); // print a message out in the serial port
- String currentLine = ""; // make a String to hold incoming data from the client
- while (client.connected()) { // loop while the client's connected
- if (client.available()) { // if there's bytes to read from the client,
- char c = client.read(); // read a byte, then
- Serial.write(c); // print it out the serial monitor
- header += c;
- if (c == '\n') { // if the byte is a newline character
- // if the current line is blank, you got two newline characters in a row.
- // that's the end of the client HTTP request, so send a response:
- if (currentLine.length() == 0) {
- // HTTP headers always start with a response code (e.g. HTTP/1.1 200 OK)
- // and a content-type so the client knows what's coming, then a blank line:
- client.println("HTTP/1.1 200 OK");
- client.println("Content-type:text/html");
- client.println("Connection: close");
- client.println();
-
- // Controls the motor pins according to the button pressed
- if (header.indexOf("GET /forward") >= 0) {
- Serial.println("Forward");
- servo1.write(170);
- servo2.write(10);
- } else if (header.indexOf("GET /left") >= 0) {
- Serial.println("Left");
- servo1.write(90);
- servo2.write(10);
- } else if (header.indexOf("GET /stop") >= 0) {
- Serial.println("Stop");
- servo1.write(90);
- servo2.write(90);
- } else if (header.indexOf("GET /right") >= 0) {
- Serial.println("Right");
- servo1.write(170);
- servo2.write(90);
- } else if (header.indexOf("GET /reverse") >= 0) {
- Serial.println("Reverse");
- servo1.write(10);
- servo2.write(170);
- }
- // Display the HTML web page
- client.println("<!DOCTYPE HTML><html>");
- client.println("<head><meta name="viewport" content="width=device-width, initial-scale=1">");
- client.println("<link rel="icon" href="data:,">");
- // CSS to style the buttons
- // Feel free to change the background-color and font-size attributes to fit your preferences
- client.println("<style>html { font-family: Helvetica; display: inline-block; margin: 0px auto; text-align: center;}");
- client.println(".button { -webkit-user-select: none; -moz-user-select: none; -ms-user-select: none; user-select: none; background-color: #4CAF50;");
- client.println("border: none; color: white; padding: 12px 28px; text-decoration: none; font-size: 26px; margin: 1px; cursor: pointer;}");
- client.println(".button2 {background-color: #555555;}</style>");
- client.println("<script src="https://ajax.googleapis.com/ajax/libs/jquery/3.3.1/jquery.min.js"></script></head>");
-
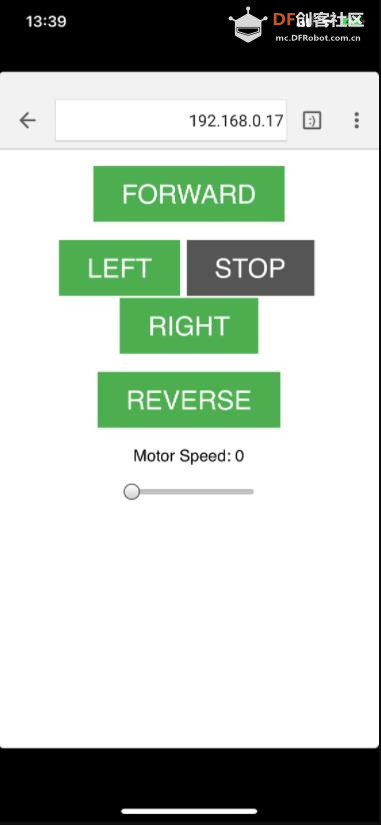
- // Web Page
- client.println("<p><button class="button" onclick="moveForward()">FORWARD</button></p>");
- client.println("<div style="clear: both;"><p><button class="button" onclick="moveLeft()">LEFT </button>");
- client.println("<button class="button button2" onclick="stopRobot()">STOP</button>");
- client.println("<button class="button" onclick="moveRight()">RIGHT</button></p></div>");
- client.println("<p><button class="button" onclick="moveReverse()">REVERSE</button></p>");
- client.println("<p>Motor Speed: <span id="motorSpeed"></span></p>");
- client.println("<input type="range" min="0" max="100" step="25" id="motorSlider" onchange="motorSpeed(this.value)" value="" + valueString + ""/>");
-
- client.println("<script>$.ajaxSetup({timeout:1000});");
- client.println("function moveForward() { $.get("/forward"); {Connection: close};}");
- client.println("function moveLeft() { $.get("/left"); {Connection: close};}");
- client.println("function stopRobot() {$.get("/stop"); {Connection: close};}");
- client.println("function moveRight() { $.get("/right"); {Connection: close};}");
- client.println("function moveReverse() { $.get("/reverse"); {Connection: close};}");
- client.println("var slider = document.getElementById("motorSlider");");
- client.println("var motorP = document.getElementById("motorSpeed"); motorP.innerHTML = slider.value;");
- client.println("slider.oninput = function() { slider.value = this.value; motorP.innerHTML = this.value; }");
- client.println("function motorSpeed(pos) { $.get("/?value=" + pos + "&"); {Connection: close};}</script>");
-
- client.println("</html>");
-
- //Request example: GET /?value=100& HTTP/1.1 - sets PWM duty cycle to 100% = 255
- if(header.indexOf("GET /?value=")>=0) {
- pos1 = header.indexOf('=');
- pos2 = header.indexOf('&');
- valueString = header.substring(pos1+1, pos2);
- //Set motor speed value
- if (valueString == "0") {
- servo1.write(90);
- servo2.write(90);
- }
- else {
- Serial.println(valueString);
- }
- }
- // The HTTP response ends with another blank line
- client.println();
- // Break out of the while loop
- break;
- } else { // if you got a newline, then clear currentLine
- currentLine = "";
- }
- } else if (c != '\r') { // if you got anything else but a carriage return character,
- currentLine += c; // add it to the end of the currentLine
- }
- }
- }
- // Clear the header variable
- header = "";
- // Close the connection
- client.stop();
- Serial.println("Client disconnected.");
- Serial.println("");
- }
- }
- // Fill the dots one after the other with a color
- void colorWipe(uint32_t c, uint8_t wait) {
- //for(uint16_t i=0; i<strip.numPixels(); i++) {
- for(uint16_t i=1; i<4; i++) {
- strip.setPixelColor(i, c);
- strip.show();
- delay(wait);
- }
- }
| 


 沪公网安备31011502402448
 置顶卡
置顶卡 变色卡
变色卡 千斤顶
千斤顶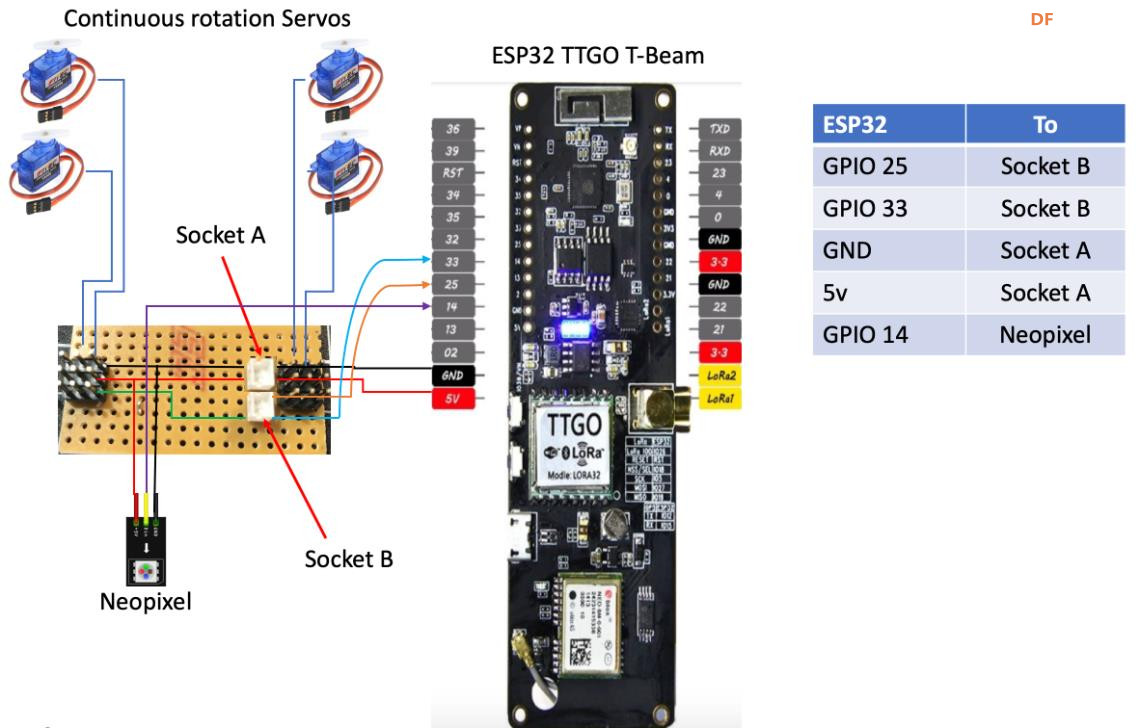

 萌萌哒新人
萌萌哒新人
 活跃会员
活跃会员
 宣传大使
宣传大使
 牛X认证
牛X认证
 创作达人
创作达人
 ARD DAY
 摸鱼团员
摸鱼团员
 志“童”道合
 编辑选择奖
编辑选择奖


