python的“face_recognition”包进行人脸检测、用OpenCV在原图像中绘制人脸box框和landmark关键点。
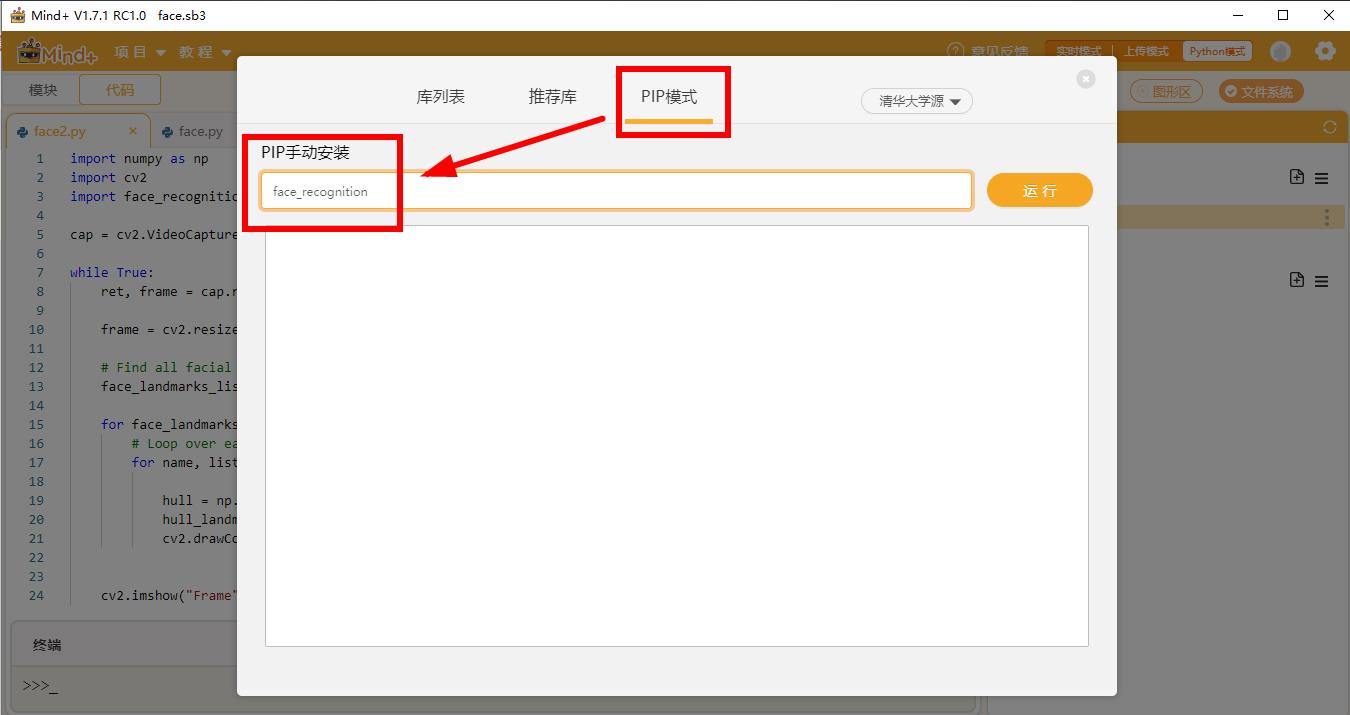
【安装】
【人脸检测】face_recognition可以输出一幅图像中人脸框的左上和右下点的坐标
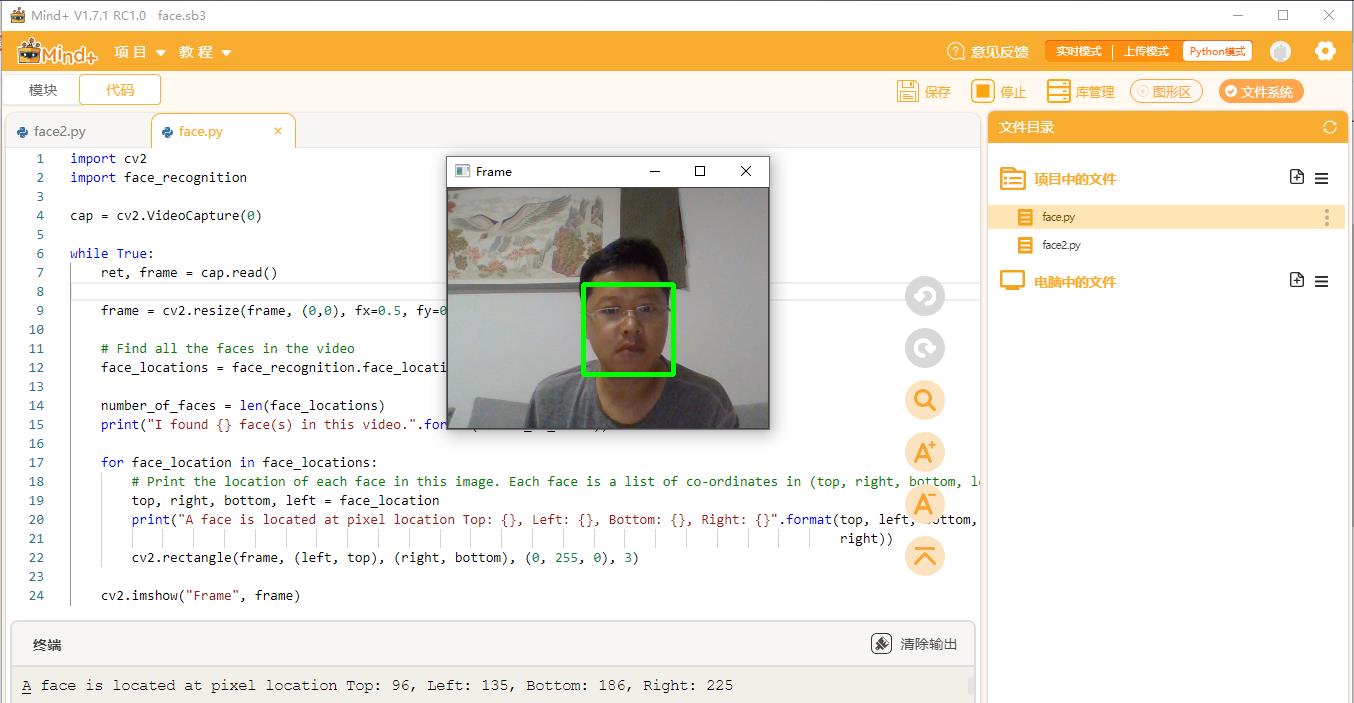
-
- import cv2
- import face_recognition
-
- cap = cv2.VideoCapture(0)
-
- while True:
- ret, frame = cap.read()
-
- frame = cv2.resize(frame, (0,0), fx=0.5, fy=0.5)
-
- # Find all the faces in the video
- face_locations = face_recognition.face_locations(frame)
-
- number_of_faces = len(face_locations)
- print("I found {} face(s) in this video.".format(number_of_faces))
-
- for face_location in face_locations:
- # Print the location of each face in this image. Each face is a list of co-ordinates in (top, right, bottom, left) order.
- top, right, bottom, left = face_location
- print("A face is located at pixel location Top: {}, Left: {}, Bottom: {}, Right: {}".format(top, left, bottom,
- right))
- cv2.rectangle(frame, (left, top), (right, bottom), (0, 255, 0), 3)
-
- cv2.imshow("Frame", frame)
-
- ch = cv2.waitKey(1)
- if ch & 0xFF == ord('q'):
- break
-
- cap.release()
- cv2.destroyAllWindows()
【landmark关键点】face_recognition可输出如下图所示人脸五官的landmark坐标(共68个坐标点)。
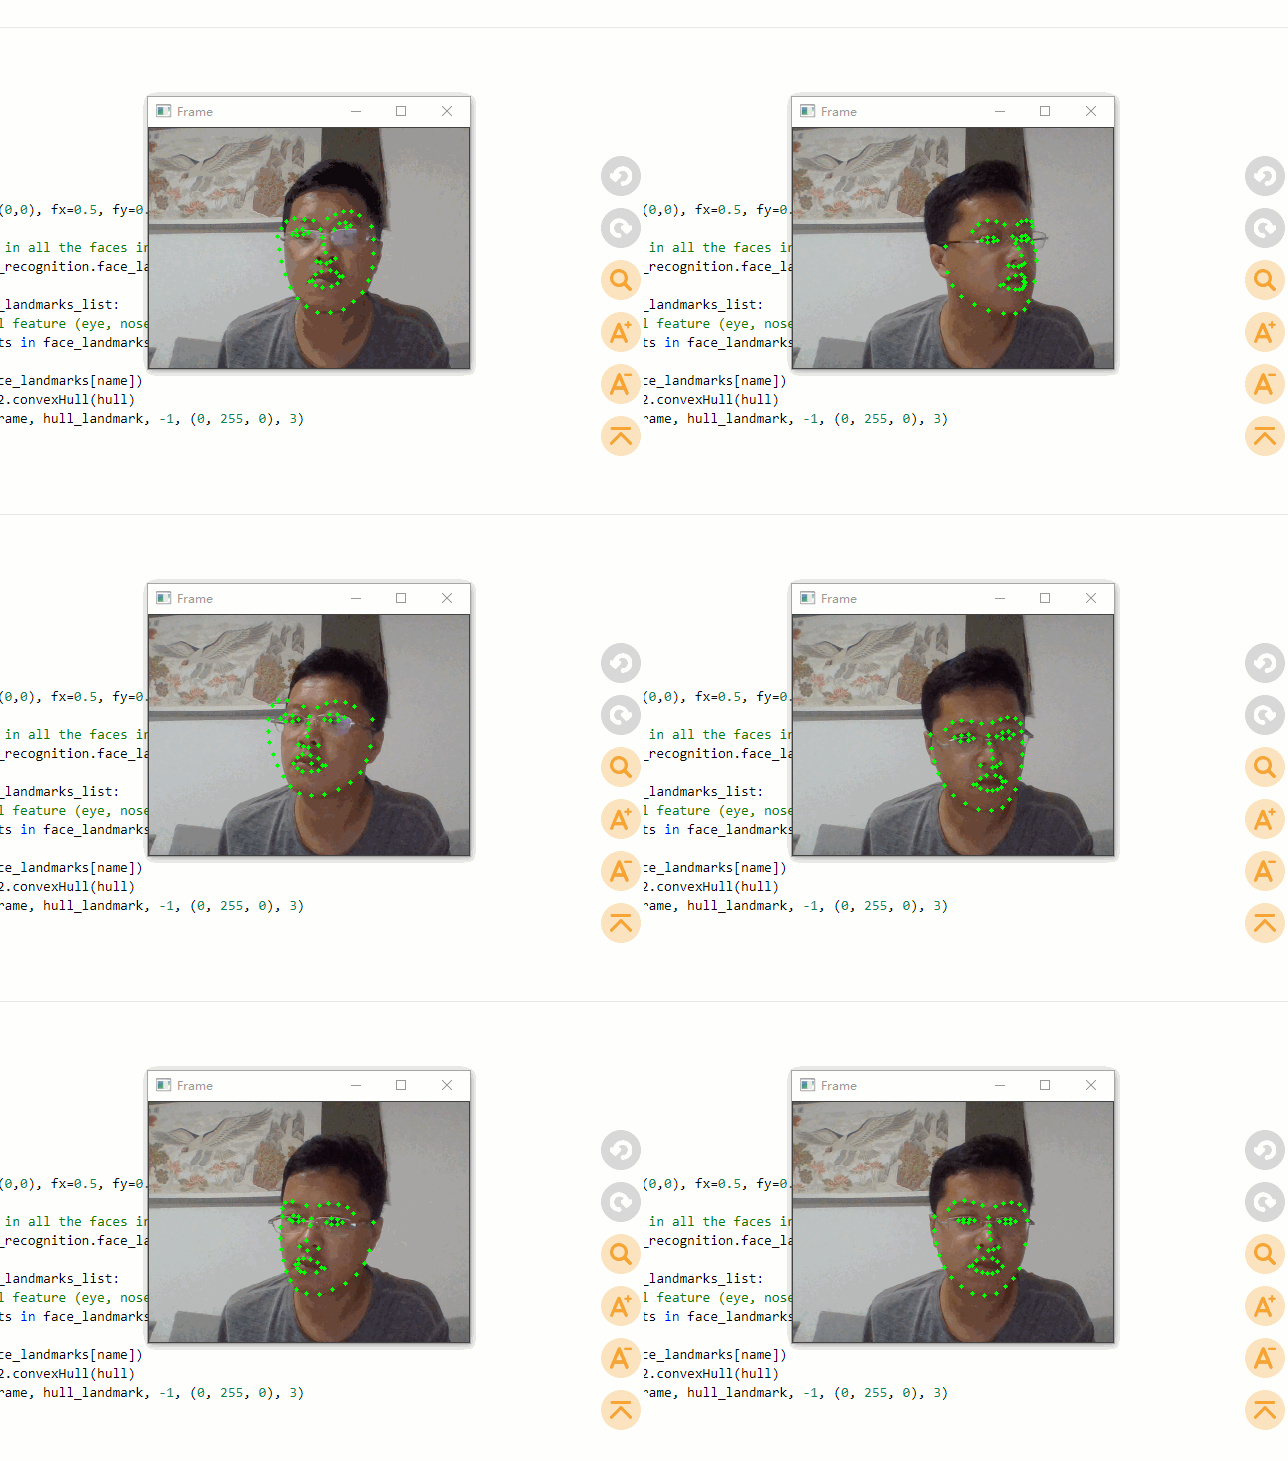
-
- import numpy as np
- import cv2
- import face_recognition
-
- cap = cv2.VideoCapture(0)
-
- while True:
- ret, frame = cap.read()
-
- frame = cv2.resize(frame, (0,0), fx=0.5, fy=0.5)
-
- # Find all facial features in all the faces in the video
- face_landmarks_list = face_recognition.face_landmarks(frame)
-
- for face_landmarks in face_landmarks_list:
- # Loop over each facial feature (eye, nose, mouth, lips, etc)
- for name, list_of_points in face_landmarks.items():
-
- hull = np.array(face_landmarks[name])
- hull_landmark = cv2.convexHull(hull)
- cv2.drawContours(frame, hull_landmark, -1, (0, 255, 0), 3)
-
-
- cv2.imshow("Frame", frame)
-
- ch = cv2.waitKey(1)
- if ch & 0xFF == ord('q'):
- break
- cap.release()
- cv2.destroyAllWindows()
|