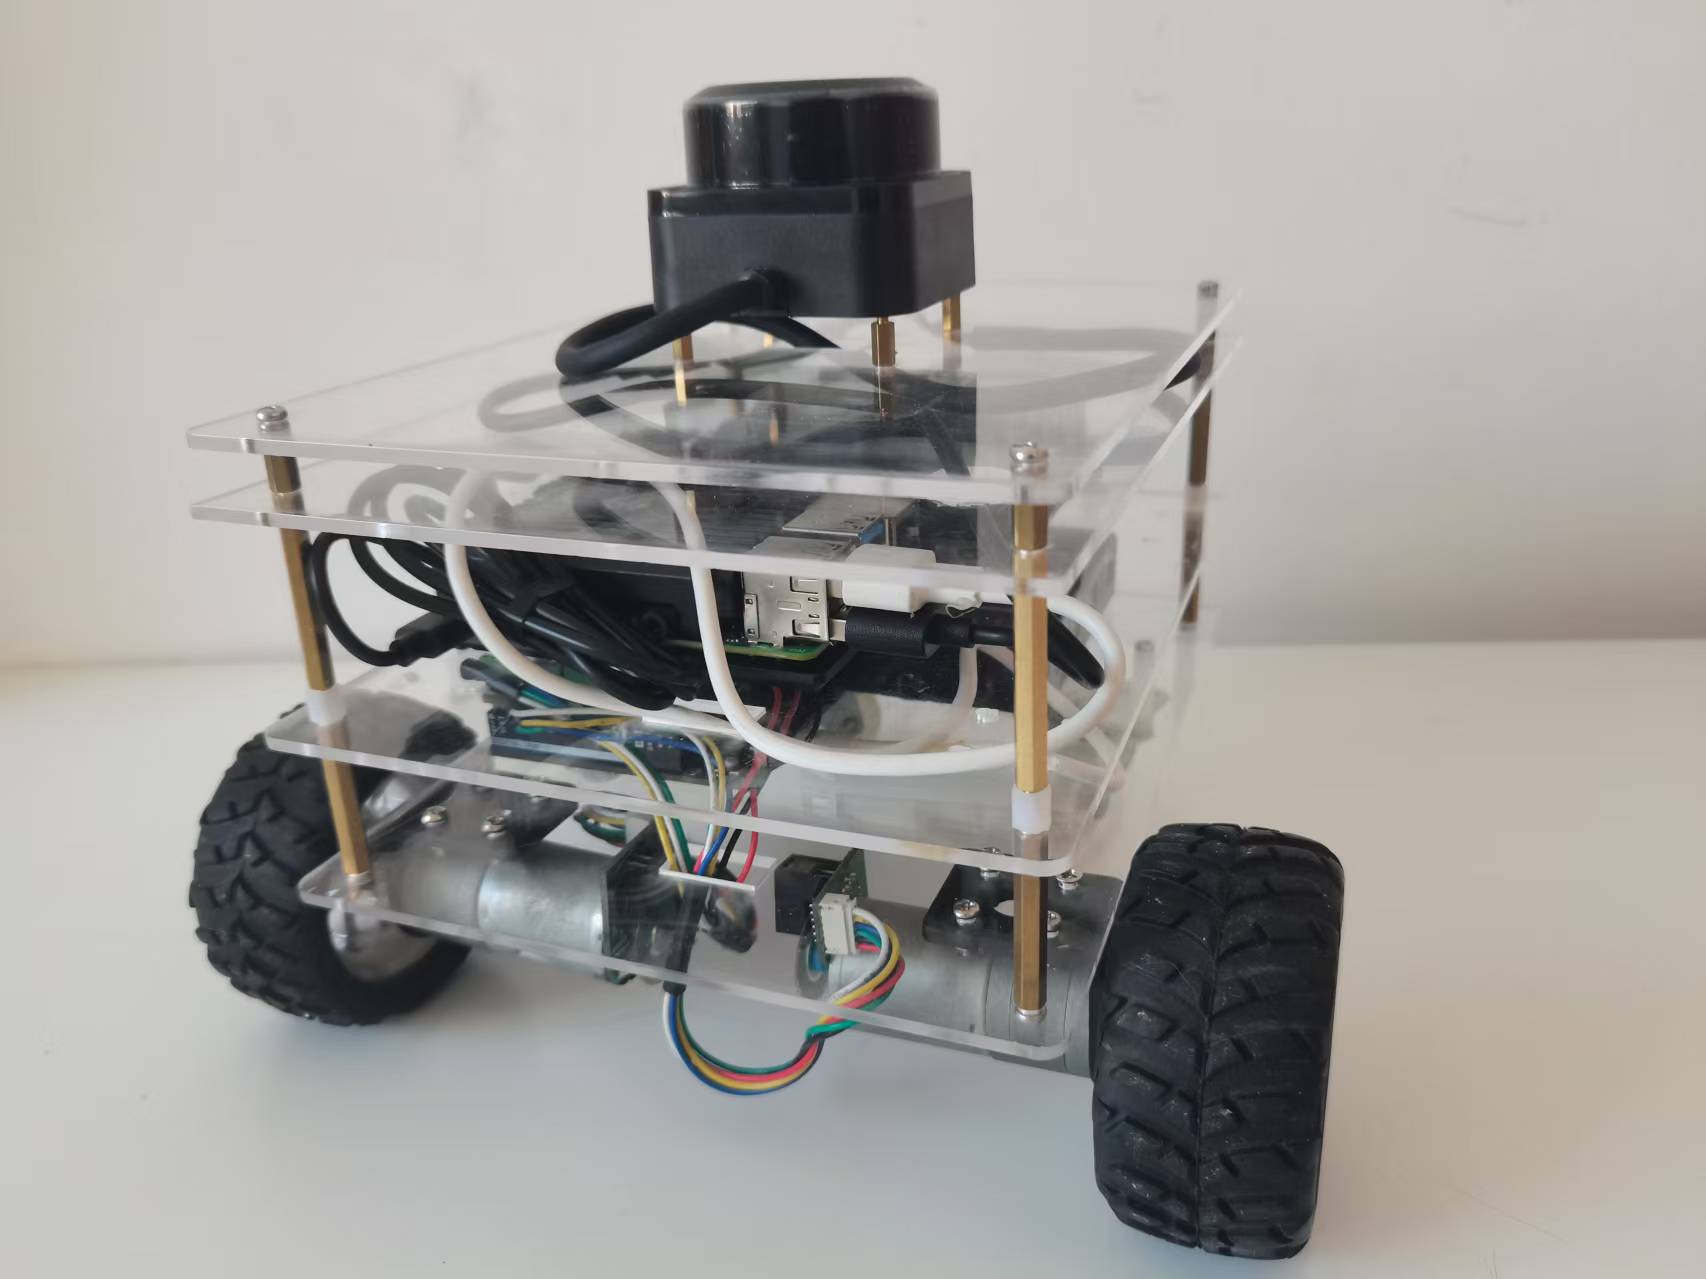
本文介绍在树莓派上使用Pyside2+QML方式进行GUI程序的开发,该GUI程序可以通过按钮来控制蜂鸣器播放不同的音调,这里演示按钮弹奏歌曲《两只老虎》。开发环境依然使用之前介绍的PyCharm编写python代码和远程开发,然后使用QtCreator编写QML界面的方式。
1、新建项目
1.1、新建工程
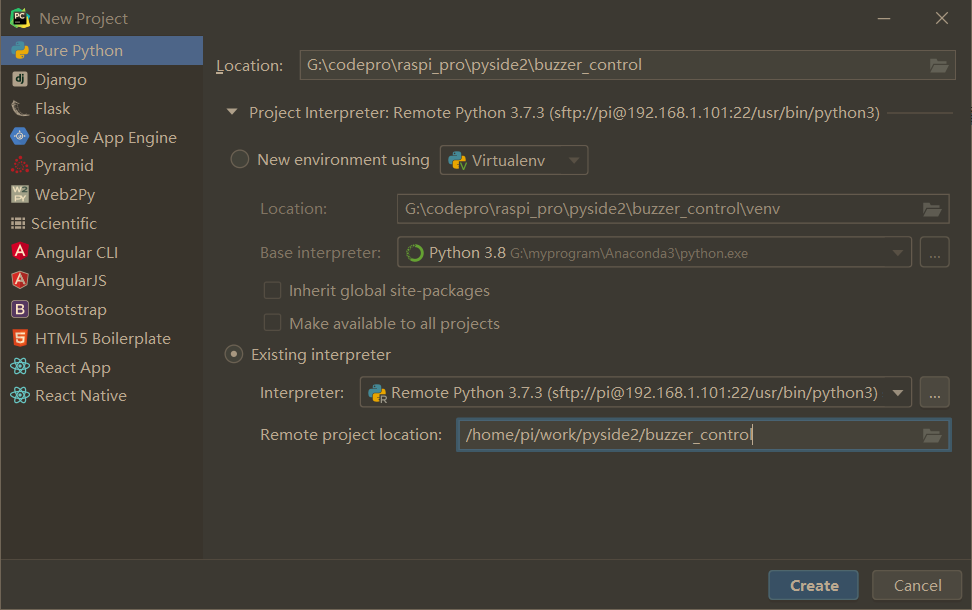
打开PyCharm,新建工程buzzer_control,如下:
1.2、添加python主程序
buzzer_control.py 主程序如下:
# This Python file uses the following encoding: utf-8
import os
from pathlib import Path
import sys

from PySide2.QtCore import Qt, QObject, Slot, QTimer
from PySide2.QtGui import QGuiApplication
from PySide2.QtQml import QQmlApplicationEngine
from gpiozero import TonalBuzzer
from gpiozero.tones import Tone

class Controler(QObject):

    buzzer = TonalBuzzer(25)

    def __init__(self):
        super().__init__()

    @Slot()
    def exit(self):
        sys.exit()

    @Slot(str)
    def play(self,mid_tone):
        self.buzzer.play(Tone(mid_tone))
        print("play.")
        QTimer.singleShot(200, lambda: self.stop())

    def stop(self):
        self.buzzer.stop()
        print("stop.")

if __name__ == "__main__":
    app = QGuiApplication(sys.argv)

    app.setOverrideCursor(Qt.BlankCursor)

    engine = QQmlApplicationEngine()

    controler = Controler()
    context = engine.rootContext()
    context.setContextProperty("_Controler", controler)

    engine.load(os.fspath(Path(__file__).resolve().parent / "ui/main.qml"))
    if not engine.rootObjects():
        sys.exit(-1)
    sys.exit(app.exec_())
这个类用于控制python控制硬件和退出程序
这个接口用于Buzzer播放不同的音调,使用play方法播放,stop方法停止
要在播放一定时间后停止需要一定的延时,如果直接使用python中的sleep方法会导致界面在延时过程中无法响应,因此这里使用Qt中的QTimer来实现延时,即 QTimer.singleShot()
1.3、添加界面文件
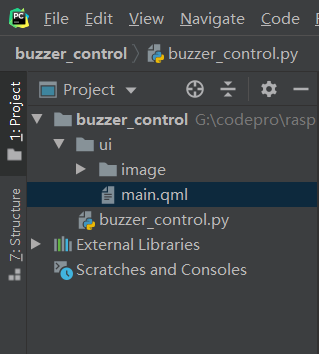
- 在项目中添加ui文件夹,并新建main.qml文件;
- 同时在ui文件夹下新建image文件夹,并把要用到的资源放置在这个文件夹下;
2、界面制作
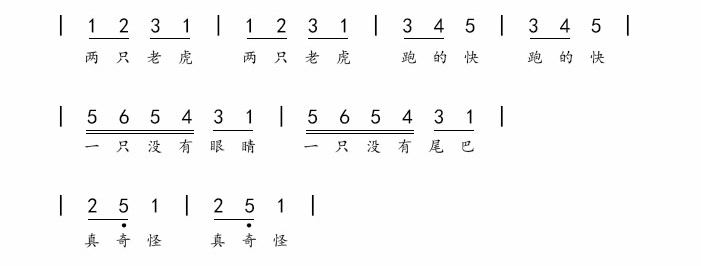
界面用QtCreator编写,里面主要包含一个7个按键用于控制不同声调;这里为了简单,演示歌曲《两只老虎》里面一共有7个音符:1、2、3、4、5、6、5.(低音5),因此这里就只制作了7个按钮,如果要播放更复杂的歌曲,就需要实现完整的音符按钮。

import QtQuick 2.11
import QtQuick.Window 2.4
import QtQuick.Controls 2.4
import QtQuick.Controls.Styles 1.4
import QtQuick.Extras 1.4
import QtGraphicalEffects 1.0

ApplicationWindow{
    id:root
    width: 800
    height: 480
    visible: true
    visibility: Window.FullScreen

    background: Rectangle{
        color: "black"
        anchors.fill: parent
    }

    Button{
        id:btnexit
        background: Rectangle{
            color: "#a01010"
            anchors.fill: parent
            radius:12
        }
        width: 48
        height: 48
        anchors{
            top: parent.top
            right: parent.right
            topMargin: 8
            rightMargin: 8
        }
        Text {
            text: qsTr("X")
            anchors.centerIn: parent
            font{
                pointSize: 32
            }
            color: "white"
        }
        onClicked: {
            _Controler.exit();
        }
    }

    Text {
        id: title
        text: qsTr("BUZZER Control")
        anchors{
            horizontalCenter: parent.horizontalCenter
            top: parent.top
            topMargin: 10
        }
        font{
            pointSize: 24
            bold: true
        }
        color: "#1165B7"
    }

    AnimatedImage{
        source: "./image/dance.gif"
        anchors{
            left: parent.left
            top:parent.top
            leftMargin: 40
            topMargin: 40
        }
        width: 200
        height: 160
    }

    Row{
        id:pannelBack
        spacing: 1
        anchors{

            bottom: parent.bottom
            horizontalCenter: parent.horizontalCenter
            bottomMargin: 30
        }

        Repeater{
            model:8

            Rectangle{
                width: 80
                height: 140
                color: "#C4B197"

            }
        }
    }

    Row{
        spacing: 12
        anchors{

            top: pannelBack.top
            horizontalCenter: parent.horizontalCenter
        }

        Repeater{
            model:7

            Button {
                width: 70
                height: 100

                property color backcolor: "#165D8F"

                background: Rectangle{
                    anchors.fill: parent
                    color: parent.backcolor
                }
                onPressed: {
                    backcolor="#34ADE3"
                }
                onReleased: {
                    backcolor="#165D8F"
                }

                onClicked: {
                    console.log("click:"+index)
                    switch(index){
                    case 0:
                        one.visible=true;
                        one.restart();
                        _Controler.play("C5");
                        break;
                    case 1:
                        two.visible=true;
                        two.restart();
                        _Controler.play("D5");
                        break;
                    case 2:
                        three.visible=true;
                        three.restart();
                        _Controler.play("E5");
                        break;
                    case 3:
                        four.visible=true;
                        four.restart();
                        _Controler.play("F5");
                        break;
                    case 4:
                        five.visible=true;
                        five.restart();
                        _Controler.play("G5");
                        break;
                    case 5:
                        six.visible=true;
                        six.restart();
                        _Controler.play("A5");
                        break;
                    case 6:
                        seven.visible=true;
                        seven.restart();
                        _Controler.play("G4");
                        break;
                    }
                }
            }
        }
    }

    Row{
        spacing: 64
        anchors{
            horizontalCenter: parent.horizontalCenter
            bottom: pannelBack.top
        }
        Repeater{
            model: ["1","2","3","4","5","6","5."]

            Text {
                text: modelData
                font.pointSize: 24
                color: "#C4A781"
            }
        }

    }

    Image{
//        anchors.centerIn: parent
        id:one
        x:pannelBack.x+50
        y:pannelBack.y-60
        width: 64
        height: 64
        source: "./image/1.svg"
        visible: false

        function restart(){
            anixone.restart();
            aniyone.restart();
            anirone.restart();
        }

        NumberAnimation on y{
            id:anixone
            from:pannelBack.y-60
            to: pannelBack.y - 1000
            duration: 20000
            easing.type: Easing.OutCirc

        }

        NumberAnimation on x{
            id:aniyone
            from:pannelBack.x+50
            to: pannelBack.x +400
            duration: 8000
            easing.type: Easing.OutBounce
        }

        RotationAnimator on rotation{
            id:anirone
            to: 720
            duration: 8000
        }

    }

    ......

}

/*##^##
Designer {
    D{i:0;formeditorZoom:0.66;height:480;width:800}
}
##^##*/
3、执行程序
3.1、上传程序到树莓派
在工程上右键将这个项目文件上传到树莓派中:

3.2、执行程序
上传后,在树莓派对应文件夹中,执行如下命令执行程序:
python3 buzzer_control.py
执行后可以看到显示如下:

3.3、演示弹奏歌曲
这里演示歌曲为《两只老虎》,其简谱如下图,只需要按照简谱表弹奏即可:
视频效果如下:
|