有人说“千不怕,万不怕,就怕福建人讲土话",《明史》记载:“闽人入阁,自杨荣、陈山后,以语言难晓,垂二百年无人。”确实如此。我生活闽北一个小县城,同栋楼的邻居操向不同方言;有建瓯方言、有顺昌方言(据说与将乐方言一样)、有闽南方言、有客家方言、有福州方言、有畲族方言、有古田方言、有屏南言。不同方言的人在一天聊天,对于我而言,他们的方言比英语还难懂。在农村,有相当一部分上岁数的老者不会讲普通话,根本用不了现代的语音控制的智能设备,因为当前的语音智能设备听不懂福建土话。
基于上述实际情况,该项目的目的就是尝试应用Edge impulse训练一个福建土话关键词识别的模型,实现用福建土话控制LED。
1.测试esp32S3AI模块麦克风功能
用下面代码实现捕获声音信号,板载麦克风引脚分配图
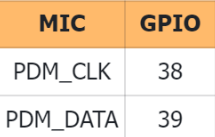
确保电脑安装了esP32开发板后,上传下面的代码,实现显示环境声音波形。
- <font size="4">#include <ESP_I2S.h>
- I2SClass I2S;
-
- void setup() {
-
- Serial.begin(115200);
- while (!Serial) {
- }
-
- // setup 38 PDM clock and 39 PDM data pins
- I2S.setPinsPdmRx(38, 39);
-
- // start I2S at 16 kHz with 16-bits per sample
- if (!I2S.begin(I2S_MODE_PDM_RX, 16000, I2S_DATA_BIT_WIDTH_16BIT, I2S_SLOT_MODE_MONO)) {
- Serial.println("Failed to initialize I2S!");
- while (1); // do nothing
- }
- }
-
- void loop() {
- // read a sample
- int sample = I2S.read();
-
- if (sample && sample != -1 && sample != 1) {
- Serial.println(sample);
- }
- }</font>
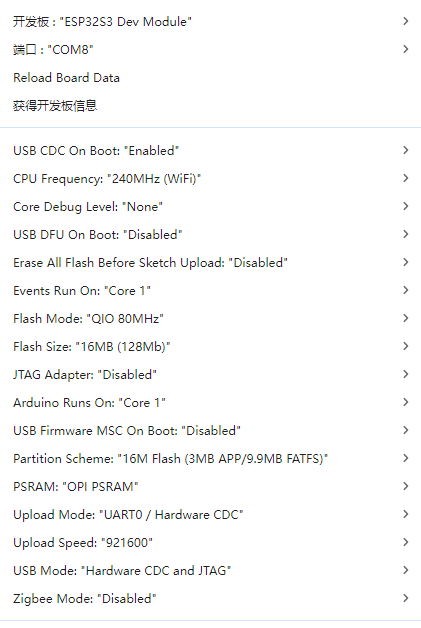
板子配置如上图
烧录代码后,在串口绘图可观察到声音变化图形
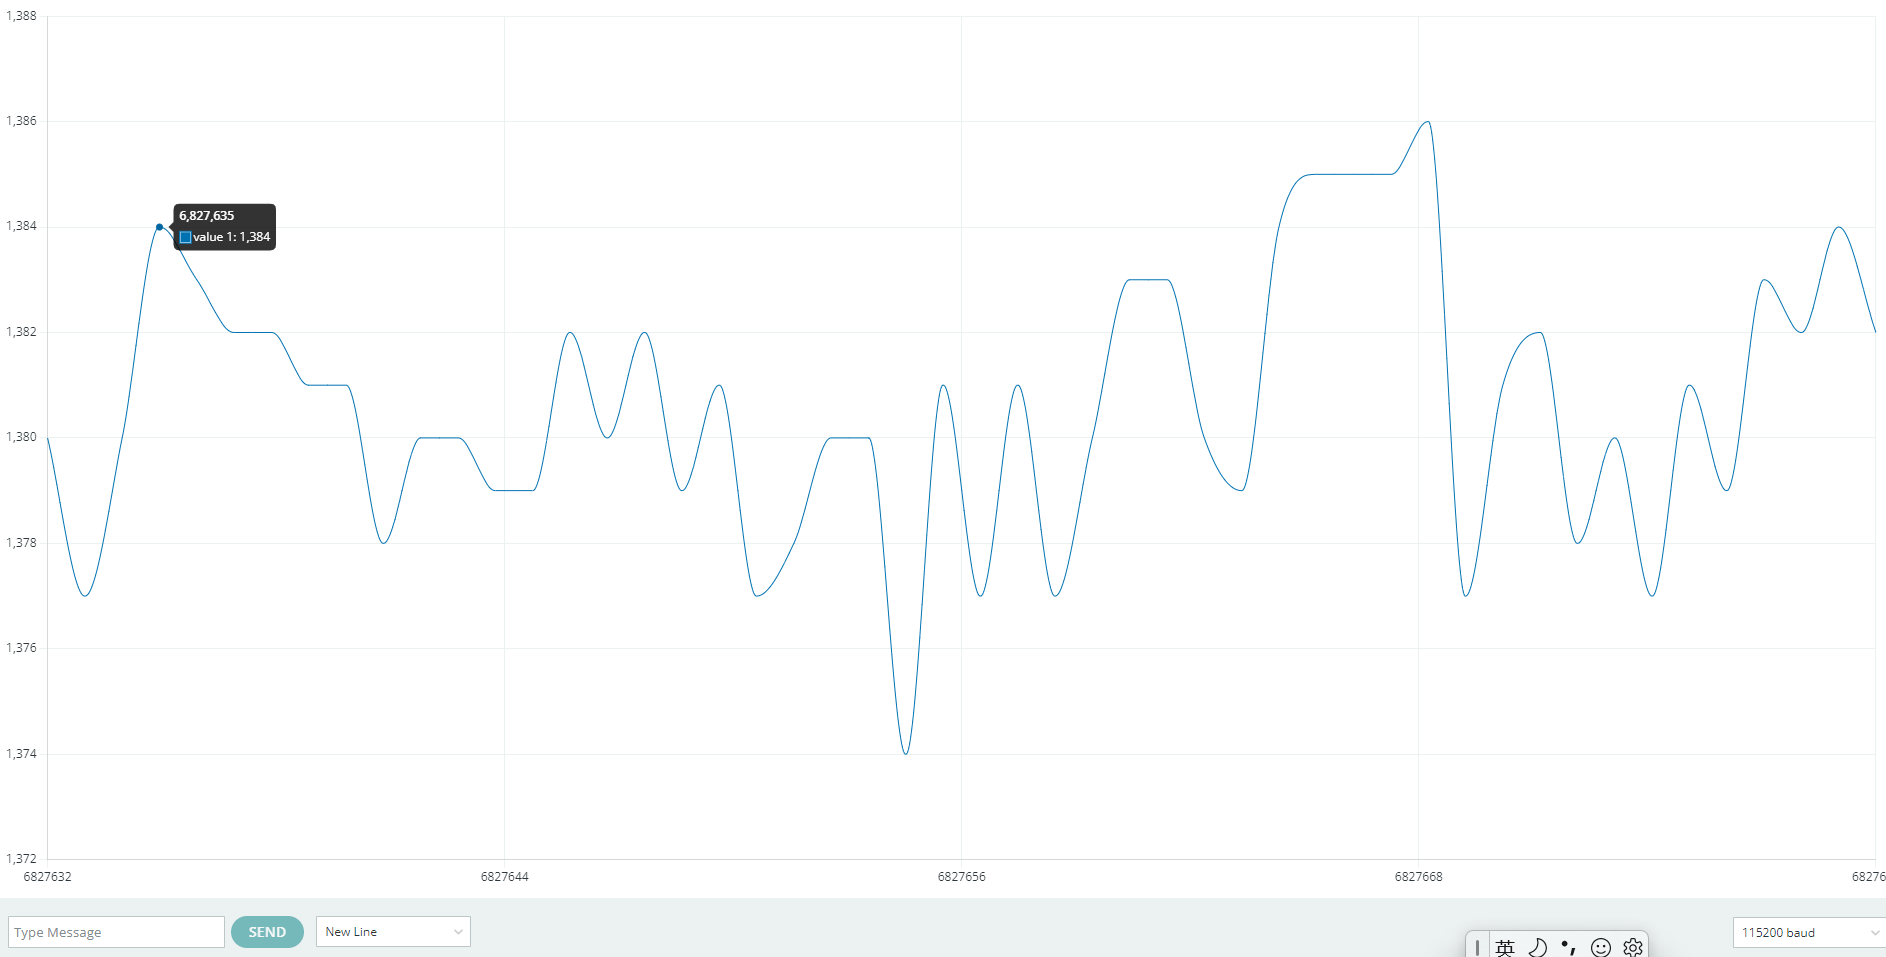
表明代码与开发板麦克风工作正常。
2.实现将录制的声音保存到 microSD 卡
- <font size="4">#include "ESP_I2S.h"
- #include "FS.h"
- #include "SD.h"
- #include "SPI.h"
-
- void setup() {
- I2SClass i2s;
-
- uint8_t *wav_buffer;
- size_t wav_size;
-
- Serial.begin(115200);
- while (!Serial) {
- delay(10);
- }
-
- Serial.println("Initializing I2S bus...");
-
- i2s.setPinsPdmRx(38,39);
-
- // start I2S at 16 kHz with 16-bits per sample
- if (!i2s.begin(I2S_MODE_PDM_RX, 16000, I2S_DATA_BIT_WIDTH_16BIT, I2S_SLOT_MODE_MONO)) {
- Serial.println("Failed to initialize I2S!");
- while (1); // do nothing
- }
-
- Serial.println("I2S bus initialized.");
- Serial.println("Initializing SD card...");
-
- #ifdef REASSIGN_PINS
- SPI.begin(sck, miso, mosi, cs);
- if (!SD.begin(cs)) {
- #else
- if (!SD.begin()) {
- #endif
- Serial.println("Card Mount Failed");
- return;
- }
- uint8_t cardType = SD.cardType();
-
- if (cardType == CARD_NONE) {
- Serial.println("No SD card attached");
- return;
- }
- Serial.println("SD card initialized.");
- Serial.println("Recording 20 seconds of audio data...");
-
- // Record 20 seconds of audio data
- wav_buffer = i2s.recordWAV(20, &wav_size);
-
- // Create a file on the SD card
- File file = SD.open("/Arduinor_rec.wav", FILE_WRITE);
- if (!file) {
- Serial.println("Failed to open file for writing!");
- return;
- }
-
- Serial.println("Writing audio data to file...");
-
- // Write the audio data to the file
- if (file.write(wav_buffer, wav_size) != wav_size) {
- Serial.println("Failed to write audio data to file!");
- return;
- }
-
- // Close the file
- file.close();
-
- Serial.println("Application complete.");
- }
-
- void loop() {
- delay(1000);
- Serial.printf(".");
- }</font>
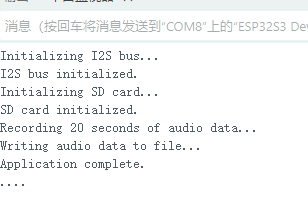
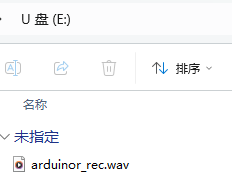
打开串口监视器,当串口输出信息”Recording 20 seconds of audio data...“时,模块开始录音,当串口显示”Writing audio data to file...“录音结束。随后出现............时,断电取下SD卡,用电脑查看音频文件arduinor_rec.wav,播放该文件,音量较小。
采集声音到SD卡,可增加音量,代码如下:
- <font size="4">#include "ESP_I2S.h"
- #include "FS.h"
- #include "SD.h"
- #include "SPI.h"
-
- // make changes as needed
- #define RECORD_TIME 10 // seconds, The maximum value is 240
- #define WAV_FILE_NAME "data"
- #define I2S_READ_CHUNK_SIZE 1920 // 添加到文件头部或全局作用域:ml-citation{ref="1,6" data="citationList"}
-
- // do not change for best
- #define SAMPLE_RATE 16000U
- #define SAMPLE_BITS 16
- #define WAV_HEADER_SIZE 44
- #define VOLUME_GAIN 4 //取4音量较大,3应该更合适
-
- I2SClass I2S;
- String baseFileName;
-
- int fileNumber = 1;
- bool isRecording = false;
-
- void setup() {
-
- Serial.begin(115200);
- while (!Serial) ;
-
- // setup 38 PDM clock and 39 PDM data pins
- I2S.setPinsPdmRx(38,39);
- if (!I2S.begin(I2S_MODE_PDM_RX, 16000, I2S_DATA_BIT_WIDTH_16BIT, I2S_SLOT_MODE_MONO)) {
- Serial.println("Failed to initialize I2S!");
- while (1) ;
- }
-
- #ifdef REASSIGN_PINS
- SPI.begin(sck, miso, mosi, cs);
- if (!SD.begin(cs)) {
- #else
- if (!SD.begin()) {
- #endif
- Serial.println("Card Mount Failed");
- return;
- }
- uint8_t cardType = SD.cardType();
- if (cardType == CARD_NONE) {
- Serial.println("No SD card attached");
- return;
- }
- Serial.println("SD card initialized.");
-
- Serial.printf("Enter with the label name\n");
- //record_wav();
- }
-
- void loop() {
- if (Serial.available() > 0) {
- String command = Serial.readStringUntil('\n');
- command.trim();
- if (command == "rec") {
- isRecording = true;
- } else {
- baseFileName = command;
- fileNumber = 1; // reset file number each time a new base file name is set
- Serial.printf("Send rec for starting recording label \n");
- }
- }
- if (isRecording && baseFileName != "") {
- String fileName = "/" + baseFileName + "." + String(fileNumber) + ".wav";
- fileNumber++;
- record_wav(fileName);
- delay(1000); // delay to avoid recording multiple files at once
- isRecording = false;
- }
- }
-
- void record_wav(String fileName)
- {
- uint32_t sample_size = 0;
- uint32_t record_size = (SAMPLE_RATE * SAMPLE_BITS / 8) * RECORD_TIME;
- uint8_t *rec_buffer = NULL;
- Serial.printf("Start recording ...\n");
-
- File file = SD.open(fileName.c_str(), FILE_WRITE);
- // Write the header to the WAV file
- uint8_t wav_header[WAV_HEADER_SIZE];
- generate_wav_header(wav_header, record_size, SAMPLE_RATE);
- file.write(wav_header, WAV_HEADER_SIZE);
-
- // PSRAM malloc for recording
- rec_buffer = (uint8_t *)ps_malloc(record_size);
- if (rec_buffer == NULL) {
- Serial.printf("malloc failed!\n");
- while(1) ;
- }
- Serial.printf("Buffer: %d bytes\n", ESP.getPsramSize() - ESP.getFreePsram());
-
- // 开始录音
- sample_size = 0;
- sample_size = I2S.readBytes((char*)rec_buffer, record_size);
-
- if (sample_size == 0) {
- Serial.println("Record Failed!");
- } else {
- Serial.printf("Record %d bytes\n", sample_size);
- }
- // Increase volume
- for (uint32_t i = 0; i < sample_size; i += SAMPLE_BITS/8) {
- (*(uint16_t *)(rec_buffer+i)) <<= VOLUME_GAIN;
- }
-
- // Write data to the WAV file
- Serial.printf("Writing to the file ...\n");
- if (file.write(rec_buffer, record_size) != record_size)
- Serial.printf("Write file Failed!\n");
-
- free(rec_buffer);
- file.close();
- Serial.printf("Recording complete: \n");
- Serial.printf("Send rec for a new sample or enter a new label\n\n");
- }
-
- void generate_wav_header(uint8_t *wav_header, uint32_t wav_size, uint32_t sample_rate)
- {
- // See this for reference: http://soundfile.sapp.org/doc/WaveFormat/
- uint32_t file_size = wav_size + WAV_HEADER_SIZE - 8;
- uint32_t byte_rate = SAMPLE_RATE * SAMPLE_BITS / 8;
- const uint8_t set_wav_header[] = {
- 'R', 'I', 'F', 'F', // ChunkID
- file_size, file_size >> 8, file_size >> 16, file_size >> 24, // ChunkSize
- 'W', 'A', 'V', 'E', // Format
- 'f', 'm', 't', ' ', // Subchunk1ID
- 0x10, 0x00, 0x00, 0x00, // Subchunk1Size (16 for PCM)
- 0x01, 0x00, // AudioFormat (1 for PCM)
- 0x01, 0x00, // NumChannels (1 channel)
- sample_rate, sample_rate >> 8, sample_rate >> 16, sample_rate >> 24, // SampleRate
- byte_rate, byte_rate >> 8, byte_rate >> 16, byte_rate >> 24, // ByteRate
- 0x02, 0x00, // BlockAlign
- 0x10, 0x00, // BitsPerSample (16 bits)
- 'd', 'a', 't', 'a', // Subchunk2ID
- wav_size, wav_size >> 8, wav_size >> 16, wav_size >> 24, // Subchunk2Size
- };
- memcpy(wav_header, set_wav_header, sizeof(set_wav_header));
- }</font>
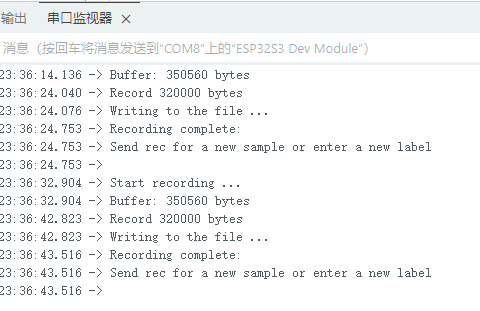
上传后,在串口输入“hello",该字串将是声音文件的名称前缀,根据串口信息提示,输入”rec",开始录音,如此循环。
 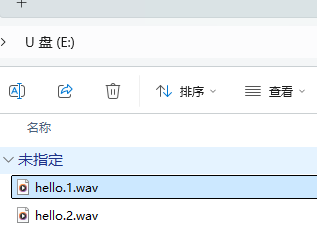
DAY2
1.准备声音数据集
利用昨天最后一个程序实现声音收集。首先收集用建瓯方言(而且是乡村口音)说“开灯”关键词,方法是先格式化SD卡,插入ESP32S3AI模块SD卡槽,上电。打开Arduino IDE串口,等串口提示:“Send rec for a new sample or enter a new label”时,输入关键词的标签。由于每次录音只有10秒,我就多次采集该关键词,输入“on”,表示采集“开灯”语音录音文件。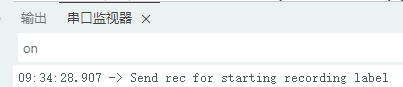
此时,串口提示: , ,
在串口中输入“rec”,开始采集该段录音。
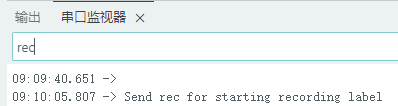
对着esp32s3用方言重复说“开灯”
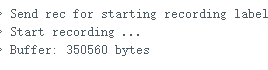
10秒后结束本次录音。
用上述方法分别录制10次噪音、10次“关灯”,10次“开灯”。
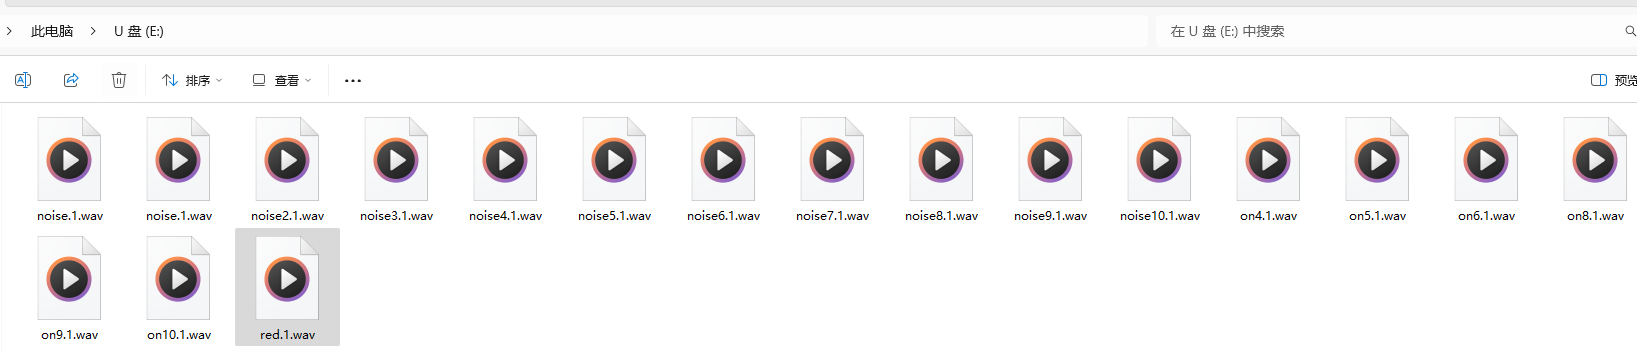
2.用edge Impulse训练与生成模型
在edge impulse上创建一个名为“fj_dialect_detector"的工程,并把SD卡上的录音文件上传到平台数据集中。
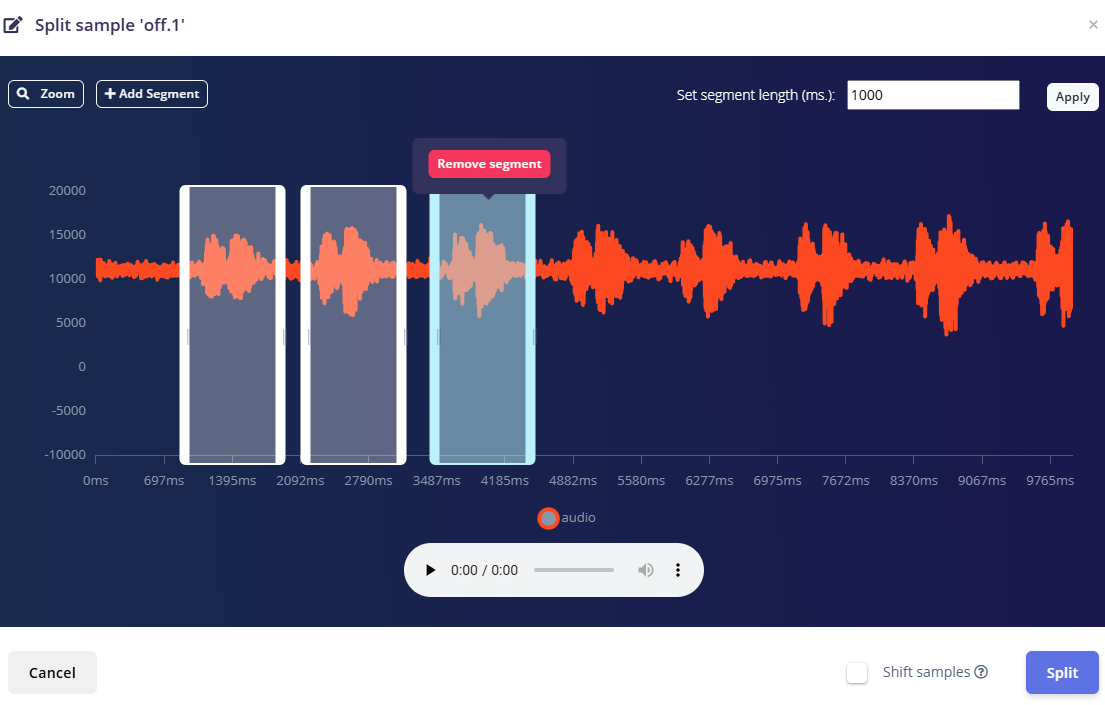
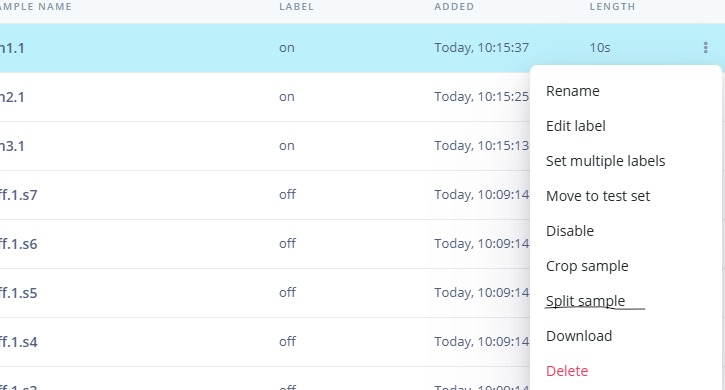 用”split sample"把时长为10秒的文件分割成1秒的数据,方法如下图。 用”split sample"把时长为10秒的文件分割成1秒的数据,方法如下图。
如果数据集数量太少,少于50个,可用平台上的收集数据功能,通过电脑或手机采集声音数据。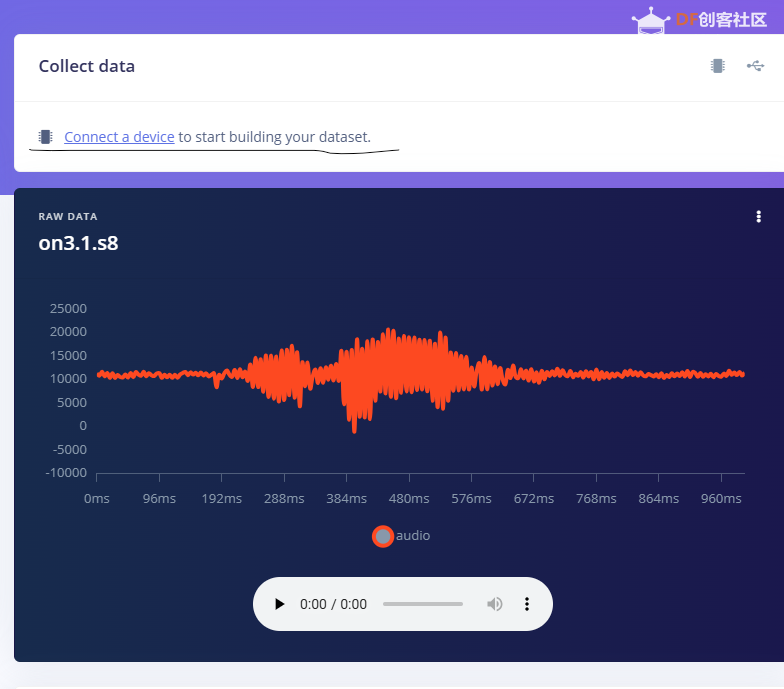
 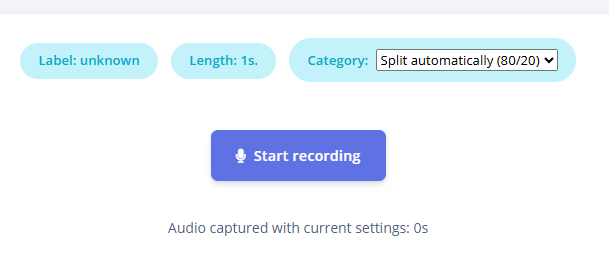
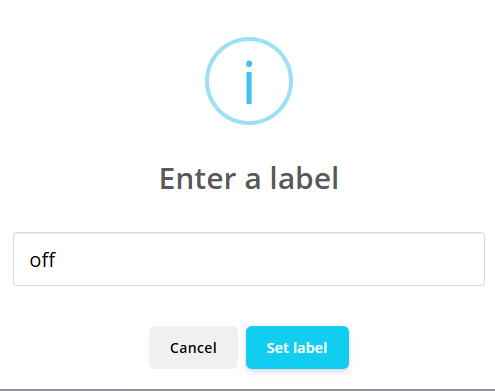
通过电脑麦克风采集的声音文件时,可以先标注收集数据的标签,如下图是将要采集的数据标签为off(关灯)
当三类声音的样本量都有60个时,观察每个声音数据的波形,删除一些不合格的文件,如下图
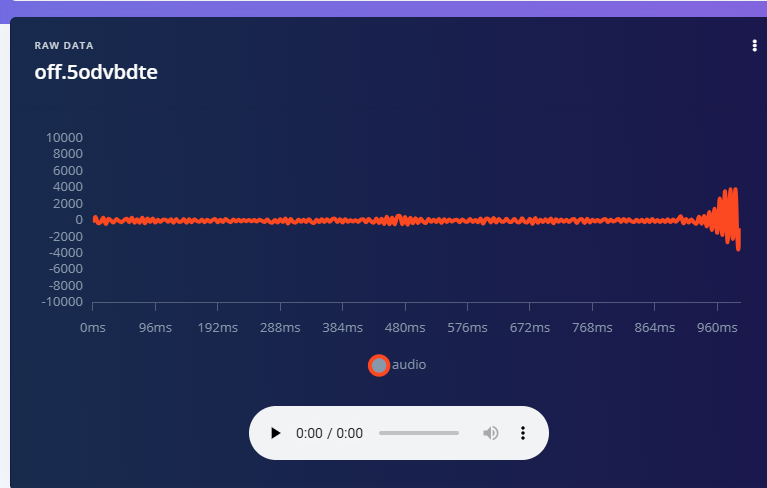
开关灯声音的正常的波形应该是下面这样的。
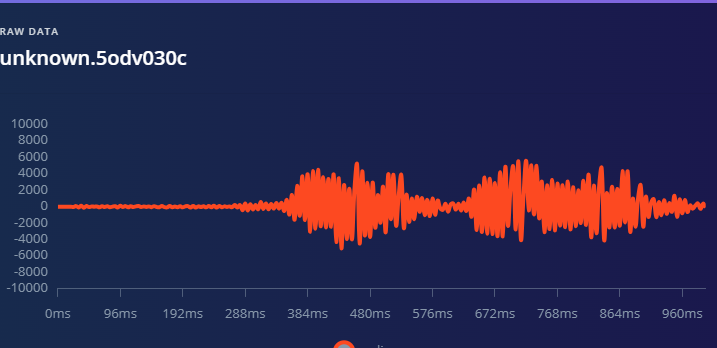 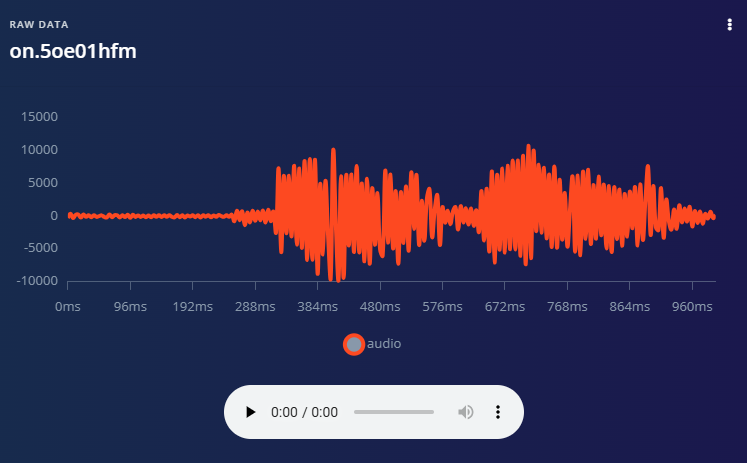
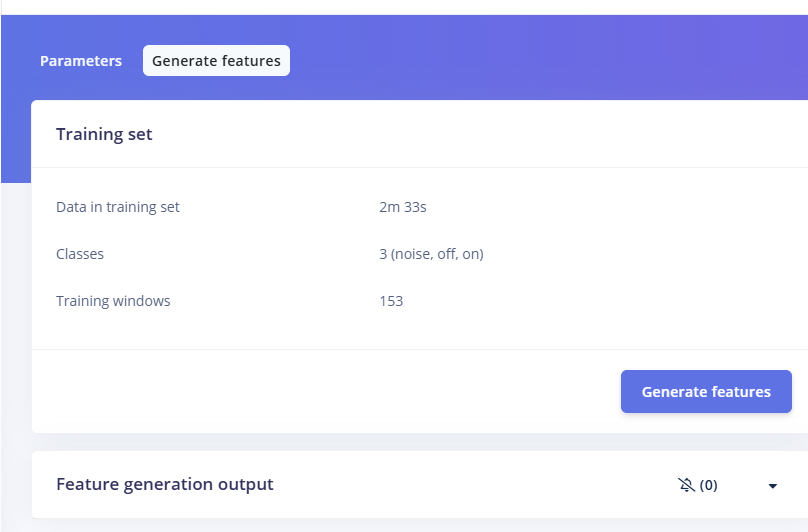
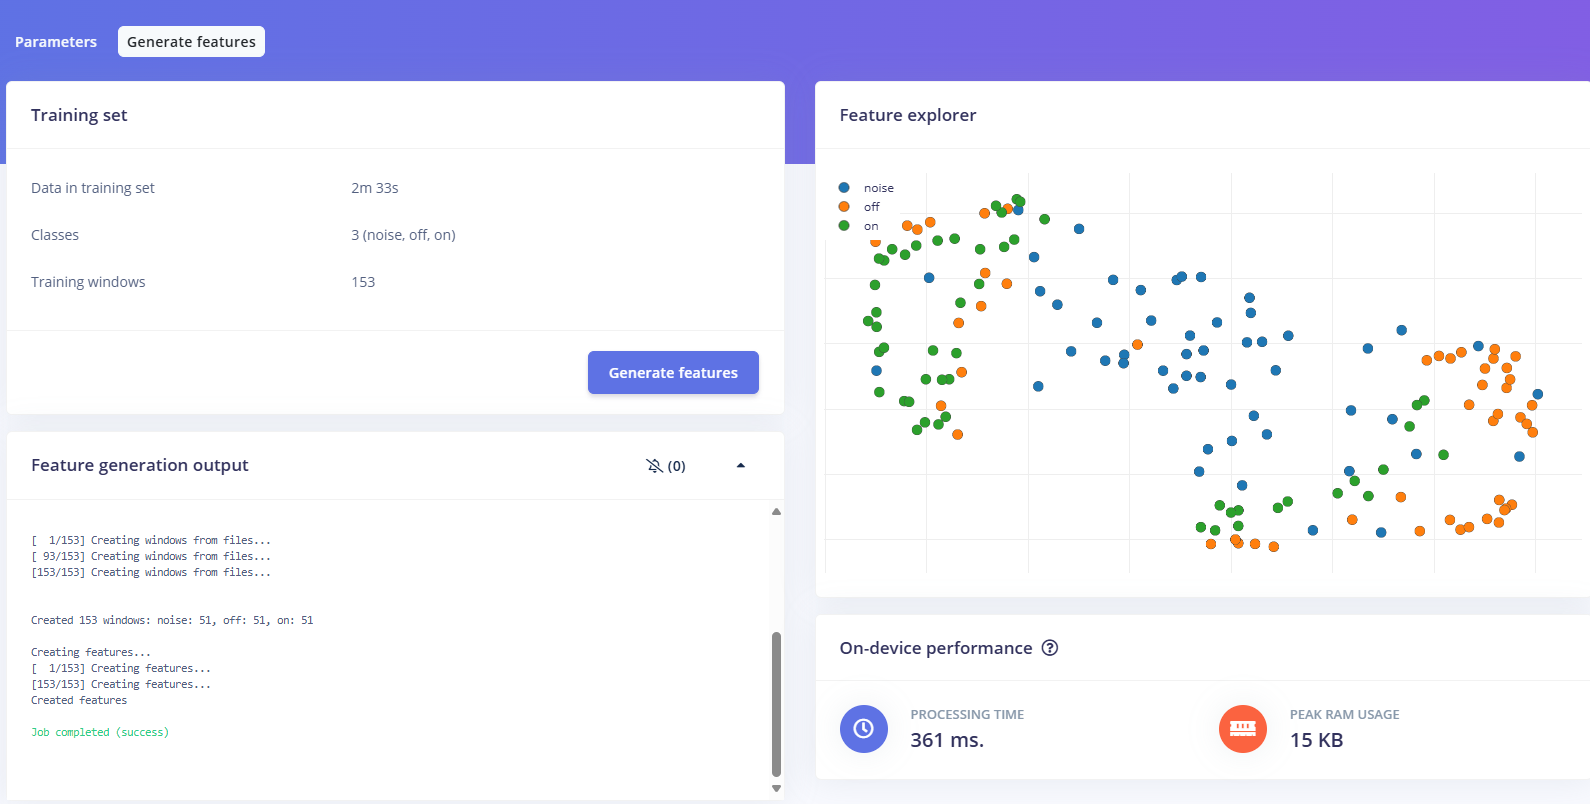
我的数据集分三个分类:开灯、关灯、背景音,每类51个样本。
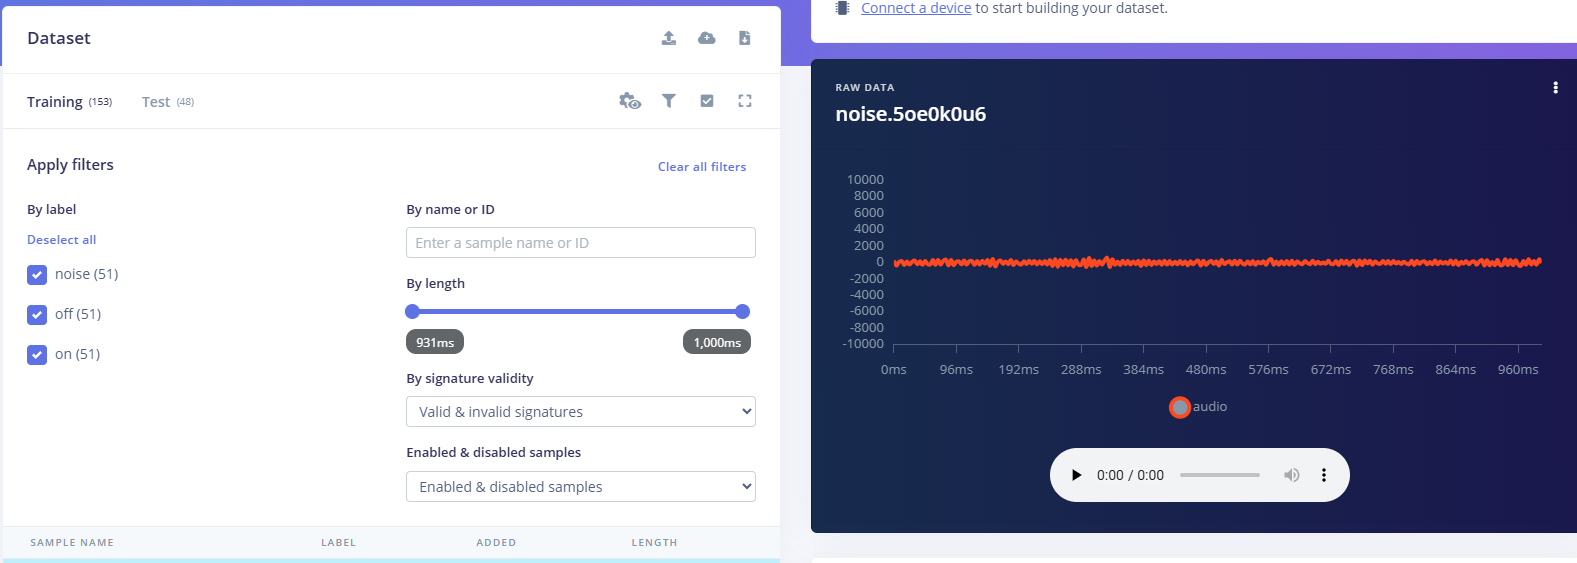
3.准备好数据集,就可以进行设置Impulse
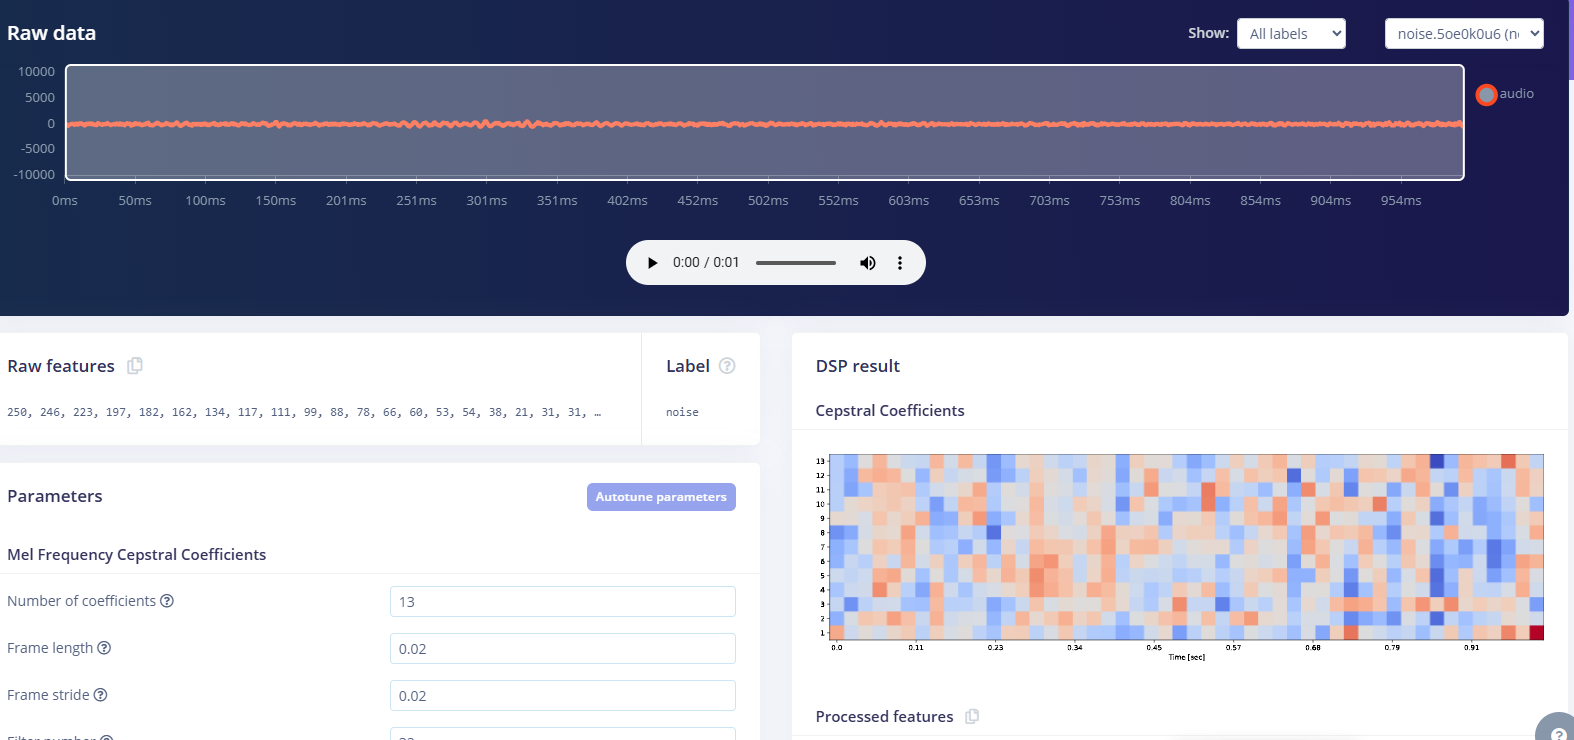
首先,impulse处理的音频文件为1秒窗口的数据点,每 500 毫秒滑动一次该窗口。 必须用小于 1 秒的零样本填充。另外,我们将每个 1 秒的音频样本经过预处理并转换为图像(例如,13 x 49 x 1)。因此,我使用 MFCC,它从音频信号中提取特征,这对分析人类的声音效果很好。模型各类是Classifier,使用卷积神经网络进行图像分类构建分类模型。
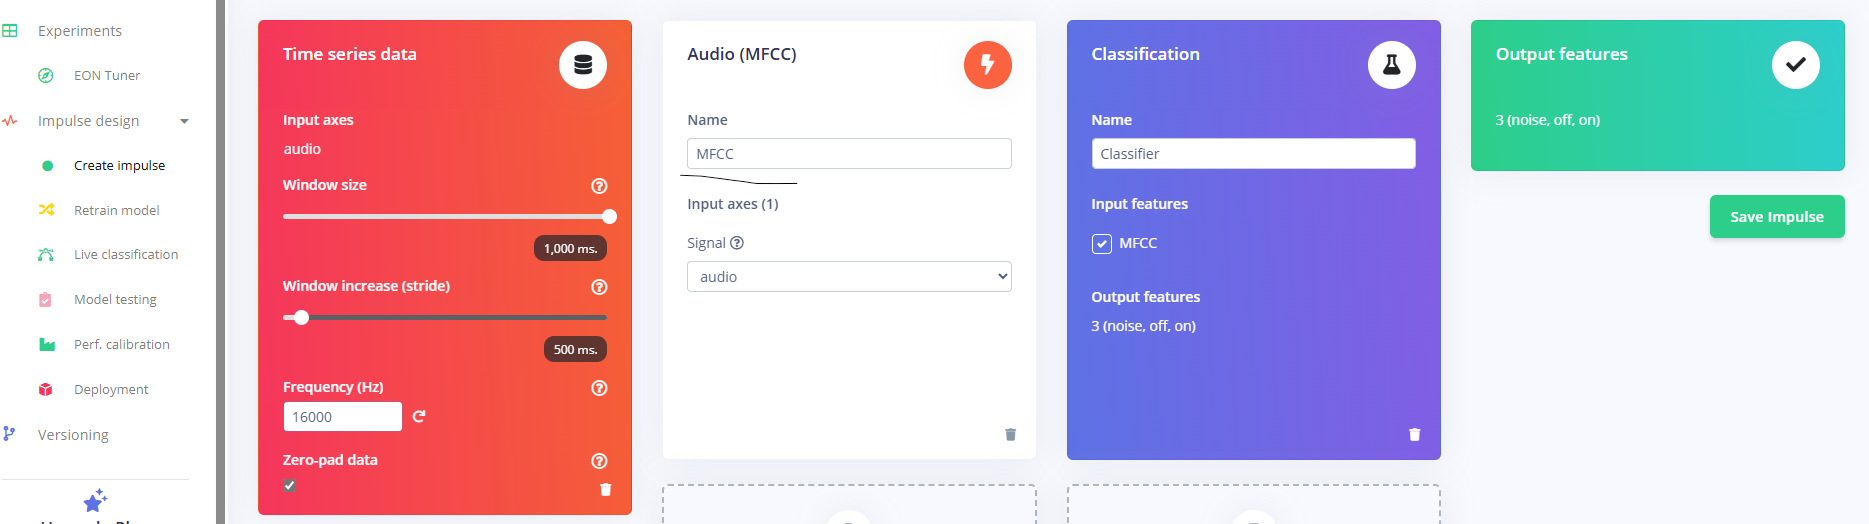
点击下面的按键后保存参数,此时左侧多出了MFCC 和 Classifier两个条目
点击MFCC,显示MFCC是把声音变图像的功能.
点击”autotun parameters"(自动调节参数)

点击“save parameters”保存参数按键

点击“generate feature"生成特征按键,可观察三个分类声音文件分布图
现在要设置训练模型的超参数。
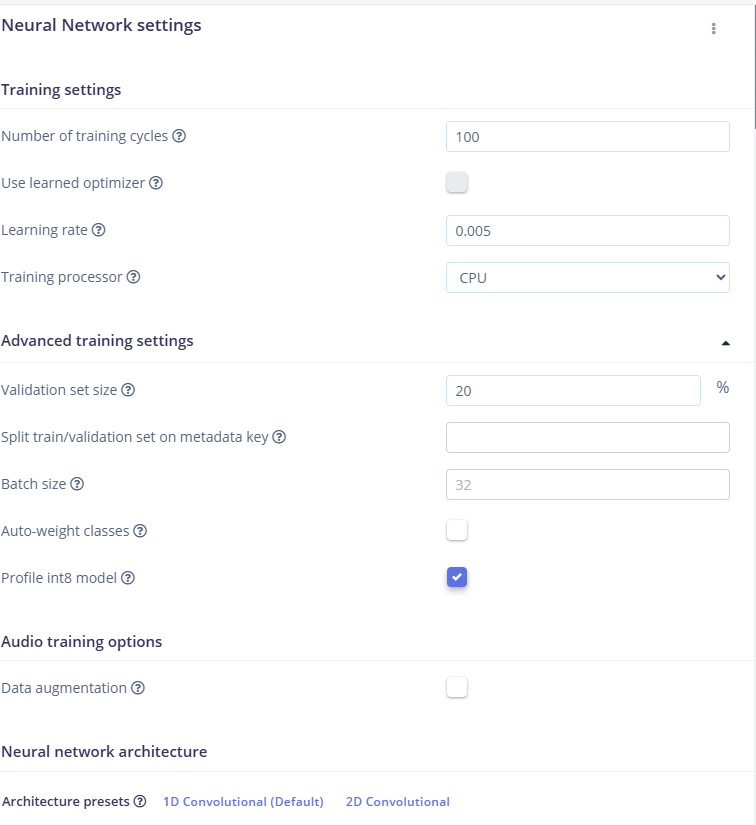
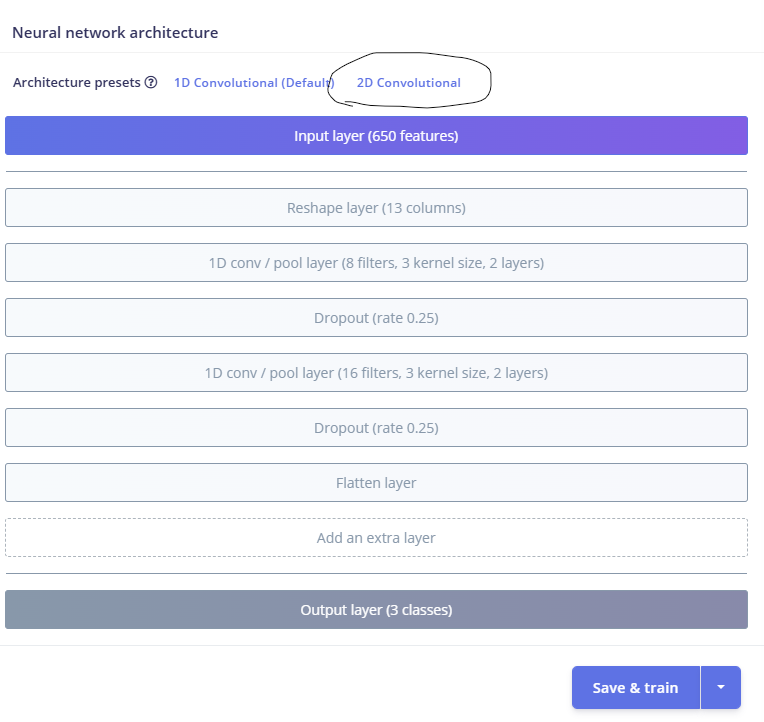
我的数据量小,训练速度很快就完成。
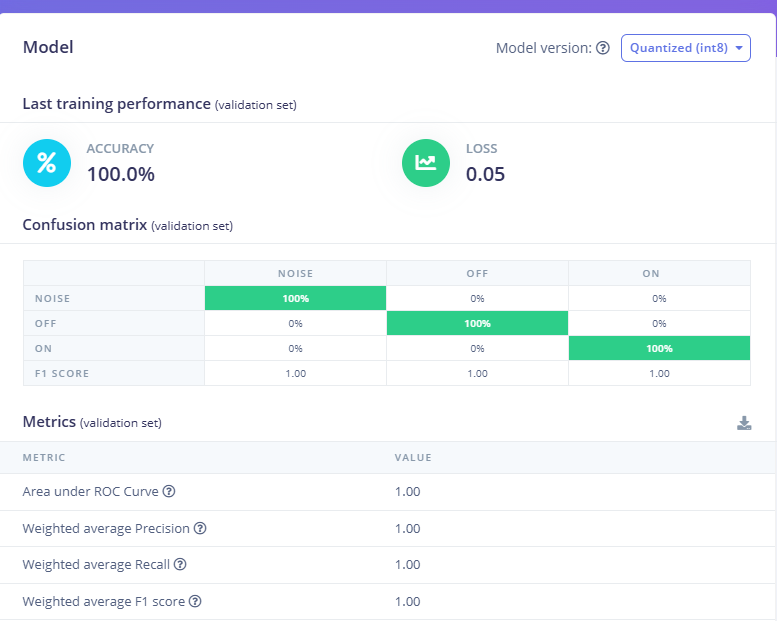
4.部署模型,首先要先生成Arduino 库文件
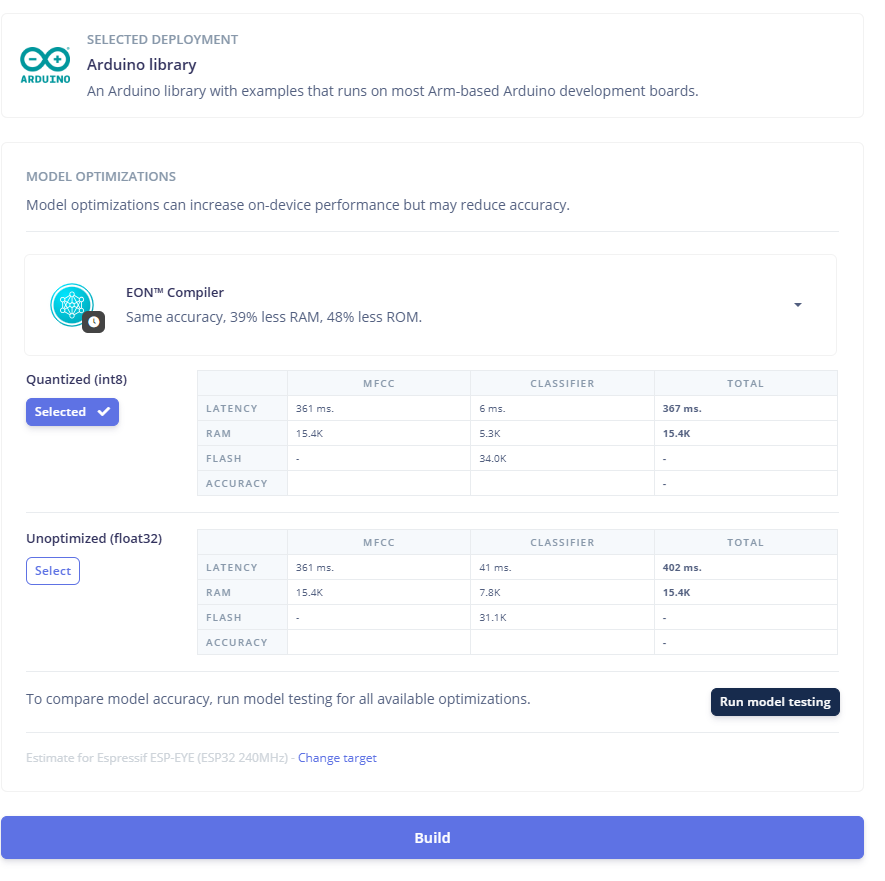
点击 build,右侧显示生成模型的过程
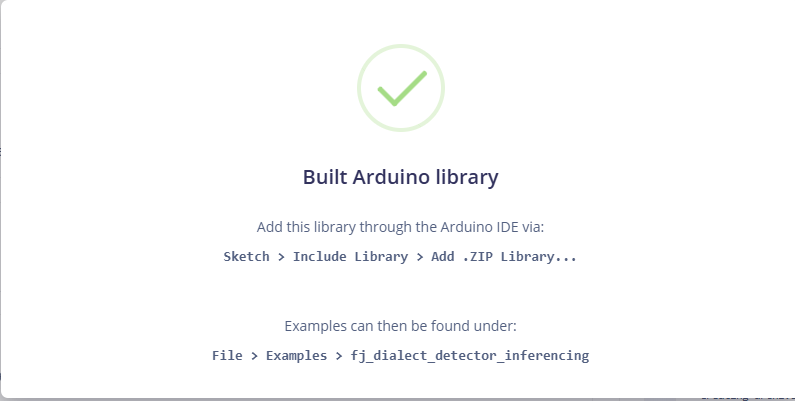
解压下载的模型文件
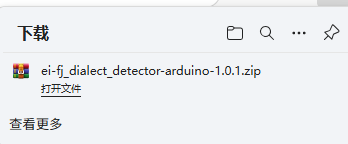
把该文件安装到Arduino libraries中,打开“esp32_microphone”文件,并做适合的修改,修改后的文件如下:
- <font size="4">#include <fj_dialect_detector_inferencing.h>
- #include "ESP_I2S.h"
- #define SAMPLE_RATE 16000U
- #define SAMPLE_BITS 16
-
- /** Audio buffers, pointers and selectors */
- typedef struct {
- int16_t *buffer;
- uint8_t buf_ready;
- uint32_t buf_count;
- uint32_t n_samples;
- } inference_t;
-
- static inference_t inference;
- static const uint32_t sample_buffer_size = 2048;
- static signed short sampleBuffer[sample_buffer_size];
- static bool debug_nn = false; // Set this to true to see e.g. features generated from the raw signal
- static bool record_status = true;
- I2SClass I2S;
- /**
- * @brief Arduino setup function
- */
- void setup()
- {
- // put your setup code here, to run once:
- Serial.begin(115200);
- // comment out the below line to cancel the wait for USB connection (needed for native USB)
- while (!Serial);
- Serial.println("Edge Impulse Inferencing Demo");
- pinMode(3, OUTPUT); // Set the pin as output
- digitalWrite(3, LOW); //Turn off
-
- // setup 38 PDM clock and 39 PDM data pins
- I2S.setPinsPdmRx(38, 39);
- if (!I2S.begin(I2S_MODE_PDM_RX, 16000, I2S_DATA_BIT_WIDTH_16BIT, I2S_SLOT_MODE_MONO)) {
- Serial.println("Failed to initialize I2S!");
- while (1) ;
- }
-
- // summary of inferencing settings (from model_metadata.h)
- ei_printf("Inferencing settings:\n");
- ei_printf("\tInterval: ");
- ei_printf_float((float)EI_CLASSIFIER_INTERVAL_MS);
- ei_printf(" ms.\n");
- ei_printf("\tFrame size: %d\n", EI_CLASSIFIER_DSP_INPUT_FRAME_SIZE);
- ei_printf("\tSample length: %d ms.\n", EI_CLASSIFIER_RAW_SAMPLE_COUNT / 16);
- ei_printf("\tNo. of classes: %d\n", sizeof(ei_classifier_inferencing_categories) / sizeof(ei_classifier_inferencing_categories[0]));
-
- ei_printf("\nStarting continious inference in 2 seconds...\n");
- ei_sleep(2000);
-
- if (microphone_inference_start(EI_CLASSIFIER_RAW_SAMPLE_COUNT) == false) {
- ei_printf("ERR: Could not allocate audio buffer (size %d), this could be due to the window length of your model\r\n", EI_CLASSIFIER_RAW_SAMPLE_COUNT);
- return;
- }
-
- ei_printf("Recording...\n");
- }
-
- /**
- * @brief Arduino main function. Runs the inferencing loop.
- */
- void loop()
- {
- bool m = microphone_inference_record();
- if (!m) {
- ei_printf("ERR: Failed to record audio...\n");
- return;
- }
-
- signal_t signal;
- signal.total_length = EI_CLASSIFIER_RAW_SAMPLE_COUNT;
- signal.get_data = µphone_audio_signal_get_data;
- ei_impulse_result_t result = { 0 };
-
- EI_IMPULSE_ERROR r = run_classifier(&signal, &result, debug_nn);
- if (r != EI_IMPULSE_OK) {
- ei_printf("ERR: Failed to run classifier (%d)\n", r);
- return;
- }
-
- int pred_index = 0; // Initialize pred_index
- float pred_value = 0; // Initialize pred_value
-
- // print the predictions
- ei_printf("Predictions ");
- //ei_printf("(DSP: %d ms., Classification: %d ms., Anomaly: %d ms.)",
- // result.timing.dsp, result.timing.classification, result.timing.anomaly);
- // ei_printf(": \n");
- for (size_t ix = 0; ix < EI_CLASSIFIER_LABEL_COUNT; ix++) {
- ei_printf(" %s: ", result.classification[ix].label);
- ei_printf_float(result.classification[ix].value);
- ei_printf("\n");
-
- if (result.classification[ix].value > pred_value){
- pred_index = ix;
- pred_value = result.classification[ix].value;
- }
- }
- ei_printf("%d: ",pred_index);
- ei_printf("\n");
- if (pred_index == 1){
- digitalWrite(3, LOW); //Turn on
- }
- else if (pred_index == 2){
- digitalWrite(3, HIGH); //Turn off
- }
-
- #if EI_CLASSIFIER_HAS_ANOMALY == 1
- ei_printf(" anomaly score: ");
- ei_printf_float(result.anomaly);
- ei_printf("\n");
- #endif
- }
-
- static void audio_inference_callback(uint32_t n_bytes)
- {
- for(int i = 0; i < n_bytes>>1; i++) {
- inference.buffer[inference.buf_count++] = sampleBuffer[i];
-
- if(inference.buf_count >= inference.n_samples) {
- inference.buf_count = 0;
- inference.buf_ready = 1;
- }
- }
- }
-
- static void capture_samples(void* arg) {
-
- const int32_t i2s_bytes_to_read = (uint32_t)arg;
- size_t bytes_read = i2s_bytes_to_read;
-
- while (record_status) {
-
- /* read data at once from i2s */
- //i2s_read((i2s_port_t)1, (void*)sampleBuffer, i2s_bytes_to_read, &bytes_read, 100);
-
- //I2S.i2s_read(esp_i2s::I2S_NUM_0, (void*)sampleBuffer, i2s_bytes_to_read, &bytes_read, 100);
- //从 I2S 接口中读取 i2s_bytes_to_read 字节到 sampleBuffer 中,读取结果保存在 bytes_read 中。
- bytes_read = I2S.readBytes((char*)sampleBuffer, i2s_bytes_to_read);
-
- if (bytes_read <= 0) {
- ei_printf("Error in I2S read : %d", bytes_read);
- }
- else {
- if (bytes_read < i2s_bytes_to_read) {
- ei_printf("Partial I2S read");
- }
-
- // scale the data (otherwise the sound is too quiet)
- for (int x = 0; x < i2s_bytes_to_read/2; x++) {
- sampleBuffer[x] = (int16_t)(sampleBuffer[x]) * 8;
- }
-
- if (record_status) {
- audio_inference_callback(i2s_bytes_to_read);
- }
- else {
- break;
- }
- }
- }
- vTaskDelete(NULL);
- }
-
- /**
- * @brief Init inferencing struct and setup/start PDM
- *
- * @param[in] n_samples The n samples
- *
- * @return { description_of_the_return_value }
- */
- static bool microphone_inference_start(uint32_t n_samples)
- {
- inference.buffer = (int16_t *)malloc(n_samples * sizeof(int16_t));
-
- if(inference.buffer == NULL) {
- return false;
- }
-
- inference.buf_count = 0;
- inference.n_samples = n_samples;
- inference.buf_ready = 0;
-
- // if (i2s_init(EI_CLASSIFIER_FREQUENCY)) {
- // ei_printf("Failed to start I2S!");
- // }
-
- ei_sleep(100);
-
- record_status = true;
-
- xTaskCreate(capture_samples, "CaptureSamples", 1024 * 32, (void*)sample_buffer_size, 10, NULL);
-
- return true;
- }
-
- /**
- * @brief Wait on new data
- *
- * @return True when finished
- */
- static bool microphone_inference_record(void)
- {
- bool ret = true;
-
- while (inference.buf_ready == 0) {
- delay(10);
- }
-
- inference.buf_ready = 0;
- return ret;
- }
-
- /**
- * Get raw audio signal data
- */
- static int microphone_audio_signal_get_data(size_t offset, size_t length, float *out_ptr)
- {
- numpy::int16_to_float(&inference.buffer[offset], out_ptr, length);
-
- return 0;
- }
-
- /**
- * @brief Stop PDM and release buffers
- */
- static void microphone_inference_end(void)
- {
- free(sampleBuffer);
- ei_free(inference.buffer);
- }
-
-
- // static int i2s_init(uint32_t sampling_rate) {
- // // Start listening for audio: MONO @ 8/16KHz
- // i2s_config_t i2s_config = {
- // .mode = (i2s_mode_t)(I2S_MODE_MASTER | I2S_MODE_RX | I2S_MODE_TX),
- // .sample_rate = sampling_rate,
- // .bits_per_sample = (i2s_bits_per_sample_t)16,
- // .channel_format = I2S_CHANNEL_FMT_ONLY_RIGHT,
- // .communication_format = I2S_COMM_FORMAT_I2S,
- // .intr_alloc_flags = 0,
- // .dma_buf_count = 8,
- // .dma_buf_len = 512,
- // .use_apll = false,
- // .tx_desc_auto_clear = false,
- // .fixed_mclk = -1,
- // };
- // i2s_pin_config_t pin_config = {
- // .bck_io_num = 26, // IIS_SCLK
- // .ws_io_num = 32, // IIS_LCLK
- // .data_out_num = -1, // IIS_DSIN
- // .data_in_num = 33, // IIS_DOUT
- // };
- // esp_err_t ret = 0;
-
- // ret = i2s_driver_install((i2s_port_t)1, &i2s_config, 0, NULL);
- // if (ret != ESP_OK) {
- // ei_printf("Error in i2s_driver_install");
- // }
-
- // ret = i2s_set_pin((i2s_port_t)1, &pin_config);
- // if (ret != ESP_OK) {
- // ei_printf("Error in i2s_set_pin");
- // }
-
- // ret = i2s_zero_dma_buffer((i2s_port_t)1);
- // if (ret != ESP_OK) {
- // ei_printf("Error in initializing dma buffer with 0");
- // }
-
- // return int(ret);
- // }
-
- // static int i2s_deinit(void) {
- // i2s_driver_uninstall((i2s_port_t)1); //stop & destroy i2s driver
- // return 0;
- // }
-
- #if !defined(EI_CLASSIFIER_SENSOR) || EI_CLASSIFIER_SENSOR != EI_CLASSIFIER_SENSOR_MICROPHONE
- #error "Invalid model for current sensor."
- #endif
- </font>
文件上传后,打开串口,输出的信息如下:
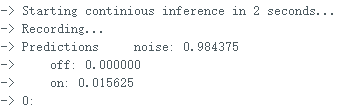
输出该信息对应的代码部分为
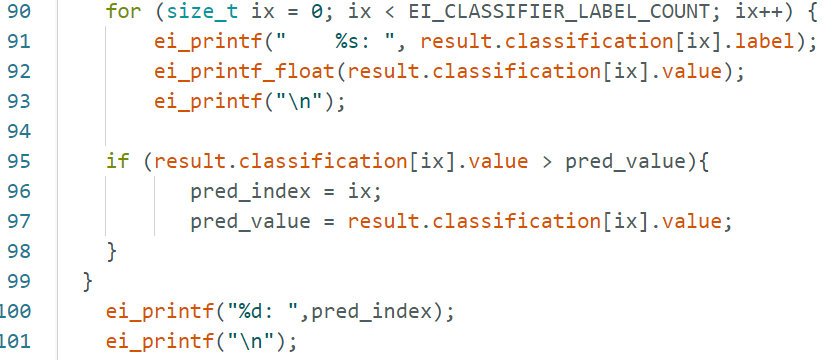
对该段代码的变量说明:
result.classification[ix].label是标签名(noise,off,on);
result.classification[ix].value是当前声音为三个标签的可能性;
pred_index是最大可能标签的序号,noise--0,off--1,on--2.
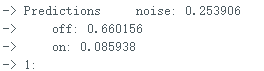 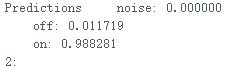
上两个截图是表示当时麦克风听到“关灯”“开灯”的方言词。
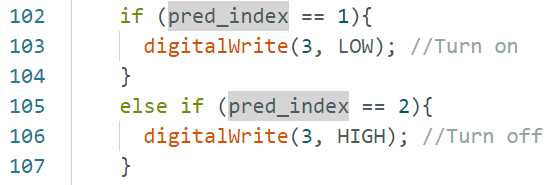
上面的代码是根据听到的命令(标签值)控制板载LED的亮与灭。
全文完 感谢:Solomon Githu的文章“Environment audio monitoring wearable with XIAO ESP32S3 - Hackster.io”对本项目的顺利完成帮助巨大
代码的移植也借助于ChatGPT.
向他们致敬!
|