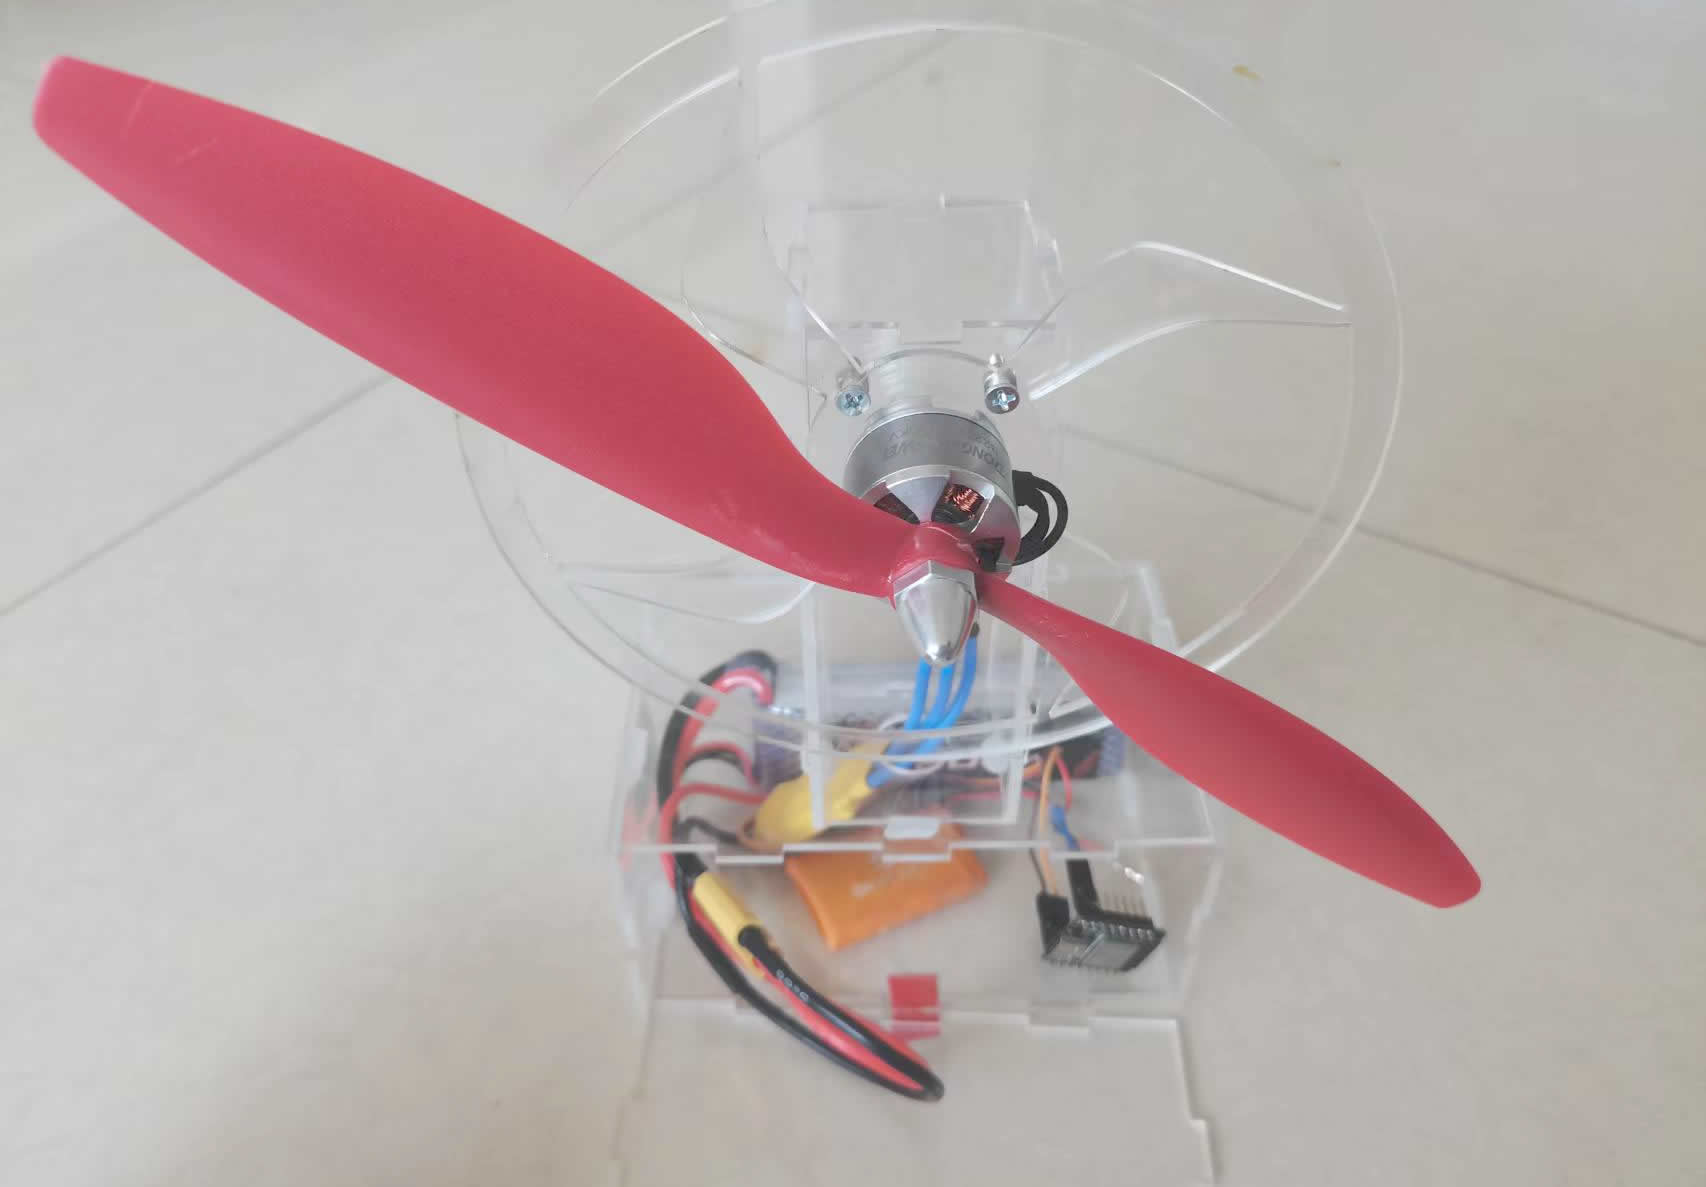
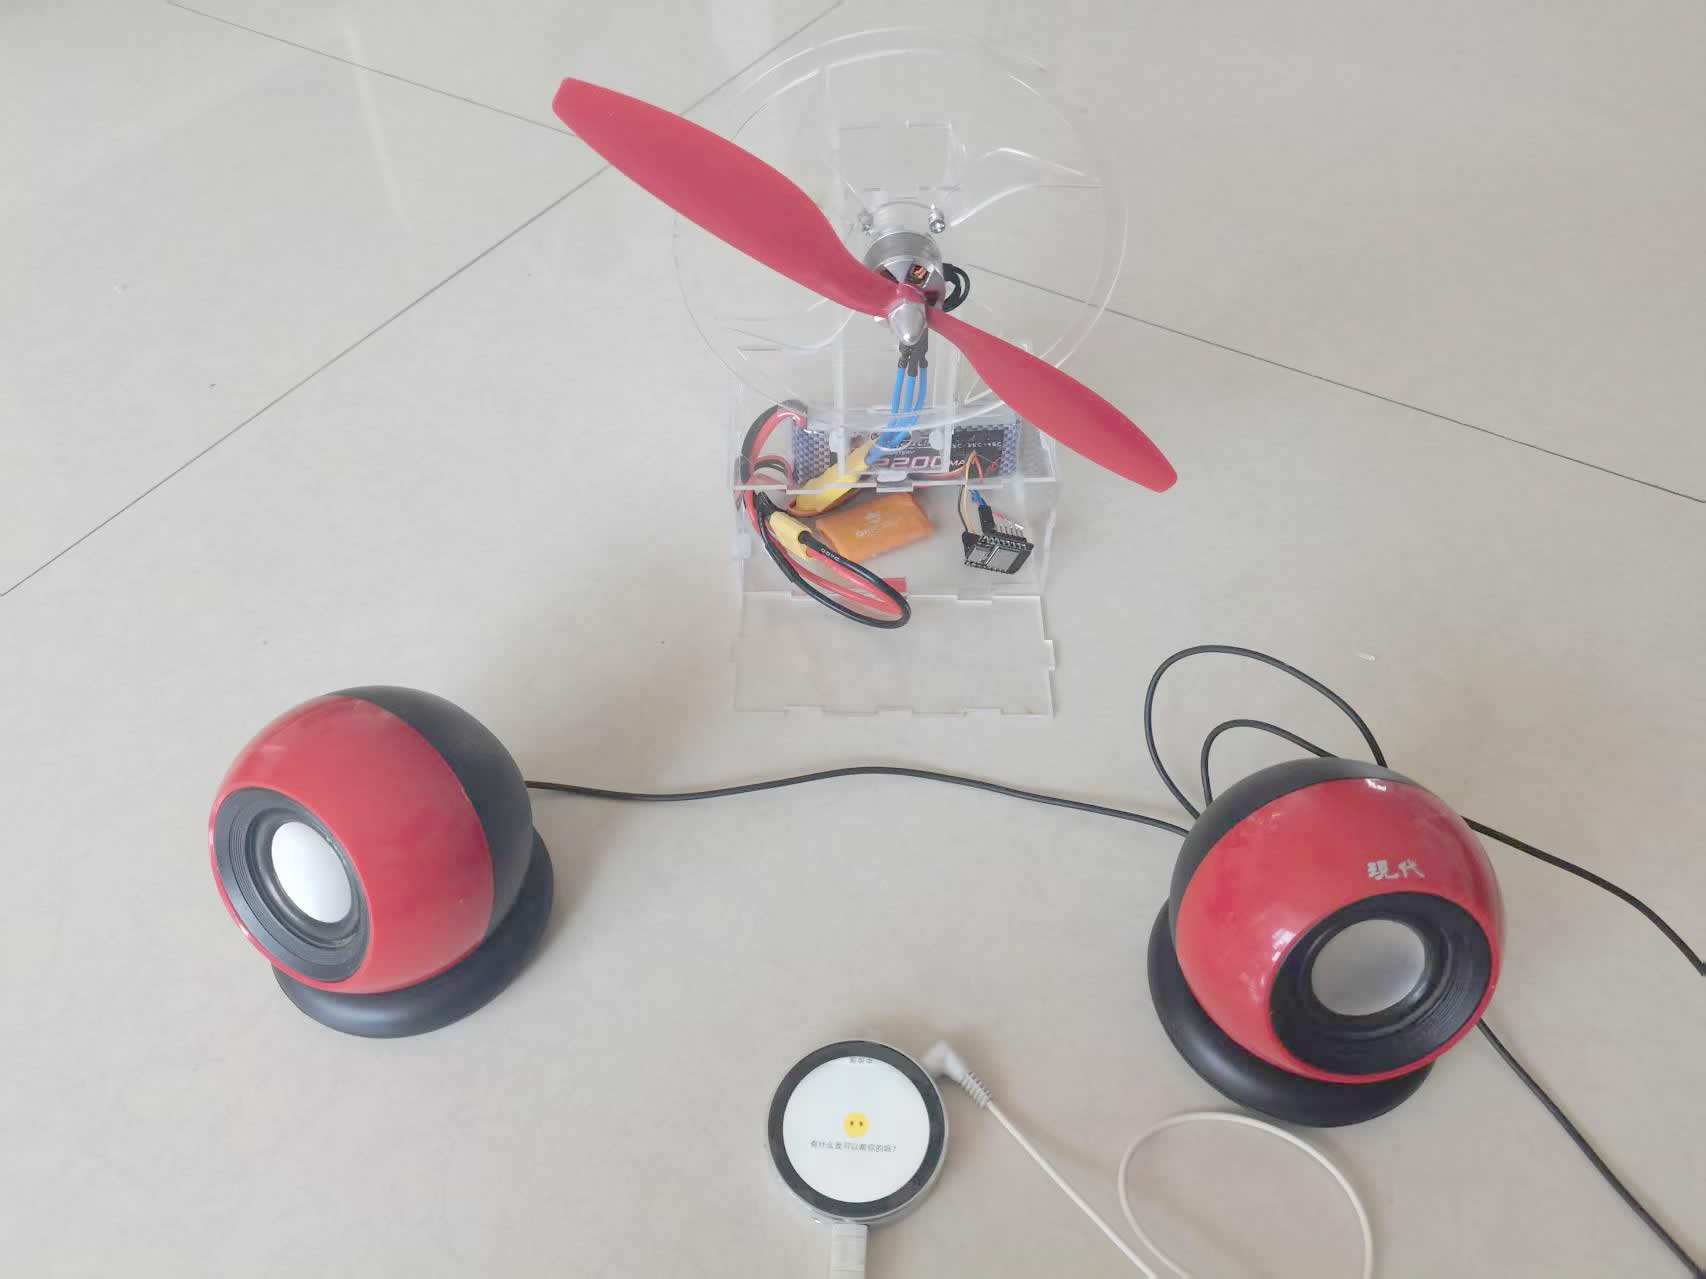
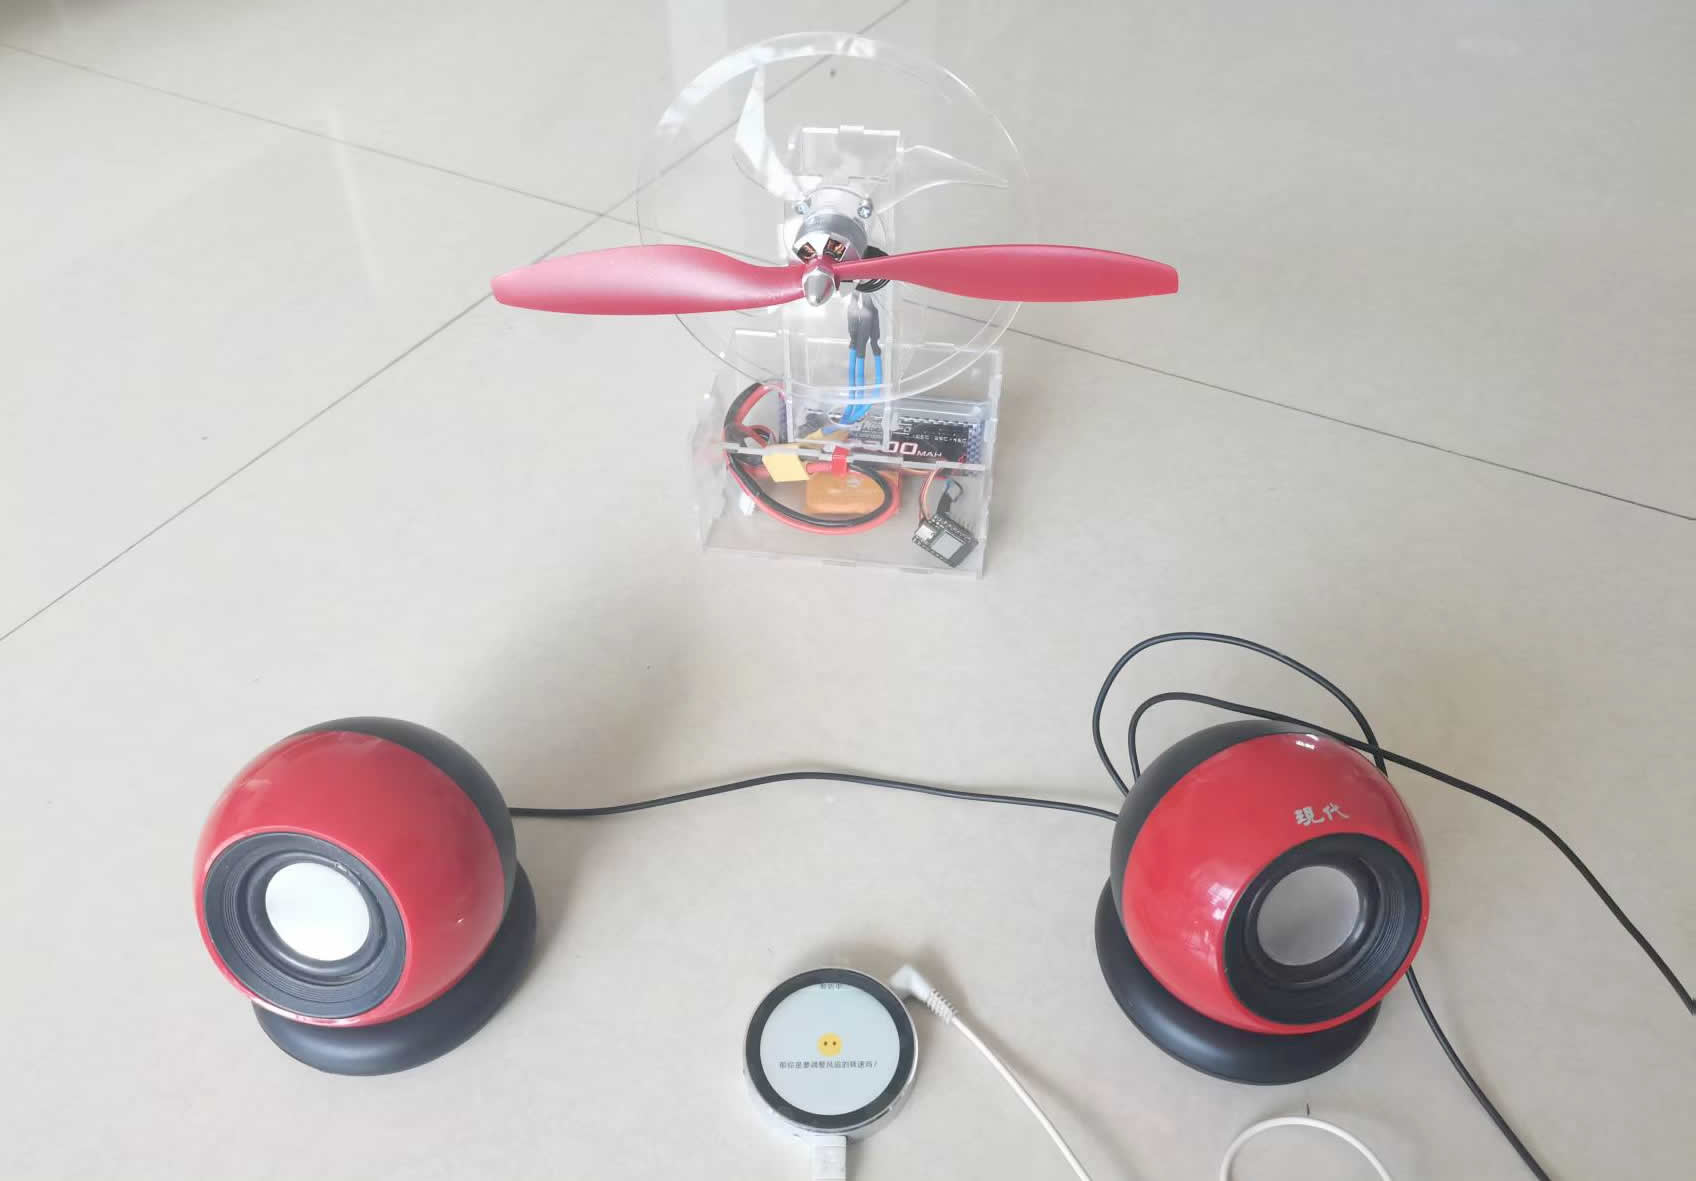
让小智AI不仅能听会说,还能驱动无刷电机高速旋转——从RGB灯测试到暴力风扇,一步步打造你的AI语音控制风扇。 【项目缘起】
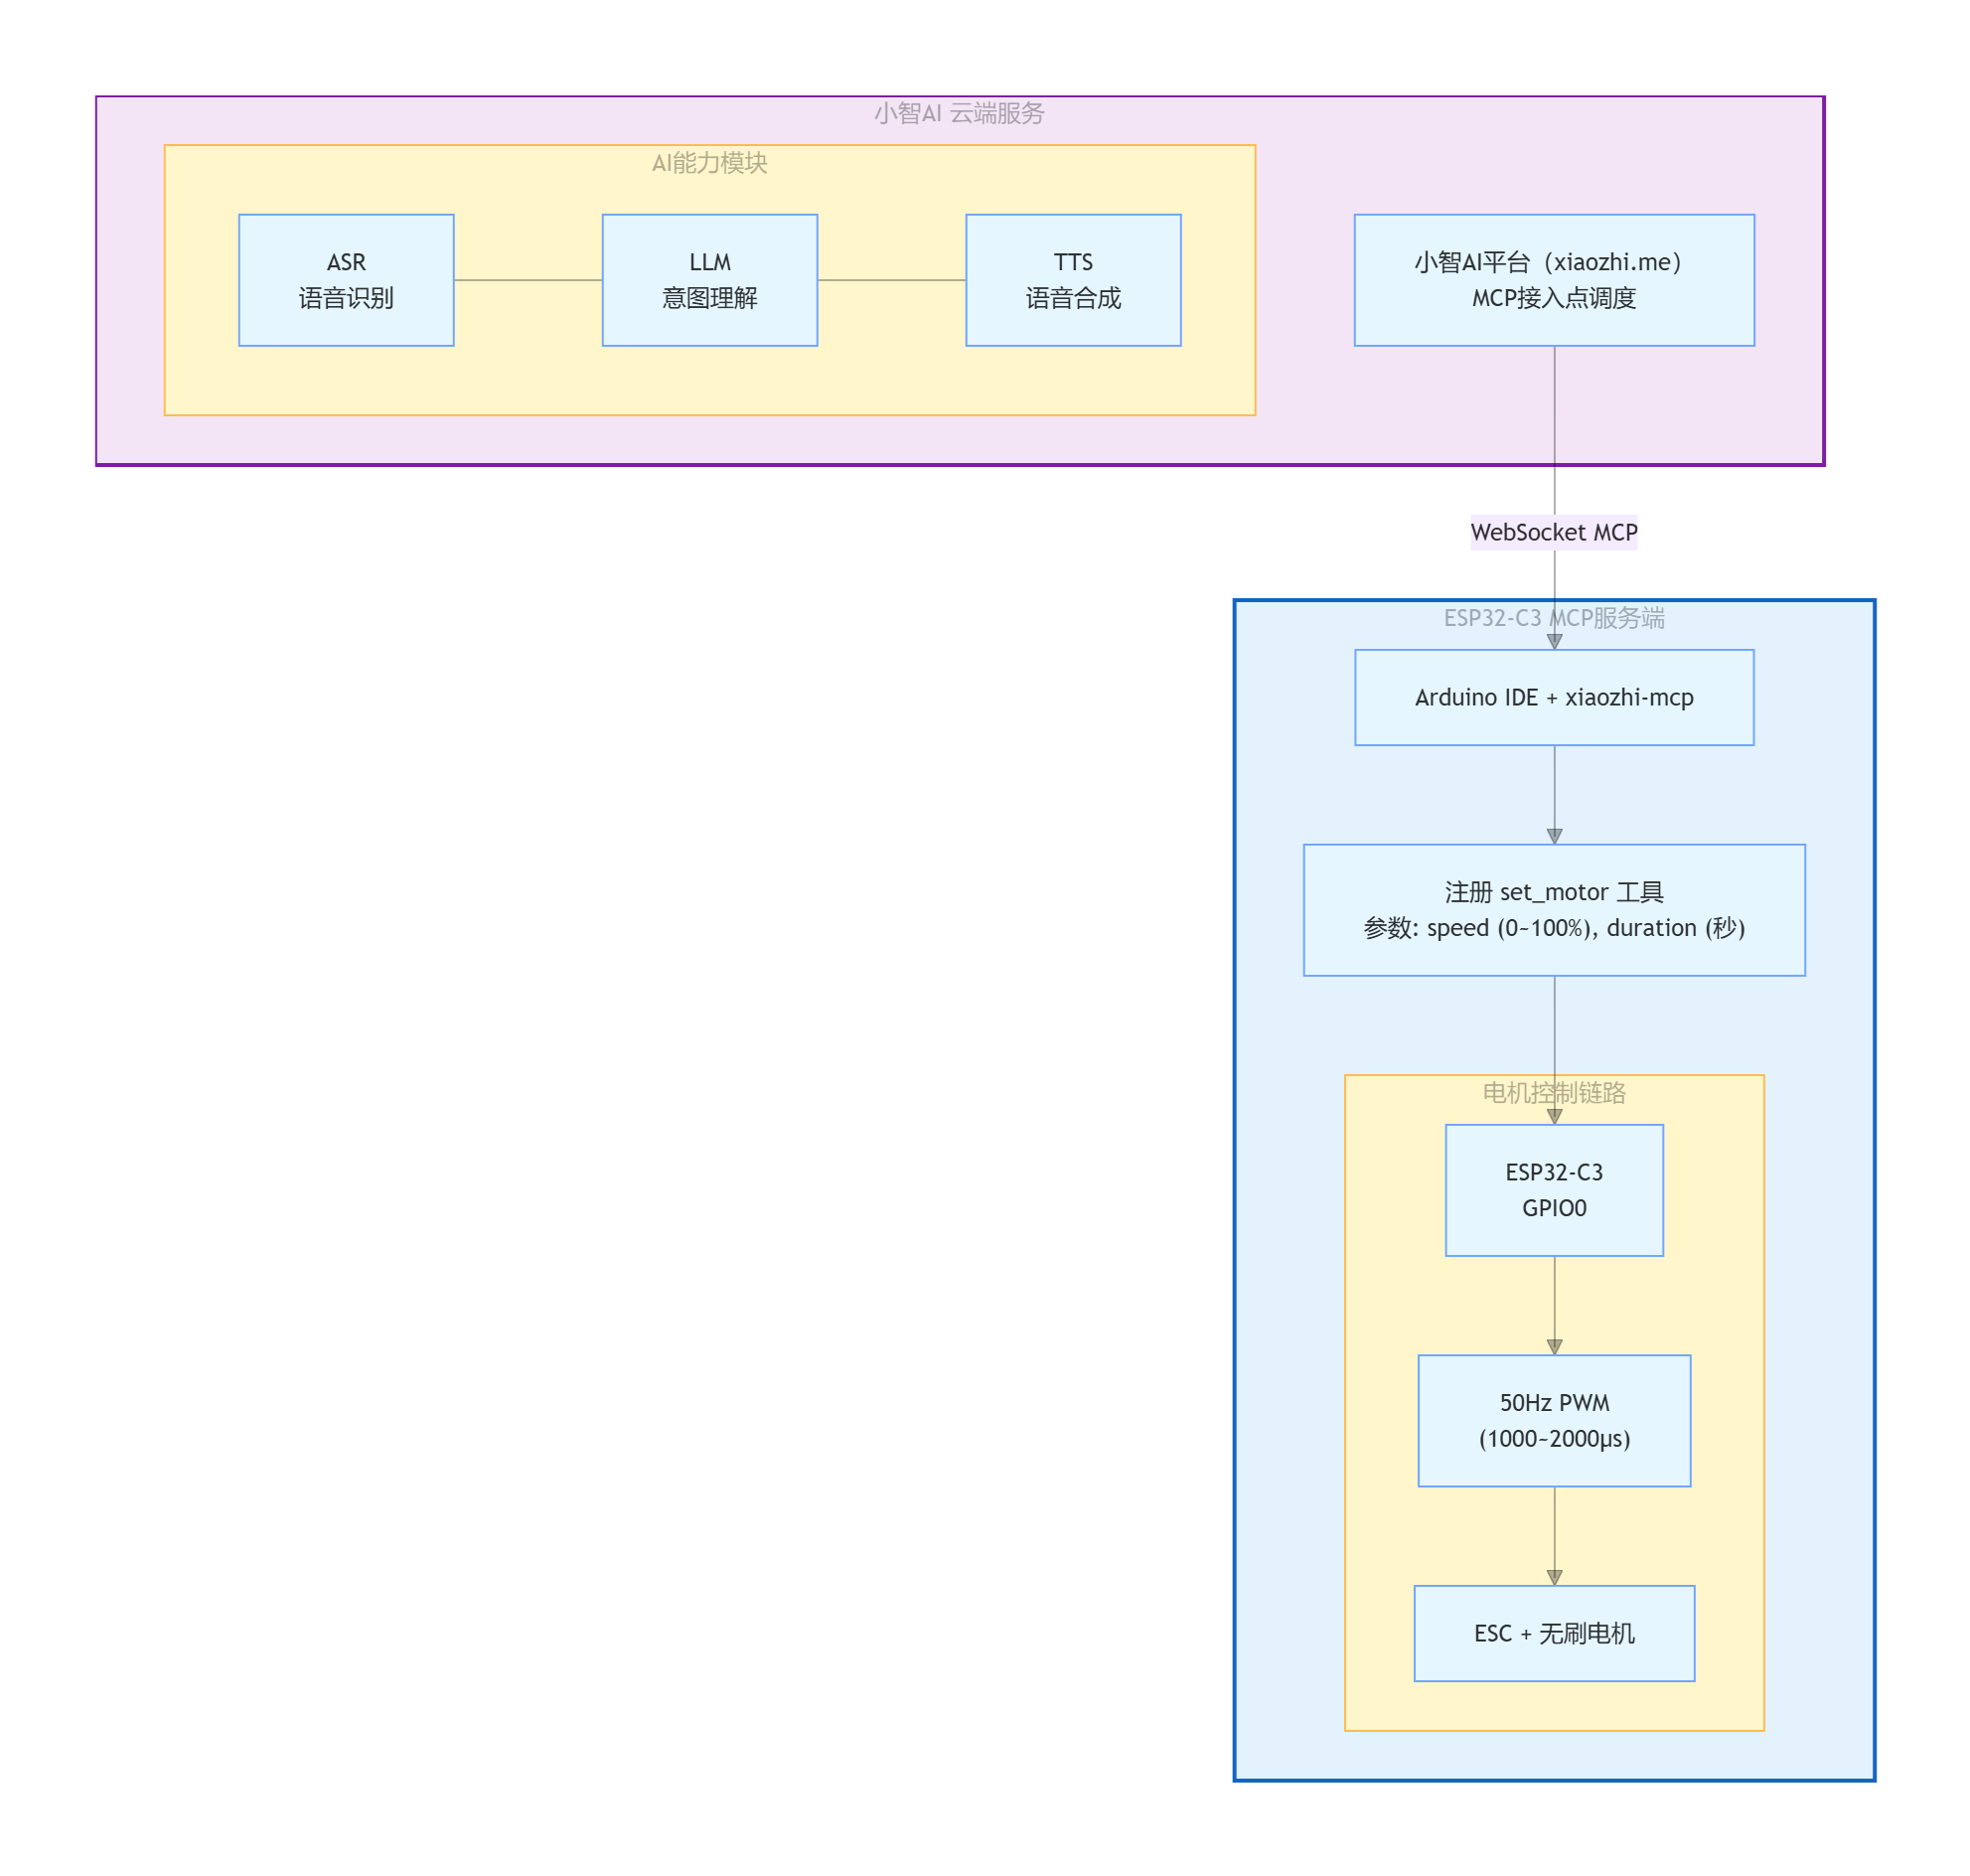
小智AI是一款开源的端侧语音助手项目,基于ESP32实现,支持唤醒词、语音识别、大模型对话等功能。它的代码结构清晰,硬件抽象层完善,非常适合作为智能硬件的“大脑”。而MCP(Model Context Protocol) 则让AI可以直接调用设备端的工具函数,实现语音控制硬件——小智AI利用Qwen/DeepSeek等大模型的AI能力,通过MCP协议实现多端控制。 这前我做了一个麦克纳姆轮小车项目,用两块掌控板分别跑小智AI和MCP服务,实现了语音控制小车全向移动。做完小车后我就在想:能不能用同样的思路,做一个更“暴力”的东西? 于是就有了这个项目:用ESP32-C3跑MCP服务,通过小智AI语音控制无刷电机。无刷电机响应快、转速高、噪音大,配上大尺寸扇叶,吹出来的风堪称“暴力”。夏天在桌前喊一声“风扇开到50%”,瞬间凉风扑面——这种体验比按遥控器爽太多了。 本文将分享完整的制作过程,从RGB灯测试开始,到最终实现语音控制无刷电机转速和运行时间。 【项目架构】 整个系统采用 “小智AI(云端大脑)+ MCP服务(本地执行)” 的分工架构: 工作流程: 【准备工作】
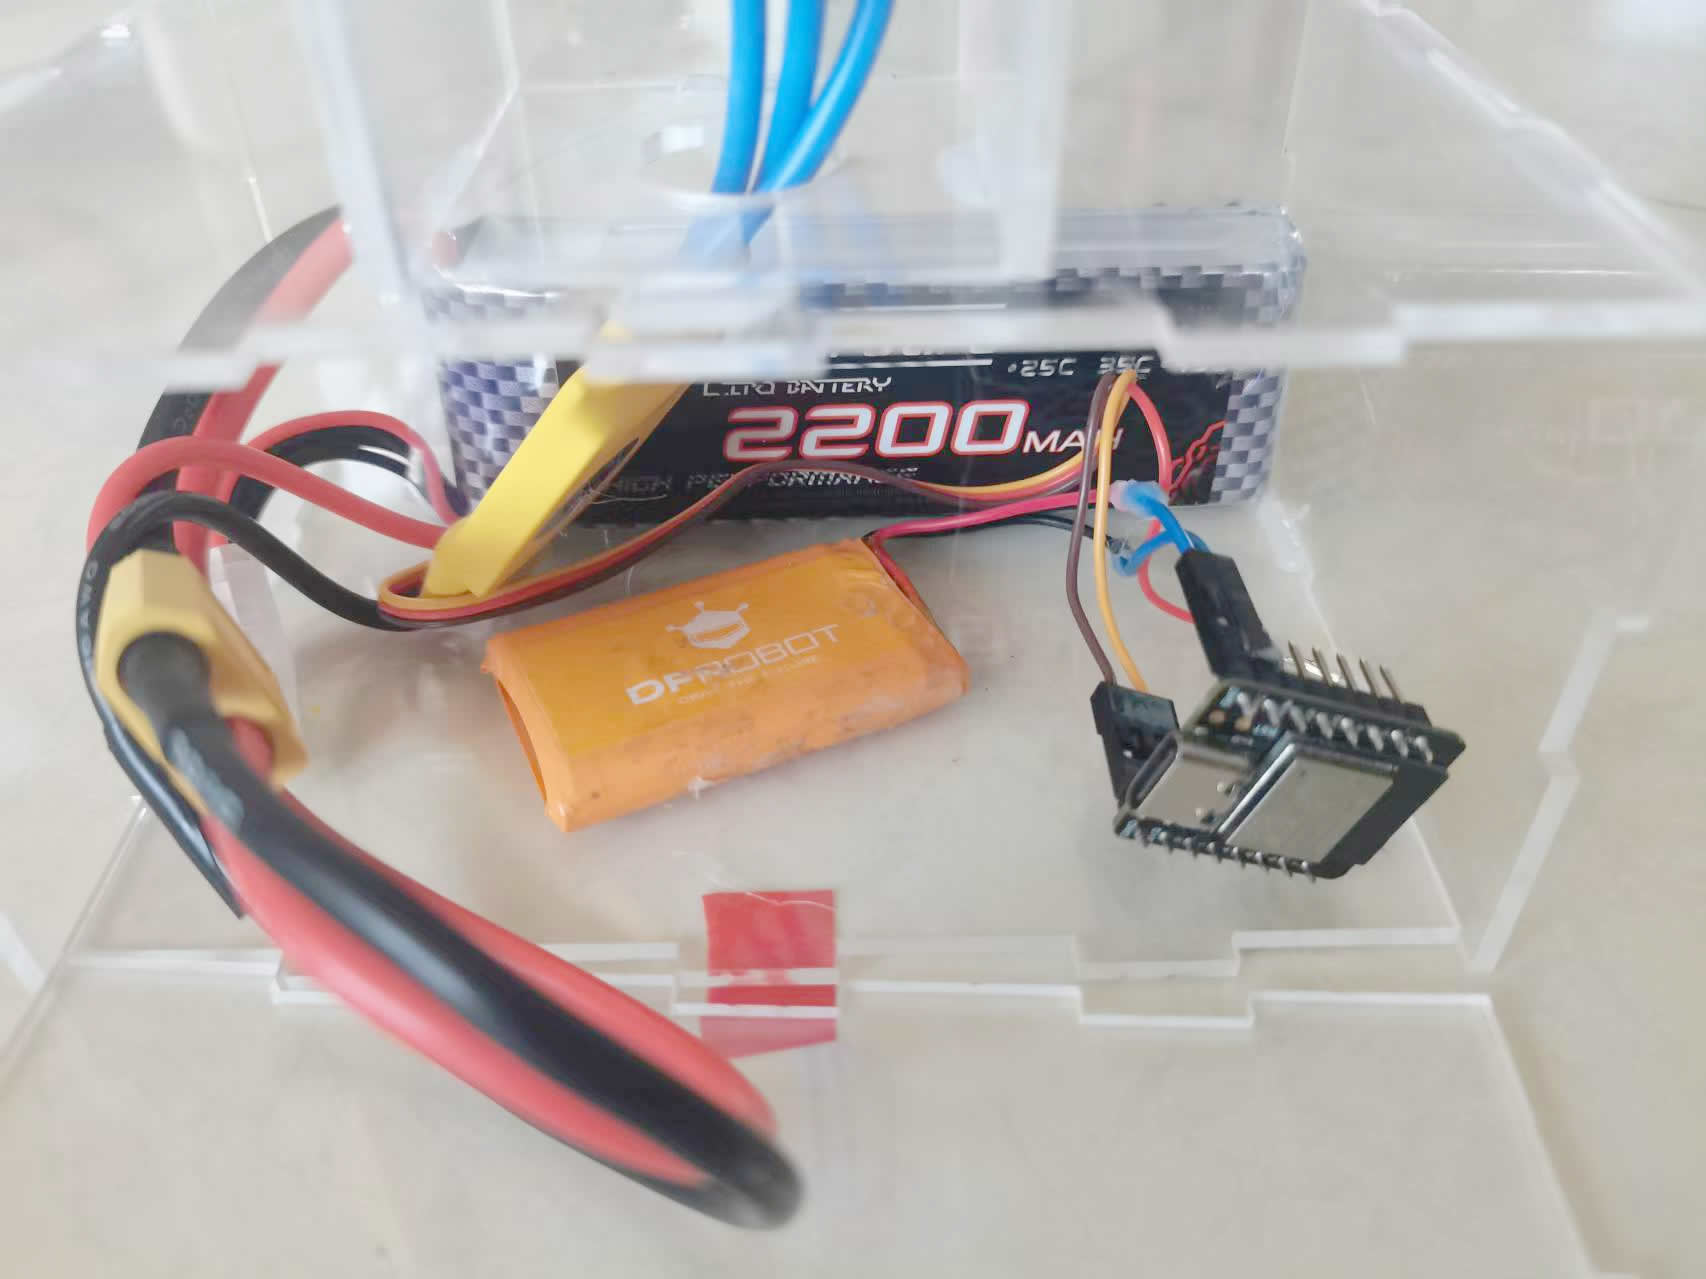
硬件清单
硬件 | 数量 | 说明 | | ESP32-C3开发板 | 1块 | 核心主控 | | 无刷电机(BLDC) | 1个 | 建议30A以上,KV值2000左右 | | 无刷电机电调(ESC) | 1个 | 30A以上,支持50Hz PWM信号 | | 7.4V~11.1V锂电池 | 1块 | 为ESC和电机供电 | | 大尺寸风扇扇叶 | 1个 | 适配电机轴径 | | RGB LED模块 | 1个 | 前期测试用(可选) | | 杜邦线、电源线 | 若干 | 连接与固定 |
安全提醒:无刷电机转速极高,测试时务必卸下扇叶,待程序调试完成、确认电机转向正确后再安装扇叶!
【硬件组装】
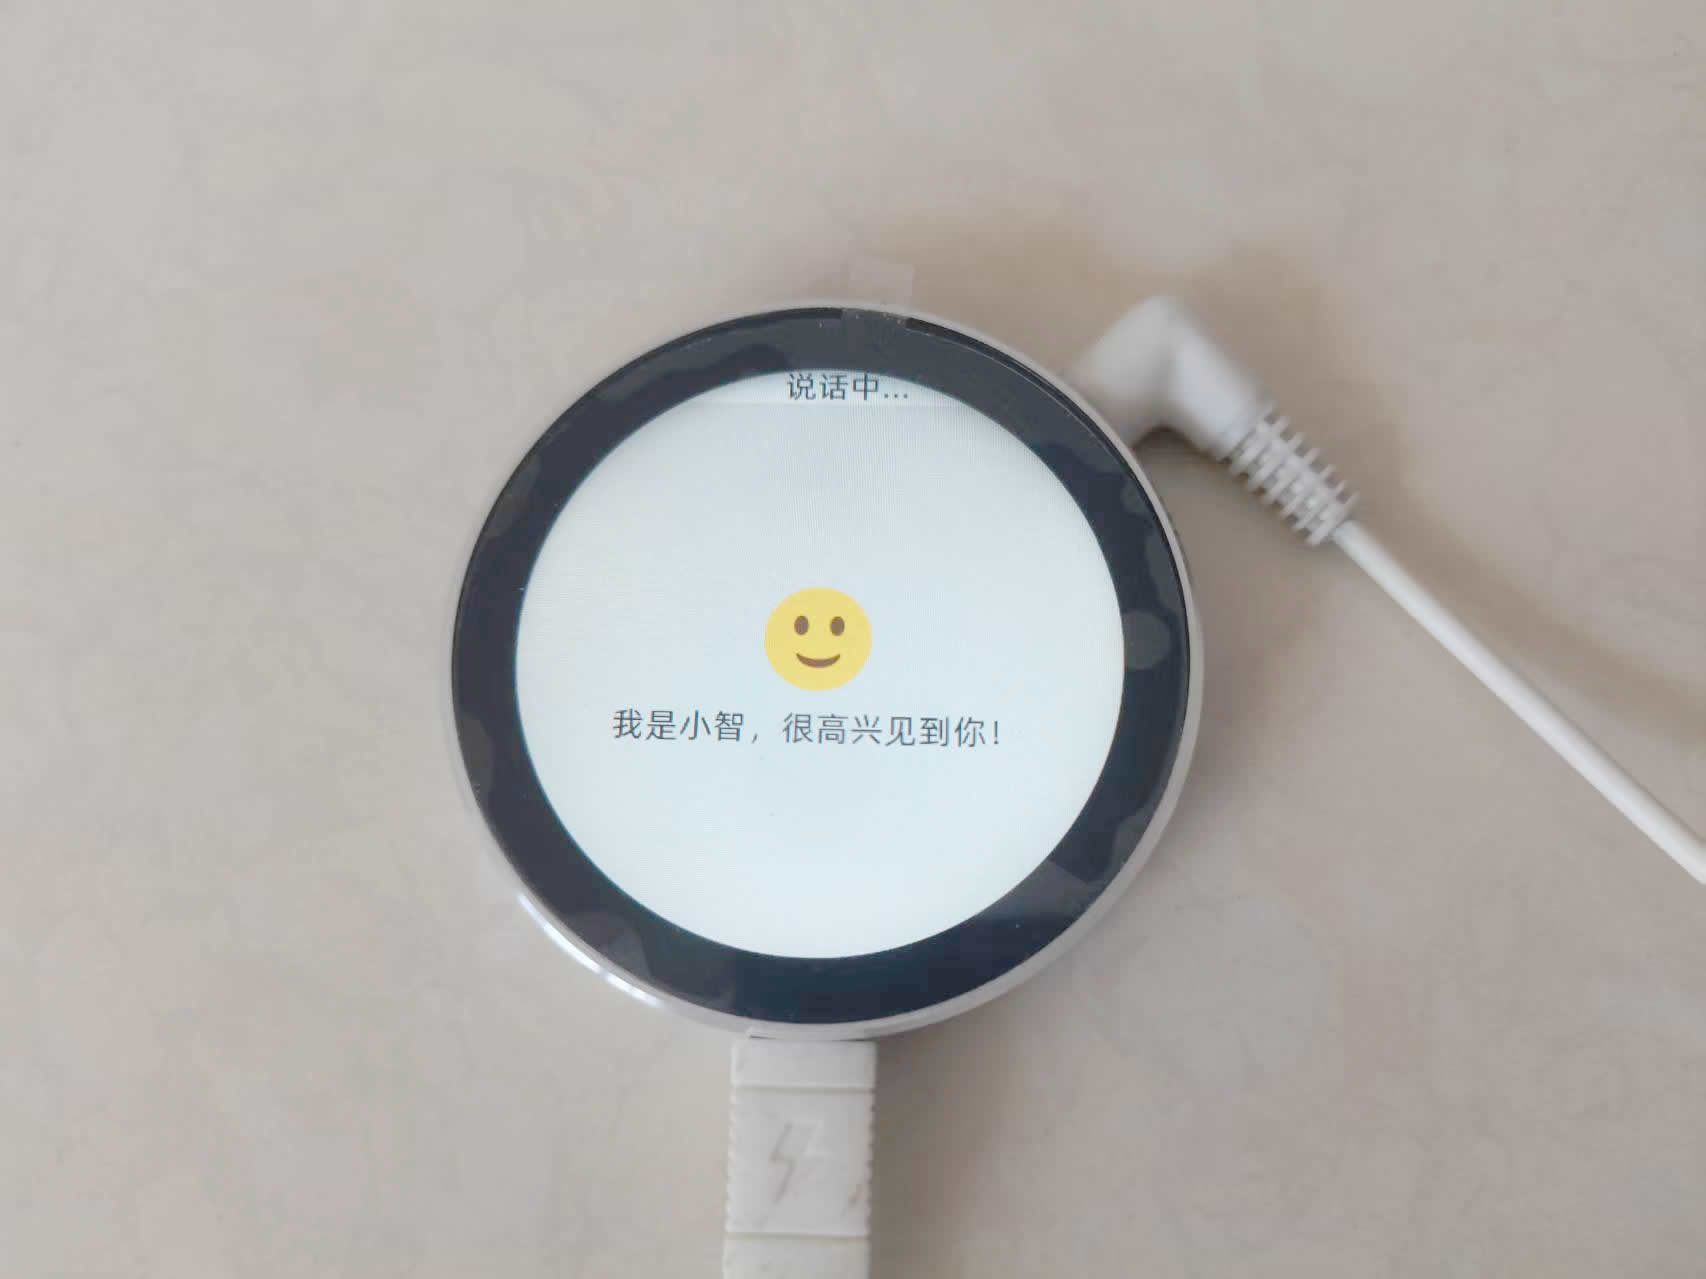
ESP32-S3圆形显示屏开发板,安装小智固件(https://www.dfrobot.com.cn/goods-4194.html)。
【软件环境】【第一步:前期测试——控制RGB灯】 在驱动无刷电机之前,我建议先用RGB灯做测试。原因很简单:RGB灯比电机安全得多,万一代码写错了,最多灯不亮,不会造成物理伤害。而且通过控制RGB灯,可以完整验证整个MCP通信链路是否畅通。 硬件连接 这里用的是DFRobot的“柔性RGB LCD多彩发光板”,本质上是一个由红、绿、蓝三色LED组成的共阳极发光板。引脚从上到下依次为:红、电源正极、绿、蓝。 VCC(共阳极)→ ESP32-C3的3.3V R(红) → GPIO0 G(绿) → GPIO1 B(蓝) → GPIO2
注意:该发光板极限正向电流为3-15mA【用户提供】。建议在红、绿、蓝三个控制引脚与ESP32之间各串联一个约200Ω的限流电阻,防止电流过大损坏引脚。 Arduino代码(RGB灯MCP控制)
- #include <Arduino.h>
- #include <WiFi.h>
- #include <WebSocketMCP.h>
- #include <ArduinoJson.h>
-
- /********** WiFi 配置 ***********/
- const char* WIFI_SSID = "你的WiFi名称";
- const char* WIFI_PASS = "你的WiFi密码";
-
- /********** MCP 服务器地址 ***********/
- const char* MCP_ENDPOINT = "wss://api.xiaozhi.me/mcp/?token=你的token";
-
- /********** RGB LED 引脚定义 ***********/
- #define RED_PIN 0
- #define GREEN_PIN 1
- #define BLUE_PIN 2
-
- /********** 全局变量 ***********/
- WebSocketMCP mcpClient;
- bool wifiConnected = false;
- bool mcpConnected = false;
-
- void setup() {
- Serial.begin(115200);
- Serial.println("\n[ESP32-C3 MCP RGB灯] 初始化...");
-
- pinMode(RED_PIN, OUTPUT);
- pinMode(GREEN_PIN, OUTPUT);
- pinMode(BLUE_PIN, OUTPUT);
-
- // 连接WiFi
- WiFi.begin(WIFI_SSID, WIFI_PASS);
- while (WiFi.status() != WL_CONNECTED) { delay(500); Serial.print("."); }
- wifiConnected = true;
- Serial.println("\nWiFi连接成功!");
-
- // 初始化MCP
- if (mcpClient.begin(MCP_ENDPOINT, onMcpConnectionChange)) {
- Serial.println("[MCP] 初始化成功");
- }
- }
-
- void loop() {
- mcpClient.loop();
- }
-
- void onMcpConnectionChange(bool connected) {
- mcpConnected = connected;
- if (connected) {
- Serial.println("[MCP] 已连接,注册工具...");
- registerMcpTools();
- }
- }
-
- void registerMcpTools() {
- mcpClient.registerTool(
- "set_rgb",
- "设置RGB LED颜色",
- R"({
- "type": "object",
- "properties": {
- "r": {"type": "integer", "minimum": 0, "maximum": 255},
- "g": {"type": "integer", "minimum": 0, "maximum": 255},
- "b": {"type": "integer", "minimum": 0, "maximum": 255}
- },
- "required": ["r", "g", "b"]
- })",
- [](const String& args) -> WebSocketMCP::ToolResponse {
- DynamicJsonDocument doc(256);
- deserializeJson(doc, args);
- int r = doc["r"].as<int>();
- int g = doc["g"].as<int>();
- int b = doc["b"].as<int>();
-
- // 共阳极:取反输出
- analogWrite(RED_PIN, 255 - r);
- analogWrite(GREEN_PIN, 255 - g);
- analogWrite(BLUE_PIN, 255 - b);
-
- return WebSocketMCP::ToolResponse(
- "{"success":true,"r":" + String(r) +
- ","g":" + String(g) + ","b":" + String(b) + "}"
- );
- }
- );
- }
通过这个测试,可以验证: WiFi连接是否正常 MCP接入点token是否有效 小智AI能否正确调用工具
测试成功后,再进入下一步——驱动无刷电机。 【第二步:无刷电机控制原理】
ESC(电子调速器)工作原理 无刷电机本身有三根相线,需要ESC(Electronic Speed Controller,电子调速器) 来驱动。ESC接收的是50Hz的PWM信号,脉宽范围通常为:
油门 | 脉宽 | 说明 | | 0% | 1000µs | 最小油门,电机停止 | | 50% | 1500µs | 中速 | | 100% | 2000µs | 最大油门 |
这个信号和舵机控制信号完全一样,所以我们可以用Servo库或LEDC外设来生成-。
为什么用LEDC而非Servo库? 在ESP32-C3上,我尝试过两种方案: 最终我选择了LEDC方案,信号精度更高,且不受库版本限制。 【第三步:ESP32-C3 MCP服务端代码】
硬件连接
ESP32-C3引脚 | 连接 | 说明 | | GPIO0 | ESC信号线 | PWM输出 | | GND | ESC地线 | 共地 | | 3.3V | (可选) | ESC逻辑电源 |
ESC供电:ESC的电源线(红/黑)连接锂电池(7.4V~11.1V),必须与ESP32-C3共地。 完整代码- #include <Arduino.h>
- #include <WiFi.h>
- #include <WebSocketMCP.h>
- #include <ArduinoJson.h>
-
- /********** WiFi 配置 ***********/
- const char* WIFI_SSID = "你的WiFi名称";
- const char* WIFI_PASS = "你的WiFi密码";
-
- /********** MCP 服务器地址 ***********/
- const char* MCP_ENDPOINT = "wss://api.xiaozhi.me/mcp/?token=你的token";
-
- /********** 无刷电机引脚定义 ***********/
- #define MOTOR_PIN 0
-
- /********** ESC 脉宽参数 ***********/
- #define MIN_PULSE 1000 // 0% 油门
- #define MAX_PULSE 2000 // 100% 油门
- #define PWM_PERIOD 20000 // 周期 20000μs
-
- /********** LEDC 参数 ***********/
- #define PWM_FREQ 50
- #define PWM_RES 10
-
- /********** 全局变量 ***********/
- WebSocketMCP mcpClient;
- bool wifiConnected = false, mcpConnected = false;
-
- bool motorRunning = false;
- unsigned long motorStartTime = 0;
- float motorDuration = 0;
- int targetSpeed = 0;
- int currentSpeed = 0;
- unsigned long lastStepTime = 0;
- const int STEP_DELAY = 20;
-
- /********** setup ***********/
- void setup() {
- Serial.begin(115200);
- Serial.println("\n[ESP32-C3 MCP 无刷电机] 初始化...");
-
- // 配置LEDC PWM
- ledcSetup(0, PWM_FREQ, PWM_RES);
- ledcAttachPin(MOTOR_PIN, 0);
-
- // ESC校准
- Serial.println("开始ESC校准...");
- calibrateESC();
- Serial.println("校准完成");
-
- // 连接WiFi
- WiFi.begin(WIFI_SSID, WIFI_PASS);
- while (WiFi.status() != WL_CONNECTED) { delay(500); Serial.print("."); }
- wifiConnected = true;
- Serial.println("\nWiFi连接成功!");
-
- // 初始化MCP
- if (mcpClient.begin(MCP_ENDPOINT, onMcpConnectionChange)) {
- Serial.println("[MCP] 初始化成功");
- }
- }
-
- /********** loop ***********/
- void loop() {
- mcpClient.loop();
- updateMotor();
-
- // 平滑调速
- if (motorRunning || targetSpeed != currentSpeed) {
- if (millis() - lastStepTime >= STEP_DELAY) {
- lastStepTime = millis();
- if (currentSpeed < targetSpeed) currentSpeed++;
- else if (currentSpeed > targetSpeed) currentSpeed--;
- setThrottle(currentSpeed);
- }
- }
- }
-
- /********** ESC校准 ***********/
- void calibrateESC() {
- int dutyMax = (MAX_PULSE * 1023) / PWM_PERIOD;
- ledcWrite(0, dutyMax);
- delay(2000);
- int dutyMin = (MIN_PULSE * 1023) / PWM_PERIOD;
- ledcWrite(0, dutyMin);
- delay(2000);
- ledcWrite(0, 0);
- }
-
- /********** MCP连接回调 ***********/
- void onMcpConnectionChange(bool connected) {
- mcpConnected = connected;
- if (connected) {
- Serial.println("[MCP] 已连接,注册工具...");
- registerMcpTools();
- }
- }
-
- /********** 注册MCP工具 ***********/
- void registerMcpTools() {
- mcpClient.registerTool(
- "set_motor",
- "控制无刷电机转速(0~100%)和运行时间(秒)",
- R"({
- "type": "object",
- "properties": {
- "speed": {"type": "integer", "minimum": 0, "maximum": 100},
- "duration": {"type": "number", "description": "运行时间(秒)"}
- },
- "required": ["speed"]
- })",
- [](const String& args) -> WebSocketMCP::ToolResponse {
- DynamicJsonDocument doc(256);
- deserializeJson(doc, args);
- int speed = doc["speed"].as<int>();
- speed = constrain(speed, 0, 100);
- float duration = doc.containsKey("duration") ? doc["duration"].as<float>() : 0;
-
- targetSpeed = speed;
- if (duration > 0) {
- motorRunning = true;
- motorStartTime = millis();
- motorDuration = duration;
- } else {
- motorRunning = false;
- }
-
- return WebSocketMCP::ToolResponse(
- "{"success":true,"speed":" + String(speed) +
- ","duration":" + String(duration) + "}"
- );
- }
- );
- }
-
- /********** 电机控制 ***********/
- void setThrottle(int percent) {
- percent = constrain(percent, 0, 100);
- int pulse = map(percent, 0, 100, MIN_PULSE, MAX_PULSE);
- pulse = constrain(pulse, MIN_PULSE, MAX_PULSE);
- int duty = (pulse * 1023) / PWM_PERIOD;
- duty = constrain(duty, 0, 1023);
- ledcWrite(0, duty);
- }
-
- void stopMotor() {
- targetSpeed = 0;
- currentSpeed = 0;
- setThrottle(0);
- motorRunning = false;
- }
-
- void updateMotor() {
- if (!motorRunning) return;
- if (millis() - motorStartTime >= (unsigned long)(motorDuration * 1000)) {
- stopMotor();
- Serial.println("[电机] 定时结束,自动停止");
- }
- }
代码关键点解读ESC校准:calibrateESC() 在上电时先发送最大油门(2000µs),再降至最小油门(1000µs),让ESC学习脉宽范围。这一步非常重要,否则电机可能在中间转速区间出现抖动。 平滑调速:targetSpeed 和 currentSpeed 分离,速度以每20ms步进1%的方式渐变,避免突变导致电机抖动。 定时停止:若指定了duration,超时后自动调用stopMotor()。 MCP工具注册:向小智AI平台注册set_motor工具,支持speed(0~100%)和duration(秒)两个参数。
【第四步:配网与设备绑定】 代码烧录成功后,需要让小智AI掌控板联网并绑定到平台。 配网步骤连接设备热点:掌控板启动后会发出名为 Xiaozhi-XXXX 的WiFi热点(无密码),用手机或电脑连接它。 配置Wi-Fi:在页面中选择你家里的2.4G Wi-Fi网络,输入密码,点击“连接”。 等待重启:配置成功后,设备会显示“登录成功”并自动重启,之后会自动连接刚才配置的Wi-Fi。
添加设备到小智AI平台获取验证码:设备联网后,屏幕会显示一个6位数字验证码。 创建智能体(如已创建可跳过):进入“智能体”页面,点击“新建智能体”并命名。 添加设备:点击“添加设备”,输入设备上显示的6位验证码,协议选择“开源版”。 完成绑定:点击“开始使用”,设备即绑定成功。
【第五步:语音指令测试】 绑定成功后,就可以通过语音控制无刷电机了。 常用指令示例
语音指令 | 实际效果 | | “风扇开到50%,运行5秒” | 50%油门运转5秒后自动停止 | | “风扇30%” | 30%油门持续运转 | | “关闭风扇” | 停止电机 |
MCP工具调用格式 小智AI后端会生成如下JSON调用: - {
- "tool": "set_motor",
- "arguments": {
- "speed": 50,
- "duration": 5
- }
- }
【项目总结】 本项目实现了 ESP32-C3 + 小智AI + MCP 的语音控制无刷电机风扇: 技术亮点: - 使用MCP协议实现AI与硬件的标准化通信-
LEDC直接生成PWM信号,无需依赖Servo库 ESC校准 + 平滑调速,保证电机稳定运行 RGB灯先期测试,降低调试风险
|