
树莓派针脚定义
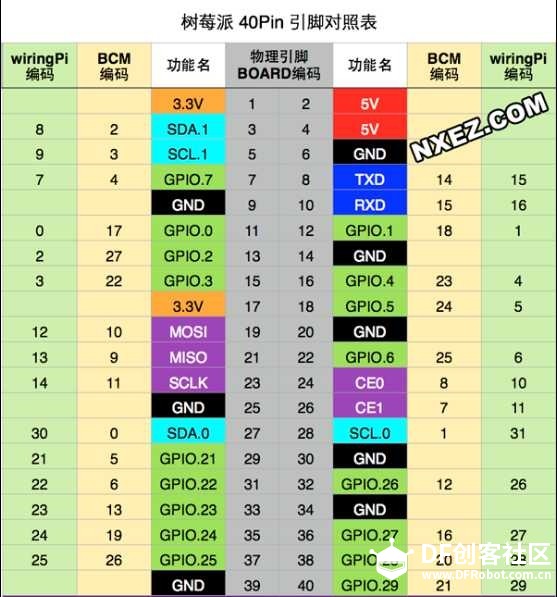
OLED各针脚定义以及联线
GND——rasp gnd
VCC ——rasp vcc(3.3/5V)
D0(SCLK) ——rasp SCLK (BCM:11/BOARD:23)
D1(MOSI )——rasp MOSI(BCM:10/BOARD:19)
RST——rasp GPIO(BCM:17/BOARD:11)
DC(数据与命令选择)——rasp (BCM:27/BOARD:13)
CS(SPI片选)——rasp (BCM:8/BOARD:24)
重要的部分要开始啦~~~~ATTENTION!!!!!!!!!!
1.打开树莓派的SPI。
树莓派的SPI默认是关闭的(这一点和I2C类似),打开方法有多种,在这仅介绍一种
vi /etc/modprobe.d/raspi-blacklist.conf
修改为如图

注释掉两行表示启用SPI/I2C
- # blacklist spi and i2c by default (many users don't need them)
-
- #blacklist spi-bcm2708
- #blacklist i2c-bcm2708
reboot 以下
复制代码
你会看到spidev0.0以及spidev0.1

2.库
- sudo apt-get update
- sudo apt-get install build-essential python-dev python-pip
- sudo pip install RPi.GPIO
- sudo apt-get install python-imaging python-smbus
- sudo apt-get install git
安装完成之后我们就可以用git 啦~~在此要感谢@孙毅带我入git的坑~~O(∩_∩)O哈哈~
- git clone https://github.com/adafruit/Adafruit_Python_SSD1306.git
- cd Adafruit_Python_SSD1306
- sudo python setup.py install
到这就差不多了,来一个python的程序
- #!/usr/bin/python/
- # coding: utf-8
- import time
- import Adafruit_GPIO.SPI as SPI
- import Adafruit_SSD1306
- import Image
- import ImageDraw
- import ImageFont
-
- # Raspberry Pi pin configuration:
- RST = 17
- # Note the following are only used with SPI:
- DC = 27
- SPI_PORT = 0
- SPI_DEVICE = 0
-
- # 128x64 display with hardware SPI:
- disp = Adafruit_SSD1306.SSD1306_128_64(rst=RST, dc=DC, spi=SPI.SpiDev(SPI_PORT, SPI_DEVICE, max_speed_hz=8000000))
-
- # Initialize library.
- disp.begin()
-
- # Clear display.
- disp.clear()
- disp.display()
-
- # Create blank image for drawing.
- # Make sure to create image with mode '1' for 1-bit color.
- width = disp.width
- height = disp.height
- image = Image.new('1', (width, height))
-
- # Get drawing object to draw on image.
- draw = ImageDraw.Draw(image)
-
- # Draw a black filled box to clear the image.
- draw.rectangle((0,0,width,height), outline=0, fill=0)
-
- # Draw some shapes.
- # First define some constants to allow easy resizing of shapes.
- padding = 1
- top = padding
- x = padding
- # Load default font.
- font = ImageFont.load_default()
-
- # Alternatively load a TTF font.
- # Some other nice fonts to try: http://www.dafont.com/bitmap.php
- #font = ImageFont.truetype('Minecraftia.ttf', 8)
-
- # Write two lines of text.
- draw.text((x, top), 'This is first line', font=font, fill=255)
- draw.text((x, top+10), 'This is second line', font=font, fill=255)
- draw.text((x, top+20), 'This is third line', font=font, fill=255)
- draw.text((x, top+30), 'This is fourth line', font=font, fill=255)
- draw.text((x, top+40), 'This is fifth line', font=font, fill=255)
- draw.text((x, top+50), 'This is last line', font=font, fill=255)
-
- # Display image.
- disp.image(image)
- disp.display()
| 


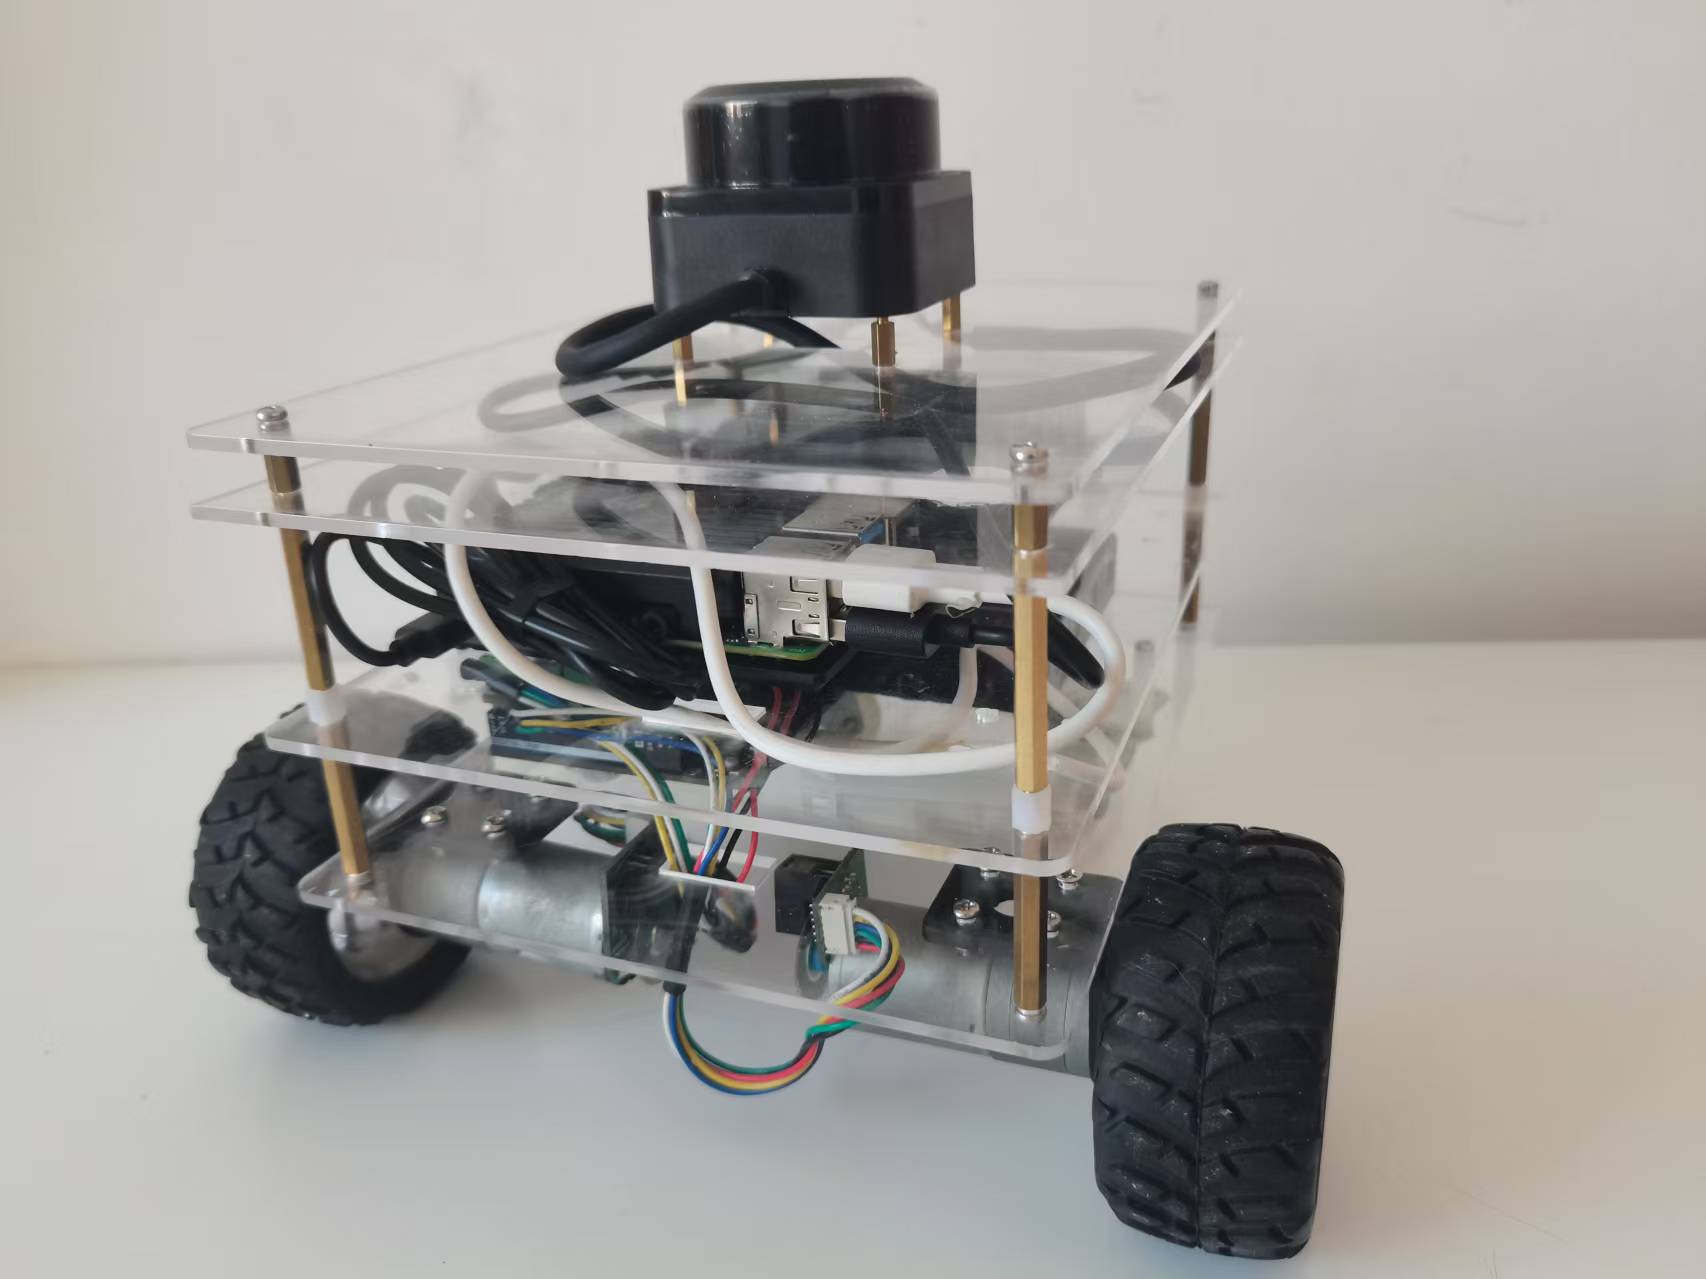
这块可以用么啊?
驱动芯片估计不一样
用什么“软体”?