|
18515| 4
|
2016Intel竞赛作品“向日葵式太阳能自动追踪系统” 分享 |
|
本帖最后由 Apollo 于 2016-11-26 23:12 编辑 为期两天的2016Intel物联网创客竞赛顺利落下了帷幕,作为参赛者中的一份子我和我的队员们都倍感荣幸和骄傲。在短短的48小时里,我们历经了自由组队、头脑风暴、最终实现了我们的产品原型:一套“向日葵式太阳能自动追踪系统”。 见下图:  正在调试中的“向日葵” 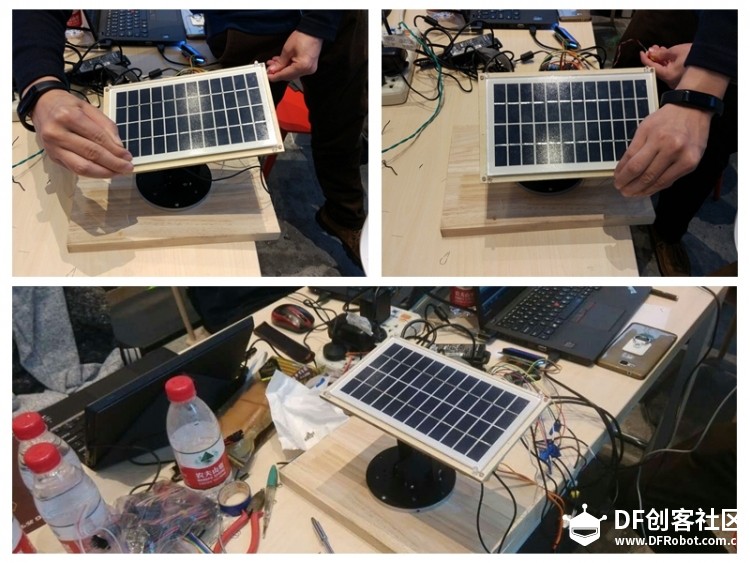 向左走,向右走,立正! 制作这套系统的本意是为了更有效率的利用太阳能,这种即清洁又环保但是转换效率不高的新能源。通过这套“向日葵式太阳能自动追踪系统”装置的设想、试验、实验制作来实现太阳能板始终面对太阳的最佳位置,以获得最大的光照强度,增加对太阳能量的输出效率,并同时收集数据上传包括光照强度,阳光方位、本地地理位置以及环境的实时数据传到网络平台,也可以下载实时气象突发数据(如冰雹、风暴)来及时控制太阳能板的角度,对附近或其他区域的太阳能发电厂进行监控。实现双向的互动和操控,最终提高太阳能的使用效率获得以点带面的大数据控制效果。 示意图: 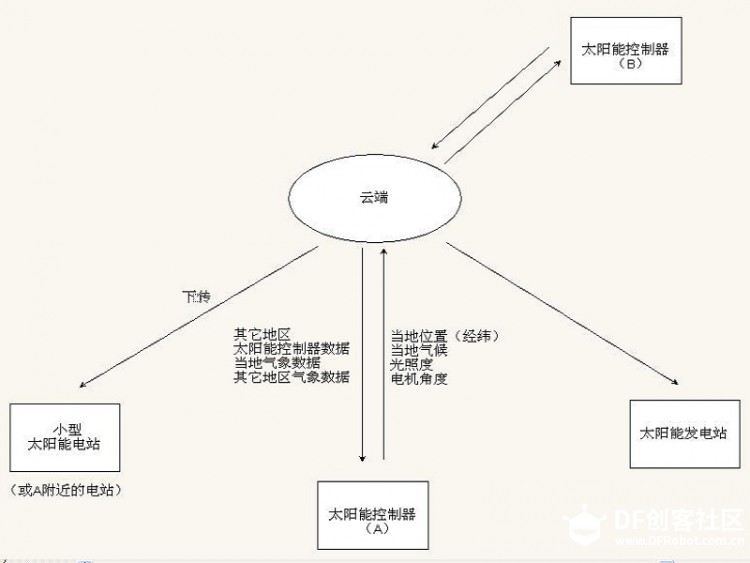 本着创客们:追求极致,乐于分享的理念,我们最终决定把整个制作过程一步一步拿出来与有兴趣的朋友一起分享!制作“向日葵”所需的材料会用到下面这些材料: 1.二个舵机与二个龙门架 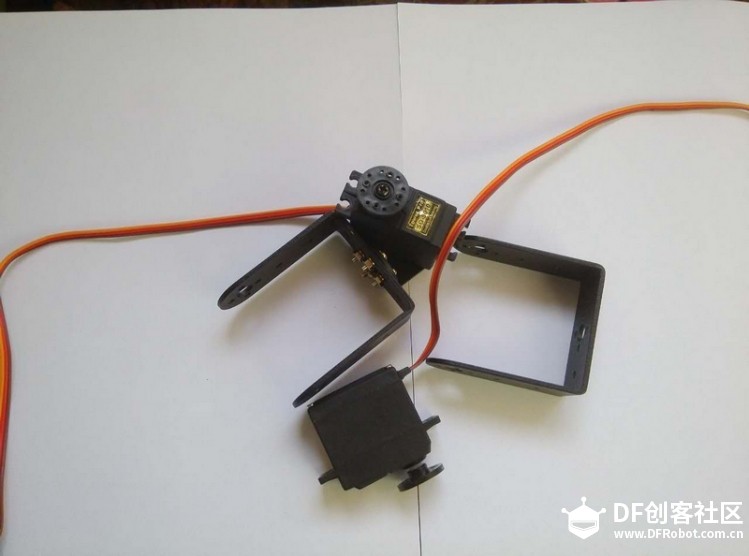 2.lcd显示器一个,光敏传感器四个,控制开关一个 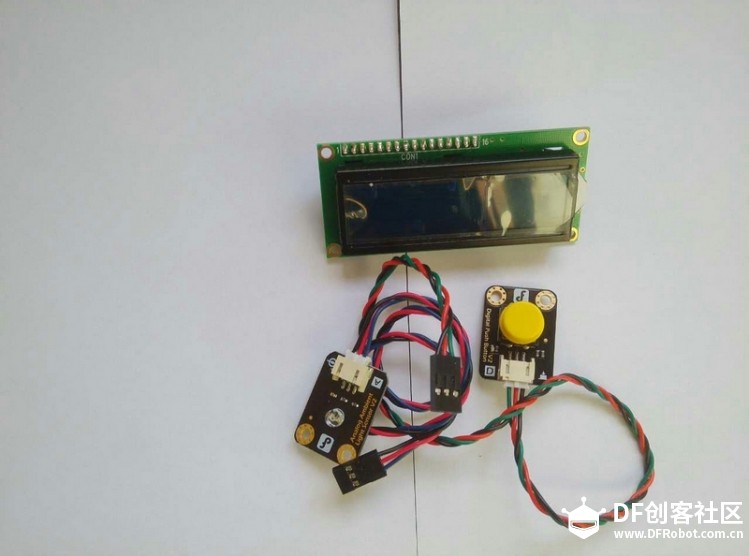 3.光敏传感器我们选择自制:四个光敏电阻(或光敏二极管),四个电阻 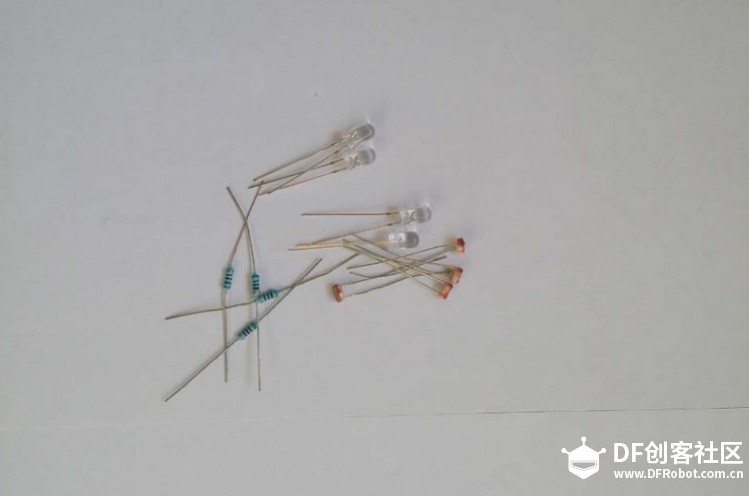 4.伏光电池板一块 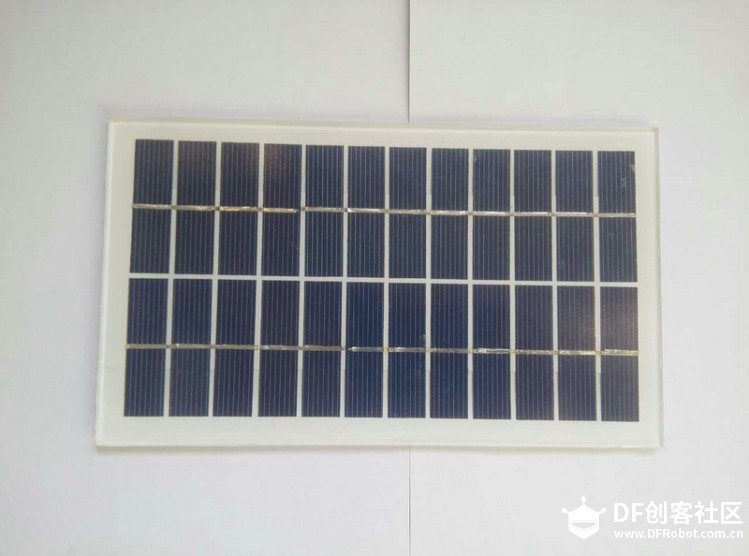 5.Edison与扩展板各一块(电线与杜邦线若干) 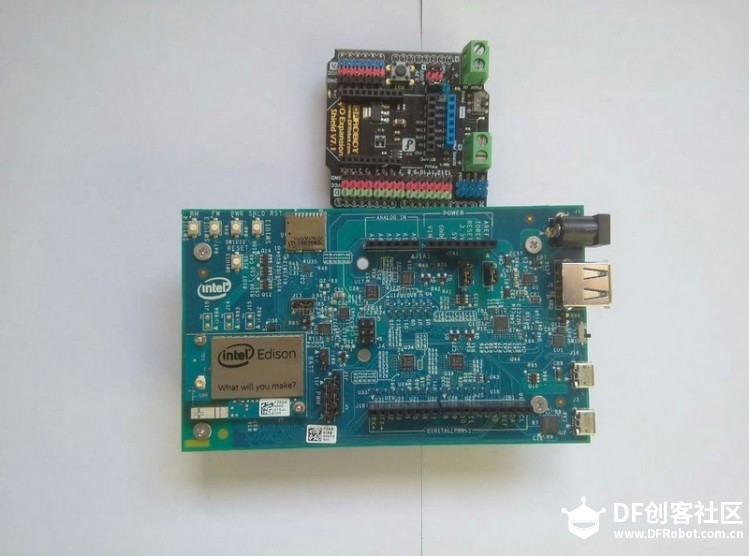 二.组装
1.二个舵机与龙门架的安装 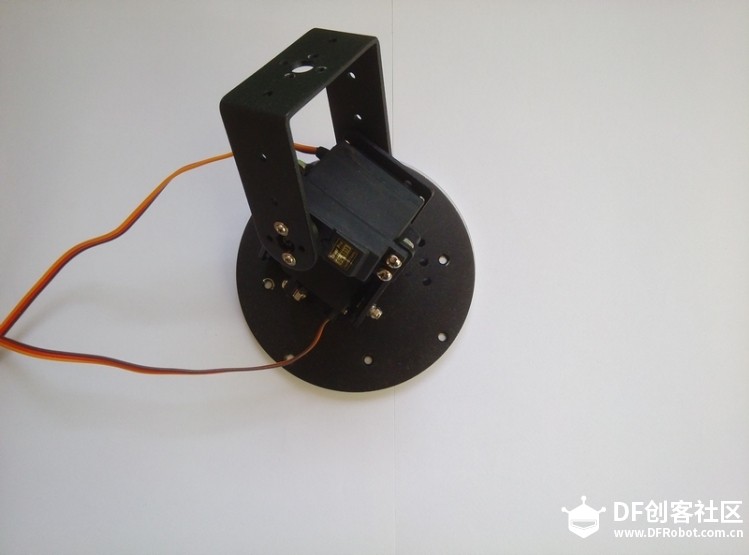 2.光敏二极管与电阻的焊接 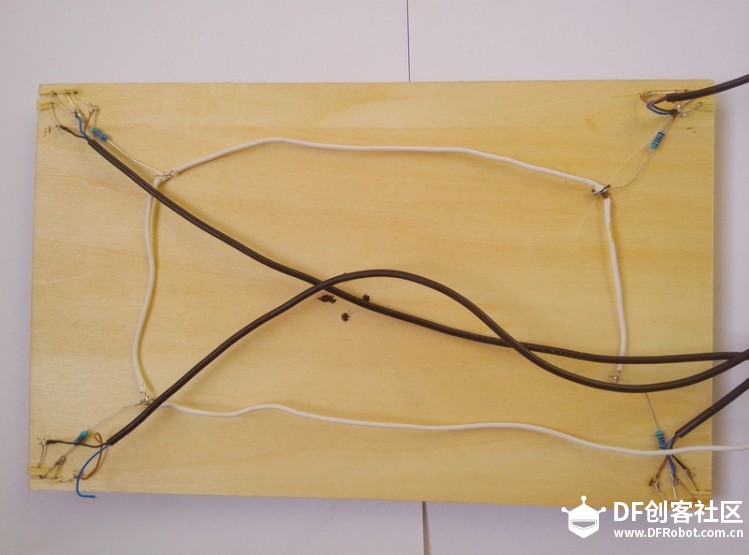 三.物理安装完成 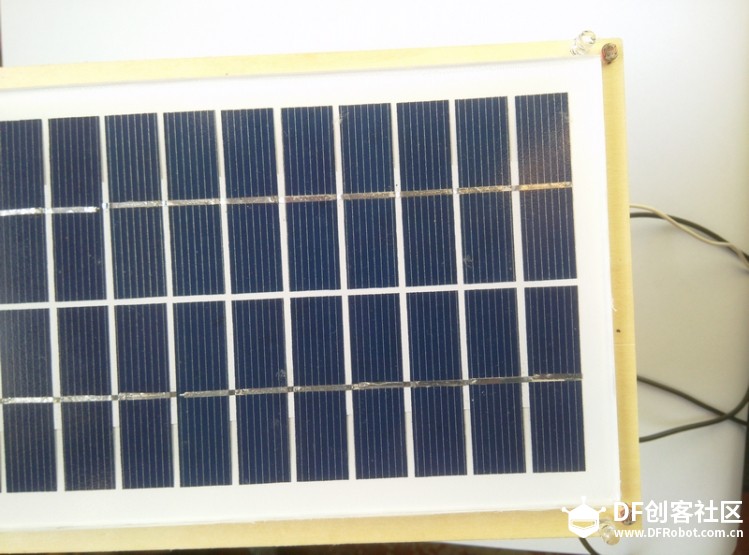 把各个结构都安装到位并拧紧螺丝,最后装上伏光板 四.电路的连接、调试 1.扩展板与Edison连接 2.四个光敏传感器分别连接模拟口0-3 3.LCD接液晶屏扩展板端口 4.舵机连接数字口6与9 5.上传协议:MQTT http://115.159.187.371 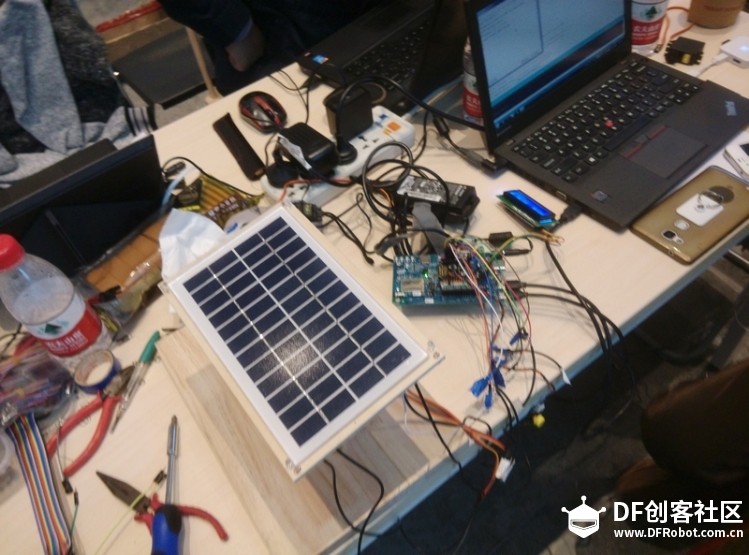 比赛现场调试图 五.源程序: 1.自动控制与上传程序: #include <Servo.h> #include <math.h> //一些库函数 #include <SPI.h> #include <WiFi.h> #include <Wire.h> #include <LiquidCrystal_I2C.h> #include <PubSubClient.h> char ssid[] = "Innospace-office"; // your network SSID(name) char pass[] = "inn0space"; // your network password (use for WPA, oruse as key for WEP) #define TemperatureID "SunPos01"// your can customized yourself to be different from others. #define HumidityID "SunPos02" //your can customized yourself to be different from others. #define IoTUserName "edison" // your user name on http://115.159.187.37 #define IoTPassword "edison" // your password on http://115.159.187.37 int TemperaturePin=A1; //设置LM35线性温度传感器的引脚 int temperature; //用于存储温度数据 int temperatureValue; //用于存储温度的模拟量 int HumidityPin=A2; //Set the pin number of the SoilMoisture Sensor int humidityValue; //由于存储湿度的模拟量 const int buttonPin = 2; // 定义按键引脚 Servo Servo01;//up&down Servo Servo02;//left&right int rain = 0; intval1=0,val2=0,val3=0,val4=0; int sum12,sum34,sum14,sum23; int comnub=20;//差值 int TimeCheck=0;//用来存储按键状态值 int pos01=90,pos02=90;//初始角度 int status = WL_IDLE_STATUS; LiquidCrystal_I2C lcd(0x20,16,2); // set the LCD address to 0x20 for a 16 chars and 2 line display WiFiClient wifiClient; // Initialize theWifi client library IPAddress server(115,159,187,37); // serveraddress: unsigned long lastConnectionTime = 0; // last time you connected to theserver, in milliseconds const unsigned long postingInterval =1000; // delay between updates, inmilliseconds void callback(char* topic, byte* payload,unsigned int length) { //handle message arrived } PubSubClient client(server, 1883, callback,wifiClient); void ready() { Servo01.write(pos01); Servo02.write(pos02); } void ReadLight() { val1=analogRead(0); //传感器数值读入 val2=analogRead(1); val3=analogRead(2); val4=analogRead(3); sum12=val1+val2;//边求和 sum34=val3+val4; sum14=val1+val4; sum23=val2+val3; Serial.print(sum12); Serial.print(";"); Serial.print(sum34); Serial.print(";"); Serial.print(sum14); Serial.print(";"); Serial.println(sum23); } void printWifiStatus() { //print the SSID of the network you're attached to: Serial.print("SSID: "); Serial.println(WiFi.SSID()); //print your WiFi shield's IP address: IPAddress ip = WiFi.localIP(); Serial.print("IP Address: "); Serial.println(ip); //print the received signal strength: long rssi = WiFi.RSSI(); Serial.print("signal strength (RSSI):"); Serial.print(rssi); Serial.println(" dBm"); } void setup() { Serial.begin(9600); Servo01.attach(6); Servo02.attach(9); pinMode(buttonPin, INPUT); //初始化按键引脚为输入状态 ready; Serial.print("pos01:"); Serial.print(pos01); Serial.print(";"); Serial.print("pos02:"); Serial.println(pos02); Servo01.write(pos01); Servo02.write(pos02); delay(1000); lcd.init(); // initialize the lcd lcd.backlight(); lcd.setCursor(0, 0); //光标移到第一行,第一个字符 lcd.print("Wifi Connecting."); //check for the presence of the shield: if(WiFi.status() == WL_NO_SHIELD) { Serial.println("WiFi shield not present"); // don't continue: while(true); } while ( status != WL_CONNECTED) { Serial.print("Attempting to connect to SSID: "); Serial.println(ssid); // Connect to WPA/WPA2 network. Change this line if using open or WEPnetwork: status = WiFi.begin(ssid, pass); // wait 10 seconds for connection: delay(10000); } //you're connected now, so print out the status: printWifiStatus(); lcd.setCursor(0, 0); //光标移到第一行,第一个字符 lcd.print(" "); //clear the first line } void loop() { static unsigned long readSensorTimer=0; if(millis()-readSensorTimer>300) { readSensorTimer=millis(); temperatureValue=analogRead(TemperaturePin); //读取温度的模拟量 humidityValue=analogRead(HumidityPin); //读取湿度的模拟量 temperature=(500 * temperatureValue) /1024; //通过模拟量计算出实际温度 //LCD显示当前温度 lcd.setCursor(0, 0); //光标移到第一行,第一个字符 lcd.print("P1:"); lcd.print(pos01); // lcd.print("C"); lcd.print(" "); //LCD现实当前湿度 lcd.setCursor(8, 0); //光标移动到第一行,第七个字符 lcd.print("P2:"); // lcd.print(humidityValue); lcd.print(pos02); lcd.print(" "); //显示当前土壤情况 /*lcd.setCursor(0, 1); //光标移动到第二行,第一个字符 if (humidityValue<300) { lcd.print("Soil: Dry "); } else if (humidityValue>=300 && humidityValue<700){ lcd.print("Soil: Humid"); } else{ lcd.print("Soil: Water"); }*/ } //if you're not connected, and ten seconds have passed since if(millis() - lastConnectionTime > postingInterval) { lastConnectionTime = millis(); if (client.connect("", IoTUserName, IoTPassword)) { char bufferChar[20]; String temperatureString(pos01); temperatureString.toCharArray(bufferChar, 20); client.publish("event/" IoTUserName "/"TemperatureID,bufferChar); String humidityString(pos02); humidityString.toCharArray(bufferChar, 20); client.publish("event/" IoTUserName "/"HumidityID,bufferChar); } TimeCheck = digitalRead(buttonPin); //读取按键引脚的状态值 // 检测按键是否按下,如果是的话,按键状态值为HIGH Serial.println(TimeCheck); if (TimeCheck) //判断时间(6:00-17:00), { ReadLight(); if (abs(sum12-sum34)>=comnub) { if(sum12>sum34){ pos01=pos01+10; //舵机转到光源所在方向 if (pos01>=135){ pos01=135; } } else{ pos01=pos01-10; //舵机1转到光源所在方向 if (pos01<=45){ pos01=45; } } } if (abs(sum14-sum23)>=comnub) { if(sum14>sum23){ pos02=pos02+10; //舵机2转到光源所在方向 if (pos02>=135){ pos02=135; } } else { pos02=pos02-10; //舵机转到光源所在方向 if (pos02<=45){ pos02=45; } } } Serial.print("pos01:"); Serial.print(pos01); Serial.print(";"); Serial.print("pos02:"); Serial.println(pos02); Servo01.write(pos01); Servo02.write(pos02); delay(5000); } } 注:舵机数据用温度与湿度代替。 2.网络传送程序: #Written by Cascode.Huang #Python version: python2.7.x #2016-10-20 #encoding:UTF-8 import requests import json import csv import sys import threading import time import os import datetime import re from collections import OrderedDict #服务器地址和json数据名称 uri = 'Write Your Cloud URL Here/xxx.json' #上传数据到服务器(测试上传用) def PostData(url): data ='''{"time": "10", "solar_degree":"100","lightness":"1000"}''' requests.post(url,data,verify=False) #关闭SSL认证 #从云端下载数据 def GetData(url,f): data1=requests.get(url,verify=False) #获得Response对象data1,数据格式为json data2=json.loads(data1.text,object_pairs_hook=OrderedDict)#将data1转换为按顺序排列的字典型数据类型 for (k,v) in data2.items(): flag=0 #print "item[%s]="%k,v for(k2,v2) in v.items(): print "item[%s]="%k2,v2 flag=flag+1 if flag<2: f.write('%s,'%v2) else: v3=int(v2) f.write('%d,'%v3) f.write('\n') #定义Test类 class Test(threading.Thread): def __init__(self): pass def test(self): print '----------run test!----------' def run(self): while True: self.test() #每隔4s上传一次数据 print "//////////" print "post data to cloud\n" print time.strftime('%Y-%m-%d %H:%M:%S') PostData(uri) time.sleep(4) #每隔2s下载一次数据,并将数据处理后存入指定位置的.csv文件中。 print "//////////" print "download data from cloud\n" str_time=str(datetime.datetime.now()) nowtime=re.sub(r'[^0-9]','',str_time) #nowtime用于生成当前时间戳,并写入当前记录数据的log文件中。 filename='E://Solar/Solar_Client/SolarSystem_DataLog_'+nowtime+'.csv' file1=open(filename,'wb') file1.write('%s,%s,%s\n'%('lightness','degree','time')) GetData(uri,file1) file1.close() time.sleep(2) #生成Test对象 a=Test() #运行对象的run方法,开始每隔4s上传一次数据,每隔2s下载一次数据 a.run() 至此,我们的分享到此结束了,虽然比赛已经完美落幕,但是我却意犹未尽,仿佛又回到比赛现场,和团队的四个兄弟,我们一起大声的说着:大家好!我们是第22组,蘑菇云一米阳光团队,请大家支持我们!O(∩_∩)O哈哈哈~! 第22组,蘑菇云一米阳光团队,@luna |
|
太棒了,这套装置可以根据光线的角度自动调节太阳能板的方向,想法很赞; 唯一担心的问题就是:程序是否考虑到:每个季节的日照角度差异。 蘑菇云战友 |
 沪公网安备31011502402448
© 2013-2026 Comsenz Inc. Powered by Discuz! X3.4 Licensed