|
4920| 0
|
[讨论交流] 【IoT套件测评】Gravity:阿里云IoT 之智能灯光控制 |
|
上一篇介绍了阿里云IoT软件篇:Gravity:阿里云IoT 之温度控制 接下来分享物联篇:IGravity:阿里云IoT 之智能灯光控制  一、利用物联网控制灯光思路框架: 1、灯设备与移动设备建立网络通信连接 2、通过服务器实时转发,被第三方设备调用 3、移动控制设备app控制灯的开关实现物联; 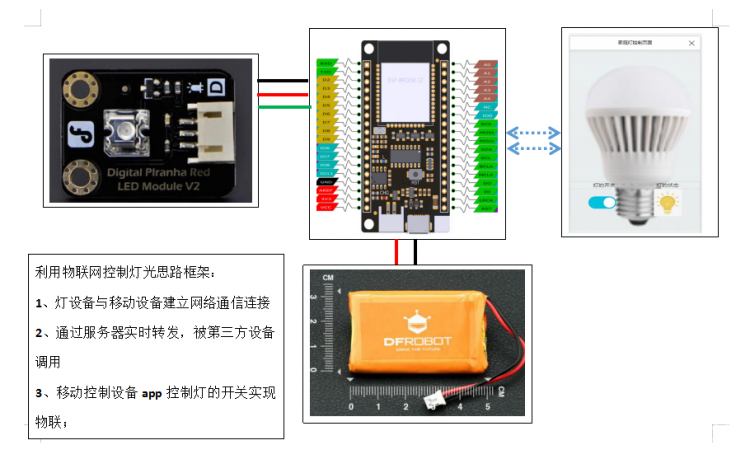 二、环境 1、硬件:阿里云IoT 入门套件x1 FireBeetle Board-ESP32 主板,购买地址:https://www.dfrobot.com.cn/goods-1394.html 2、软件: 1、操作系统:基于 Windows 7操作系统, 2、软件:Arduino1.8.0 以上版本下载链接: https://www.arduino.cc/en/main/software?setlang=cn 三、物联产品和设备创建 1、创建产品:iot智能灯光 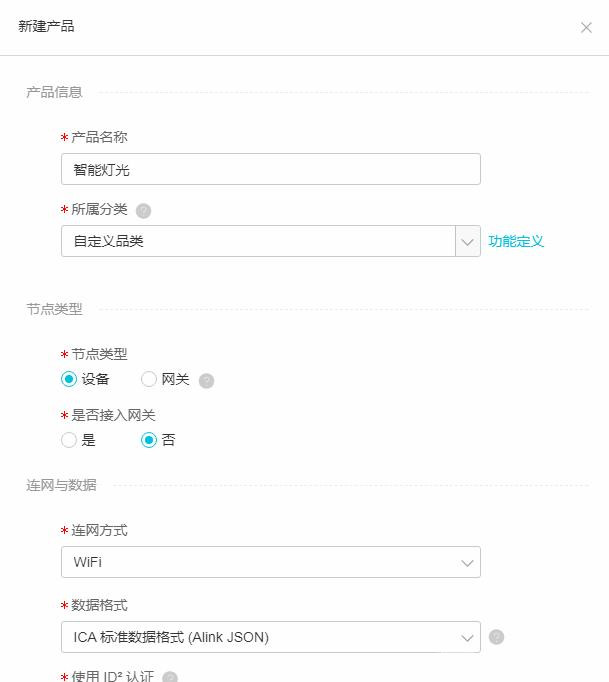 2、添加设备:2019esp  3、功能定义  4、复制设备证书、域名、端口号等连接信息 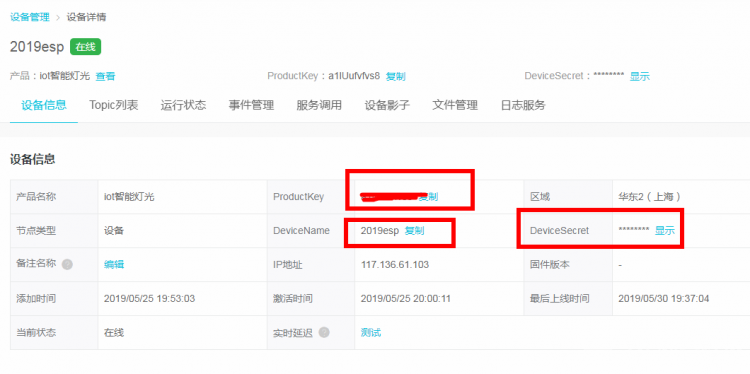 5、设备的Topic列表  四、编写IDE智能灯光控制程序 [mw_shl_code=python,true]#include <WiFi.h> #include <PubSubClient.h> #include <ArduinoJson.h> #include "DFRobot_Aliyun.h" #define LED D2 #define BUTTON D3 /*配置WIFI名和密码*/ const char * WIFI_SSID = "**************"; const char * WIFI_PASSWORD = "********"; /*配置设备证书信息*/ String ProductKey = "*******"; String ClientId = "12345";/*自定义ID*/ String DeviceName = "2019esp"; String DeviceSecret = "****************"; /*配置域名和端口号*/ String ALIYUN_SERVER = "iot-as-mqtt.cn-shanghai.aliyuncs.com"; uint16_t PORT = 1883; /*需要操作的产品标识符*/ String Identifier = "switch2"; /*需要上报和订阅的两个TOPIC*/ const char * subTopic = "/sys/a1lUufvfvs8/*************";//****set const char * pubTopic = "/sys/a1lUufvfvs8/************";//******post DFRobot_Aliyun myAliyun; WiFiClient espClient; PubSubClient client(espClient); /*ButtonState、LEDState用来存储LED灯同BUTTON按钮的当前值*/ uint8_t ButtonState = 0; uint16_t LEDState = 0; static void openLight(){ digitalWrite(LED, HIGH); } static void closeLight(){ digitalWrite(LED, LOW); } void connectWiFi(){ Serial.print("Connecting to "); Serial.println(WIFI_SSID); WiFi.begin(WIFI_SSID,WIFI_PASSWORD); while(WiFi.status() != WL_CONNECTED){ delay(500); Serial.print("."); } Serial.println(); Serial.println("WiFi connected"); Serial.print("IP Adderss: "); Serial.println(WiFi.localIP()); } void callback(char * topic, byte * payload, unsigned int len){ Serial.print("123"); Serial.print("Recevice ["); Serial.print(topic); Serial.print("] "); for (int i = 0; i < len; i++){ Serial.print((char)payload); } Serial.println(); StaticJsonBuffer<300> jsonBuffer; JsonObject& root = jsonBuffer.parseObject((const char *)payload); if(!root.success()){ Serial.println("parseObject() failed"); return; } const uint16_t LightStatus = root["params"][Identifier]; if(LightStatus == 1){ openLight(); }else{ closeLight(); } /*当LED灯的状态发生改变后,则上报LED灯的当前状态*/ if(LightStatus != LEDState) { LEDState = LightStatus; String tempMseg = "{\"id\":"+ClientId+",\"params\":{\""+Identifier+"\":"+(String)LightStatus+"},\"method\":\"thing.event.property.post\"}"; char sendMseg[tempMseg.length()]; strcpy(sendMseg,tempMseg.c_str()); client.publish(pubTopic,sendMseg); } } void ConnectAliyun(){ while(!client.connected()){ Serial.print("Attempting MQTT connection..."); /*根据自动计算的用户名和密码连接到Alinyun的设备,不需要更改*/ if(client.connect(myAliyun.client_id,myAliyun.username,myAliyun.password)){ Serial.println("connected"); client.subscribe(subTopic); }else{ Serial.print("failed, rc="); Serial.print(client.state()); Serial.println(" try again in 5 seconds"); delay(5000); } } } void setup(){ Serial.begin(115200); /*将LED(D2)设置为IO输出,BUTTON(D3)设置为IO输入*/ pinMode(LED,OUTPUT); pinMode(BUTTON,INPUT); /*连接WIFI*/ connectWiFi(); /*初始化Alinyun的配置,可自动计算用户名和密码*/ myAliyun.init(ALIYUN_SERVER,ProductKey,ClientId,DeviceName,DeviceSecret); client.setServer(myAliyun.mqtt_server,PORT); /*设置回调函数,当收到订阅信息时会执行回调函数*/ client.setCallback(callback); /*连接到Aliyun*/ ConnectAliyun(); /*开机先关灯*/ closeLight(); /*保存BUTTON按钮的初始值状态*/ ButtonState =digitalRead(BUTTON); //Serial.print("ButtonState:"); //Serial.println(ButtonState); /*上报关灯信息*/ client.publish(pubTopic,("{\"id\":"+ClientId+",\"params\":{\""+Identifier+"\":0},\"method\":\"thing.event.property.post\"}").c_str()); } void loop(){ if(!client.connected()){ ConnectAliyun(); } uint8_t ButtonValue = digitalRead(BUTTON); /*如果检测到按钮的状态发生了改变,则发送指令到阿里云平台以更新设备信息*/ if (ButtonValue != ButtonState) { /*保存按钮的当前状态*/ ButtonState = ButtonValue; /*按下:发送开灯指令,阿里云IoT上的相应设备状态变为1;松开:发送关灯指令,阿里云IoT上的相应设备状态值变为0,只需改变Identifier后的值*/ String tempMseg = "{\"id\":"+ClientId+",\"params\":{\""+Identifier+"\":"+(String)ButtonState+"},\"method\":\"thing.event.property.post\"}"; char sendMseg[tempMseg.length()]; strcpy(sendMseg,tempMseg.c_str()); client.publish(pubTopic,sendMseg); delay(1000); } client.loop(); }[/mw_shl_code] 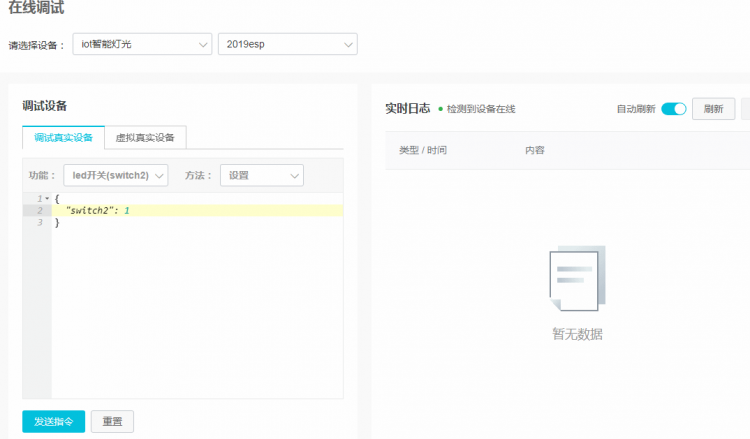 2、通过串口监视器观察串口发送的数据,表示接收数据成功! 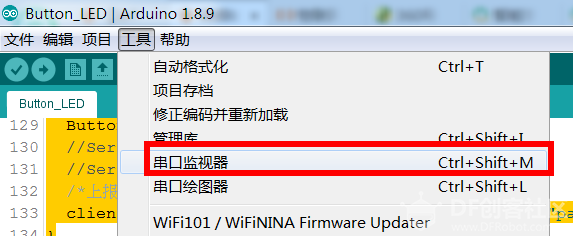  六、移动控制设备控制灯的开关 1、创建IoT套件智能灯光, 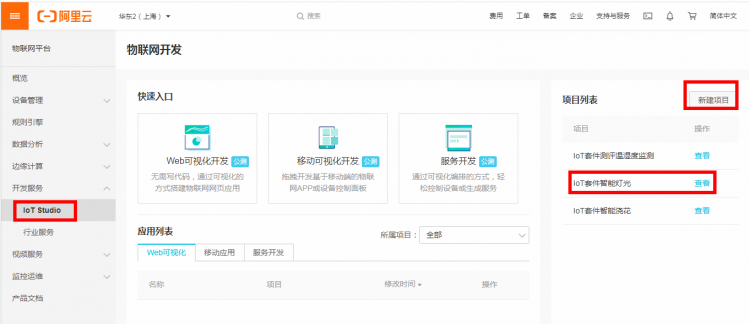 2、导入产品  3、产品被激活,联产品设备 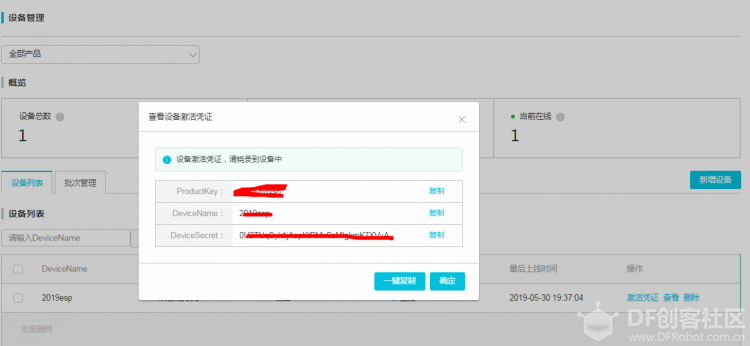 七、移动应用开发 1、新增可视化应用 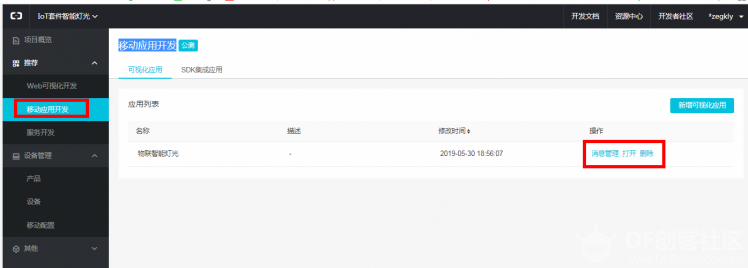 2、配置物联智能灯光APP页面 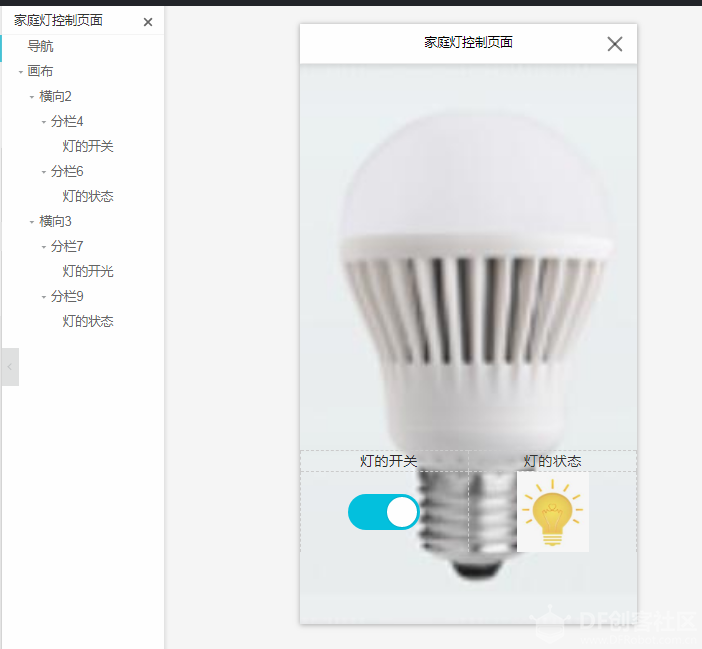 3、预览测试 八、知识拓展 IoT Studio 物联网开发服务 (IoT Studio,原 Link Develop),是阿里云针对物联网场景提供的生产力工具,可覆盖各个物联网行业核心应用场景,帮助您高效经济地完成设备、服务及应用开发。物联网开发服务提供了移动可视化开发、Web 可视化开发、服务开发与设备开发等一系列便捷的物联网开发工具,解决物联网开发领域开发链路长、技术栈复杂、协同成本高、方案移植困难的问题,重新定义物联网应用开发。 |
 沪公网安备31011502402448
© 2013-2026 Comsenz Inc. Powered by Discuz! X3.4 Licensed