本帖最后由 -YAYA- 于 2023-8-2 17:38 编辑
【项目简介】
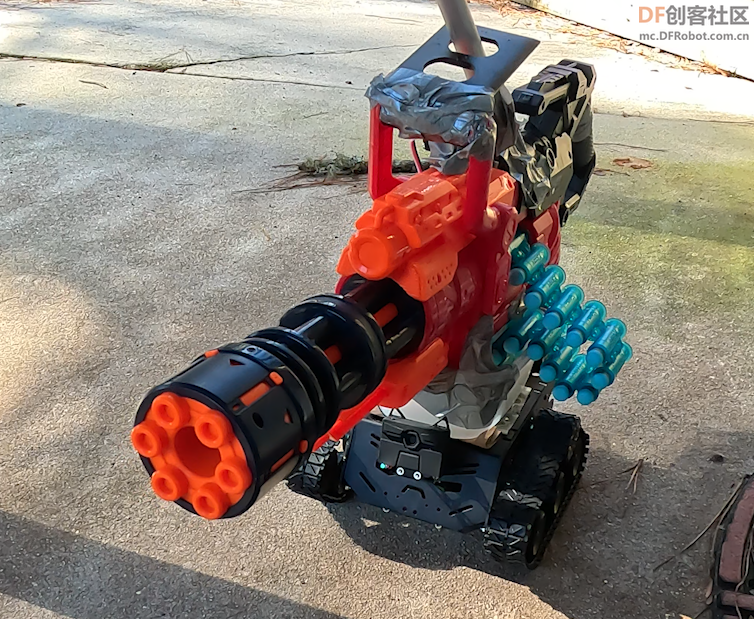
在这里,我将展示如何构建自己的机器人,该机器人可以使用Nerf自动炮塔机器人来追踪瞄准人类。如果你是一个对机器人学、电子学感兴趣,或者只是单纯想参加一个有趣的周末活动的人的话,这个项目就非常适合你。我们将使用DFRobot的Devastator履带机器人移动平台作为我们机器人的底座,并为其配备用于物体检测和瞄准系统的HuskyLens。无论你是初学者还是经验丰富的创客爱好者,本教程都将指导你完成整个过程,那现在就让我们开始吧!
【硬件列表】
【操作步骤】
步骤一
注:这些步骤会根据你所选用的nerf枪的类型略有变化,但变化不大。
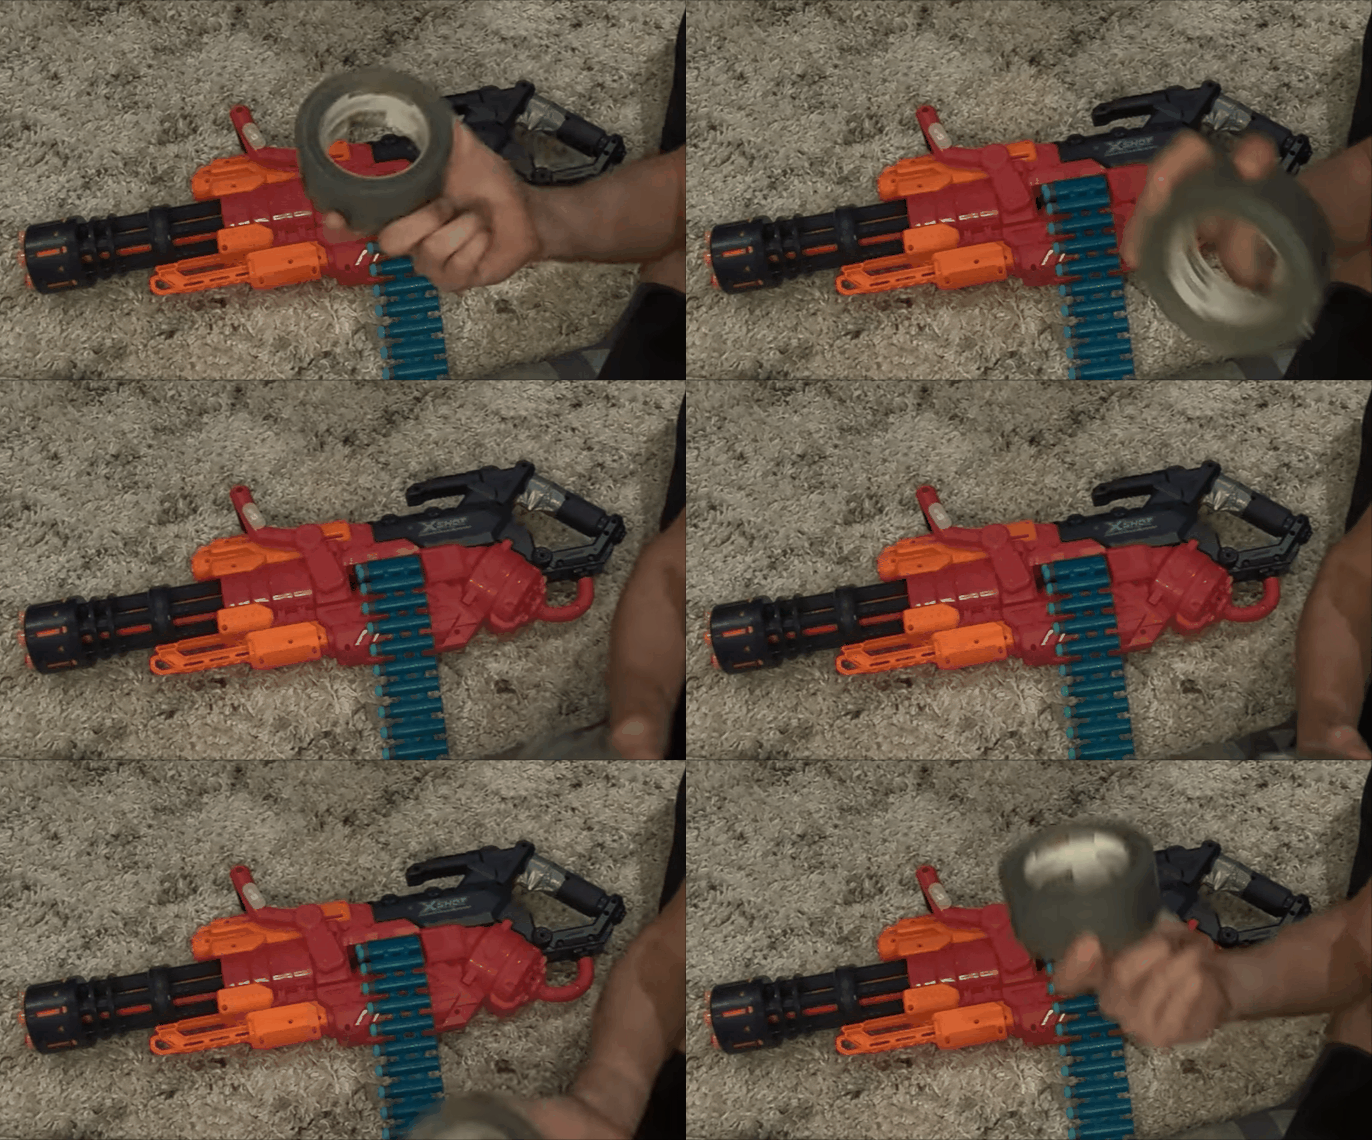
只要选择一把可以在需要重新装弹之前能接连发射多发子弹的nerf枪,其实我们通过伺服系统的通讯功能即可实现这一点。我们只需要安装伺服装置,这样当它旋转一定量时,它就会按下扳机,要么按住它,要么根据nerf枪的工作方式重复这个过程。我的有点复杂,需要按住扳机才能快速开火,然后需要来回拉动顶部的一个机械装置。这仍然可以用一个伺服来完成(尽管我的需要一个更强大的伺服)。这是我用过的nerf枪,但我真诚地建议你为自己的项目寻找与众不同的一款。nerf枪体型比较大,同时也很有趣,但它有一个问题就是需要很大的力气才能将触发机械装置来拉回足够远的距离开火。
步骤二
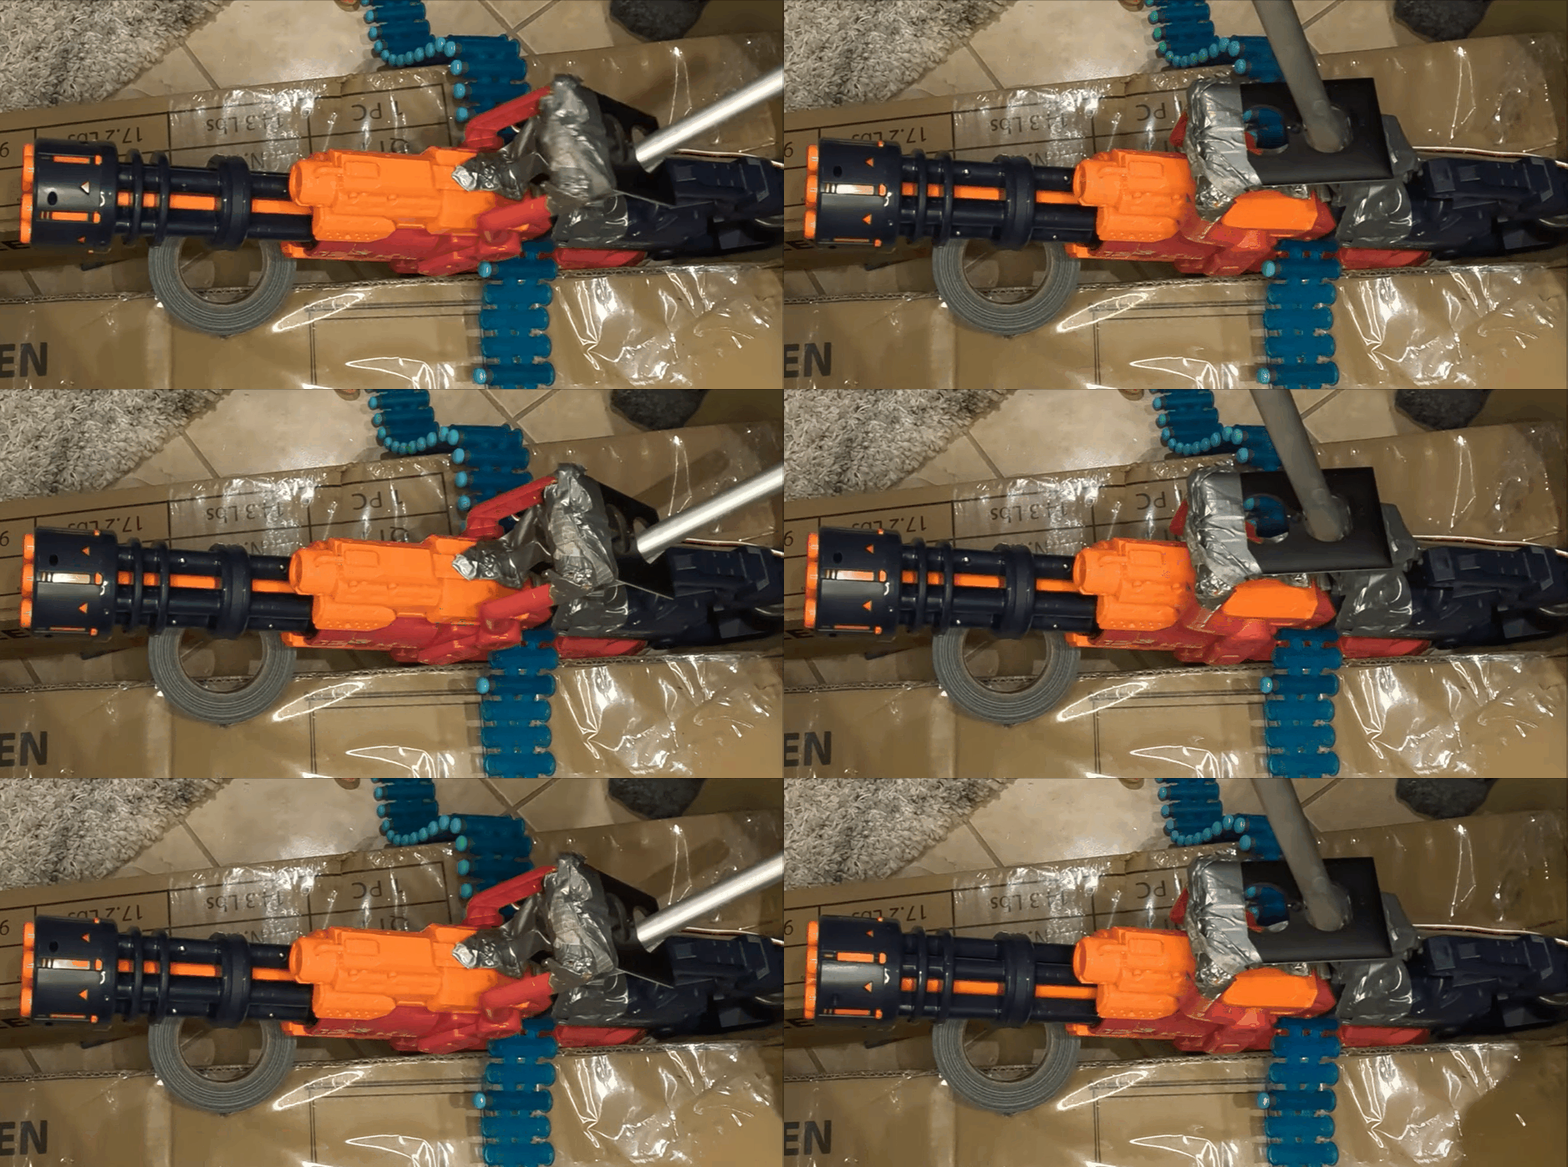
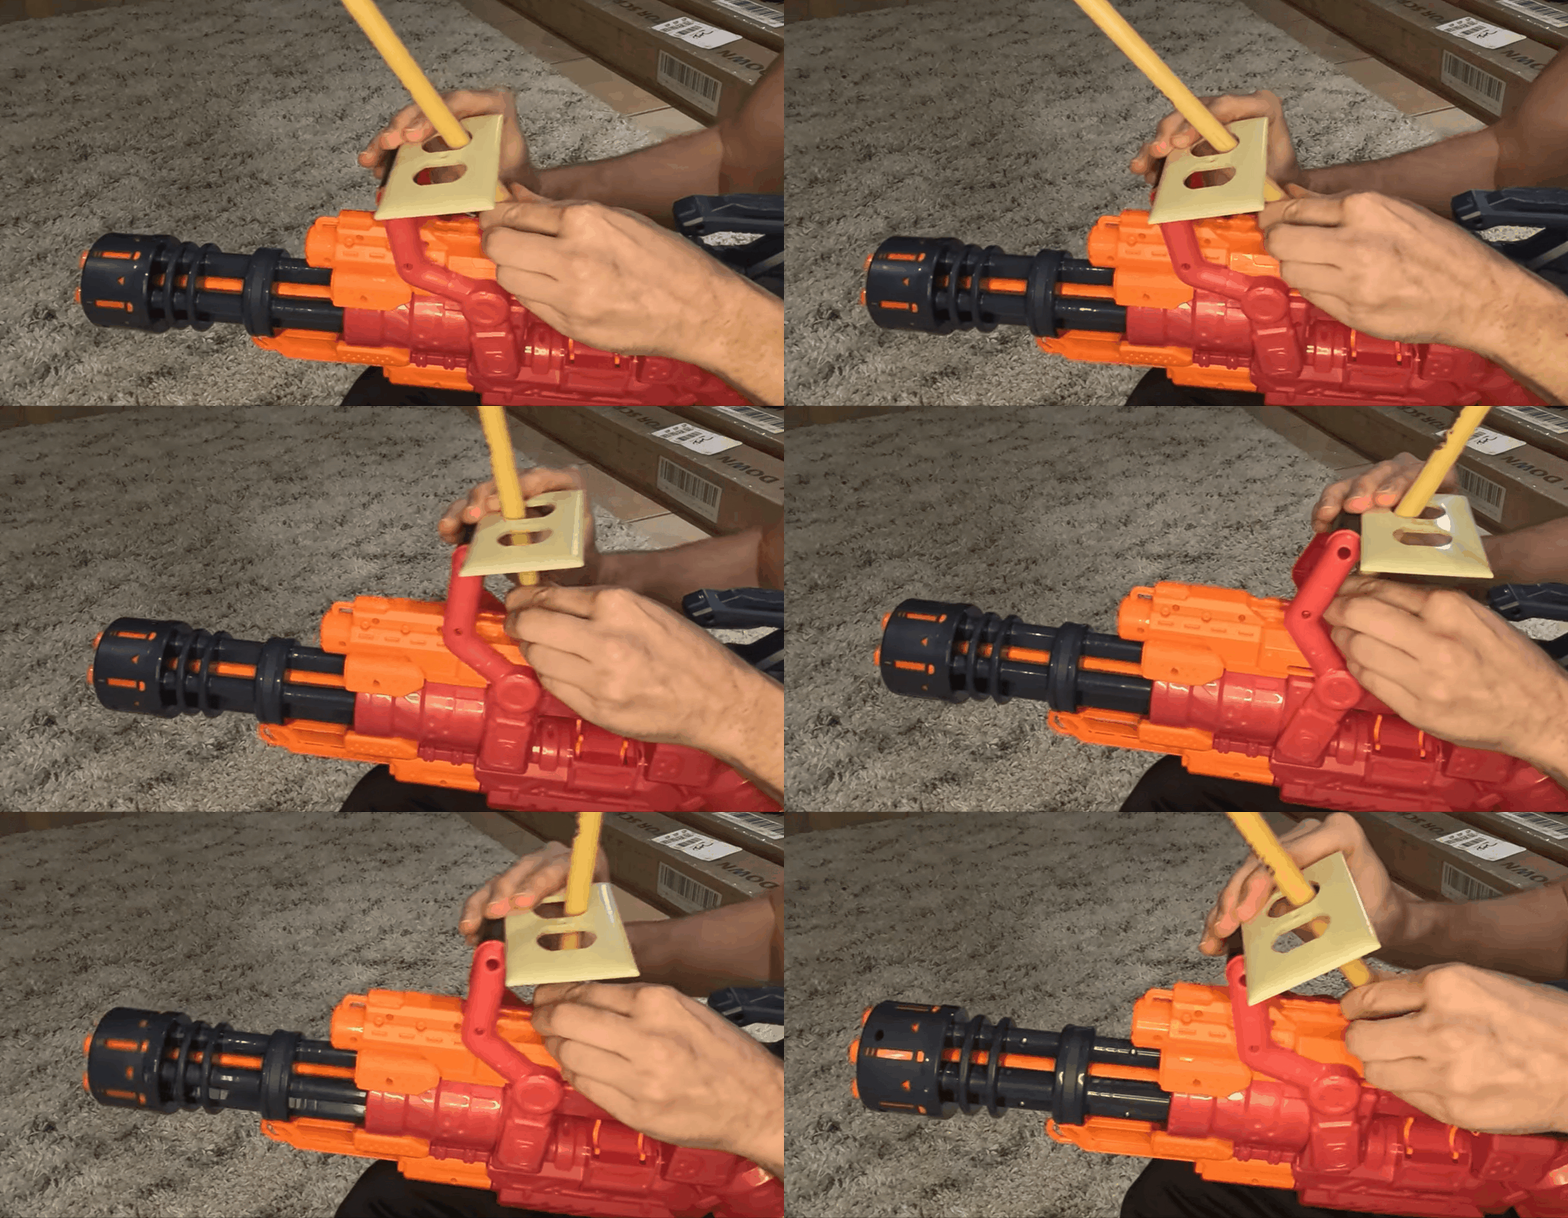
将伺服电机安装在油箱顶部,Nerf喷枪零件仍能正确移动。这可以通过使用螺钉或3D打印支架来完成。确保伺服装置固定到位,并且伺服装置的臂连接到Nerf枪的扳机。一旦安装了伺服和Nerf枪,通过将其连接到电源来测试伺服的旋转,并确保Nerf枪可以旋转到不同的角度。如果你没有3D打印机或无法使用3D打印服务,你可以使用其他方法,如使用粘合剂、夹具,甚至热胶将伺服和nerf枪固定到位。那么在这个项目中,因为考虑到想让伺服归位的问题,所以我只使用了胶带。这看起来可能有点傻,但它很管用!如果你选择的枪和我的枪有同样的机制,你可能需要发挥点创造性,因为当涉及到重新调整用途时,问题可能会有点复杂。我常常绞尽脑汁,最终我使用的是一根杆子和一个插座盖。考虑到杆需要推动和拉动各种机械装置,因此我们就不能把它们粘在一起。可以放一些东西让杆在里面移动,比如插座盖,这样杆就可以各种角度上下移动,同时还能有效地进行推拉。为了实现这一点,你可以使用一根更细的杆子(比如帐篷木桩)和一个圆形金属片,比如一个尺寸合适的垫圈。伺服的代码取决于你的设置,包括发射所需的角度,对于我来说只需要以下这个小片段:
代码:
- //Just runs once - it should be continually triggered if the person is still there
- void fireNerfGun(){
- Serial.println("FIRE!!!");
-
- myservo.write(130); // tell servo to go to position
- delay(1000); //Wait briefly
- myservo.write(50);
- delay(1000);
-
- }
HuskyLens就像是坦克和nerf炮塔的眼睛。代码附在下一步中,现在让我们通过设置HuskyLens来进入这个阶段!
我在下面引用的很多内容都可以在wiki中找到(在这里找到-https://wiki.dfrobot.com/HUSKYLENS_V1.0_SKU_SEN0305_SEN0336),但为了方便起见,我将在此处介绍入门步骤:
-下载HuskyLens上传程序。
-下载USB转UART驱动程序,并安装它。点击这里下载它。https://www.silabs.com/developers/usb-to-uart-bridge-vcp-drivers
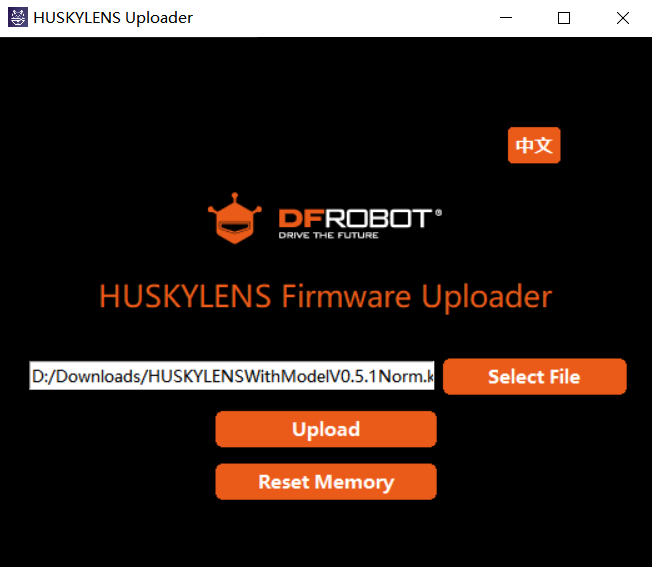
-此时,你应该能够通过USB将HuskyLens插入计算机-运行HuskyLens Uploader,首先会弹出一个黑色的cmd小窗口,过一段时间后,会出现界面窗口,然后单击“选择文件”按钮加载固件。
-点击“上传”按钮,等待上传完成。
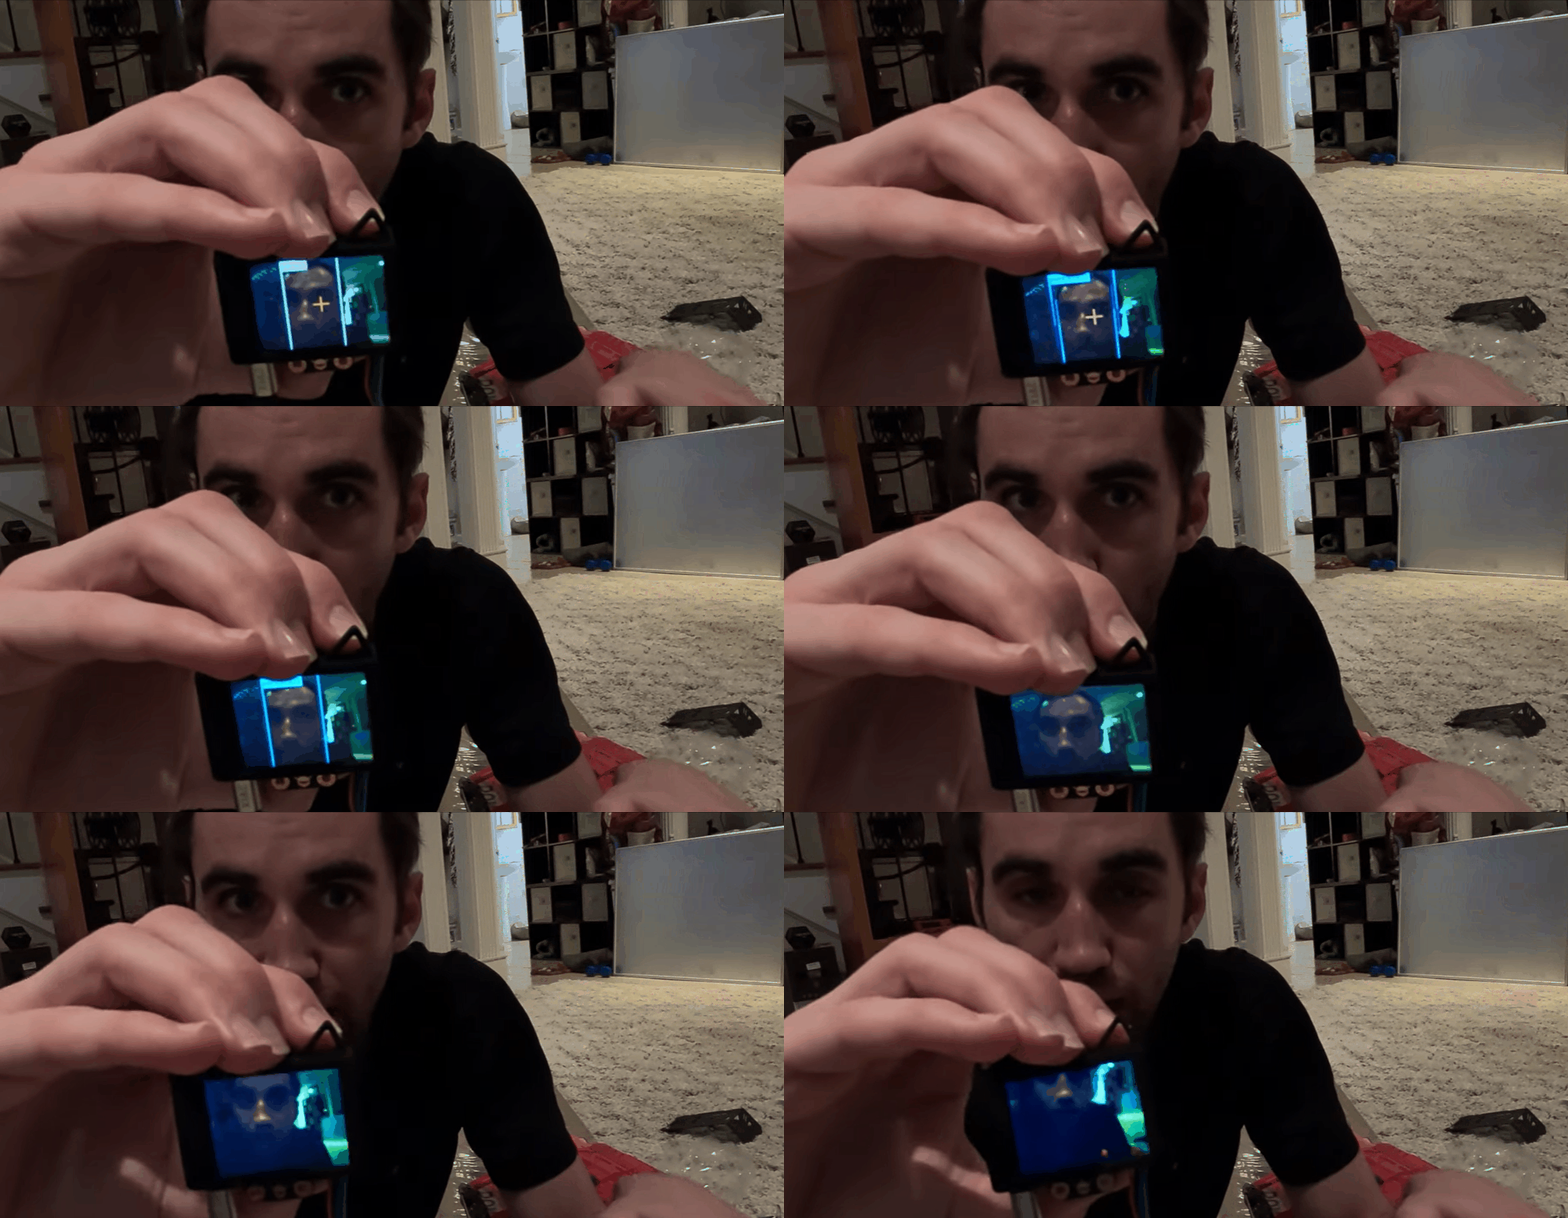
当它完成时,只要插上电源,就可以通过移动顶部的旋转器并按下按钮在不同模式之间切换。它可以在不修改的情况下检测人脸等。
根据HuskyLens维基:HuskyLens的R和T引脚(此处为SCL和SDA)分别连接到micro:bit的SCL(P19)和SDA(P20)引脚。HuskyLens与micro:bit之间的通信协议为I2C。现在是时候让HuskyLens引导一个配备nerf炮塔的坦克机器人追捕我们了!
步骤三
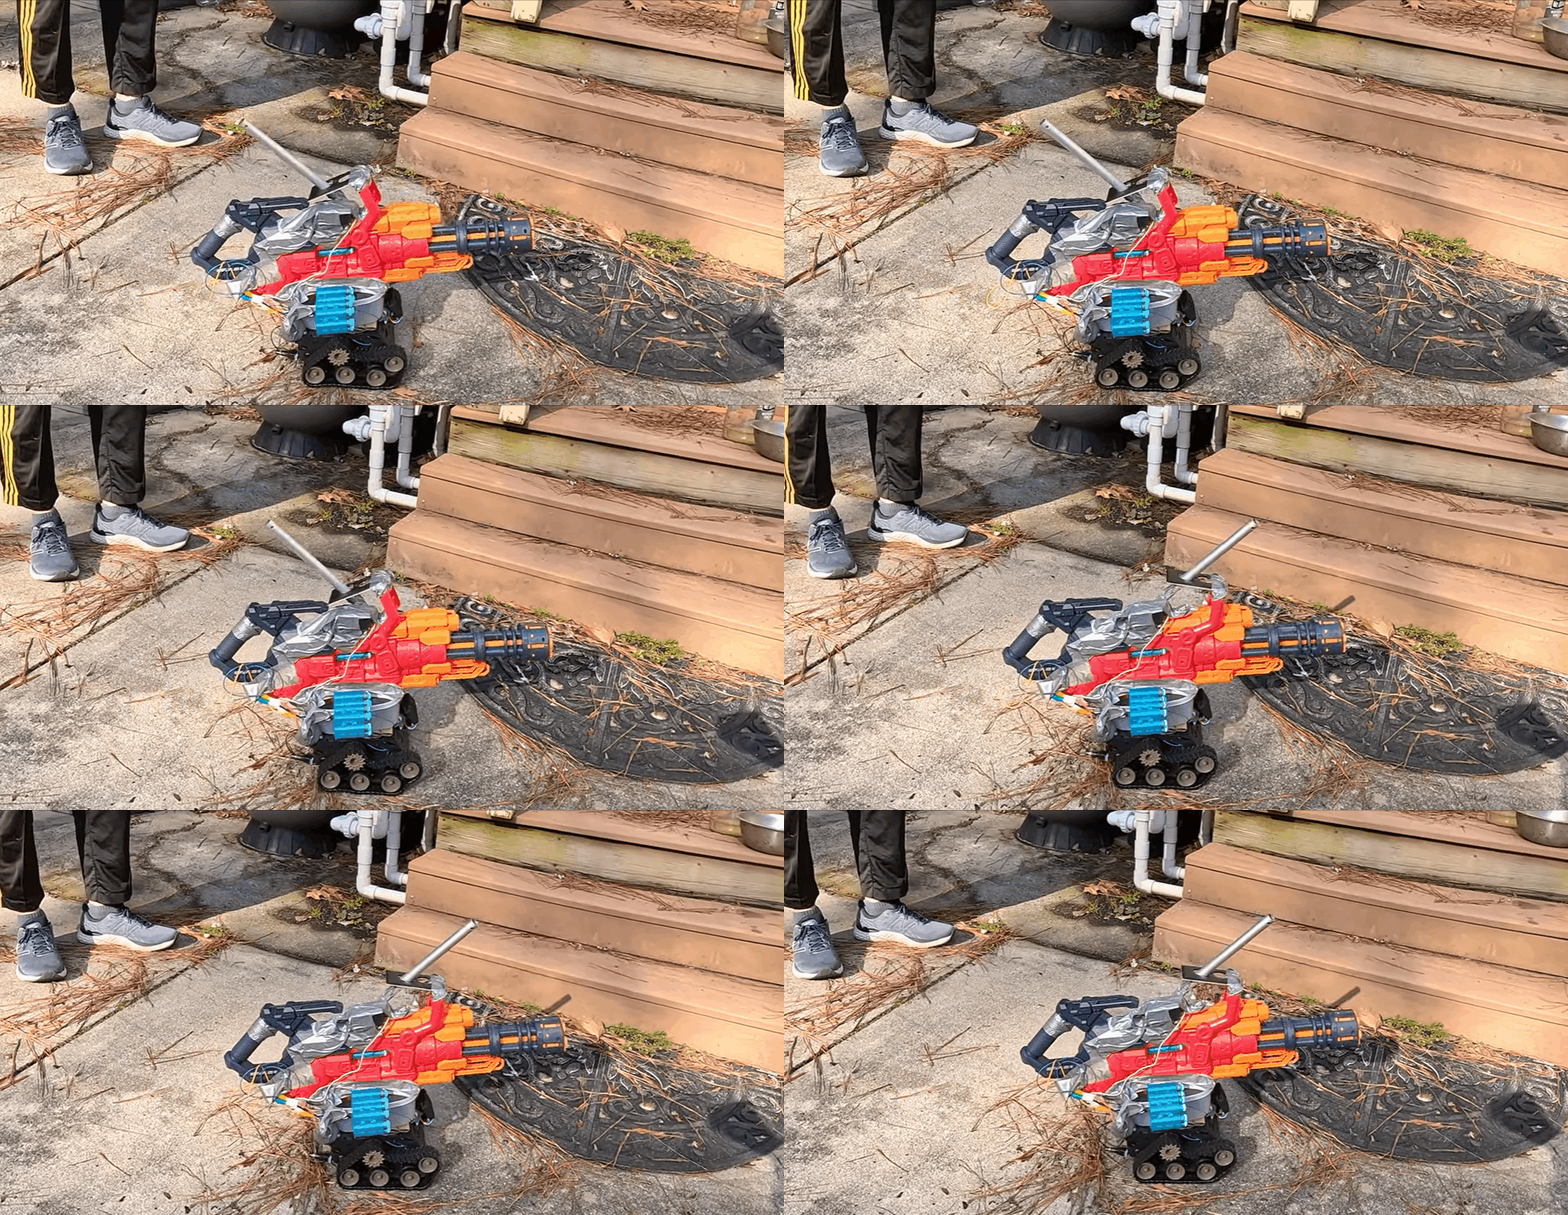
同一个微控制器(在这种情况下是Romeo BLE)将控制坦克机器人和发射nerf炮塔。我修改了HuskyLens的示例代码,该代码设置为让机器人跟踪它所跟踪的对象,这样的话无论何时,nerf炮塔都会开火(有时它会移动寻找目标,但此时看不到目标)。如果你的机器人还没有组装好,请按照包装中的说明组装Devastator坦克。谢天谢地,它打人一点都不痛。不过,在你打开水箱的顶部之前,一定要把代码上传到你的微控制器上!HuskyLens有一个附件,可以用来把它粘在Devastator身上,但我用我的附件把它放在前面而不是顶部,这可能也适用于你的解决方案,因为坦克顶部是放置nerf枪最直观的地方。最后把nerf枪放在上面,把所有东西连接在一起!该代码假定伺服连接到pin2。
代码:
- //This code is modified from the HuskyLens example code
- /***************************************************
- HUSKYLENS An Easy-to-use AI Machine Vision Sensor
- <https://www.dfrobot.com/product-1922.html>
-
- ***************************************************
- This example shows how to play with object tracking.
-
- Created 2020-03-13
- By [Angelo qiao](Angelo.qiao@dfrobot.com)
-
- GNU Lesser General Public License.
- See <http://www.gnu.org/licenses/> for details.
- All above must be included in any redistribution
- ****************************************************/
-
- /***********Notice and Trouble shooting***************
- 1.Connection and Diagram can be found here
- <https://wiki.dfrobot.com/HUSKYLENS_V1.0_SKU_SEN0305_SEN0336#target_23>
- 2.This code is tested on Arduino Uno, Leonardo, Mega boards.
- ****************************************************/
-
-
- #include "HUSKYLENS.h"
- #include "DFMobile.h"
- #include <Servo.h>
-
- DFMobile Robot (7,6,4,5); // initiate the Motor pin
-
- HUSKYLENS huskylens;
- //HUSKYLENS green line >> SDA; blue line >> SCL
-
- Servo myservo; // create a servo object
- void setup() {
- Serial.begin(115200);
- Robot.Direction (HIGH, LOW); // initiate the positive direction
-
- Wire.begin();
- while (!huskylens.begin(Wire))
- {
- Serial.println(F("Begin failed!"));
- Serial.println(F("1.Please recheck the "Protocol Type" in HUSKYLENS (General Settings>>Protocol Type>>I2C)"));
- Serial.println(F("2.Please recheck the connection."));
- delay(100);
- }
-
- huskylens.writeAlgorithm(ALGORITHM_OBJECT_TRACKING); //Switch the algorithm to object tracking.
-
- // while (true)
- // {Robot.Speed (200-50,200+50);
- // delay(2000);
- // Robot.Speed (0,0);
- // delay(2000);
- // Robot.Speed (200,200);
- // delay(2000);
- // Robot.Speed (0,0);
- // delay(2000);
- // Robot.Speed (200+50,200-50);
- // delay(2000);
- // Robot.Speed (0,0);
- // delay(2000);}
-
- myservo.attach(2); // attaches the servo on pin 9 to the servo object
- myservo.write(90); // tell servo to go to position in variable 'pos'
- }
-
- int widthLevel = 50;
-
- int xLeft = 160-40;
- int xRight = 160+40;
-
- bool isTurning = false;
- bool isTurningLeft = true;
-
- bool isInside(int value, int min, int max){
- return (value >= min && value <= max);
- }
-
- void printResult(HUSKYLENSResult result);
-
- void loop() {
- int32_t error;
-
- int left = 0, right = 0;
-
- if (!huskylens.request()) Serial.println(F("Fail to request objects from HUSKYLENS!"));
- else if(!huskylens.isLearned()) {Serial.println(F("Object not learned!")); Robot.Speed (0,0);}
- else if(!huskylens.available()) Serial.println(F("Object disappeared!"));
- else
- {
- HUSKYLENSResult result = huskylens.read();
-
- if (result.width < widthLevel){
- widthLevel = 65;
- if (isInside(result.xCenter, 0, xLeft)){
- if (isTurningLeft){
- if (!isTurning){
- Robot.Speed (200-50,200+50);
- }
- }
- else{
- if (isTurning){
- isTurning = false;
- isTurningLeft = !isTurningLeft;
- }
- Robot.Speed (200-50,200+50);
- }
- }
- else if (isInside(result.xCenter, xLeft, xRight)){
- if (isTurning){
- isTurning = false;
- isTurningLeft = !isTurningLeft;
- }
- Robot.Speed (200,200);
- }
- else if (isInside(result.xCenter, xRight, 320)){
- if (isTurningLeft){
- if (isTurning){
- isTurning = false;
- isTurningLeft = !isTurningLeft;
- }
- Robot.Speed (200+50,200-50);
- }
- else{
- if (!isTurning){
- Robot.Speed (200+50,200-50);
- }
- }
- }
- }
- else
- {
- widthLevel = 55;
- isTurning = true;
- if (isTurningLeft){
- Robot.Speed (0,200);
- }
- else{
- Robot.Speed (200,0);
- }
- }
- printResult(result);
- fireNerfGun();
-
- }
- }
-
- void printResult(HUSKYLENSResult result){
- if (result.command == COMMAND_RETURN_BLOCK){
- Serial.println(String()+F("Block:xCenter=")+result.xCenter+F(",yCenter=")+result.yCenter+F(",width=")+result.width+F(",height=")+result.height+F(",ID=")+result.ID);
- }
- else if (result.command == COMMAND_RETURN_ARROW){
- Serial.println(String()+F("Arrow:xOrigin=")+result.xOrigin+F(",yOrigin=")+result.yOrigin+F(",xTarget=")+result.xTarget+F(",yTarget=")+result.yTarget+F(",ID=")+result.ID);
- }
- else{
- Serial.println("Object unknown!");
- }
- }
-
-
- //Just runs once - it should be continually triggered if the person is still there
- void fireNerfGun(){
- Serial.println("FIRE!!!");
-
- myservo.write(130); // tell servo to go to position
- delay(1000); //Wait briefly
- myservo.write(50);
- delay(1000);
-
- }
步骤四
机器人在追你!哈哈哈开个玩笑啦。大概无论哪种方式,现在是时候享受躲避新机器人的乐趣了,你可以把它分享给你的朋友一起玩。祝你好运!
原文作者:donutsorelse
原文链接:https://community.dfrobot.com/makelog-313045.html
转载请注明来源信息
| 
 沪公网安备31011502402448