|
15108| 6
|
[3D+Arduino课程(中学生)] 3D+Arduino课程(面向中学生)——一种简单水箱水质水位监...A |

|
苏教版《技术与设计2》第四章第二节“控制系统的过程与方式”在介绍控制系统时是以一个游泳池注水控制系统作为案例进行知识讲授。而我之前在教学生时也做了个简单的水位报警模型激发学生学习的兴趣。但其功能相对单一:只是监测水位是否达到警戒值的作用。当水位达到警戒水位时,LED报警灯亮起,蜂鸣器响起。 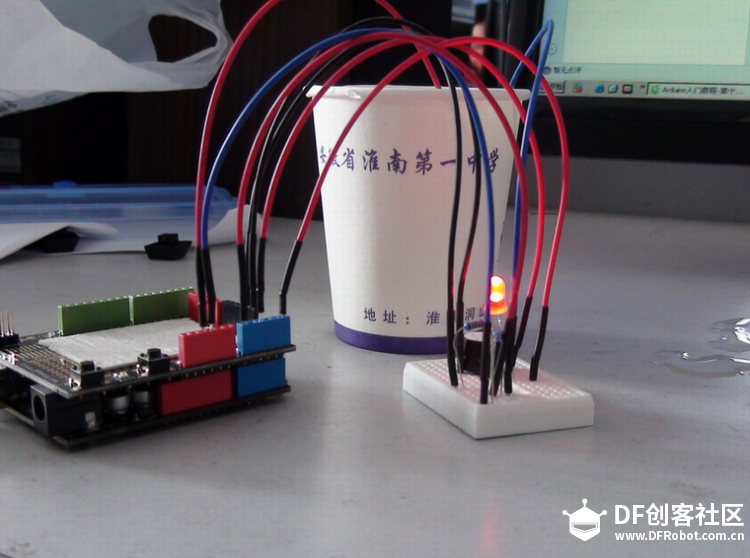 图1水位报警装置模型 而我们今天要制作的这个水质水位监测系统模型,则要实现水温、水的浊度、PH值、分段水位深度的监测及简单处理。  图2一种简单水质水位监测系统模型 制作器材: DFRduino Mega2560 V3.0控制器 电机驱动板 IO 传感器扩展板 V7.1 模拟PH计(Arduino兼容) 水质浊度传感器 DS18B20 防水温度传感器套件 1K电阻 导线若干 I2C LCD1602液晶模块(兼容ArduinoGadgeteer) 开关电源 水泵 硅胶软管 塑料收纳盒 3D打印件 功能设计: 水位的监测及简单处理:水箱里的水位监测及显示,缺水、水满时的自动水位控制。 水质的监测:水温、PH值、水质浊度的显示。 模型制作: 水位传感器制作: 由于没有现成的多段水位传感器,我们这里使用多根导线与水导通来验证水位的高低。不过这种检测导线需要稍微加工一下,取出三根导线,红色线与1K欧电阻连接后与白色线焊接;黑色线与白色线焊接。 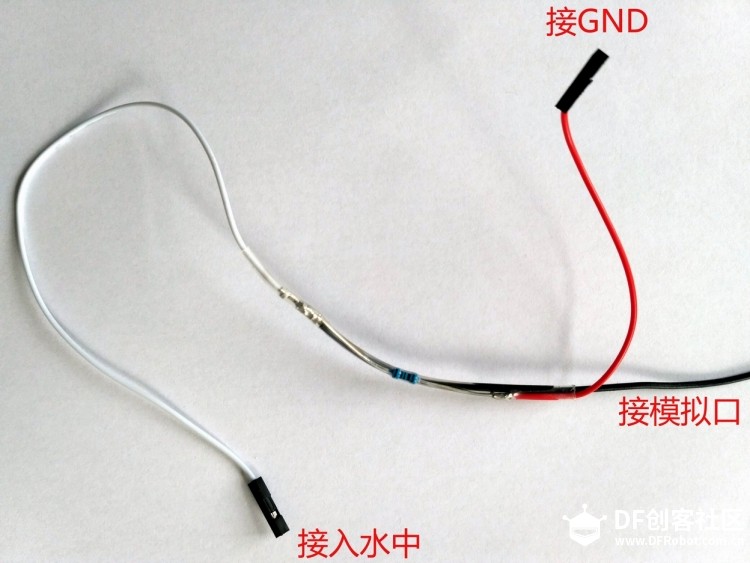 图3水位传感器导线 与之类似的水位监测线再制作三根。分别代表水位的0%,33%,66%,100%。为了使得水温监测线相对准确,安装方便使用Sketchup设计制作水位传感器的安装支架。设计图和3D打印图如下所示。 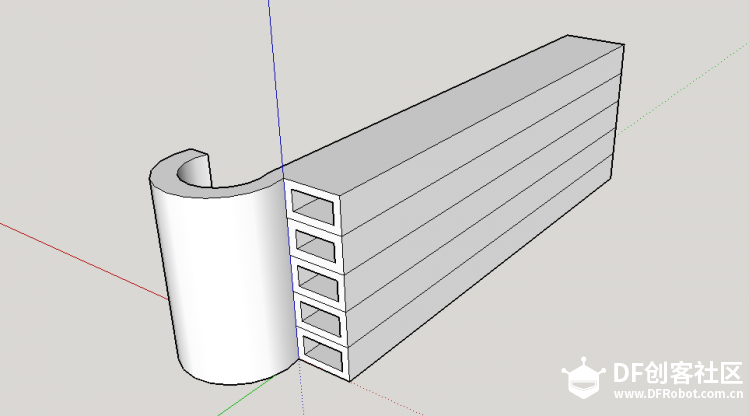 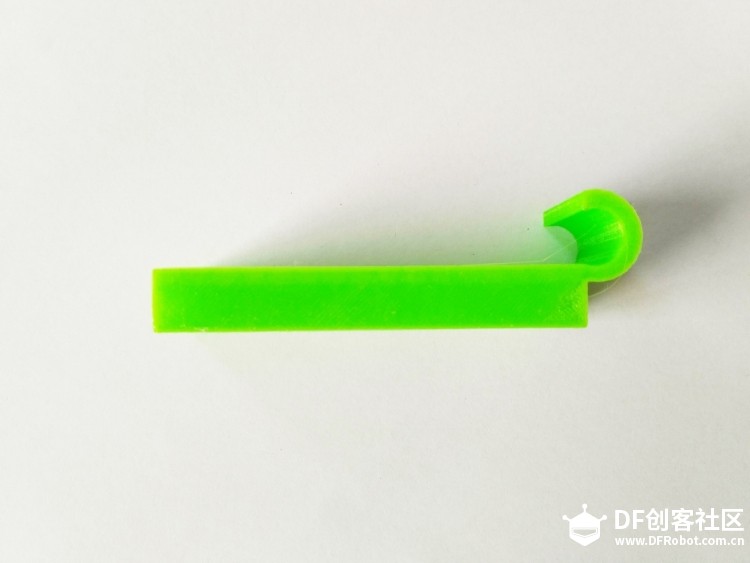 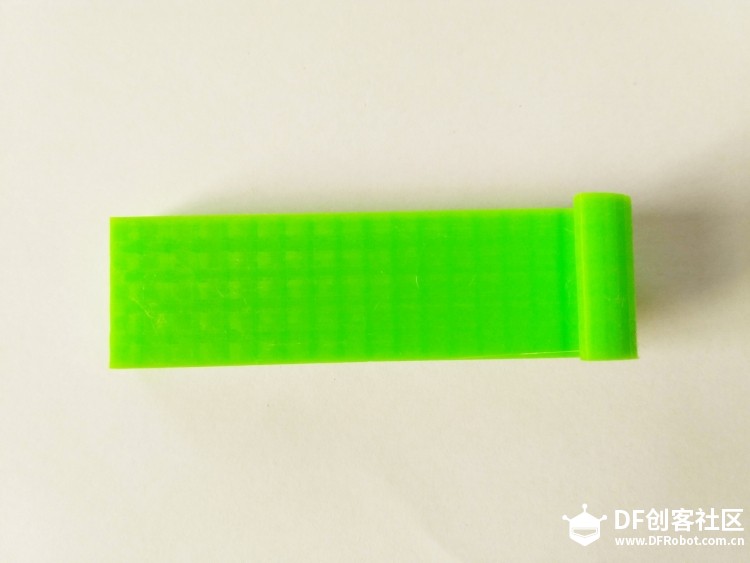 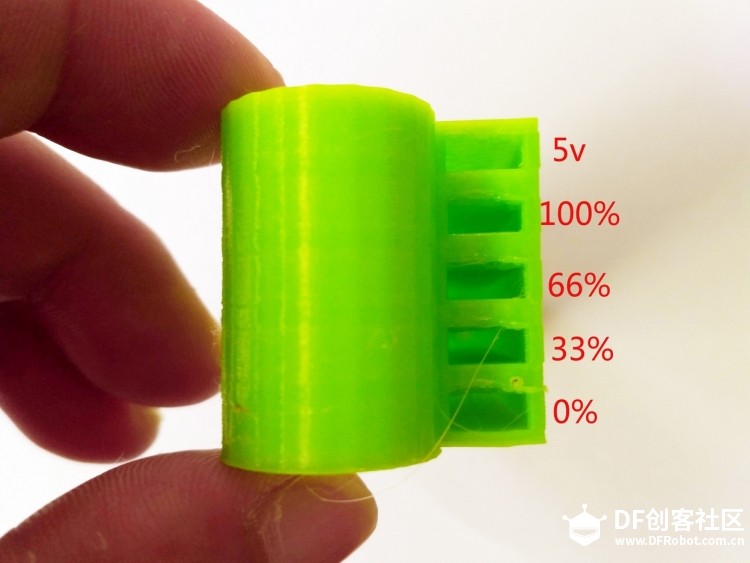 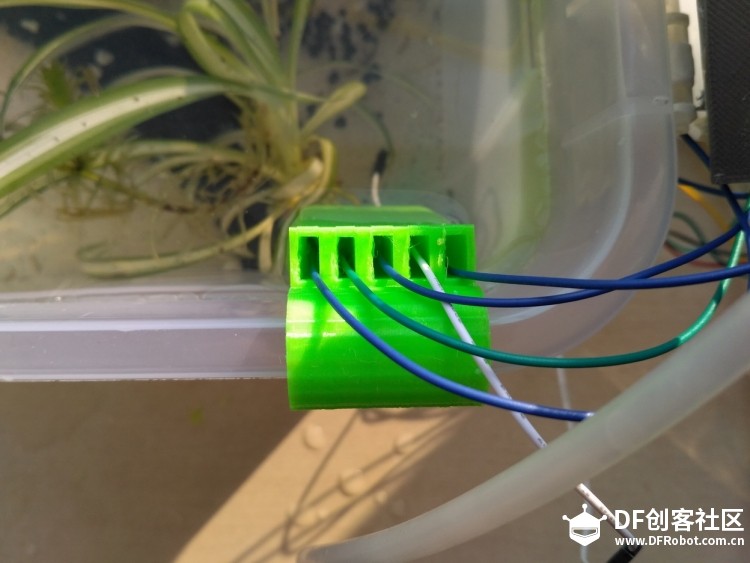 浊度传感器 浊度传感器是利用光学原理,通过测量溶液中的透光率和散射率来综合判断溶液浊度情况,从而达到检测水质的目的。传感器内部是一个红外线对管,当光线穿过一定量的水时,光线的透过量取决于该水的污浊程度,水越污浊,透过的光就越少。该传感器模块通过数模切换开关,可以选择输出的是模拟量或者数字量。如果选择输出是数字量,通过模块上的电位器调节触发阈值,当浊度达到设置好的阈值后,Dout指示灯会被点亮,传感器模块输出由高电平变成低电平,单片机通过监测该电平的变化,就可以知道水的浊度超标,从而预警或者联动其他设备。如果选择输出是模拟量,利用A/D转换器进行采样处理,单片机就可以获知当前水的污浊度。我们这里是作为模拟量来使用的。而传感器的监测端如图9所示,底部检测端是防水的,而顶部是不防水的,因此我们需要为其设计安装支架。 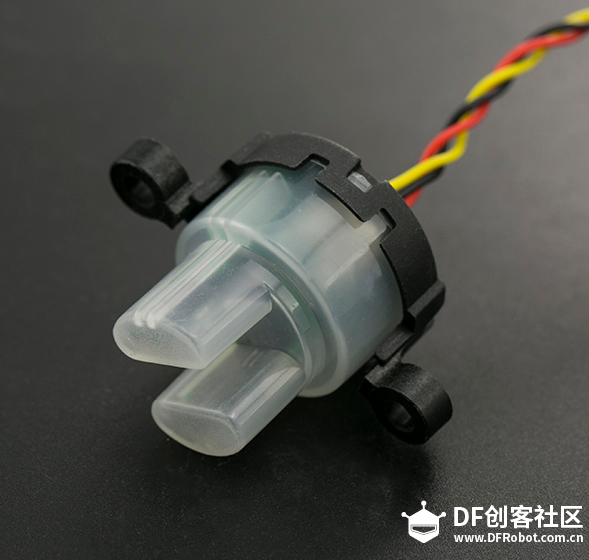 图9浊度传感器监测端 利用Sketchup设计制作3D模型并将其打印出来 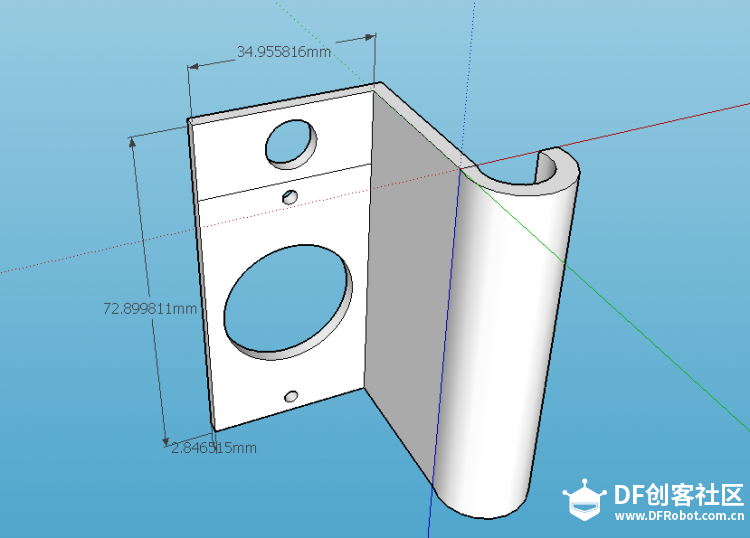 图10浊度传感器和温度传感器安装支架 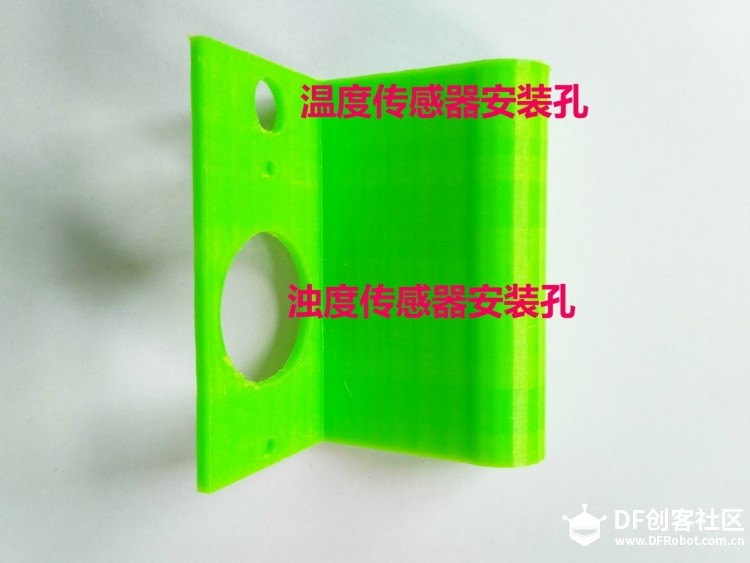 图11打印效果图 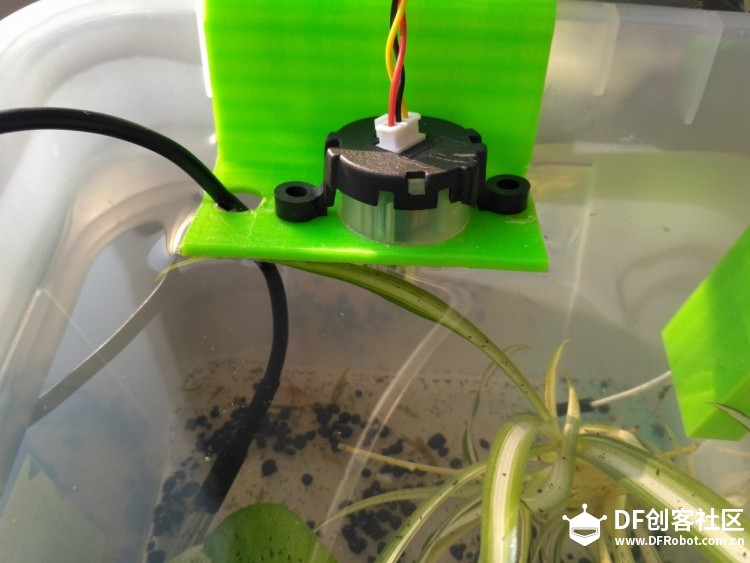 图12安装效果图 温度传感器 DS18B20是一款防水温度传感器,可用于土壤温度检测、热水箱温度控制等等,配合Plugable Terminal转换器可以直接与Arduino连接。 模拟PH计 模拟PH计是一种PH计测量元件,用来测量水溶液中的氢离子活度,即PH值。 PH校正 电极在每次连续使用前均需要使用标准缓冲溶液进行校正,为取得更正确的结果,环境温度最好在25℃左右,已知PH值要可靠,而且其PH值愈接近被测值愈好。如您测量的样品为酸性,请使用PH4.00的缓冲溶液对电极进行校正,如果您测量的样品为碱性,请使用PH9.18缓冲溶液对电极进行校正。分段进行校准,只是为了获得更好的精度。pH电极每测一种pH不同的溶液,都需要使用清水清洗,建议使用去离子水清洗。 为保证测量精度,建议使用校准液对pH计定期校准,以防止出现较大误差。一般半年校准一次,如果测量的溶液中含有较多杂质,建议增加校准次数! 注意:由于传感器的电极采用玻璃电极和参比电极组合在一起的塑壳不可填充式复合电极导通来测量水溶液中的氢离子活度。与水位传感器相互干扰,故将PH计放置在另外的水体里。 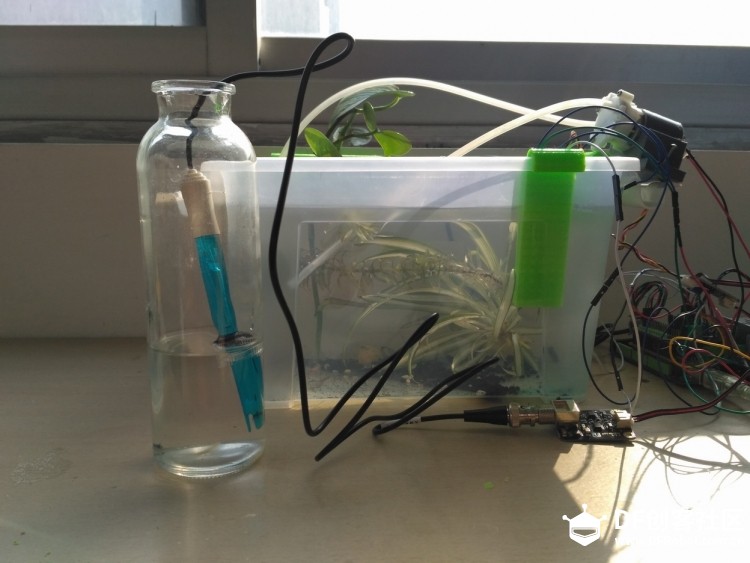 图13PH计安装 电路连接: 将各个设备按照图示方式连接,即:pH电极连接到pH meter电路板的BNC接口,然后用模拟连接线,将pH meter电路板连接到Arduino主控器的模拟口5。对Arduino主控器供电后,可以看到pH meter电路板的蓝色指示灯变亮。 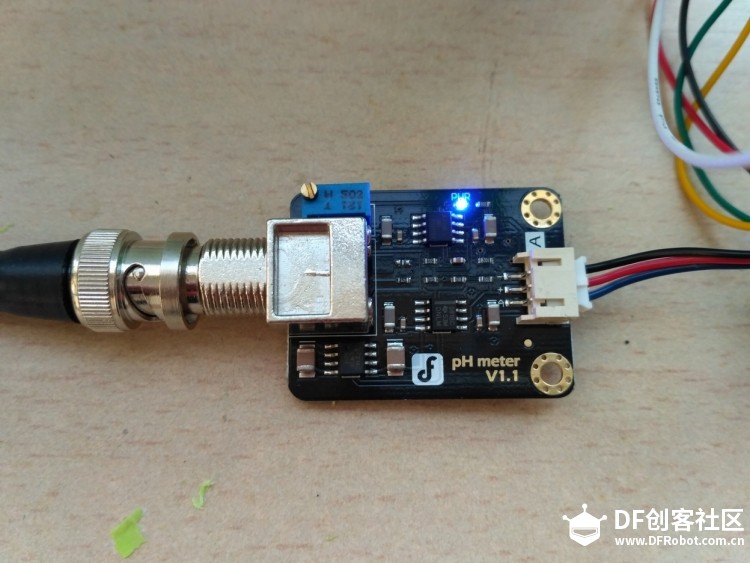 图14 测试差值 将pH电极插入到pH值为7.00的标准溶液中,或者直接短接BNC接口的两个输入,打开Arduino IDE的串口监视器,可以看到当前打印出的pH值,误差不会超过0.3。记录下此时打印的值,然后与7.00相比,把差值修改到程序中的Offset处(差值 = 标准值(7.0) - 打印值)。比如,打印出的pH值为6.88,则差值为0.12,则在样例程序中把#defineOffset 0.00改成#defineOffset 0.12。  图15差值修改 水泵 将水泵的正负极分别接在电机控制板上的A+和A-上,下图为电机控制板,下表为IO口的控制功能,如果使用电机时还会接驳其他设备应避免占用以下IO口。 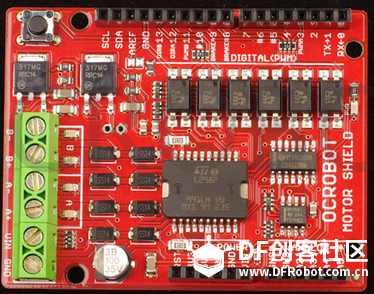 图16电机驱动板
从上表我们可以知道驱动一枚电机需要有三个参数,首先就是方向,对应IO口的高电平为一个方向,低电平为反方向,这样我们就可以通过这个参数值的设置来实现水泵抽水和防水;然后就是速度这个使用PWM的方式控制,给予其不同的占空比会获得对应的速度,最后是刹车,刹车的意思就是是否将电机的两极短接,短接两极后电机旋转会有非常大的阻尼,能量由续流二极管吸收,进而起到制动的作用。 电路连接如下图所示 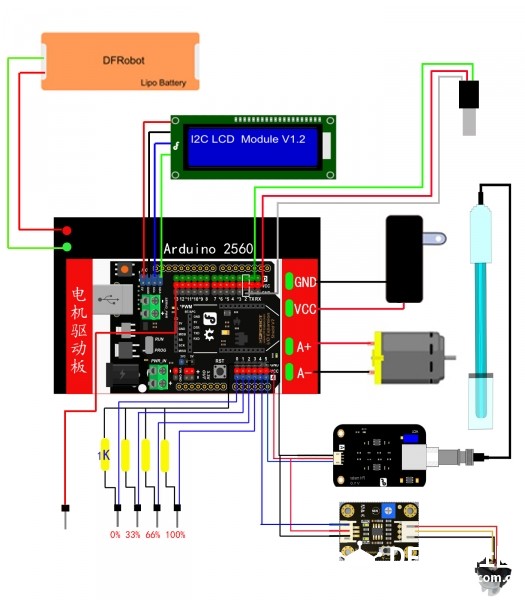 图17连接电路 代码编写(见附件) [mw_shl_code=cpp,true][mw_shl_code=objc,true]#include <OneWire.h>#include <Wire.h> #include <LiquidCrystal_I2C.h> #define SensorPin A5 //pH meter Analog output to Arduino Analog Input 0 #define Offset 0.00 //deviation compensate #define LED 13 #define samplingInterval 20 #define printInterval 800 #define ArrayLenth 40 //times of collection int pHArray[ArrayLenth]; //Store the average value of the sensor feedback int pHArrayIndex=0; LiquidCrystal_I2C lcd(0x20,16,2); // set the LCD address to 0x20 for a 16 chars and 2 line display int DS18S20_Pin = 2; //DS18S20 Signal pin on digital 2 //Temperature chip i/o OneWire ds(DS18S20_Pin); // on digital pin 2 void setup() {pinMode(12,OUTPUT); pinMode(3,OUTPUT); pinMode(9,OUTPUT); pinMode(LED,OUTPUT); Serial.begin(9600); Serial.println("pH meter experiment!"); //Test the serial monit lcd.init(); // initialize the lcd lcd.backlight(); lcd.home(); lcd.print("Hello world..."); lcd.setCursor(0, 1); lcd.print("dfrobot.com"); } void loop() { int sensorValue = analogRead(A4);// read the input on analog pin 0: float voltage = sensorValue * (5.0 / 1024.0); // Convert the analog reading (which goes from 0 - 1023) to a voltage (0 - 5V): Serial.println(voltage); // print out the value you read: float temperature = getTemp(); Serial.println(temperature); delay(100); //just here to slow down the output so it is easier to read static unsigned long samplingTime = millis(); static unsigned long printTime = millis(); float pHValue; float vol; if(millis()-samplingTime > samplingInterval) { pHArray[pHArrayIndex++]=analogRead(SensorPin); if(pHArrayIndex==ArrayLenth)pHArrayIndex=0; vol = avergearray(pHArray, ArrayLenth)*5.0/1024; pHValue = 3.5*vol+Offset; samplingTime=millis(); } if(millis() - printTime > printInterval) //Every 800 milliseconds, print a numerical, convert the state of the LED indicator { Serial.print("Voltage:"); Serial.print(vol,2); Serial.print(" pH value: "); Serial.println(pHValue,2); // digitalWrite(LED,digitalRead(LED)^1); printTime=millis(); } int n=analogRead(A0); int m=analogRead(A1); int p=analogRead(A2); int q=analogRead(A3); if( (n<1) or (q<1)) { digitalWrite(9, LOW); //松开电机A的制动 digitalWrite(3, HIGH); //采用全功率输出 digitalWrite(12, HIGH); //设置方向为正向 } else { digitalWrite(9, HIGH); //松开电机A的制动 digitalWrite(3, HIGH); //采用全功率输出 digitalWrite(12, HIGH); //设置方向为正向 } if ((n>=1) and (m<1) and (p<1) and(q<1)) { lcd.clear(); lcd.print(" Deelp:"); lcd.print("0%"); lcd.setCursor(0,1); lcd.print("Temperature:"); lcd.print(temperature); delay(900); lcd.clear(); lcd.print(" clean:"); lcd.print(voltage); lcd.setCursor(0,1); lcd.print("PH:"); lcd.print(pHValue,2); delay(800); } else { lcd.clear(); } if ((n>=1) and (m>=1) and (p<1) and(q<1)) { lcd.clear(); lcd.print(" Deelp:"); lcd.print("33%"); lcd.setCursor(0,1); lcd.print("Temperature:"); lcd.print(temperature); delay(900); lcd.clear(); lcd.print(" clean:"); lcd.print(voltage); delay(800); } else { lcd.clear(); } if ((n>=1) and (m>=1) and (p>=1) and(q<1)) { lcd.clear(); lcd.print(" Deelp:"); lcd.print("66%"); lcd.setCursor(0,1); lcd.print("Temperature:"); lcd.print(temperature); delay(900); lcd.clear(); lcd.print(" clean:"); lcd.print(voltage); lcd.setCursor(0,1); lcd.print("PH:"); lcd.print(pHValue,2); delay(800); } else { lcd.clear(); } if ((n>=1) and (m>=1) and (p>=1) and(q>=1)) { lcd.clear(); lcd.print(" Deelp:"); lcd.print("100%"); lcd.setCursor(0,1); lcd.print("Temperature:"); lcd.print(temperature); delay(900); lcd.clear(); lcd.print(" clean:"); lcd.print(voltage); lcd.setCursor(0,1); lcd.print("PH:"); lcd.print(pHValue,2); delay(800); } else { lcd.clear(); } } float getTemp(){ //returns the temperature from one DS18S20 in DEG Celsius byte data[12]; byte addr[8]; if ( !ds.search(addr)) { //no more sensors on chain, reset search ds.reset_search(); return -1000; } if ( OneWire::crc8( addr, 7) != addr[7]) { Serial.println("CRC is not valid!"); return -1000; } if ( addr[0] != 0x10 && addr[0] != 0x28) { Serial.print("Device is not recognized"); return -1000; } ds.reset(); ds.select(addr); ds.write(0x44,1); // start conversion, with parasite power on at the end byte present = ds.reset(); ds.select(addr); ds.write(0xBE); // Read Scratchpad for (int i = 0; i < 9; i++) { // we need 9 bytes data = ds.read(); } ds.reset_search(); byte MSB = data[1]; byte LSB = data[0]; float tempRead = ((MSB << 8) | LSB); //using two's compliment float TemperatureSum = tempRead / 16; return TemperatureSum; } double avergearray(int* arr, int number){ int i; int max,min; double avg; long amount=0; if(number<=0){ Serial.println("Error number for the array to avraging!/n"); return 0; } if(number<5){ //less than 5, calculated directly statistics for(i=0;i<number;i++){ amount+=arr; } avg = amount/number; return avg; }else{ if(arr[0]<arr[1]){ min = arr[0];max=arr[1]; } else{ min=arr[1];max=arr[0]; } for(i=2;i<number;i++){ if(arr<min){ amount+=min; //arr<min min=arr; }else { if(arr>max){ amount+=max; //arr>max max=arr; }else{ amount+=arr; //min<=arr<=max } }//if }//for avg = (double)amount/(number-2); }//if return avg; }[/mw_shl_code] [/mw_shl_code] 运行测试: 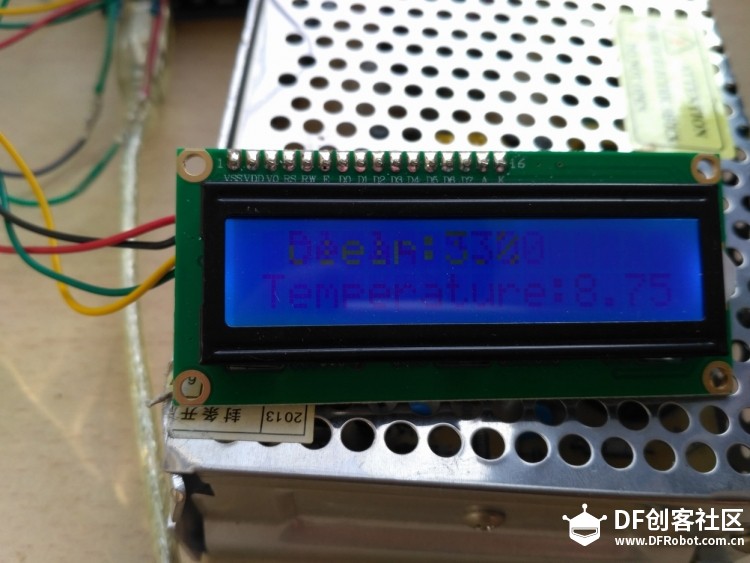 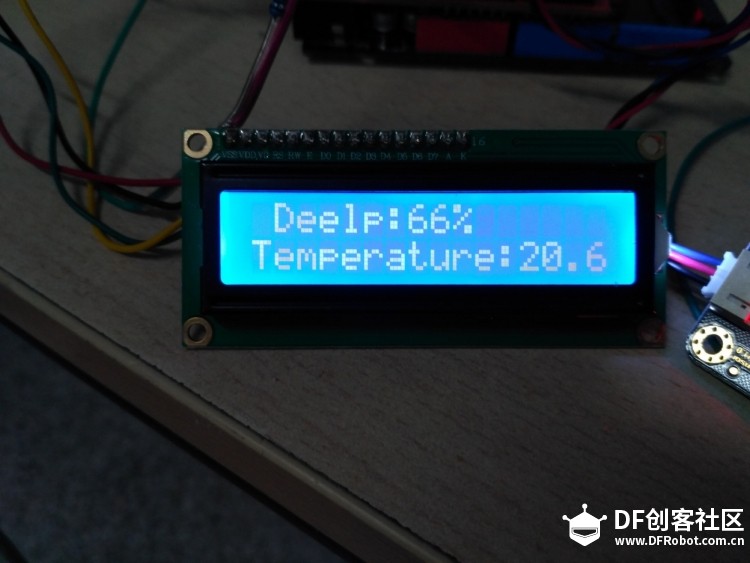 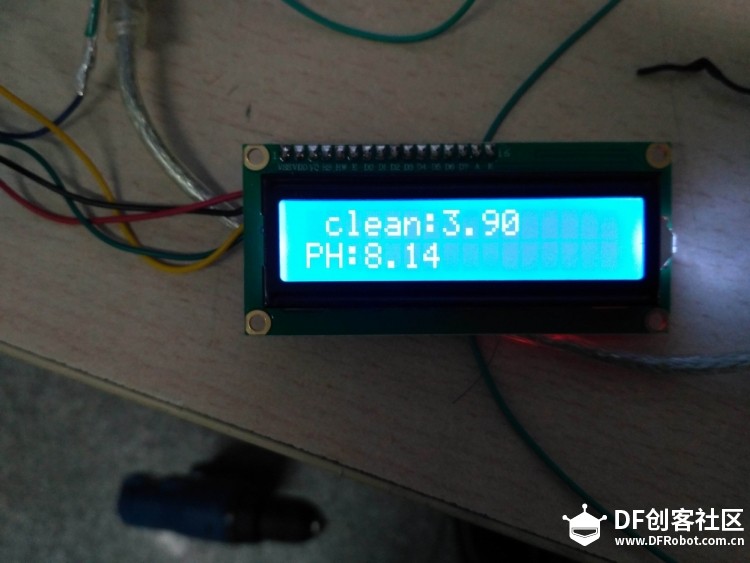 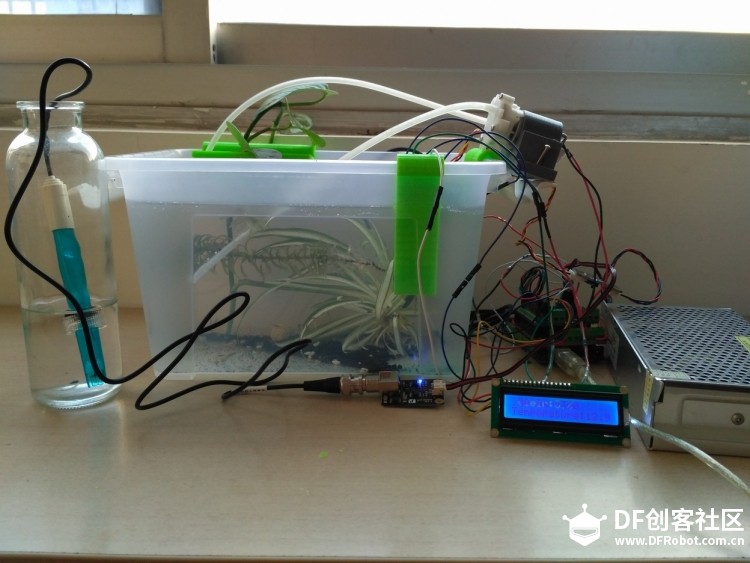 |
 沪公网安备31011502402448
© 2013-2026 Comsenz Inc. Powered by Discuz! X3.4 Licensed