|
11896| 8
|
音乐狂魔妖娆花 |
|
本帖最后由 WEIHONGYU 于 2018-7-13 17:53 编辑 近几个月来,抖音风靡全国,最魔性的就是妖娆花了,妖娆花的原型长这样:  于是,我也买了一个妖娆花来更紧时尚潮流。 欣赏了它妖娆风骚的表演 然而,拆机小能手并不能满足只是看着它表演,于是,我把它拆了 恩~~~的确很魔性 但我拆了以后发现,原理很简单,mp3芯片,里面烧录了很多首歌曲,扭动装置也就是一个通电的电机,完全没有技术含量所言。 于是,我想进行改造。 【目标】 随音乐的频率大小进行扭动,有扭动速度的变化过程。 ........................................ ........................................micro:bit版本分割线 ............................................................................. 【材料】
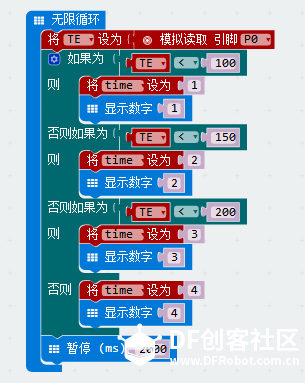
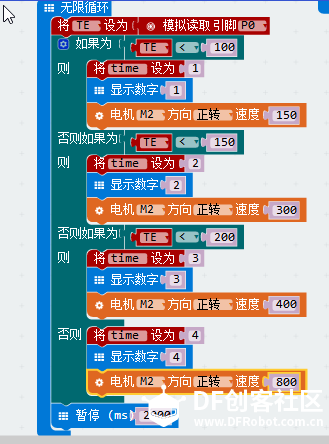
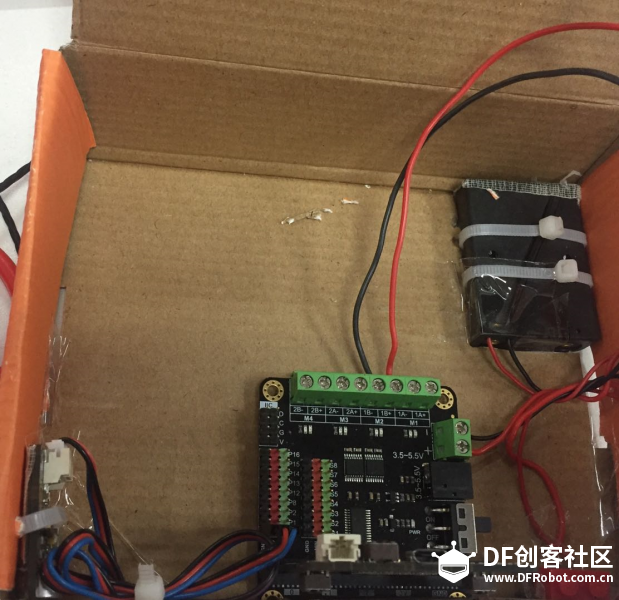
【编写程序】 step1 利用声音模拟传感器获得不同的数值,并按区间分开分别赋予变量数字  将声音模拟传感器连接电机扩展板上的P0管脚,对着声音模拟传感器放声音,观察micro:bit显示屏上的数字变化。 step2: 连接电机到电机扩展板的M2口,烧录程序,观察电机转速  如果调试无误,应该可以观察到,当有声音的时候,电机转速会增加,显示屏上的数字也会变化,当声音频率增加时,电机转速增加,显示屏上的数字值增加。 这样,就基础的完成了声音传感器控制电机转速的目标 step3 增加灯光效果,想达到随着声音频率的增加,灯带亮灯速度增加。灯带连接p2引脚  通过改变亮灯的延迟时间,来控制亮灯的速度 【内部结构】  【实物效果】[flash]%5Bflash%5D[/flash][/flash] -------------------------------- ---------------------------------Arduino版本分割线 ---------------------------------- 音乐狂魔妖娆花也可以用arduino来实现 【所需材料】
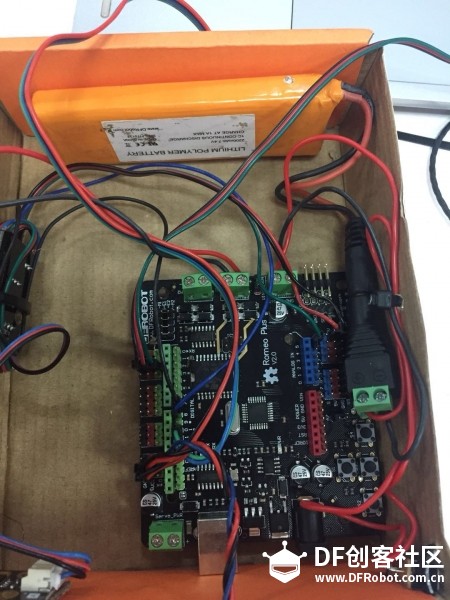
【内部结构图】  【代码】 #include <AudioAnalyzer.h> #include <SoftwareSerial.h> #include <Romeo_m.h> #include <math.h> #include <Adafruit_NeoPixel.h> #define PIN 12 #define LED_COUNT 7 SoftwareSerial mySerial(10, 11); int ledPin = 12; Adafruit_NeoPixel leds = Adafruit_NeoPixel(LED_COUNT, PIN, NEO_GRB + NEO_KHZ800); unsigned char order[4] = {0xAA, 0x06, 0x00, 0xB0}; unsigned char stopmusic[4] = {0xAA, 0x10, 0x00, 0xBA}; int E1 = 5; int M1 = 4; unsigned char pre[4] = {0xAA, 0x05, 0x00, 0xAF}; Analyzer Audio = Analyzer(8, 7, 5); int FreqVal[7]; int test; int test1; void setup() { pinMode(ledPin, OUTPUT); mySerial.begin(9600); Serial.begin(115200); leds.begin(); clearLEDs(); leds.show(); Audio.Init(); volume(0x1E);//音量设置0x00-0x1E attachInterrupt(0, turn, RISING); } void loop() { mySerial.write(order, 4); analogWrite (E1, 150); digitalWrite(M1, HIGH); delay(30000); } void M(int a) { analogWrite (E1, 50 * a); //PWM调速 digitalWrite(M1, HIGH); delay(1000); } void play(unsigned char Track) { unsigned char play[6] = {0xAA, 0x07, 0x02, 0x00, Track, Track + 0xB3}; mySerial.write(play, 6); } void volume( unsigned char vol) { unsigned char volume[5] = {0xAA, 0x13, 0x01, vol, vol + 0xBE}; mySerial.write(volume, 5); } void turn () { mySerial.write(stopmusic, 4); while (1) { Audio.ReadFreq(FreqVal);//返回7个带通滤波器过滤出的的7个对应值 test1 = max((FreqVal[3] - 250), 0); Serial.print("test"); test = test1 - 50; Serial.print(test); int flag; if (test < 100) { flag = 1; } else if (test < 200) { flag = 2; } else if (test < 300) { flag = 3; } else if (test < 400) { flag = 4; } else flag = 5; M(flag); rainbow(flag); } } void rainbow(int k) { int i, j; int h; i = random (7) ; j = random(1, 7); h = 600 / k; leds.setPixelColor(i , rainbowOrder(j)); delay(h); leds.show(); clearLEDs(); } uint32_t rainbowOrder(byte position) { if (position < 2) { return leds.Color(0xFF, position * 8, 0); } else if (position < 3) { return leds.Color(0xFF - position * 8, 0xFF, 0); } else if (position < 4) { return leds.Color(0, 0xFF, position * 8); } else if (position < 5) { return leds.Color(0, 0xFF - position * 8, 0xFF); } else if (position < 6) { return leds.Color(position * 8, 0, 0xFF); } else { return leds.Color(0xFF, 0x00, 0xFF - position * 8); } } void clearLEDs() { for (int i = 0; i < LED_COUNT; i++) { leds.setPixelColor(i, 0); } } |
 沪公网安备31011502402448
© 2013-2026 Comsenz Inc. Powered by Discuz! X3.4 Licensed