|
21474| 8
|
【ESP8266教程—Lesson3】小风扇的变形记 |

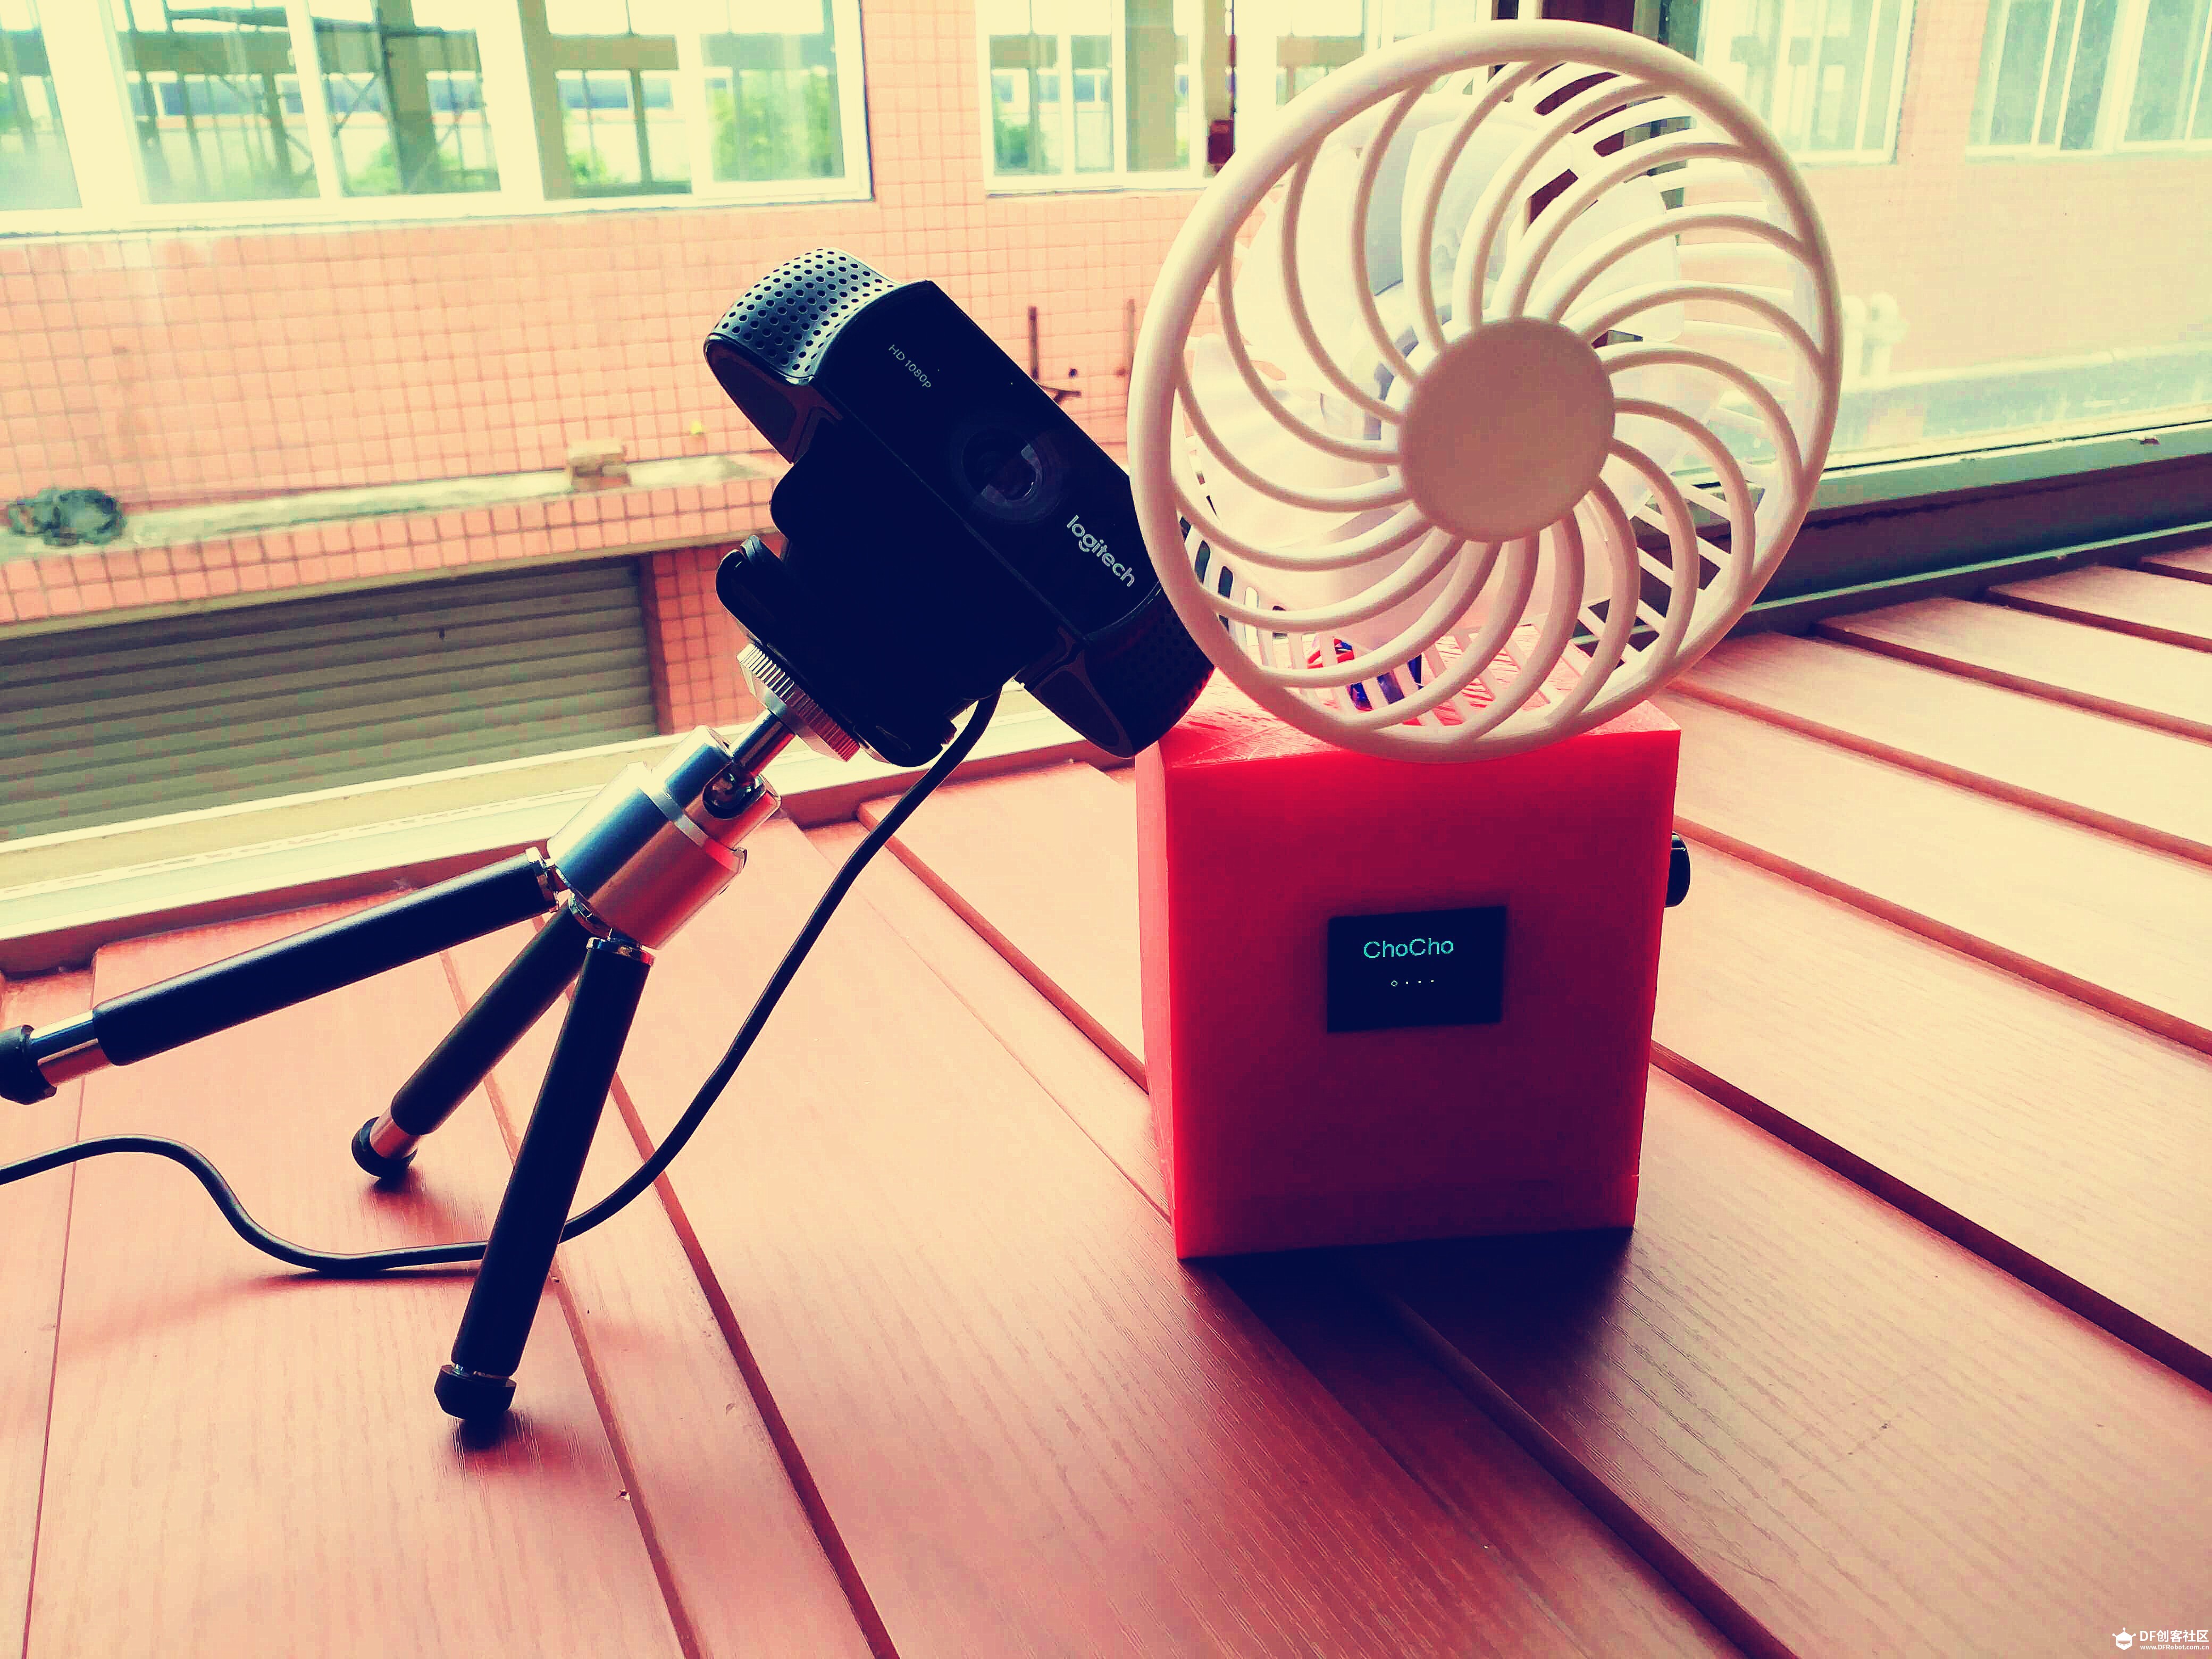   怎么看怎么决定萌萌哒。。。(*^__^*) 嘻嘻……  戳一下下面的视频,看看这个小家伙是怎么变形的吧!!! 所需硬件 ESP8266控制器 × 1 FireBeetle Covers-Gravity转接板 × 1 OLED12864显示屏 × 1 BME280温湿度传感器 × 1 EC11J旋转编码器 × 1 9g舵机 × 1 杜邦线 × 10 3D打印外壳 × 1 整个制作过程不需要任何焊接,直接用杜邦线连接就行了。 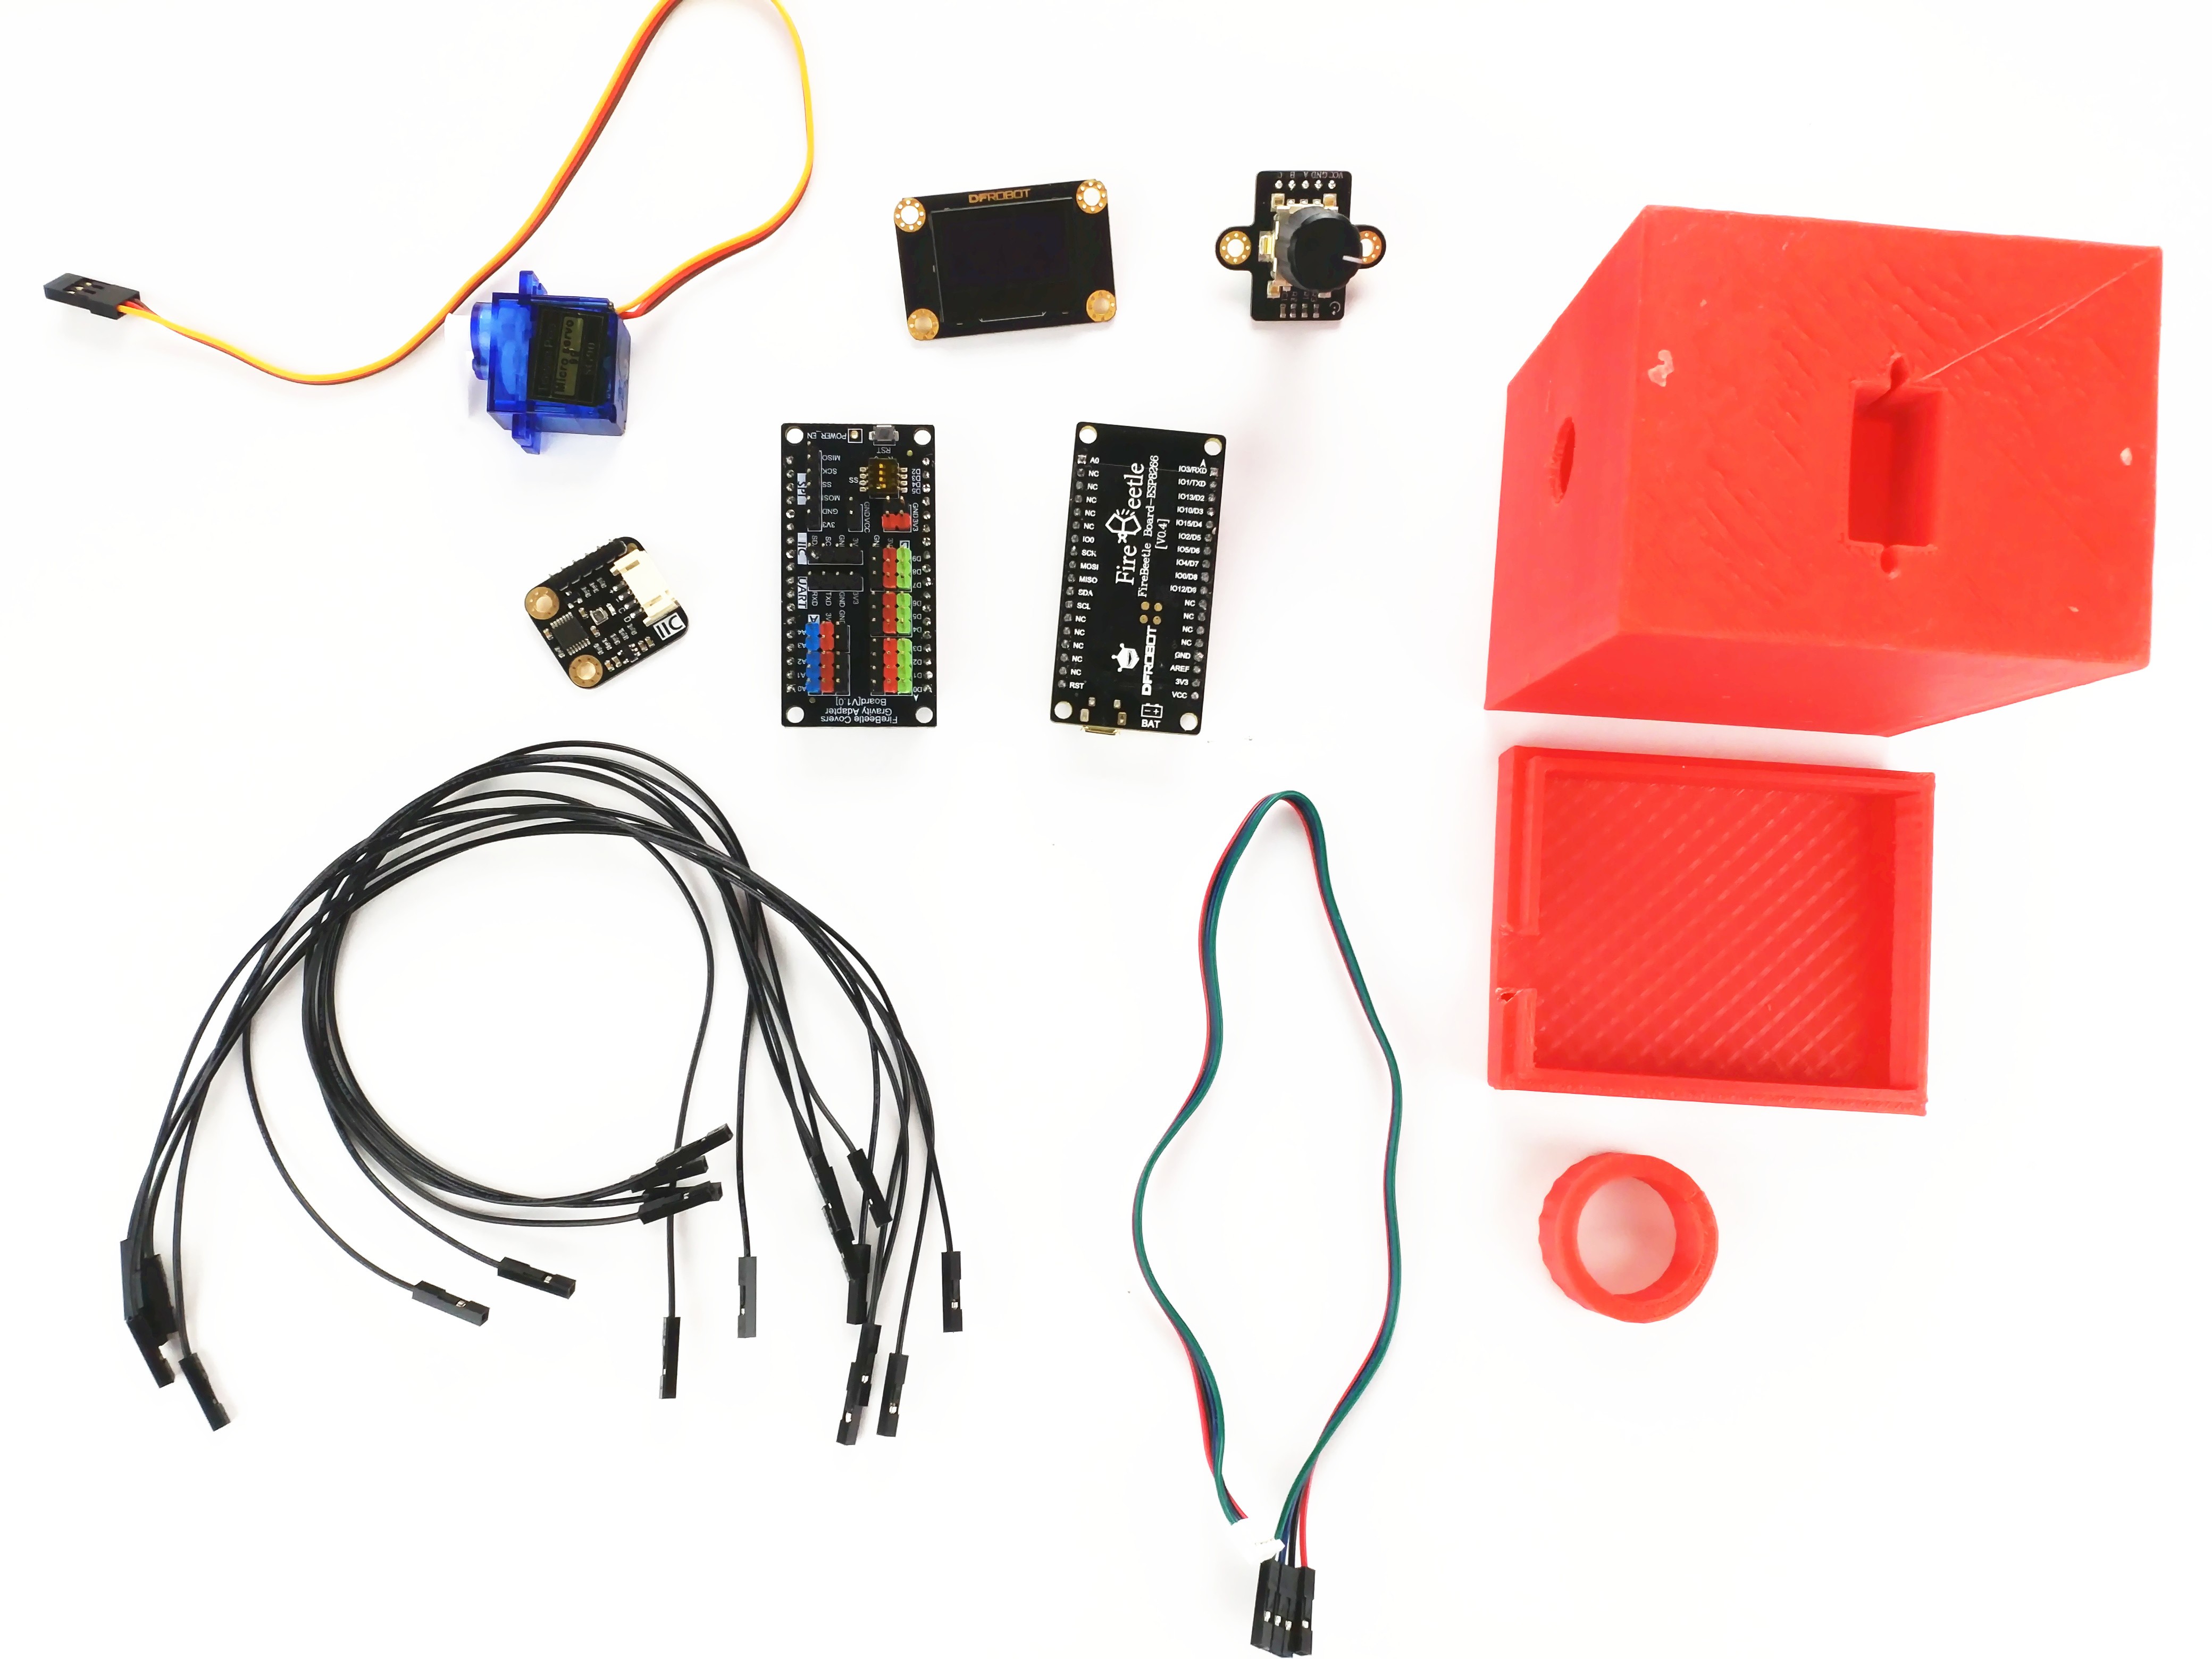 其中,OLED12864采用I2C接口,直接连接到Gravity转接板的I2C接口上,EC11J旋转编码器的A端口连接到D0,B端口连接到D1,C端口连接到D8,舵机连接到D3,BME280采用SPI接口,直接连接到Gravity转接板的SPI接口,CS片选连通D5,主原理图如下图所示: 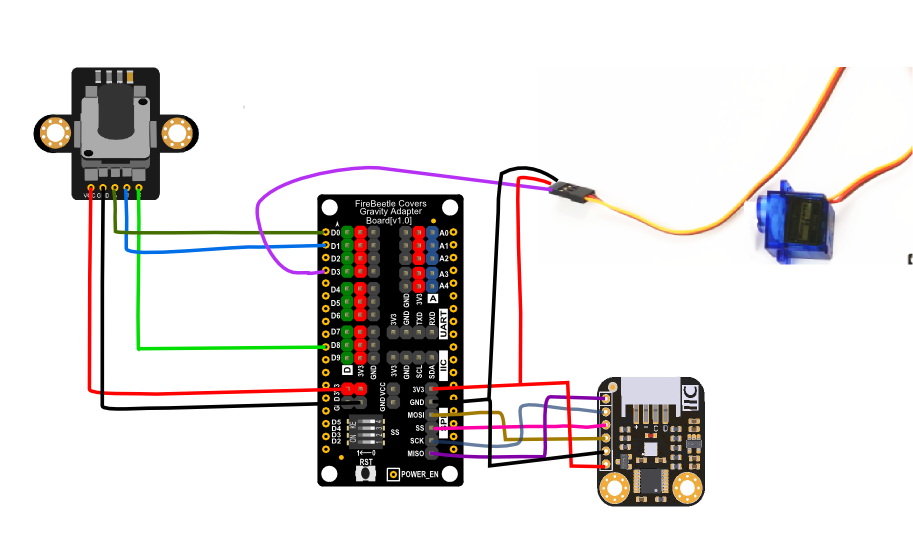 制作过程 1、3D打印外壳 所需的程序和3D源文件,点击链接下载。 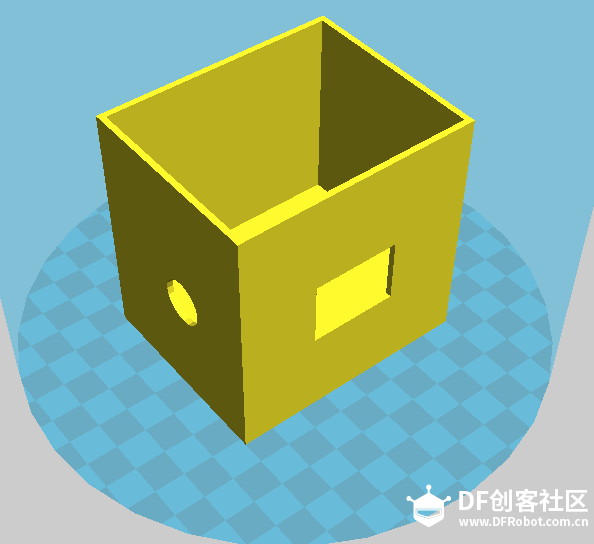 2、固定旋转编码器到外壳  用热熔胶固定 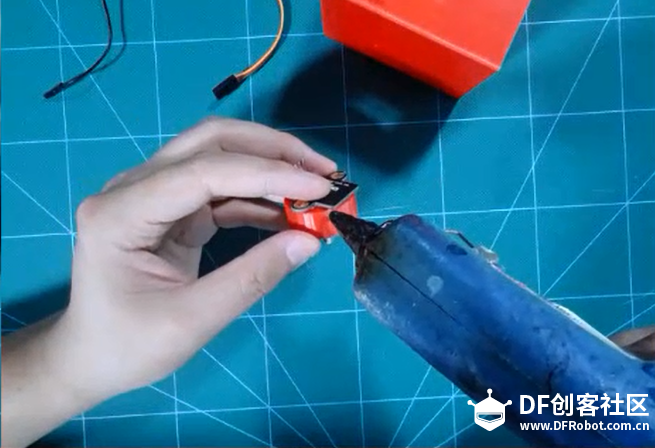 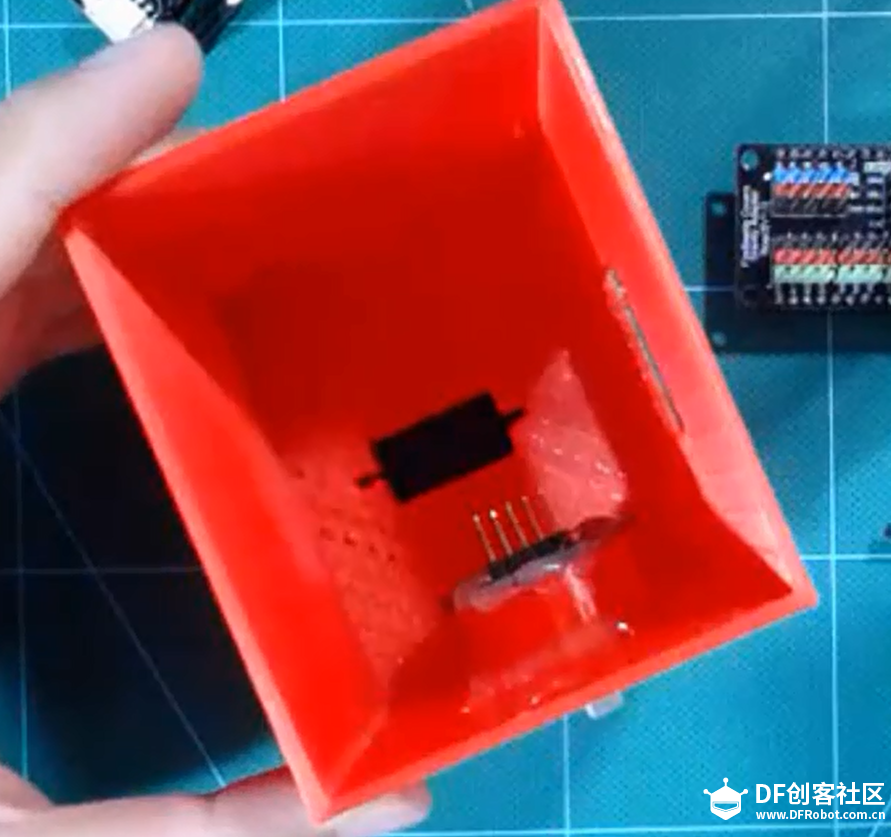 再用杜邦线连接EC11J到Gravity转接板 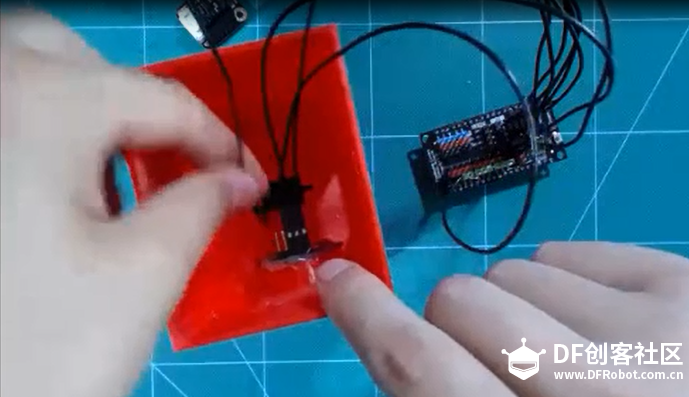 3、固定OLED12864到外壳 用杜邦线连接OLED显示屏和Gravity转接板,接口是I2C。 4、连接BME280 BME280采用SPI接口,连线方式参考前面的电路原理图。 5、安装风扇 将锂电池拔掉,通过杜邦线连接到ESP8266主板的Vcc和GND上,锂电池插接到ESP8266主板上。然后固定舵机,舵机接口连接到D3。 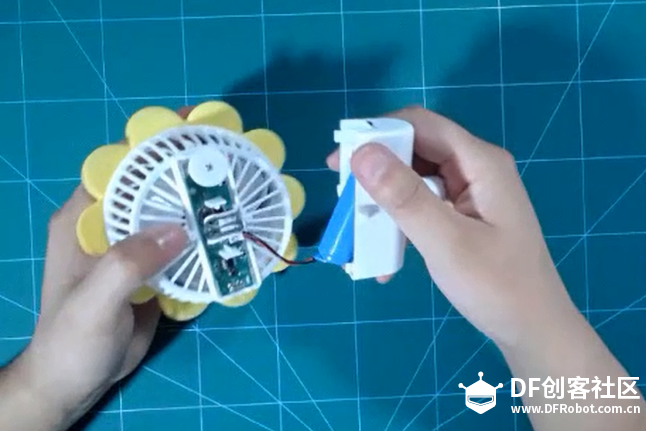 用热熔胶固定连接线 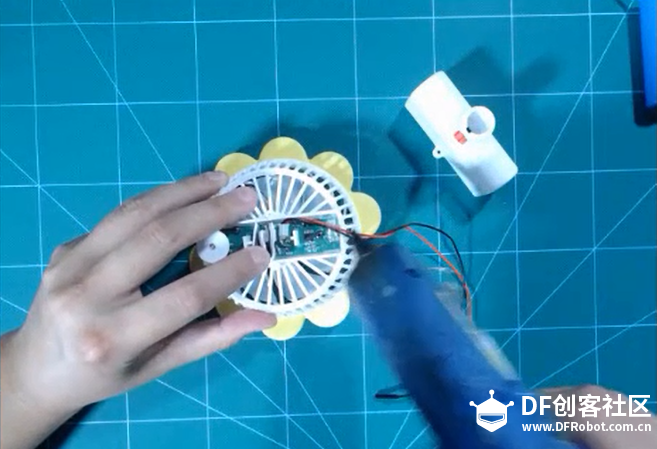 然后固定舵机。。。 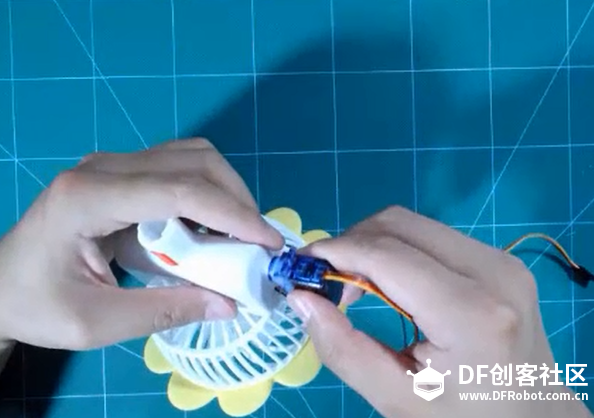 6、组装整机 将底盖合上,用热熔胶固定,然后下载程序。 [mw_shl_code=applescript,true] #include <Wire.h> // Only needed for Arduino 1.6.5 and earlier #include <Servo.h> #include "SSD1306.h" // alias for `#include "SSD1306Wire.h"` #include "OLEDDisplayUi.h" #include "images.h" #include <DFRobot_BME280.h> #include <SimpleTimer.h> #define SEA_LEVEL_PRESSURE 1013.25f #define BME_CS D5 SimpleTimer timer; int timeCounter = 0; boolean uiEnable = true; DFRobot_BME280 bme(BME_CS); //SPI SSD1306 display(0x3c, D7, D6); Servo mymotor; OLEDDisplayUi ui( &display ); enum model{ MODEL_NULL, MODEL_LEFT, MODEL_RIGHT, MODEL_BUTTON }; enum setFrame{ SET_NULL, SET_FRAME_2_ON, SET_FRAME_2_OFF, SET_FRAME_3_ON, SET_FRAME_3_OFF }; enum motorModel{ MOTOR_AUTO, MOTOR_STATIC }; char commondModel = MODEL_NULL; char setFrameValue = SET_NULL; char motorState = MOTOR_STATIC; int encoderPinA = D0; int encoderPinB = D1; int buttonPin = D8; volatile int lastEncoded = 0; volatile long encoderValue = 0; long lastencoderValue = 0; int lastMSB = 0; int lastLSB = 0; int speedValue = 5; int angleValue = 90; boolean dir = true; int frameIndex = 0; long readEncoderValue(void){ return encoderValue/4; } boolean isButtonPushDown(void){ if(!digitalRead(buttonPin)){ delay(5); if(!digitalRead(buttonPin)){ while(!digitalRead(buttonPin)); return true; } } return false; } void msOverlay(OLEDDisplay *display, OLEDDisplayUiState* state) { if(frameIndex == 0) return; display->setTextAlignment(TEXT_ALIGN_RIGHT); display->setFont(ArialMT_Plain_10); display->drawString(128, 0, String(angleValue)); } void drawFrame1(OLEDDisplay *display, OLEDDisplayUiState* state, int16_t x, int16_t y) { display->setTextAlignment(TEXT_ALIGN_LEFT); display->setFont(ArialMT_Plain_24); display->drawString(15 + x, 10+ y, "ChoCho"); } void drawFrame2(OLEDDisplay *display, OLEDDisplayUiState* state, int16_t x, int16_t y) { float temp = bme.temperatureValue(); float pa = bme.pressureValue(); float hum = bme.altitudeValue(SEA_LEVEL_PRESSURE); float alt = bme.humidityValue(); // Demonstrates the 3 included default sizes. The fonts come from SSD1306Fonts.h file // Besides the default fonts there will be a program to convert TrueType fonts into this format display->setTextAlignment(TEXT_ALIGN_LEFT); display->setFont(ArialMT_Plain_16); display->drawString(x, y,String("Temp: ")+String(temp)); display->drawString(x, 17 + y, String("Hum: ")+String(alt)); display->drawString(x, 34 + y, String("Pa: ")+String(pa)); } void drawFrame3(OLEDDisplay *display, OLEDDisplayUiState* state, int16_t x, int16_t y) { // Text alignment demo display->setFont(ArialMT_Plain_16); // The coordinates define the left starting point of the text display->setTextAlignment(TEXT_ALIGN_LEFT); display->drawString(x, y, "Set Speed"); display->drawString(40+x, y+17,String(speedValue)); } void drawFrame4(OLEDDisplay *display, OLEDDisplayUiState* state, int16_t x, int16_t y) { // Text alignment demo display->setFont(ArialMT_Plain_16); // The coordinates define the left starting point of the text display->setTextAlignment(TEXT_ALIGN_LEFT); display->drawString(x, y, "FAN Model"); if(motorState == MOTOR_STATIC){ display->drawString(40+x, y+27,"STATIC"); }else if(motorState == MOTOR_AUTO){ display->drawString(40+x, y+27,"AUTO"); } } // This array keeps function pointers to all frames // frames are the single views that slide in FrameCallback frames[] = { drawFrame1, drawFrame2, drawFrame3, drawFrame4}; // how many frames are there? int frameCount = 4; // Overlays are statically drawn on top of a frame eg. a clock OverlayCallback overlays[] = { msOverlay }; int overlaysCount = 1; void ec11Init(void){ pinMode(encoderPinA, INPUT); pinMode(encoderPinB, INPUT); pinMode(buttonPin, INPUT); digitalWrite(encoderPinA, HIGH); //turn pullup resistor on digitalWrite(encoderPinB, HIGH); //turn pullup resistor on attachInterrupt(D0, updateEncoder, CHANGE); attachInterrupt(D1, updateEncoder, CHANGE); } void displayInit(void){ ui.setTargetFPS(60); ui.setActiveSymbol(activeSymbol); ui.setInactiveSymbol(inactiveSymbol); ui.setIndicatorPosition(BOTTOM); ui.setIndicatorDirection(LEFT_RIGHT); ui.setFrameAnimation(SLIDE_LEFT); ui.setFrames(frames, frameCount); ui.setOverlays(overlays, overlaysCount); ui.disableAutoTransition(); ui.switchToFrame(frameIndex); ui.init(); display.flipScreenVertically(); } void motorInit(void){ mymotor.attach(D3); mymotor.write(speedValue); } void updateUi(void){ if(timeCounter>50){ display.displayOff(); uiEnable = false; }else{ display.displayOn(); uiEnable = true; timeCounter++; } if(commondModel == MODEL_RIGHT){ frameIndex++; if(frameIndex > 3) frameIndex = 0; ui.switchToFrame(frameIndex); }else if(commondModel == MODEL_LEFT){ frameIndex--; if(frameIndex < 0) frameIndex = 3; ui.switchToFrame(frameIndex); } commondModel = MODEL_NULL; } void updateMotor(void){ if(motorState == MOTOR_AUTO){ if(dir == true){ angleValue += speedValue; }else{ angleValue -= speedValue; } } if(angleValue > 180) dir = false; else if(angleValue < 0) dir = true; mymotor.write(angleValue); } void doButton(void){ if(isButtonPushDown()){ if(uiEnable == false){ commondModel = MODEL_NULL; }else{ commondModel = MODEL_BUTTON; } timeCounter = 0; } if(readEncoderValue()!=0){ long value = readEncoderValue(); if(uiEnable == true){ if(value > 0){ commondModel = MODEL_RIGHT; }else{ commondModel = MODEL_LEFT; } } timeCounter = 0; encoderValue = 0; } if(frameIndex == 2){ if(commondModel == MODEL_BUTTON){ if(setFrameValue == SET_FRAME_2_ON){ setFrameValue = SET_FRAME_2_OFF; }else{ setFrameValue = SET_FRAME_2_ON; } commondModel = MODEL_NULL; } if(setFrameValue == SET_FRAME_2_ON){ if(commondModel == MODEL_RIGHT){ speedValue++; }else if((commondModel == MODEL_LEFT)){ speedValue--; } if(speedValue > 20) speedValue = 20; if(speedValue < 0) speedValue = 0; commondModel = MODEL_NULL; } } if(frameIndex == 3){ if(commondModel == MODEL_BUTTON){ if(setFrameValue == SET_FRAME_3_ON){ setFrameValue = SET_FRAME_3_OFF; }else{ setFrameValue = SET_FRAME_3_ON; } commondModel = MODEL_NULL; } if(setFrameValue == SET_FRAME_3_ON){ if((commondModel == MODEL_RIGHT) || (commondModel == MODEL_LEFT)){ motorState = (motorState==MOTOR_AUTO)?MOTOR_STATIC:MOTOR_AUTO; } commondModel = MODEL_NULL; } } } void setup() { ec11Init(); displayInit(); motorInit(); bme.begin(); timer.setInterval(200,updateUi); timer.setInterval(50,updateMotor); } void loop(){ int remainingTimeBudget = ui.update(); if (remainingTimeBudget > 0) { delay(remainingTimeBudget); } doButton(); timer.run(); } void updateEncoder(){ int MSB = digitalRead(encoderPinA); //MSB = most significant bit int LSB = digitalRead(encoderPinB); //LSB = least significant bit int encoded = (MSB << 1) |LSB; //converting the 2 pin value to single number int sum = (lastEncoded << 2) | encoded; //adding it to the previous encoded value if(sum == 0b1101 || sum == 0b0100 || sum == 0b0010 || sum == 0b1011) encoderValue ++; if(sum == 0b1110 || sum == 0b0111 || sum == 0b0001 || sum == 0b1000) encoderValue --; if(uiEnable == false) encoderValue = 0; lastEncoded = encoded; //store this value for next time } [/mw_shl_code]  整个制作过程完成,是不是很简单了。。。  扫一扫二维码,观看更多的创意制作视频  ESP8266技术交流群: 619558168 |
 沪公网安备31011502402448
© 2013-2026 Comsenz Inc. Powered by Discuz! X3.4 Licensed