这里介绍在树莓派上使用Pyside2+QML方式进行GUI程序的开发,该GUI程序可以通过按钮来控制LED。
1、准备
开发环境使用PyCharm+QtCreator+树莓派远程开发方式,参考之前教程:
树莓派GUI远程开发-pyside2开发环境搭建
树莓派需要安装pyside2库和GPIO Zero库,本次使用这两个库进行开发,参考之前python操作LED的教程:
使用PyCharm进行树莓派的远程开发-python
2、步骤
2.1、新建项目
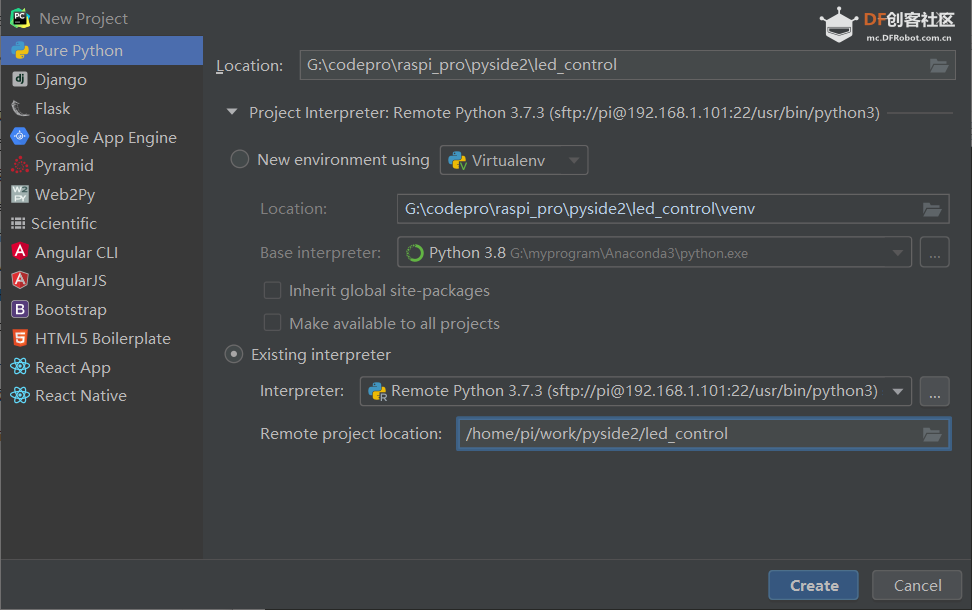
新建一个python项目,并填写好项目本地路径和树莓派远程路径,如下:

2.2、新建python文件
新建文件 main.py,文件内容如下:
import os
import sys
from pathlib import Path

from PySide2.QtCore import QObject, Slot
from PySide2.QtGui import QGuiApplication
from PySide2.QtQml import QQmlApplicationEngine

if __name__=="__main__":
    app = QGuiApplication(sys.argv)
    engine = QQmlApplicationEngine()

    engine.load(os.fspath(Path(__file__).resolve().parent / "ui/led.qml"))
    if not engine.rootObjects():
        sys.exit(-1)

    sys.exit(app.exec_())
2.3、新建qml界面文件
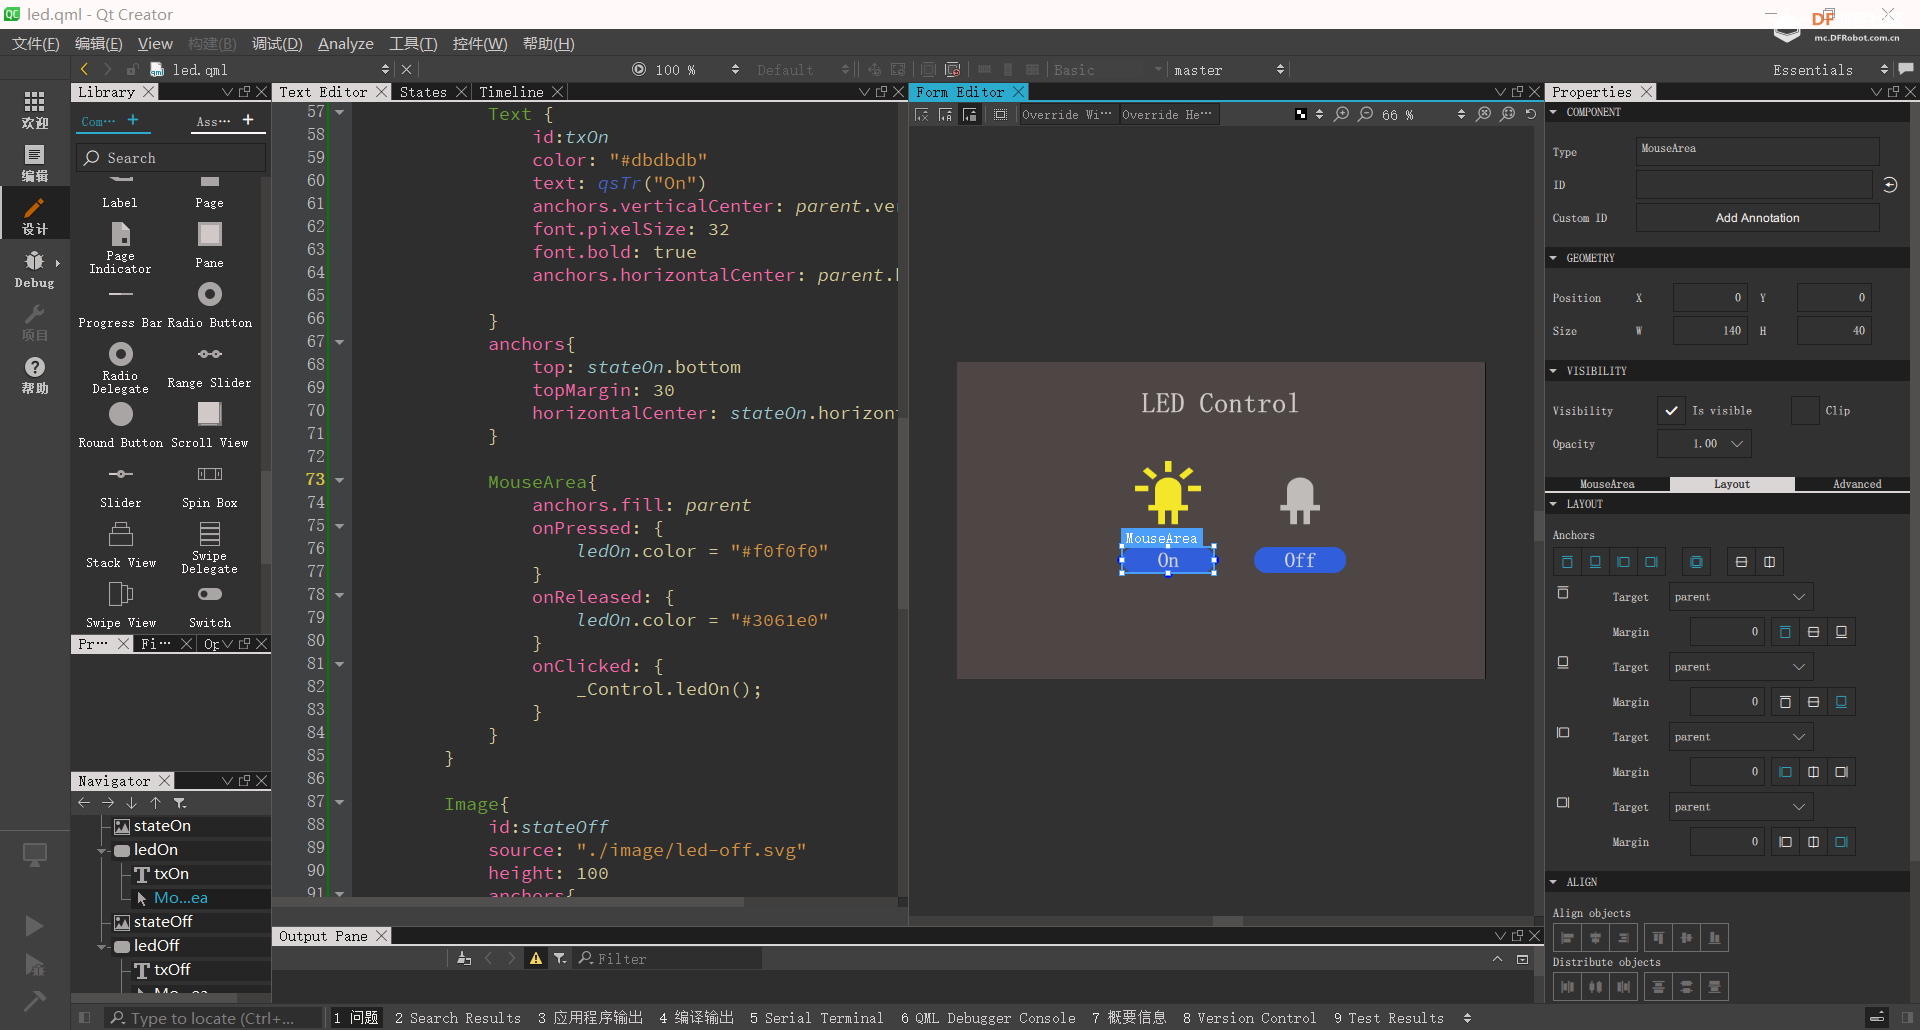
在工程目录新建ui文件夹,并在其下新建led.qml文件,然后右键用QtCreator打开,并在QtCreator中完成ui设计:

qml文件内容如下:
import QtQuick 2.11
import QtQuick.Window 2.11
import QtQuick.Controls 2.4

ApplicationWindow {
    id:root
    title:qsTr("Led Control")
    visible: true
    width: 800
    height: 480

    background: Rectangle{
        color: "#4d4747"
        anchors.fill: parent
    }

    Text {
        id: info
        color: "#cfcdcd"
        text: qsTr("LED Control")
        anchors{
            horizontalCenter: parent.horizontalCenter
            top: parent.top
            topMargin: 40
        }

        font.bold: true
        font.pointSize: 26
    }

    Item {
        id: contains
        anchors{
            left: parent.left
            top:parent.top
            leftMargin: 260
            topMargin: 150
        }

        Image {
            id: stateOn
            anchors{
                left: contains.left
                top:contains.top
            }
            height: 100
            source: "./image/led-on.svg"
        }

        Rectangle{
            id:  ledOn
            color: "#3061e0"
            radius: 20
            width: 140
            height: 40
            Text {
                id:txOn
                color: "#dbdbdb"
                text: qsTr("On")
                anchors.verticalCenter: parent.verticalCenter
                font.pixelSize: 32
                font.bold: true
                anchors.horizontalCenter: parent.horizontalCenter

            }
            anchors{
                top: stateOn.bottom
                topMargin: 30
                horizontalCenter: stateOn.horizontalCenter
            }

            MouseArea{
                anchors.fill: parent
                onPressed: {
                    ledOn.color = "#f0f0f0"
                }
                onReleased: {
                    ledOn.color = "#3061e0"
                }
                onClicked: {

                }
            }
        }

        Image{
            id:stateOff
            source: "./image/led-off.svg"
            height: 100
            anchors{
                left: stateOn.right
                top: stateOn.top
                leftMargin: 80
            }
        }

        Rectangle{
            id: ledOff
            color: "#3061e0"
            radius: 20
            width: 140
            height: 40
            Text {
                id:txOff
                color: "#dbdbdb"
                text: qsTr("Off")
                anchors.verticalCenter: parent.verticalCenter
                font.pixelSize: 32
                font.bold: true
                anchors.horizontalCenter: parent.horizontalCenter

            }
            anchors{
                top:stateOff.bottom
                topMargin: 30
                horizontalCenter: stateOff.horizontalCenter
            }
            MouseArea{
                anchors.fill: parent
                onPressed: {
                    ledOff.color = "#f0f0f0"
                }
                onReleased: {
                    ledOff.color = "#3061e0"
                }
                onClicked: {

                }
            }
        }
    }

}

/*##^##
Designer {
    D{i:0;formeditorZoom:0.66}
}
##^##*/
2.4、界面按钮控制LED
- 首先在python文件中,新建一个类用于控制LED,使qml调用这个类的槽函数即可在界面中进行控制:
...

from gpiozero import LED

class Control(QObject):
    led = LED(26)
    @Slot()
    def ledOn(self):
        print("led on")
        self.led.on()

    @Slot()
    def ledOff(self):
        print("led off")
        self.led.off()

....
......
    context = engine.rootContext()
    controler = Control()
    context.setContextProperty("_Control",controler)
......
打开按钮的点击时候:
onClicked: {
    _Control.ledOn();
}
关闭按钮点击时候:
onClicked: {
    _Control.ledOff();
}
2.5、运行
-
上传工程到树莓派
-
运行python文件即可
-
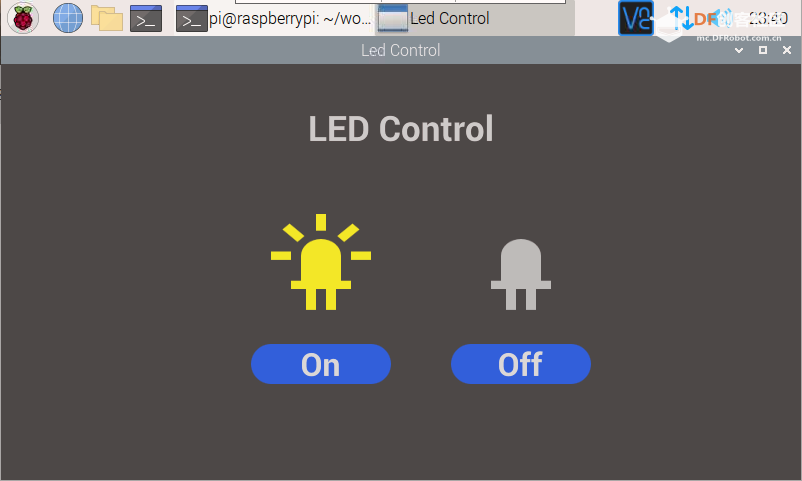
界面显示如下

视频效果:
| 
 沪公网安备31011502402448