本帖最后由 腿毛利小五郎 于 2025-12-6 11:27 编辑
基于FireBeetle 2 ESP32-C5 IIC屏幕电脑“副屏”
展示视频:
1. 项目背景与挑战
项目的目标很纯粹:想鼓捣一个电脑副屏玩一下,仅尝试。为了确保速率,手头上有一块IIC的屏幕,IIC速度限制,esp32C5支持wifi,保证成本另外一端就采用网络传输吧。
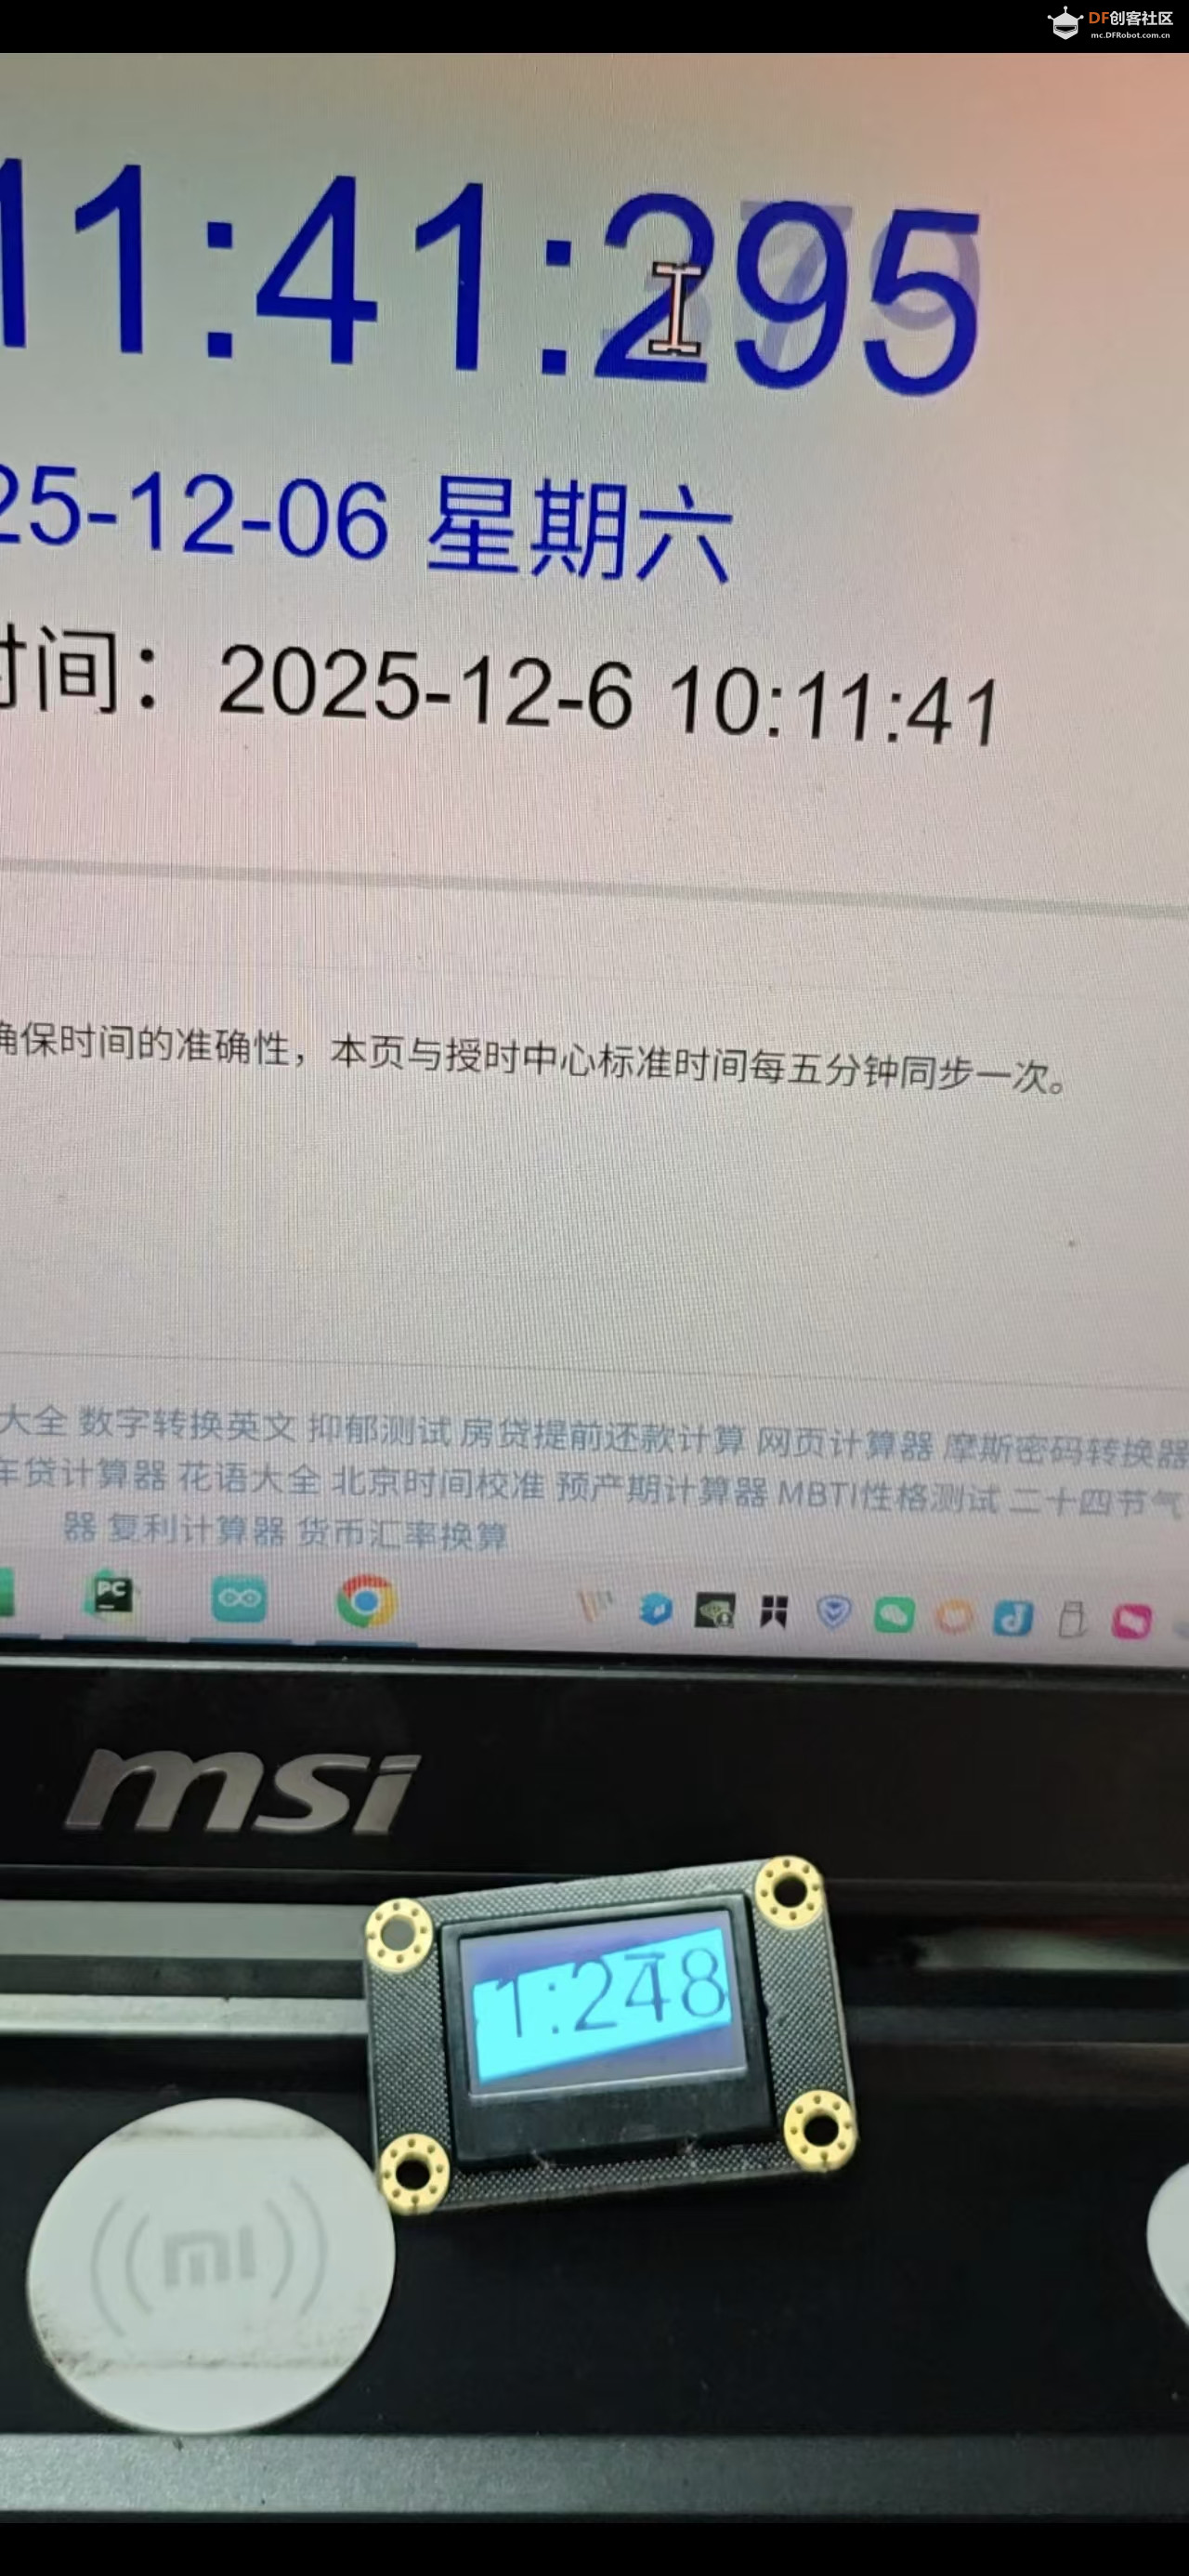
通过 TCP 协议将 PC 端画面实时传输到 ESP32 驱动的 SSD1306 OLED (128x64) 上。
这看似简单,但面临两个典型的不对称速率问题: 如果采用简单的“接收 -> 显示”同步逻辑,网络抖动会导致卡顿,而 I2C 的低速刷新会阻塞网络接收,导致丢包。为了解决这种生产者-消费者速率不匹配问题,架构设计必须解耦。
2. 接线C5 设计十分用心,不仅自带拓展板,官方还为其定制了按引脚功能分类的彩色线材,大幅降低了接线难度,让操作更直观高效,这个细节真的值得点赞!

3. 物理极限:I2C 总线的带宽分析首先,我们需要正视硬件的物理上限。对于 SSD1306,我们使用 I2C 接口。 标准速度:100 kHz (过于缓慢) 快速模式:400 kHz (本项目采用)
让我们做一个理论计算: OLED 分辨率为 128*64,即每帧需要传输 128*64/ 8 = 1024 Bytes 的数据。在 I2C 协议中,传输一个字节通常需要 9 个时钟周期(8位数据 + 1位 ACK)。 那么一个比特的时间就是9/400000 差不多是22.5us。 传输一帧完整图像(纯数据,不计地址头和 Start/Stop 信号开销)所需时间:
1024*22.5us 差不多 23.04ms
理论最大帧率(FPS):
就是23.04的倒数,43.4帧
然而,现实很骨感。 加上 I2C 的地址开销、ESP32 的中断响应延迟、TCP 协议栈的处理时间,实际能稳定跑到 30 FPS 已是工程极限。I2C 的半双工、开漏输出特性决定了它不适合大数据量吞吐,因此,每一毫秒的 CPU 时间都不能被浪费在“等待总线”上。
4. 核心架构:三重缓冲 (Triple Buffering)为了在 30 FPS 的物理极限下实现如丝般顺滑的体验,我放弃了传统的双缓冲(Double Buffering),转而采用了三重缓冲机制,很多项目里也都是用三缓冲。 在双缓冲模型中,我们有 BackBuffer(接收)和 FrontBuffer(显示)。 我也引入了第三个缓冲区,系统结构变为: Display Buffer (Front):当前 I2C 正在读取并发送给 OLED 的数据。 Receiving Buffer (Back):TCP 正在写入的网络数据。 Standby Buffer (Middle):一个空闲的中间态。
工作流程如下:
- // 核心指针交换逻辑(原子操作思想)
- volatile uint8_t* buffers[3] = { buf0, buf1, buf2 };
- volatile int displayIdx = 0;
- volatile int receivingIdx = 1;
- volatile int standbyIdx = 2;
-
- void swapBuffersForDisplay() {
- noInterrupts(); // 进入临界区,防止中断打断指针交换
- int prevDisplay = displayIdx;
- displayIdx = receivingIdx; // 将最新接收好的数据推向前台
- receivingIdx = standbyIdx; // 拿空闲缓冲去接新数据
- standbyIdx = prevDisplay; // 旧的显示数据退居二线
- interrupts();
- }
5. 上位机上位机是在Windows下执行的python脚本,大致就是图像采集,数据流处理转换,封包,发送。逻辑还是很清晰的。
6. 总结这个项目虽小,却是一个典型的软硬结合性能调优案例。
7. 源码
Arduino
- #include <WiFi.h>
- #include <Wire.h>
- #include <Adafruit_GFX.h>
- #include <Adafruit_SSD1306.h>
-
- // Wi-Fi
- const char* WIFI_SSID = "";
- const char* WIFI_PASSWORD = "";
-
- // Server
- WiFiServer server(12345);
- WiFiClient client;
-
- // Display
- #define SCREEN_WIDTH 128
- #define SCREEN_HEIGHT 64
- #define OLED_RESET -1
- Adafruit_SSD1306 display(SCREEN_WIDTH, SCREEN_HEIGHT, &Wire, OLED_RESET);
-
- // Frame sizes and buffers
- const size_t FRAME_BYTES = (SCREEN_WIDTH * SCREEN_HEIGHT) / 8; // 1024
- uint8_t buf0[FRAME_BYTES];
- uint8_t buf1[FRAME_BYTES];
- uint8_t buf2[FRAME_BYTES];
- volatile uint8_t* buffers[3] = { buf0, buf1, buf2 };
-
- // Indices
- volatile int displayIdx = 0;
- volatile int receivingIdx = 1;
- volatile int standbyIdx = 2;
-
- // Receive state
- const uint16_t HEADER_MAGIC = 0xAA55;
- uint32_t recvSeq = 0;
- unsigned long lastRecvMillis = 0;
- const unsigned long RECV_TIMEOUT_MS = 2000; // 超时 -> 清屏或暂停显示
-
- // Utility for atomic swap of indices (disable interrupts around swap)
- void swapBuffersForDisplay() {
- noInterrupts();
- int prevDisplay = displayIdx;
- displayIdx = receivingIdx;
- receivingIdx = standbyIdx;
- standbyIdx = prevDisplay;
- interrupts();
- }
-
- void clearDisplayBuffer(uint8_t* b) {
- memset(b, 0x00, FRAME_BYTES);
- }
-
- void showBuffer(uint8_t* b) {
- // SSD1306 expects page addressing; Adafruit library has drawBitmap
- display.clearDisplay();
- display.drawBitmap(0, 0, b, SCREEN_WIDTH, SCREEN_HEIGHT, SSD1306_WHITE);
- display.display();
- }
-
- bool readExact(WiFiClient& cli, uint8_t* dst, size_t len, unsigned long timeout_ms) {
- size_t got = 0;
- unsigned long start = millis();
- while (got < len) {
- if (cli.available()) {
- int r = cli.read(dst + got, len - got);
- if (r > 0) got += r;
- } else {
- if ((millis() - start) > timeout_ms) return false;
- delay(1);
- }
- }
- return true;
- }
-
- void setup() {
- Serial.begin(115200);
- delay(100);
-
- // I2C 初始化
- Wire.begin(9, 10); // SDA = 9, SCL = 10
- Wire.setClock(400000); // 400kHz fast mode
-
- // Display init
- if (!display.begin(SSD1306_SWITCHCAPVCC, 0x3C)) {
- Serial.println("SSD1306 allocation failed");
- while (1);
- }
- display.clearDisplay();
- display.display();
-
- // Clear buffers
- clearDisplayBuffer((uint8_t*)buffers[0]);
- clearDisplayBuffer((uint8_t*)buffers[1]);
- clearDisplayBuffer((uint8_t*)buffers[2]);
-
- // Wi-Fi connect
- Serial.printf("Connecting to %s\n", WIFI_SSID);
- WiFi.mode(WIFI_STA);
- WiFi.begin(WIFI_SSID, WIFI_PASSWORD);
- int retry = 0;
- while (WiFi.status() != WL_CONNECTED && retry < 40) {
- delay(250);
- Serial.print(".");
- retry++;
- }
- if (WiFi.status() == WL_CONNECTED) {
- Serial.println();
- Serial.print("Connected. IP: ");
- Serial.println(WiFi.localIP());
- } else {
- Serial.println();
- Serial.println("WiFi connect failed. Starting AP as fallback.");
- WiFi.softAP("ESP32_OLED_AP");
- Serial.print("AP IP: ");
- Serial.println(WiFi.softAPIP());
- }
-
- // Start server
- server.begin();
- Serial.printf("Server started on port %d\n", 12345);
- lastRecvMillis = millis();
- }
-
- void loop() {
- // Accept new client if none
- if (!client || !client.connected()) {
- if (server.hasClient()) {
- if (client && client.connected()) {
- WiFiClient other = server.available();
- other.stop();
- } else {
- client = server.available();
- Serial.println("Client connected");
- }
- }
- }
-
- // If client connected, try read frame header
- if (client && client.connected()) {
- // We try to read header: 2 bytes magic + 4 bytes seq + 2 bytes length = 8 bytes
- if (client.available() >= 8) {
- uint8_t header[8];
- if (!readExact(client, header, 8, 1000)) {
- Serial.println("Header read timeout");
- client.stop();
- } else {
- uint16_t magic = (header[0] << 8) | header[1];
- if (magic != HEADER_MAGIC) {
- Serial.println("Bad magic, resyncing");
- // try to resync by discarding one byte and continue
- client.read();
- return;
- }
- uint32_t seq = (uint32_t(header[2]) << 24) | (uint32_t(header[3]) << 16) | (uint32_t(header[4]) << 8) | uint32_t(header[5]);
- uint16_t length = (uint16_t(header[6]) << 8) | uint16_t(header[7]);
- if (length != FRAME_BYTES) {
- Serial.printf("Unexpected frame length: %d (expected %d)\n", length, FRAME_BYTES);
- // try to skip this amount (or drop connection)
- if (length < 50000) {
- uint8_t tmp[64];
- size_t toskip = length;
- while (toskip > 0 && client.connected()) {
- size_t r = client.read(tmp, min((size_t)64, toskip));
- if (r == 0) break;
- toskip -= r;
- }
- return;
- } else {
- client.stop();
- return;
- }
- }
- // read payload into receiving buffer
- uint8_t* recvBuf = (uint8_t*)buffers[receivingIdx];
- bool ok = readExact(client, recvBuf, FRAME_BYTES, 2000);
- if (!ok) {
- Serial.println("Frame payload timeout, dropping client");
- client.stop();
- } else {
- // frame fully received -> 更新 seq/time 并切换缓冲(无撕裂)
- recvSeq = seq;
- lastRecvMillis = millis();
- swapBuffersForDisplay();
- }
- }
- }
- }
-
- // Timeout handling: 如果长时间未接收,清屏一次并继续等待
- if ((millis() - lastRecvMillis) > RECV_TIMEOUT_MS) {
- static bool cleared = false;
- if (!cleared) {
- Serial.println("Receive timeout, clearing screen");
- clearDisplayBuffer((uint8_t*)buffers[displayIdx]);
- showBuffer((uint8_t*)buffers[displayIdx]);
- cleared = true;
- }
- } else {
- // 常规绘制当前 displayIdx 缓冲内容到 OLED(只在变化时或固定频率绘制)
- static unsigned long lastDraw = 0;
- unsigned long now = millis();
- if (now - lastDraw >= 40) { // 每 ~25fps 更新一次屏幕显示
- showBuffer((uint8_t*)buffers[displayIdx]);
- lastDraw = now;
- }
- }
- }
python:终端按下回车 切换显示样式
- #!/usr/bin/env python3
- # screen_stream_final.py
- # 依赖: pip install opencv-python numpy mss pyautogui
-
- import socket
- import threading
- import time
- import struct
- from collections import deque
- import numpy as np
- import cv2
- from mss import mss
- import pyautogui # 用于获取鼠标位置
-
- # --- 用户配置 ---
- HOST = "10.168.1.122" # <== 修改为你的 ESP32 IP
- PORT = 12345
- FPS = 30
- WIDTH, HEIGHT = 128, 64 # OLED 分辨率
-
- # 默认模式: 'FULL' (全屏) 或 'MOUSE' (跟随鼠标)
- # 你可以在运行时按 "Enter" 键切换
- DEFAULT_MODE = 'MOUSE'
-
- # --- 全局变量与锁 ---
- CURRENT_MODE = DEFAULT_MODE
- buffer_lock = threading.Lock()
- frame_queue = deque(maxlen=2)
- MAGIC = b"\xAA\x55"
-
-
- def get_mouse_region(monitor_info, target_w=128, target_h=64, zoom=2):
- """
- 计算鼠标周围的截取区域。
- zoom: 缩放倍数,2表示截取 256x128 的区域缩放到 128x64,这样更清晰。
- """
- mx, my = pyautogui.position()
-
- crop_w = target_w * zoom
- crop_h = target_h * zoom
-
- # 确保不超出屏幕边界
- # monitor_info 格式: {'left': 0, 'top': 0, 'width': 1920, 'height': 1080}
- left = mx - crop_w // 2
- top = my - crop_h // 2
-
- # 边界限制
- left = max(monitor_info["left"], min(left, monitor_info["left"] + monitor_info["width"] - crop_w))
- top = max(monitor_info["top"], min(top, monitor_info["top"] + monitor_info["height"] - crop_h))
-
- return {"top": int(top), "left": int(left), "width": crop_w, "height": crop_h}
-
-
- def capture_loop():
- global CURRENT_MODE
-
- with mss() as sct:
- # 获取主屏幕信息
- monitor = sct.monitors[1]
-
- seq = 0
- interval = 1.0 / FPS
-
- print(f"[capture] Thread started. Current Mode: {CURRENT_MODE}")
-
- while True:
- t0 = time.time()
-
- # --- 1. 根据模式截屏 ---
- if CURRENT_MODE == 'MOUSE':
- # 鼠标跟随模式:截取鼠标周围区域 (2x 采样以获得高清晰度)
- region = get_mouse_region(monitor, WIDTH, HEIGHT, zoom=2)
- img_bgra = np.array(sct.grab(region))
- else:
- # 全屏模式:直接截取整个屏幕
- img_bgra = np.array(sct.grab(monitor))
-
- # --- 2. 图像处理 (OpenCV Pipeline) ---
- # 转灰度
- gray = cv2.cvtColor(img_bgra, cv2.COLOR_BGRA2GRAY)
-
- # 缩放 (INTER_AREA 抗锯齿效果最佳)
- # 如果是全屏模式,这里会将 1920x1080 -> 128x64,文字可能会很难看清,主要看大轮廓
- resized = cv2.resize(gray, (WIDTH, HEIGHT), interpolation=cv2.INTER_AREA)
-
- # 二值化 (Otsu 自动阈值)
- # 你也可以改为固定阈值: cv2.threshold(resized, 128, 255, cv2.THRESH_BINARY)
- _, thresh = cv2.threshold(resized, 0, 255, cv2.THRESH_BINARY + cv2.THRESH_OTSU)
-
- # --- 3. 极速打包 (Numpy Packbits) ---
- # 将 0/255 图像转为 0/1 比特流
- bits = (thresh > 127).astype(np.uint8)
- # axis=1 表示横向打包,符合 SSD1306 从左到右的扫描顺序
- packed_array = np.packbits(bits, axis=1)
- payload = packed_array.tobytes()
-
- # --- 4. 组装协议包 ---
- # Header: Magic(2) + Seq(4) + Len(2)
- header = MAGIC + struct.pack(">I", seq) + struct.pack(">H", len(payload))
- packet = header + payload
-
- with buffer_lock:
- frame_queue.append(packet)
-
- seq = (seq + 1) & 0xFFFFFFFF
-
- # 帧率控制
- dt = time.time() - t0
- sleep_t = interval - dt
- if sleep_t > 0:
- time.sleep(sleep_t)
-
-
- def sender_loop():
- """负责网络发送的线程,断线重连逻辑"""
- while True:
- try:
- print(f"[sender] Connecting to {HOST}:{PORT}...")
- with socket.create_connection((HOST, PORT), timeout=3) as s:
- s.setsockopt(socket.IPPROTO_TCP, socket.TCP_NODELAY, 1)
- print("[sender] Connected! Sending stream...")
-
- while True:
- data = None
- with buffer_lock:
- if frame_queue:
- data = frame_queue.pop() # 取最新帧
- frame_queue.clear() # 丢弃旧帧
-
- if data:
- s.sendall(data)
- else:
- time.sleep(0.002) # 让出 CPU
-
- except (ConnectionRefusedError, TimeoutError, OSError) as e:
- print(f"[sender] Disconnected: {e}. Retry in 2s...")
- time.sleep(2)
- except Exception as e:
- print(f"[sender] Error: {e}")
- time.sleep(2)
-
-
- def input_listener():
- """控制台输入监听,用于运行时切换模式"""
- global CURRENT_MODE
- print("-" * 50)
- print(f"当前模式: [{CURRENT_MODE}]")
- print(">>> 按 [回车键] (Enter) 可在 FULL / MOUSE 模式间切换 <<<")
- print("-" * 50)
-
- while True:
- # 阻塞等待用户按回车
- input()
- if CURRENT_MODE == 'FULL':
- CURRENT_MODE = 'MOUSE'
- else:
- CURRENT_MODE = 'FULL'
-
- print(f"\n[Switch] 模式已切换为: >>> {CURRENT_MODE} <<<")
-
-
- if __name__ == "__main__":
- # 启动采集线程
- t_cap = threading.Thread(target=capture_loop, daemon=True)
- t_cap.start()
-
- # 启动发送线程
- t_send = threading.Thread(target=sender_loop, daemon=True)
- t_send.start()
-
- # 在主线程运行输入监听(或者也可以另开线程,这里直接利用主线程做交互)
- try:
- input_listener()
- except KeyboardInterrupt:
- print("\nStopping...")
|  萌萌哒新人
萌萌哒新人


 沪公网安备31011502402448

 置顶卡
置顶卡 变色卡
变色卡 千斤顶
千斤顶


