|
5758| 1
|
礼物送的好女神不会跑|我的心扑通扑通的狂跳 |
|
【礼物送的好 女神不会跑】我的心扑通扑通的狂跳 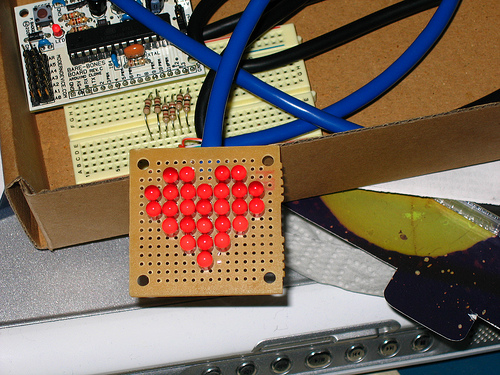 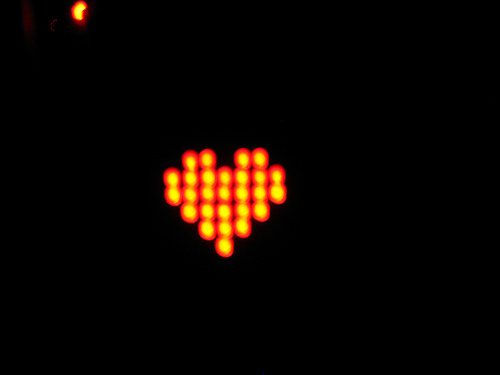 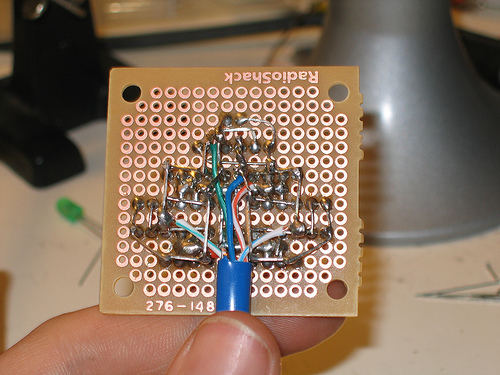 这是一个由Arduino控制的字符显示的心形LED,这天刚好赶上情人节PIC或AVR可以很容易地用于这个,但是我有Arduinos,它们很容易编程。另外,我希望以后有时间写的时候能有输入选项。 这里有对字符显示的更好解释。 https://www.instructables.com/id/Charlieplexing-LEDs--The-theory/ Update 5/20/08: 我已经为这个做了一个工具包,我现在在我的网站上接受预订。我还创建了一个基于flash的动画程序员。看看他们,然后告诉我你的想法。程序员生成代码的最新版本,因此如果您自己制作心形,它仍然是一个有用的工具。你只需要改变一个映射到你自己的LED阵列。 Update 2/12/08: 我已经将软件更新到v1.3。我在avr/pgm空间中找到了一个名为PROGMEM的函数。h库(包含在Arduino软件中),可以直接写入Flash ROM,现在可以提供超过500帧的动画,非常容易实现。你可以在这里查看新软件。 我的两个朋友目前正在努力获得一个数学版本,该版本将进一步增加这一功能(大约4500帧),但是在创建动画时,这并不容易。一旦我有了处理程序并生成动画代码,我就会发布它。 Update 2/11/08: 我把示意图放到了第一步。 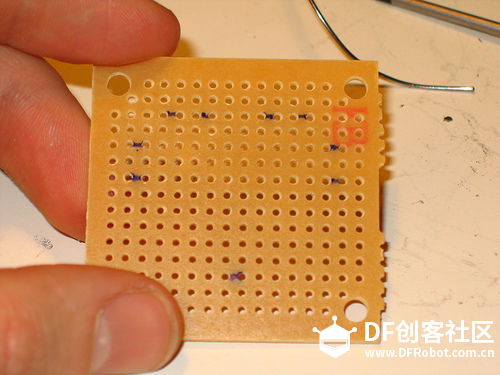 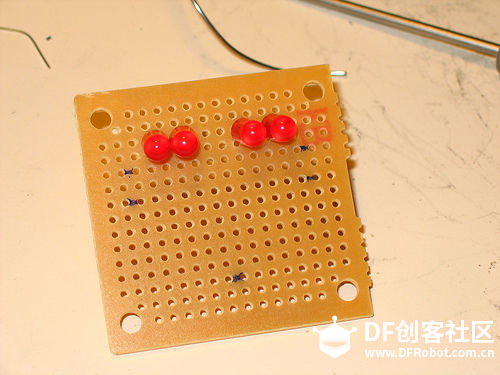 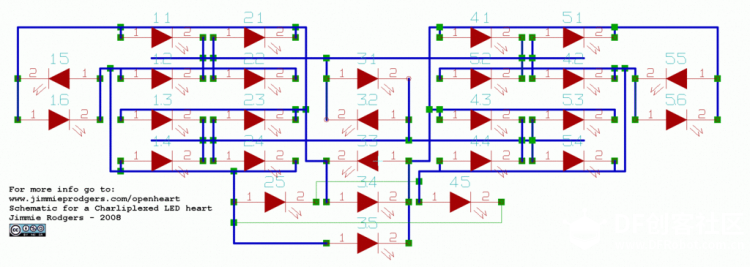 led我建议是红色的,但是这些也很酷。 电阻匹配你的led,我用了100R,但是你自己来算一下。 有线电缆,我用的是Cat5,因为它就在我身边 焊接安装 某种类型的原型电路板,我用了无线电器材公司的这个,它非常适合心形。 Update 2/11/08: 这是从上面看的示意图。希望您在构建之前、构建期间和构建之后对其进行回顾。一旦构建完成,您将需要进行彻底的测试。每两根电线连接到一块电池上,就应该点亮一个LED,而且只能点亮一个。如果2号灯亮了,那么一定是出了什么问题。将会有3种组合不会照亮任何东西,所以不要担心,只是做一个笔记。如果有3种以上的组合不能发光,那么你可能有LED短路。 [mw_shl_code=applescript,true]//**************************************************************// // Name : Charlieplexed Heart control // // Author : Jimmie P Rodgers www.jimmieprodgers.com // // Date : 08 Feb, 2008 Last update on 02/13/08 // // Version : 1.3 // // Notes : Uses Charlieplexing techniques to light up // // : a matrix of 27 LEDs in the shape of a heart // // : project website: www.jimmieprodgers.com/openheart // //**************************************************************** // 02/13/08 - v1.3 // I've changed the delay function to delayMicroseconds() // Which dramatically improves the brightness of the // displayed LEDs, while at the same time lowers the number // of run cycles needed for a clean display. This is all // around a substantial improvement that also add the // control of color possibilities. I'll put that into v2 // along with the new play functions that will allow input. // 02/12/08 - v1.2 // I found a solution for the array size issue with // PROGMEM. Basically, using the <avr/pgmspace.h> // library (included in the Arduino library) you can // write directly to the Flash memory. Granting you // access to the full 16k of storage. With this fix // you can now have over 500 frames of animation, and // still have plenty of room for your program. // 02/11/08 - v1.1 // By making all the arrays const values, it increases // the number of frames in the animation to 30. It will // now run all the original animations at the same time. #include <avr/pgmspace.h> //This is in the Arduino library int opin = 13; int owpin = 12; int gpin = 11; int gwpin = 10; int bpin = 9; int bwpin = 8; const int pins[] = { opin,owpin,gpin,gwpin,bpin,bwpin}; const int heartpins[27][2] ={ {gpin,opin}, {opin,gpin}, {bpin,opin}, {opin,bpin}, {gwpin,gpin}, {gwpin,opin}, {opin,gwpin}, {opin,owpin}, {bwpin,opin}, {opin,bwpin}, {bpin,bwpin}, {gpin,gwpin}, {gpin,owpin}, {owpin,gpin}, {owpin,opin}, {bpin,owpin}, {owpin,bpin}, {bwpin,bpin}, {gwpin,owpin}, {owpin,gwpin}, {bpin,gpin}, {bwpin,owpin}, {owpin,bwpin}, {bwpin,gwpin}, {gpin,bpin}, {gwpin,bwpin}, {gpin,bwpin} }; int blinkdelay = 200; //This basically controls brightness. Lower is dimmer int runspeed = 50; //smaller = faster byte heart[][27] PROGMEM ={ // This stores the array in Flash ROM. You can easily have 500+ frames. // // You can actually arrange the lines in a way that it mimics the heart shape and it will // run just fine. I use this for programming the animations, then reduce it to lines later. // Example: // { 1,1, 1,1, // 1,1,1,1,1,1,1, // 1,1,1,1,1,1,1, // 1,1,1,1,1, // 1,1,1, // 1}, // { 0,0, 0,0, // 0,0,0,0,0,0,0, // 0,0,0,0,0,0,0, // 0,0,0,0,0, // 0,0,0, // 0}, //Blinks all on and off {1,1,1,1,1,1,1,1,1,1,1,1,1,1,1,1,1,1,1,1,1,1,1,1,1,1,1}, {0,0,0,0,0,0,0,0,0,0,0,0,0,0,0,0,0,0,0,0,0,0,0,0,0,0,0}, {1,1,1,1,1,1,1,1,1,1,1,1,1,1,1,1,1,1,1,1,1,1,1,1,1,1,1}, {0,0,0,0,0,0,0,0,0,0,0,0,0,0,0,0,0,0,0,0,0,0,0,0,0,0,0}, //Fills the heart up from the bottom {0,0,0,0,0,0,0,0,0,0,0,0,0,0,0,0,0,0,0,0,0,0,0,0,0,0,1}, {0,0,0,0,0,0,0,0,0,0,0,0,0,0,0,0,0,0,0,0,0,0,0,0,1,0,1}, {0,0,0,0,0,0,0,0,0,0,0,0,0,0,0,0,0,0,0,0,1,0,0,1,1,1,1}, {0,0,0,0,0,0,0,0,0,0,0,0,0,0,1,0,0,0,0,1,1,1,0,1,1,1,1}, {0,0,0,0,0,0,0,1,0,0,0,0,0,1,1,1,0,0,1,1,1,1,1,1,1,1,1}, {0,0,0,0,0,0,1,1,1,0,0,0,1,1,1,1,1,0,1,1,1,1,1,1,1,1,1}, {0,1,1,0,0,1,1,1,1,1,0,1,1,1,1,1,1,1,1,1,1,1,1,1,1,1,1}, {1,1,1,1,1,1,1,1,1,1,1,1,1,1,1,1,1,1,1,1,1,1,1,1,1,1,1}, //Parts fall off the bottom {1,1,1,1,1,1,1,1,1,1,1,1,1,1,1,1,1,1,1,1,1,1,1,1,1,1,1}, {1,1,1,1,1,1,1,1,1,1,1,1,1,1,1,1,1,1,1,1,1,1,1,0,1,0,0}, {1,1,1,1,1,1,1,1,1,1,1,1,1,1,1,1,1,1,1,0,1,0,1,1,0,1,1}, {1,1,1,1,1,1,1,1,1,1,1,0,1,0,1,0,1,0,0,1,0,1,0,0,1,0,0}, {1,1,1,1,0,1,0,1,0,1,0,1,0,1,0,1,0,1,1,0,1,0,1,1,0,1,1}, {1,1,1,1,0,0,1,0,1,0,0,0,1,0,1,0,1,0,0,1,0,1,0,0,1,0,0}, {0,1,1,0,0,1,0,1,0,1,0,1,0,1,0,1,0,1,1,0,1,0,1,1,0,1,1}, {0,0,0,0,0,0,1,0,1,0,0,0,1,0,1,0,1,0,0,1,0,1,0,0,1,0,0}, {0,0,0,0,0,0,0,0,0,0,0,0,0,1,0,1,0,0,1,0,1,0,1,1,0,1,1}, {0,0,0,0,0,0,0,0,0,0,0,0,0,0,0,0,0,0,0,1,0,1,0,0,1,0,0}, {0,0,0,0,0,0,0,0,0,0,0,0,0,0,0,0,0,0,0,0,0,0,0,1,0,1,1}, {0,0,0,0,0,0,0,0,0,0,0,0,0,0,0,0,0,0,0,0,0,0,0,0,0,0,0}, //Fills up from the center {0,0,0,0,0,0,0,0,0,0,0,0,0,1,0,1,0,0,0,0,1,0,0,0,0,0,0}, {0,0,0,0,0,1,1,0,1,1,0,0,1,1,1,1,1,0,0,1,1,1,0,0,1,0,0}, {1,1,1,1,1,1,1,1,1,1,1,1,1,0,1,0,1,1,1,1,0,1,1,1,1,1,1}, {1,1,1,1,1,0,0,1,0,0,1,1,0,0,0,0,0,1,1,0,0,0,1,1,0,1,1}, {1,1,1,1,1,0,0,1,0,0,1,1,0,0,0,0,0,1,1,0,0,0,1,1,0,1,1}, //Kill line {2,0,0,0,0,0,0,0,0,0,0,0,0,0,0,0,0,0,0,0,0,0,0,0,0,0,0}, }; void setup() { // blinkall(2); // useful for testing } void loop() { // sequenceon(); // useful for testing play(); } void turnon(int led) { int pospin = heartpins[led][0]; int negpin = heartpins[led][1]; pinMode (pospin, OUTPUT); pinMode (negpin, OUTPUT); digitalWrite (pospin, HIGH); digitalWrite (negpin, LOW); } void alloff() { for(int i = 0; i < 6; i++) { pinMode (pins, INPUT); } } void play() { boolean run = true; byte k; int t = 0; while(run == true) { for(int i = 0; i < runspeed; i++) { for(int j = 0; j < 27; j++) { k = pgm_read_byte(&(heart[t][j])); if (k == 2) { run = false; } else if(k == 1) { turnon(j); delayMicroseconds(blinkdelay); alloff(); } else if(k == 0) { delayMicroseconds(blinkdelay); } } } t++; } } void blinkall(int numblink) { alloff(); for(int n = 0; n < numblink; n++) { for(int i = 0; i < runspeed; i++) { for(int j = 0; j < 27; j++) { turnon(j); delay(blinkdelay); alloff(); } } delay(500); } } void sequenceon() { for(int i = 0; i < 27; i++) { turnon(i); delay(800); alloff(); delay(800); } } [/mw_shl_code] 现在我们开始焊接。对于这一步,大多数说明都在图中。 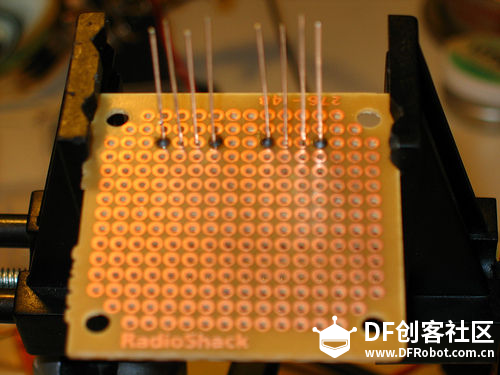  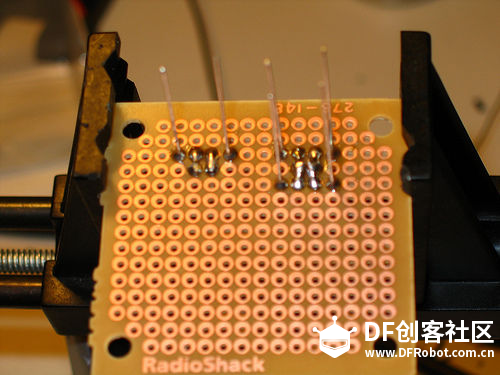 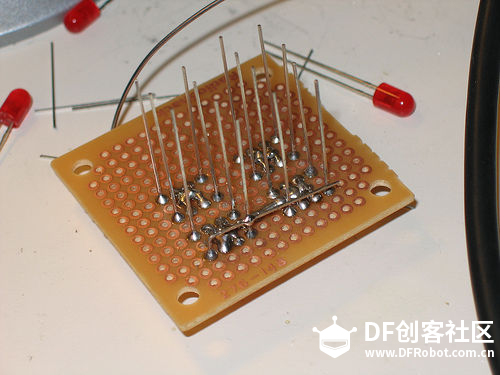 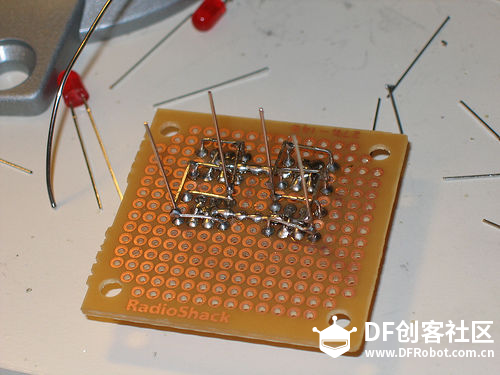 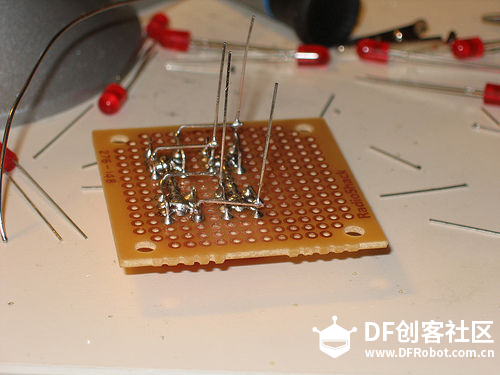 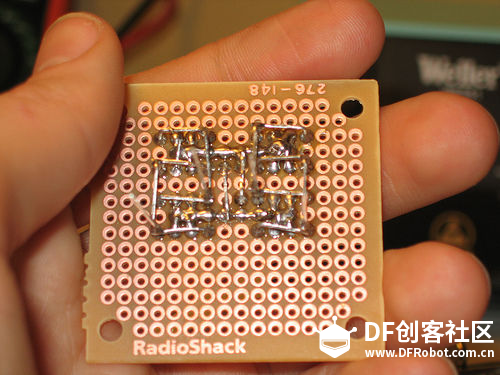 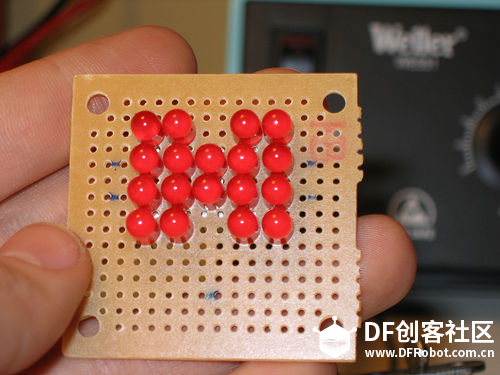 现在你要继续焊接并开始分层连接。这就是开始变得复杂的地方。至少到目前为止你只需要镜像你的连接。不管你在右边做什么,你都在左边做相反的事。只要注意不要造成任何短路,并给弯曲的电线足够的空间,使其移动一点就不会短路。 1. 右上方+引线向左弯曲到右上方-引线。 2. 右上设置的底部-引线弯曲到右边,使接触+引线。 3.对底集做同样的处理。 4. 弯曲顶部设置的左上角-向下到底部设置的左上角销。 5. 弯曲右下角+顶部设置的引线到右下角+底部设置的引线。 6. 在另一边做相反的事情。 可能看起来很糟糕,但是最终得到的结果是两个C面对面地在一边。顶部中间部分和底部中间部分将被连接。 然后将两个中间的led以相反的方向相加。你希望上面的这个和其他的都是一样的,而下面的这个是相反的。然后将底部的-连接到顶部的+,然后连接到顶部的中心连接。然后对另外两个进行相反的操作,将它们连接到底部中心连接。 每边总共有两个独立的连接,中间有两个。6个总连接的开始。现在我们只需要填入其他可能的组合 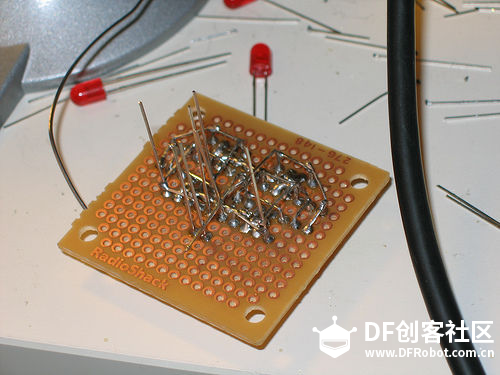 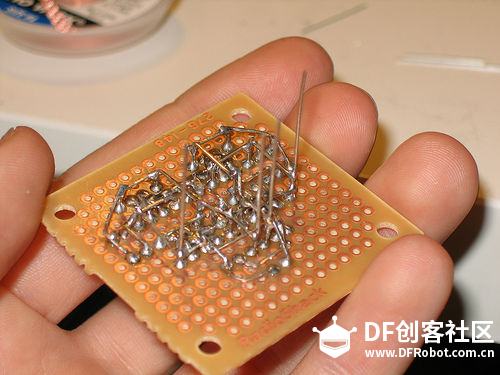 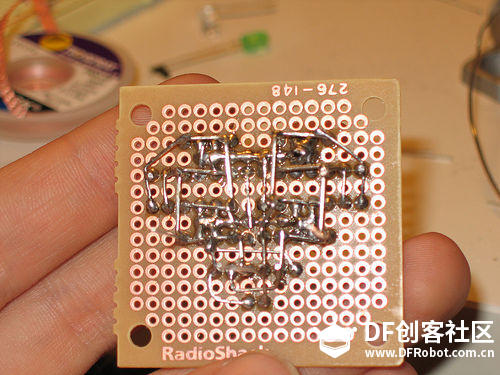 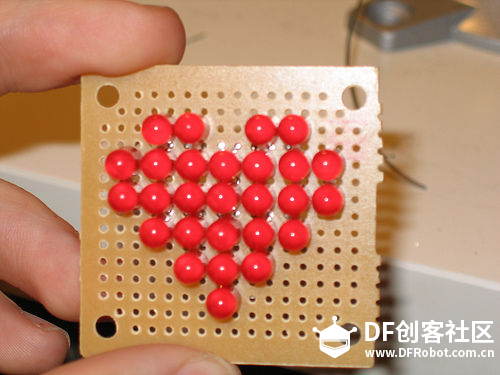 这里我们开始最后一层。 这两个边对的安装方式和中间的一样。但是现在你把它们和最靠近它们的C形连接连接起来。一个在外面,一个在里面。 然后,以相同的方式安装下一对中下对,并将它们连接到中间的两个C连接。然而,我不建议你连接最底部的LED到它的设置,因为你即将弯曲的连接下的铅。 接下来的两个我安装的方向一致,在底部中间LED的相反的两侧。我把右边的+铅弯在底部中间的LED和mate之间。连接左下LED的-引线,和左外C型引线。然后你拿左下角的LED的+铅,弯曲它到右下角的LED的-铅,然后到相反的外部C形状。 最后一个LED我弯曲的+铅的底部中间的+铅,和-铅的外部左C形状。你现在应该剪辑任何偏离的线索,并确保没有任何短路。 你最终会得到除了3种可能的组合外的所有组合这6种牢固的连接会给你。所以用3v +和-线来观察不同的led灯一个接一个的亮起来。 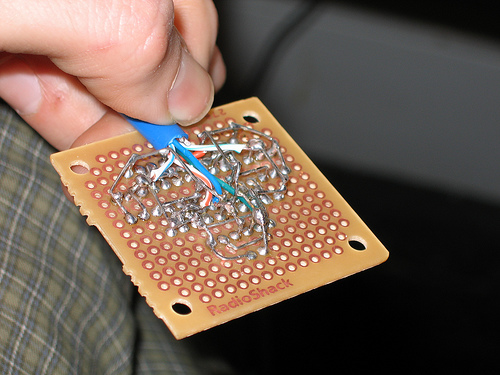 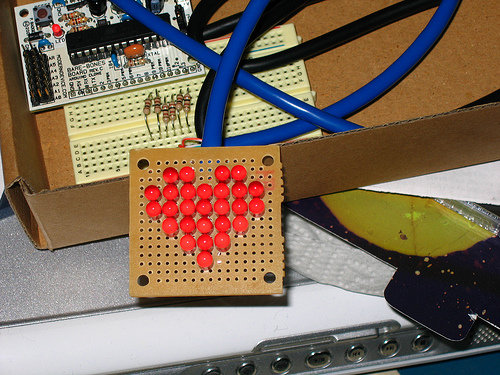 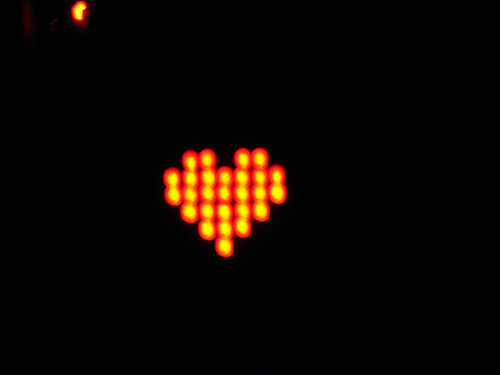 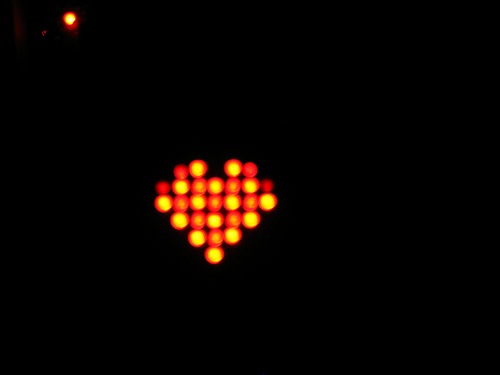 现在剩下要做的就是把它连接起来,连接到Arduino上。既然我用的是Cat5,我就用这种配色方案。这是我从第一幅图的角度所能描述的最好的。 橙色-中上部 橙色w -底部中间 蓝色-左内C 蓝色w -左外C 绿色-右内C 绿色-右外C 你需要测试电缆另一端的连接。这使得它很容易触摸随机组合的3v电池。 这是我创建的用于跟踪连接的电子表格。如果你的软件由于某些原因不一样,那就做些笔记,因为当你加载软件的时候必须要做一些修改。 开始时,我使用了基于列的数字格式。一共有5个,外面的每个有6个。在编程时忽略这一点,选择1-27,因为它在程序中更容易处理。然而,它在测试时仍然很有用,因为尝试记住哪个是16可能很疯狂,但是在第4列中找到第三个是很容易的。两者都在你身边。 这是我在视频中使用的两个动画的源代码。记得在你的Arduino插头和电线之间放一个电阻!! 不幸的是Arduino的数组大小有限制。我不确定它是什么,这就是为什么我做了一个字节数组来节省空间。基本上你可以有任意两个动画,但不是全部。如果Arduino没有响应,请注释掉动画中的一些行,然后将其发送过去。 这只是第一个版本。我已经写了一些可以用来计划动画的东西,一旦我让它生成与我的程序一起工作的代码,然后我也会发布它。我还在开发该软件的第二个版本,包含多个动画和交互式控件。一旦我有了一些这样的功能,我将确保更新。订阅我的博客以获得任何更新。 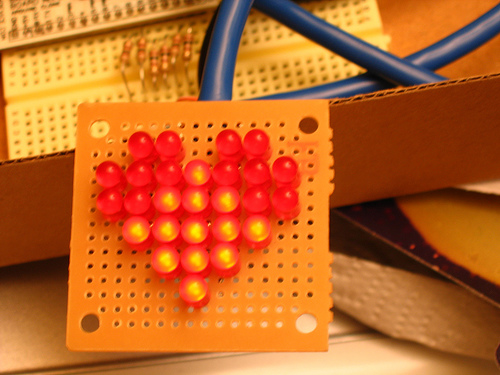 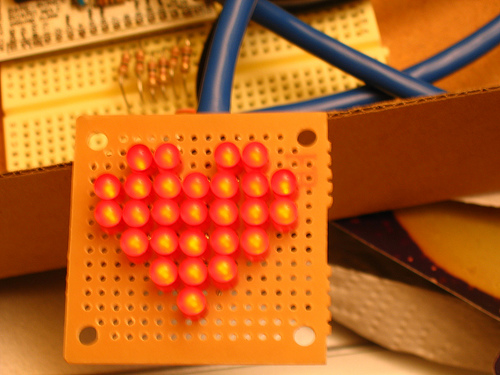 原作者: jaypee4227 翻译:KIKI (纯靠小编微薄的英语水平翻译而来,可能读起来有点别扭) 以上翻译内容为df创客社区所有,严禁转载 |
 沪公网安备31011502402448
© 2013-2026 Comsenz Inc. Powered by Discuz! X3.4 Licensed