前言
我们知道行空板有一块2.8寸的彩屏还一块触摸屏,不搞点事情总感觉浪费了,之前做了语音识别的教程,很多读者都用语音识别做了很多有趣的小项目,那么我就想能不能做一个手写输入法呢?这篇教程算是前期准备教程,我们如何运用行空板库已有的API来做一个写字板呢?好了,废话不多说了,就让开始本次的教程吧。
相关知识点
1、线 draw_line
语法:控件对象名 = GUI对象.draw_line(x0, y0, x1, y1, width, color, onclick)
- 返回值:文字对象
- 输入参数:
- x0 : 起点横坐标
- y0 : 起点纵坐标
- x1 : 终点横坐标
- y1 : 终点纵坐标
- width : 线的粗细
- color : 线的颜色
- onclick : 当被点击时触发的回调函数
- 用法举例:
from unihiker import GUI   #导入包
gui=GUI()  #实例化GUI类
gui.draw_line(x0=10, y0=60, x1= 80, y1=60, width=5, color=(122,222,44), onclick=lambda: print("line clicked"))

import time
while True:
    #增加等待,防止程序退出和卡住
    time.sleep(1)
2、鼠标坐标 on_mouse_move
语法:GUI对象.on_mouse_move(回调函数名)
from unihiker import GUI   #导入包
gui=GUI()  #实例化GUI类
info_text = gui.draw_text(x=120, y=320, text='鼠标坐标',origin='bottom')

def mouse_move(x, y):
    info_text.config(text="坐标:x={},y={}".format(x, y))
    print(x,y)
gui.on_mouse_move(mouse_move)

import time
while True:
    #增加等待,防止程序退出和卡住
    time.sleep(1)
项目思路
在我们触控屏幕的时候,其实我们的鼠标会跟着我们的手指进行移动,这个是个适合会返回鼠标的(x,y)坐标,我们使用一个列表保存所有移动过的点,然后要画线的时候,循环遍历列表,依次画出列表中点到定点之间的线即可。把所有相邻两个点之间都画一条线,就能断断续续连成鼠标的痕迹了。
程序编写
1、写字板1.0
from unihiker import GUI   #导入包
import time

gui=GUI()  #实例化GUI类
pos_xy = [] # 用来装鼠标的坐标。

gui.on_a_click(lambda: line_clear()) # A键盘被按下 清屏所有gui对象和pox_xy列表中的数据
gui.on_b_click(lambda: pos_xy.clear()) # B按键被按下,清空pox_xy列表

def line_clear():
    gui.clear()
    pos_xy.clear()

def mouse_move(x, y):
    '''
    首先判断pos_xy列表中是不是至少有两个点了
    然后将pos_xy中第一个点赋值给point_start
    利用中间变量pos_tmp遍历整个pos_xy列表
    point_end = pos_tmp
    画point_start到point_end之间的线
    point_start = point_end
    这样,不断地将相邻两个点之间画线,就能留下鼠标移动轨迹了
    '''
    pos_xy.append([x,y])
    if len(pos_xy) > 1:
        point_start = pos_xy[0]
        for pos_tmp in pos_xy:
            point_end = pos_tmp
            gui.draw_line(x0=point_start[0],y0=point_start[1],x1=point_end[0],y1=point_end[1],width=2, color=(122,222,125))
            point_start = point_end

gui.on_mouse_move(mouse_move)

while True:
    #增加等待,防止程序退出和卡住
    time.sleep(1)
效果:
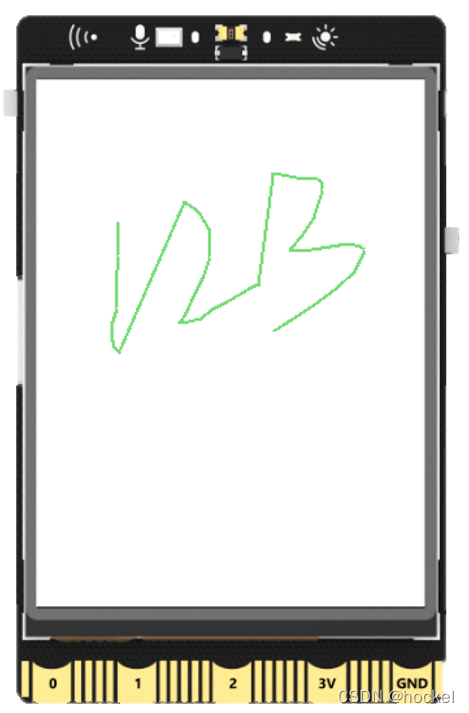
2、写字板2.0
从上面的效果,我们实现了写字的功能,但是我们写1后抬手准备写2,它就会默认把我们的1的尾部和2的头相连。那么我们如果解决呢?这里我看了行空板的库没有找到屏幕是否被按下的API,又或者是鼠标不被按下后无返回值。这里我主要是使用了time函数来标记。这里官方给了一个屏幕是否按下的api,我们就很容易解决这个BUG了
具体程序如下:
from unihiker import GUI   #导入包
import time

gui=GUI()  #实例化GUI类
pos_xy = [] # 用来装鼠标的坐标。

gui.on_a_click(lambda: line_clear())
gui.on_b_click(lambda: pos_xy.clear())
def line_clear():
    gui.clear()
        pos_xy.clear()

def mouse_move(x, y):

    '''
    首先判断pos_xy列表中是不是至少有两个点了
    然后将pos_xy中第一个点赋值给point_start
    利用中间变量pos_tmp遍历整个pos_xy列表
    point_end = pos_tmp
    画point_start到point_end之间的线
    point_start = point_end
    这样,不断地将相邻两个点之间画线,就能留下鼠标移动轨迹了
    '''
    pos_xy.append([x,y])
    if len(pos_xy) > 1:
        point_start = pos_xy[0]
        for pos_tmp in pos_xy:
            point_end = pos_tmp
            gui.draw_line(x0=point_start[0],y0=point_start[1],x1=point_end[0],y1=point_end[1],width=2, color=(122,222,125))
            point_start = point_end

def on_release(event):
    pos_xy.clear()

gui.master.bind("<ButtonRelease>", on_release)

gui.on_mouse_move(mouse_move)

while True:
    #增加等待,防止程序退出和卡住
    time.sleep(1)
效果:
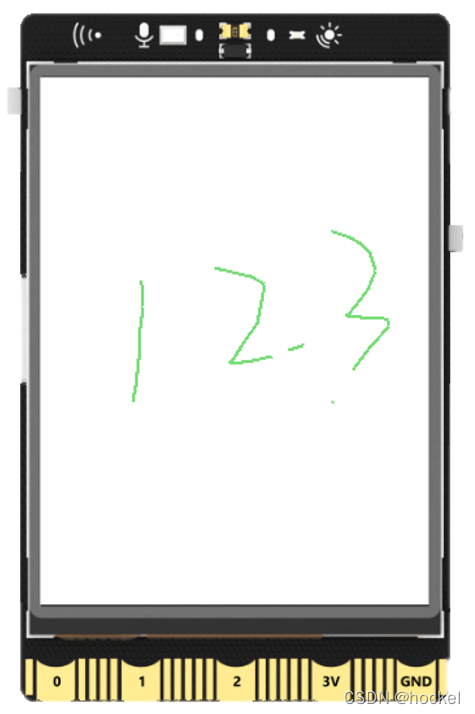
3、写字板3.0
from unihiker import GUI   #导入包
import time

gui=GUI()  #实例化GUI类

pos_xy = [] # 用来装鼠标的坐标。
penColor="black"
#每个色块被点击,我们就改变线条的颜色
gui.fill_rect(x=0, y=0, w=40, h=30,  color="green",onclick=lambda: changeColor("green"))
gui.fill_rect(x=40, y=0, w=40, h=30,  color="red",onclick=lambda: changeColor("red"))
gui.fill_rect(x=80, y=0, w=40, h=30,  color="blue",onclick=lambda: changeColor("blue"))
gui.fill_rect(x=120, y=0, w=40, h=30,  color="black",onclick=lambda: changeColor("black"))
gui.fill_rect(x=160, y=0, w=40, h=30,  color="orange",onclick=lambda: changeColor("orange"))
gui.fill_rect(x=200, y=0, w=40, h=30,  color="pink",onclick=lambda: changeColor("pink"))

gui.on_a_click(lambda: line_clear())
gui.on_b_click(lambda: pos_xy.clear())

def changeColor(color):# 切换线条颜色
    global penColor
    penColor = color
    print(penColor)

def line_clear():# 清屏操作
    gui.clear()
    pos_xy.clear()
    gui.fill_rect(x=0, y=0, w=40, h=30,  color="green",onclick=lambda: changeColor("green"))
    gui.fill_rect(x=40, y=0, w=40, h=30,  color="red",onclick=lambda: changeColor("red"))
    gui.fill_rect(x=80, y=0, w=40, h=30,  color="blue",onclick=lambda: changeColor("blue"))
    gui.fill_rect(x=120, y=0, w=40, h=30,  color="black",onclick=lambda: changeColor("black"))
    gui.fill_rect(x=160, y=0, w=40, h=30,  color="orange",onclick=lambda: changeColor("orange"))
    gui.fill_rect(x=200, y=0, w=40, h=30,  color="pink",onclick=lambda: changeColor("pink"))

def mouse_move(x, y):# 画线
    global penColor

    '''
    首先判断pos_xy列表中是不是至少有两个点了
    然后将pos_xy中第一个点赋值给point_start
    利用中间变量pos_tmp遍历整个pos_xy列表
    point_end = pos_tmp
    画point_start到point_end之间的线
    point_start = point_end
    这样,不断地将相邻两个点之间画线,就能留下鼠标移动轨迹了
    '''
    pos_xy.append([x,y])

    if len(pos_xy) > 1:
        point_start = pos_xy[0]
        for pos_tmp in pos_xy:
            point_end = pos_tmp
            line_text= gui.draw_line(x0=point_start[0],y0=point_start[1],x1=point_end[0],y1=point_end[1],width=4,color=penColor)
            point_start = point_end

def on_release(event):
    print("on release")
    pos_xy.clear()

gui.master.bind("<ButtonRelease>", on_release)

gui.on_mouse_move(mouse_move)

while True:
    #增加等待,防止程序退出和卡住
    time.sleep(1)
效果:
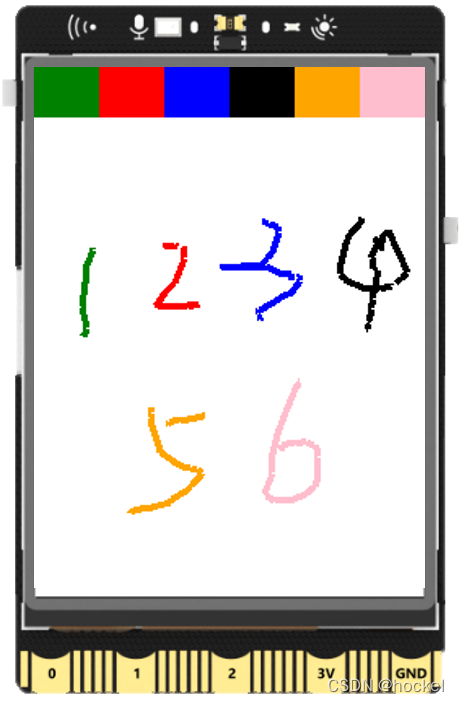
总结
enen~!本次【行空板教程】写字板到这里就结束了,里面有些功能的实现还不算太完美,如果读者有更好的办法,欢迎讨论。现在我们可以实现写字的功能了,那么距离我们手写输入法是不是更近了一步。【行空板教程】手写输入法 敬请期待,更多教程欢迎关注个人公众号:跟着hockel玩科创。


 沪公网安备31011502402448
 置顶卡
置顶卡 变色卡
变色卡 千斤顶
千斤顶

 ,,,
,,,

 萌萌哒新人
萌萌哒新人
 活跃会员
活跃会员
 宣传大使
宣传大使
 编辑选择奖
编辑选择奖
 编辑选择奖
编辑选择奖


