首先,感谢论坛给了我这次评测的机会,评测的过程也是学习的过程,哪怕啥也不干,就是在群里看一看,感觉都很有收获。说实在的,从一开始,我有些低估这次评测的难度了,一直以为自己有掌控板和行空板的操作经验,评测C6应该问题不大,谁知过程中遇到了种种困难。第一天安装Arduino esp32库文件,差不多花了近1天时间,总是提示失败,装了3遍以上才装好,就给了一个下马威。Downloading packages
esp32:esp32-arduino-libs@idf-release_v5.1-3662303f31
。。。。。。
【功能说明】:
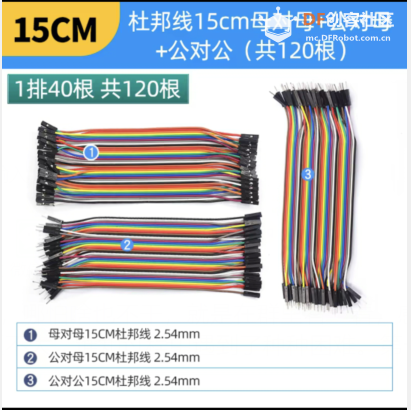
拿到FireBeetle 2 ESP32 C6 ,第一感觉非常小巧,想做一个点灯的程序,但是又想做一个不一样的点灯程序,真不想点板载灯,于是我翻箱倒柜找出很久以前买的一块米奇小灯,这个小灯最初是适配micro:bit用的,后来玩掌控比较多,就闲置了。刚好这次测试一下这些传感器的兼容性。拿出电烙铁,把针头焊好,然后找出杜邦线,一通连接。这里安利一下杜邦线,如果经常玩这些传感器,建议备一些不同接口(公头、母头、公转母)的杜邦线,转接的时候特别好用。
我这次要实现的功能是:将C6和米奇小灯连接,打开C6自带的wifi热点,手机/电脑连上C6热点,通过手机浏览器或者电脑浏览器,发送命令on/off控制米奇小灯。
【准备】: Arduino IDE 2.3.2 EPS32库、Adafruit_NeoPixel库
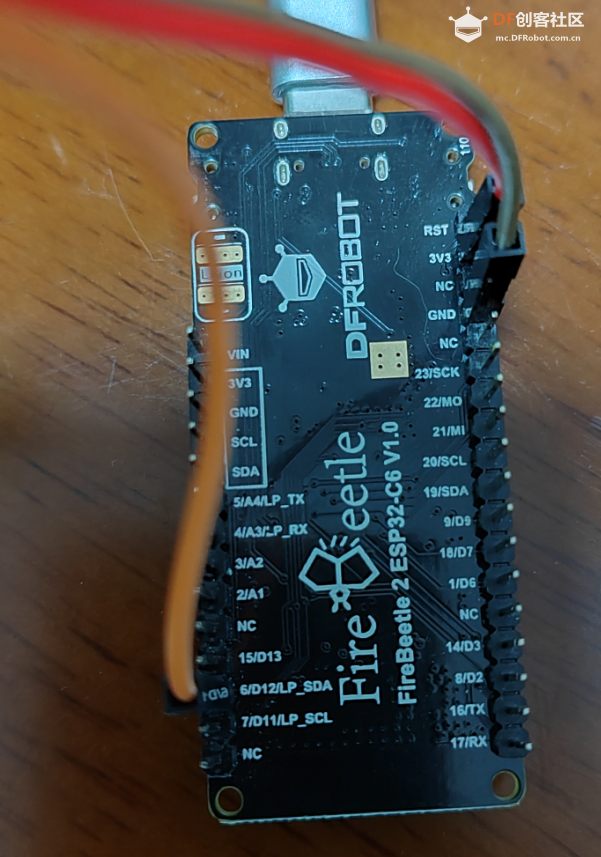
【过程】: 接线 灯带的DIN接口连接C6的6号口,VCC和GND分别连接C6的3v3、GND接口。
【程序控制】
- /*
- 这个程序是可用的,C6自己做热点,手机或者电脑连到热点上去,控制米老鼠的小灯带。
- 步骤:
- 1.手机或者电脑连接到WIFI热点名为 FireBeetle ESP32 ,已设置WIFI密码:12345678
- 2.手机或者电脑浏览器访问网址 http://192.168.4.1/ON 来打开灯 访问 http://192.168.4.1/OFF 来关闭灯
- 3.在访问后通过点击上下 here 来便捷控制灯的亮灭
- */
-
- #include <WiFi.h>
- #include <WiFiClient.h>
- #include <WiFiAP.h>
-
- #include <Adafruit_NeoPixel.h>
- #ifdef __AVR__
- #include <avr/power.h> // Required for 16 MHz Adafruit Trinket
- #endif
-
- // Which pin on the Arduino is connected to the NeoPixels?
- #define PIN 6 // On Trinket or Gemma, suggest changing this to 1
-
- // How many NeoPixels are attached to the Arduino?
- #define NUMPIXELS 15 // Popular NeoPixel ring size
-
- // 设置WIFI名称以及密码
- const char *ssid = "FireBeetle ESP32";//WIFI名称
- const char *password = "12345678";//密码
-
- WiFiServer server(80);//网页服务端口默认为80
-
- Adafruit_NeoPixel pixels(NUMPIXELS, PIN, NEO_GRB + NEO_KHZ800);
-
- #define DELAYVAL 500 // Time (in milliseconds) to pause between pixels
-
- void setup() {
-
- Serial.begin(115200);
- Serial.println();
- Serial.println("Configuring access point...");
-
- //如果想要无密码开放网络请删除password
- WiFi.softAP(ssid, password);
- IPAddress myIP = WiFi.softAPIP();
- Serial.print("AP IP address: ");
- Serial.println(myIP);
- server.begin();
-
- Serial.println("Server started");
- #if defined(__AVR_ATtiny85__) && (F_CPU == 16000000)
- clock_prescale_set(clock_div_1);
- #endif
- // END of Trinket-specific code.
-
- pixels.begin(); // INITIALIZE NeoPixel strip object (REQUIRED)
- }
-
- void loop() {
- WiFiClient client = server.available(); // 检测等待连接
-
- if (client) { // 检测是否连接
- Serial.println("New Client.");
- String currentLine = ""; // 创建String变量来保存数据
- while (client.connected()) { // 保持连接时一直循环
- if (client.available()) { // 检测连接是否有数据
- char c = client.read(); // 读取接收的数据
- //Serial.write(c); // 打印在串行监视器
- if (c == '\n') { // 如果读取的是换行符
-
- //结尾用换行符提醒结束
- if (currentLine.length() == 0) {
- client.println("HTTP/1.1 200 OK");
- client.println("Content-type:text/html");
- client.println();
- //将字符与here连接
- client.print("Click <a href="/ON">here</a> to turn ON the LED.<br>");
- client.print("Click <a href="/OFF">here</a> to turn OFF the LED.<br>");
-
- // HTTP响应为空行
- client.println();
- // 跳出循环
- break;
- } else { // 如果有一个换行符就清除变量缓存的数据
- currentLine = "";
- }
- } else if (c != '\r') { // 如果获得回车以外的字符
- currentLine += c; // 获得的字符添加到变量末尾
- }
-
- // 检查是否获得/ON或者/OFF
- if (currentLine.endsWith("/ON")) {
- pixels.clear();
- for(int i=0; i<NUMPIXELS; i++) { // For each pixel...
-
- // pixels.Color() takes RGB values, from 0,0,0 up to 255,255,255
- // Here we're using a moderately bright green color:
- pixels.setPixelColor(i, pixels.Color(0, 150, 0));
-
- pixels.show(); // Send the updated pixel colors to the hardware.
- delay(0); // Pause before next pass through loop
- }
- //得到/ON时打开灯
- }
- if (currentLine.endsWith("/OFF")) {
- pixels.clear(); //得到/OFF时关闭灯
- for(int i=0; i<NUMPIXELS; i++) { // For each pixel...
-
- // pixels.Color() takes RGB values, from 0,0,0 up to 255,255,255
- // Here we're using a moderately bright green color:
- pixels.setPixelColor(i, pixels.Color(0, 0, 0));
-
- pixels.show(); // Send the updated pixel colors to the hardware.
- delay(0); // Pause before next pass through loop
- }
- }
- }
- }
- // 关闭连接
- client.stop();
- Serial.println("Client Disconnected.");
- }
- }
【测试结果】: 在手机和电脑网页端分别做测试,都ok。 【评测过程中的感受】: 1、C6的开发初衷是什么?其实我挺困惑的,物联网的功能之前我在掌控板和扩展板连接上都能实现,现在C6的优势在哪里呢,是太阳能电池,还是自带热点,还是什么,有没有不可替代性? 2、目前C6用起来还不太便利,在进阶版的帮助里面能看到代码,但是并不能找到相应的库文件和演示效果,建议在帮助文档中补齐。 https://wiki.dfrobot.com.cn/_SKU_DFR1075_FireBeetle_2_Board_ESP32_C6_Advanced_Tutorial#target_3 3、期待C6能像掌控板一样,支持图形化,支持添加本地库。说实在的,用arduino和thonny还是有些不太顺手,虽说开放性很好,但是有些库文件真的是不好找,如果小编能出一期,帮助寻找库文件的帖子,我觉得也是极好的。
评测过程中得到了群里众多大神的支持,参考了很多帖子。在此一并表示感谢! 参考: 点亮板载pin 15 小灯 Beetle ESP32 C6 点亮灯带
| 


 沪公网安备31011502402448
 置顶卡
置顶卡 变色卡
变色卡 千斤顶
千斤顶
 编辑选择奖
编辑选择奖


