|
9370| 8
|
树莓派教程之使用yeelink进行远程监控 |
本帖最后由 大连林海 于 2016-4-20 20:15 编辑
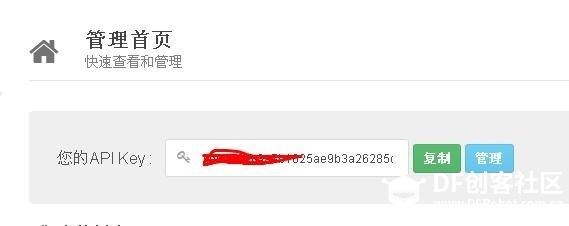
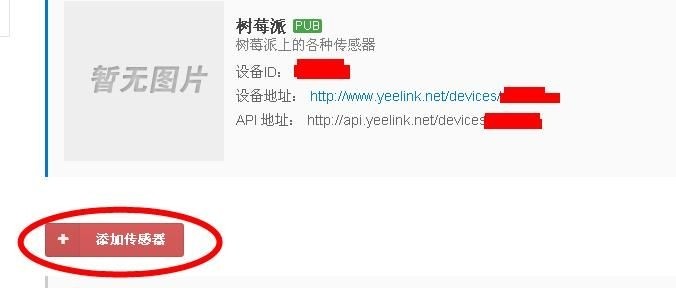
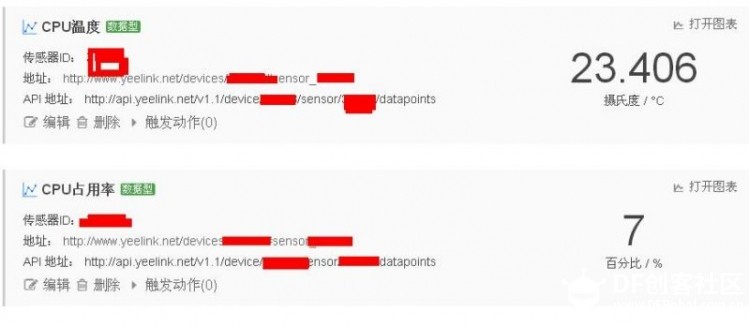
首先注册一个yeelink账号。网址:http://www.yeelink.net/register 然后点击登录   回到首页后点击用户中心  这里的APIKEY先复制下来备用  点击设备开发然后创建一个新的设备,两个键都可以  写完所有项后保存。 这时跳转到设备开发页,点击管理,  然后点击创建新传感器  这里类型选数据型。因为我们现在只是用来检测树莓派工作状态的。 所有填完点保存。  跳转后可以看见新的传感器。记下api地址备用。  我的早就弄好了,所以有数据。接下来该轮到树莓派了。 先安装requests 网上一大把我就不复制了。 新建文档yeelink.py 键入以下内容: #!/usr/bin/env python # -*- coding: utf-8 -*- import requests import json import time def main(): fileRecord = open("result.txt", "w") fileRecord.write("connect to yeelink\n"); fileRecord.close() while True: # 打开文件 file = open("/sys/class/thermal/thermal_zone0/temp") # 读取结果,并转换为浮点数 temp = float(file.read()) / 1000 # 关闭文件 file.close() # 设备URI apiurl = 'http://api.yeelink.net/v1.1/device/xxxx/sensor/xxxx/datapoints这里换成你的' # 用户密码, 指定上传编码为JSON格式 apiheaders = {'U-ApiKey': 'xxxxxxxxxxxxxx这里换成你的', 'content-type': 'application/json'} # 字典类型数据,在post过程中被json.dumps转换为JSON格式字符串 {"value": 48.123} payload = {'value': temp} #发送请求 r = requests.post(apiurl, headers=apiheaders, data=json.dumps(payload)) # 向控制台打印结果 fileRecord = open("result.txt", "a") strTime = time.strftime('%Y-%m-%d:%H-%M-%S',time.localtime(time.time())) fileRecord.writelines(strTime + "\n") strTemp = "temp : %.1f" %temp + "\n" fileRecord.writelines(strTemp) fileRecord.writelines(str(r.status_code) + "\n") fileRecord.close() time.sleep(5*60) if __name__ == '__main__': main() 把上面的apikey和api地址换成你的就行了。 运行sudo python yeelink.py这时可以看见正在不断获取CPU温度且上传,现在就可以在yeelink里看见上传的数据了  |
 沪公网安备31011502402448
© 2013-2026 Comsenz Inc. Powered by Discuz! X3.4 Licensed