用到的硬件:
DFRduino UNO R3
WIFI扩展板 V3 RPSMA接口
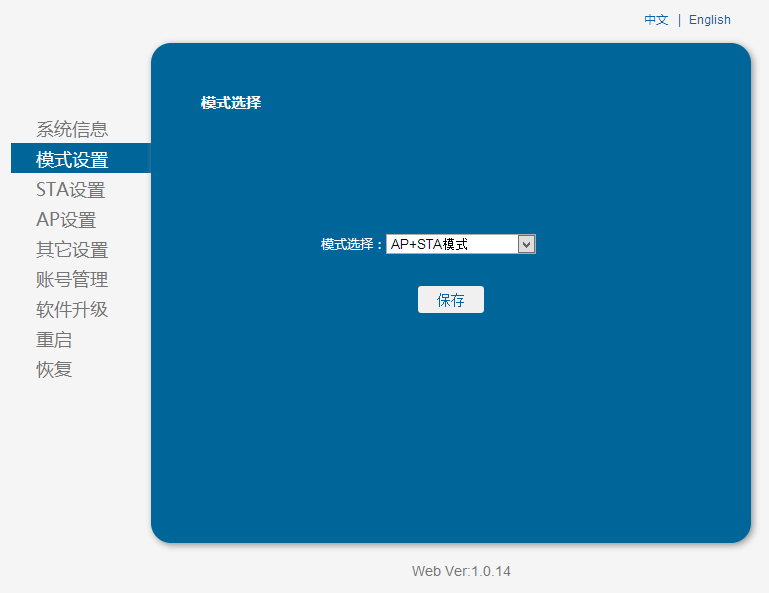
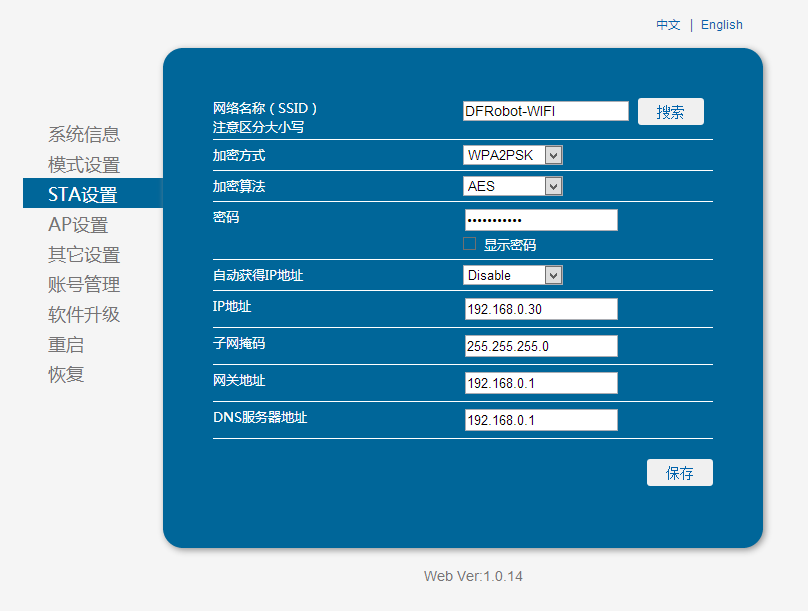
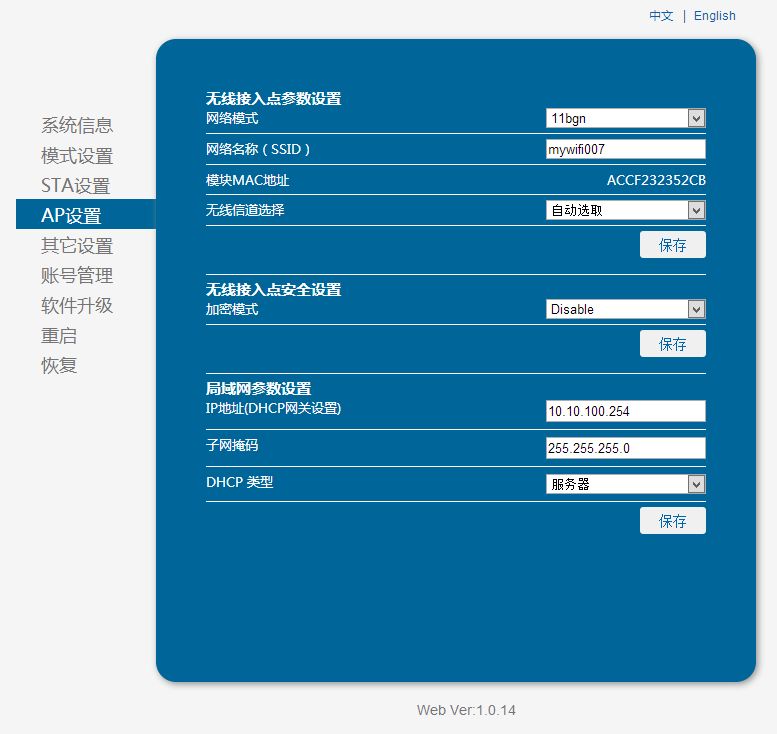
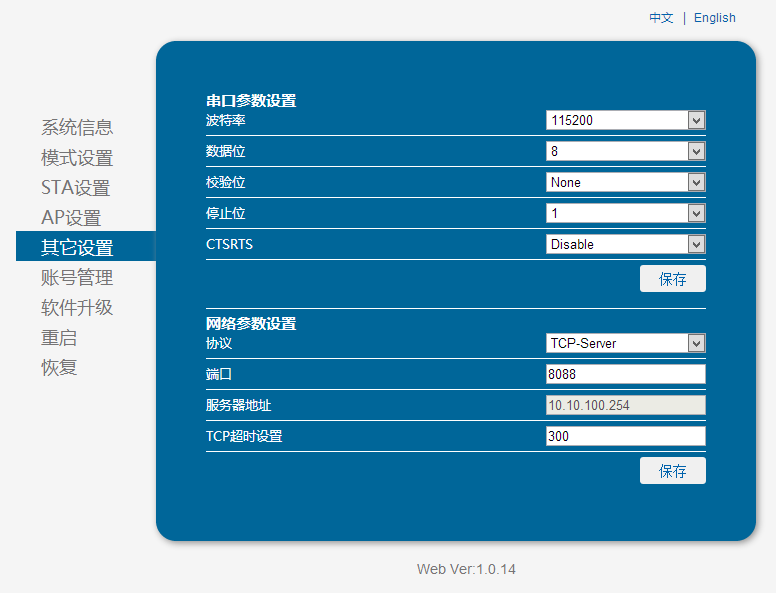
首先是wifi shield v3的设置,直接看图吧,不懂的可以参考这里
这里要输入你自己要连的无线路由和密码,并设置静态IP地址,
这里设置自己的ip为192.168.0.30
这里将模式设置为TCP-Server(就是服务器模式),端口号设为8088(自定义)
接着上代码:
- /*
- * 作者: lisper (lisper.li@dfrobot.com)
- * 使用Uno + WIFI扩展板 V3 RPSMA接口
- * 官方产品链接: https://www.dfrobot.com.cn/goods-861.html
- * 功能: 通过电脑wifi控制Arduino Uno的2~13号引脚的电平
- *
- * 需要的库: DFRobot_utility
- * 下载链接: https://github.com/DFRobot/DFRobot_utility
- * 电脑端需要的软件:putty
- * 下载链接: https://www.chiark.greenend.org.uk/~sgtatham/putty/download.html
- * 当前wifi shield设为服务器模式
- */
-
- #include <DFRobot_utility.h> //包含DFRobot_utility库头文件
-
- #define RECVBUF_MAX 20 //设定数据缓冲区大小
- #define COMMAND_MAX 2 //设定命令参数的最大长度
-
- uint8_t recvBuf[RECVBUF_MAX]; //声明一个数组用来数据缓存
- char* command[COMMAND_MAX]; //声明一个指针数组用来从recbBuf获得多个参数
-
- void setup () {
- Serial.begin (115200); //设置串口0的波特率为115200,与WIFI SHIELD设置一致
-
- for (int i=2; i<= 13; i++) { //设置2~13引脚为输出模式
- pinMode (i, OUTPUT);
- }
- }
-
- void loop () {
- //从Serial最大读入RECVBUF_MAX-1的数据到recvBuf, 超时时间为3毫秒
- int recvLeng = serialReads (Serial, recvBuf, RECVBUF_MAX-1, 3);
- if (recvLeng) {
- int cmdleng = split (command, (char*)recvBuf, COMMAND_MAX); //拆分数据为多个命令参数
- if (cmdleng == 1) { //如果参数的个数为1
- if ( strcmp(command[0], "hello") == 0) { //如果客户端输入hello
- Serial.println ("I am here!"); //向客户返回:I am here!
- }
- }
- else if (cmdleng == 2) { //如果参数的个数为2
- if (strcmp (command[0], "open") == 0) { //如果客户端输入的第一个参数为open
- int pin = atoi (command[1]); //将第二个参数转为整数,即引脚号
- if (pin >=2 && pin <= 13) {
- digitalWrite (pin, HIGH); //相应引脚输出高电平
- Serial.println ("ok"); //向客户返回:ok
- }
- }
- else if (strcmp (command[0], "close") == 0) { //如果客户端输入的第一个参数为close
- int pin = atoi (command[1]); //将第二个参数转为整数,即引脚号
- if (pin >=2 && pin <= 13) {
- digitalWrite (pin, LOW); //相应引脚输出低电平
- Serial.println ("ok");
- }
- }
- }
- }
- }
接着,电脑上打开putty,输入服务器(就是arduino+wifi shield)的IP地址和端口号,Connection type选择Raw
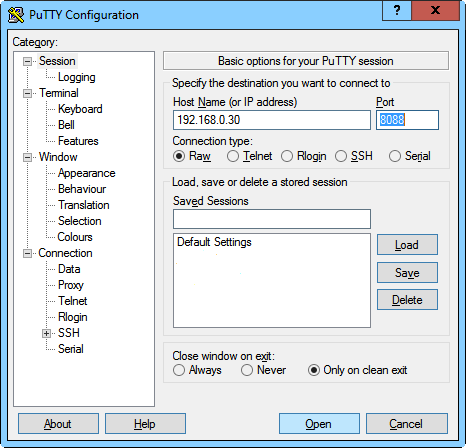
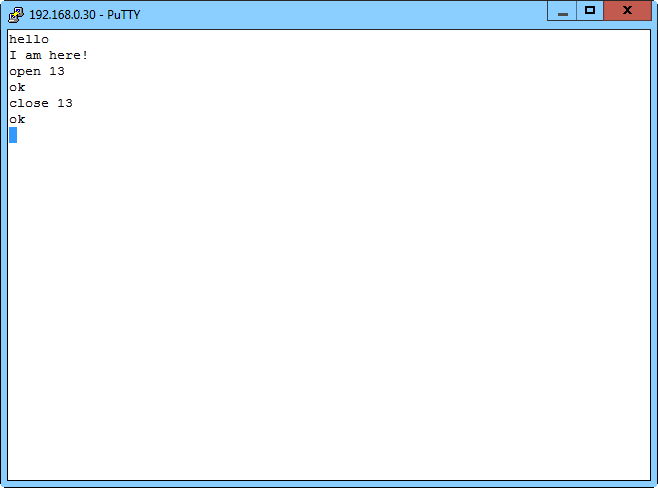
点open,在出现的窗口中输入hello,如果不出意外的话arduino会向我们返回"I am here!"
接着输入open 13,就会点亮13引脚上的led,再输入close 13就会关掉它
| 


 活跃会员
活跃会员
 老版主限定
老版主限定
 沪公网安备31011502402448