K210入门-裸机开发(四)之按键中断
开发板:K210 AIRV R3版 widora
开发环境:kendryte IDE 官方的
必须的参考文档:Standalone SDK编程指南v0.5.0,以及widora的原理图
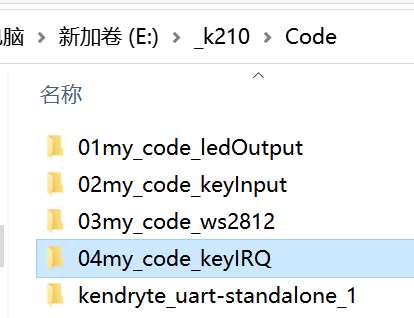
1.新建文件夹04my_code_keyIRQ
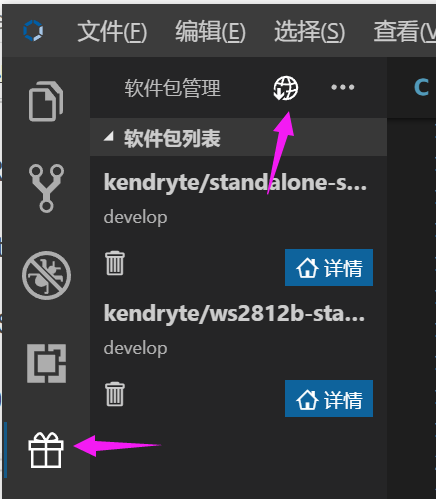
礼物 -> 地球
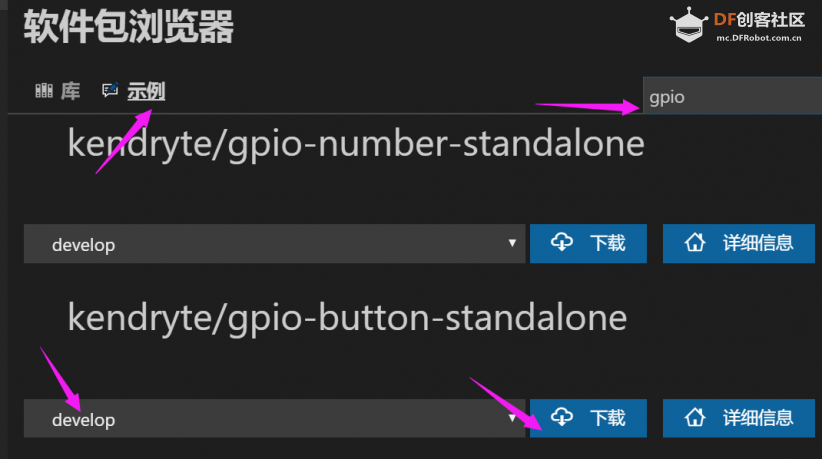
实例 搜索 gpio 选择button那个 选择develop开发版本 然后下载到刚才新建的文件夹中
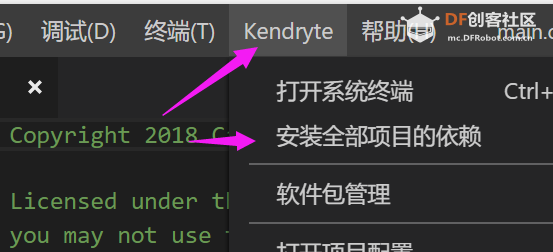
安装依赖
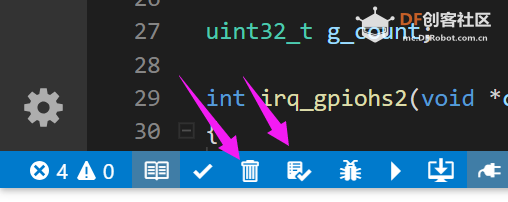
清理 + 构建
环境搭建完毕 下面开始改代码
2.看原理图
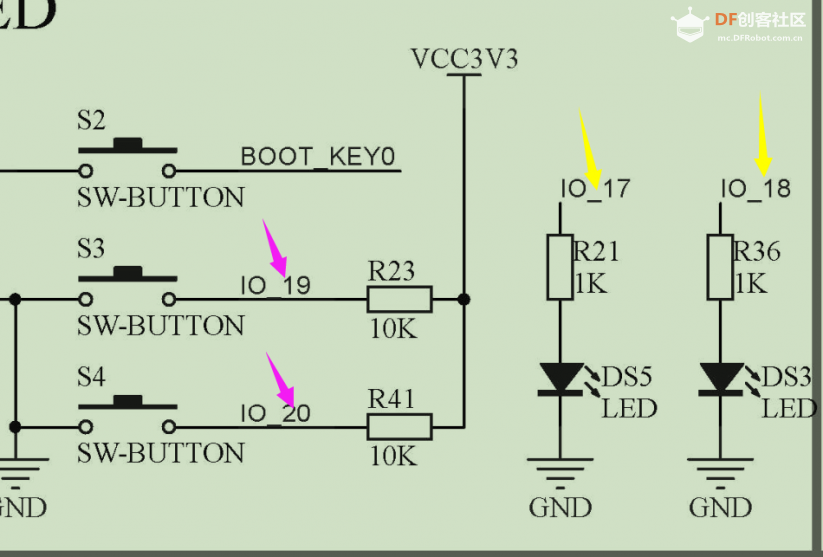
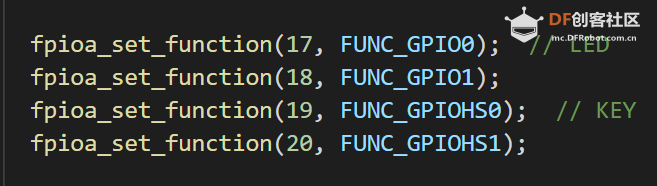
按键为 IO19,20 ; LED为IO17,18
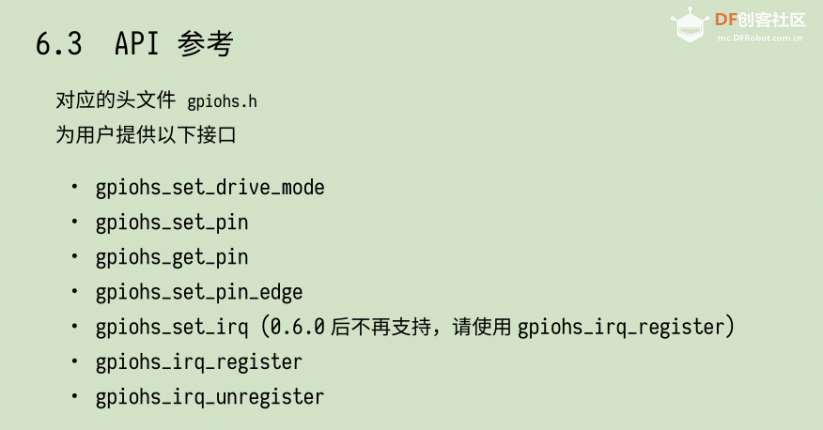
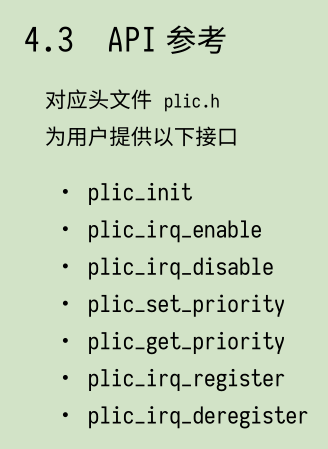
中断在 第六章, 第四章
有个举例 等下抄一抄就行
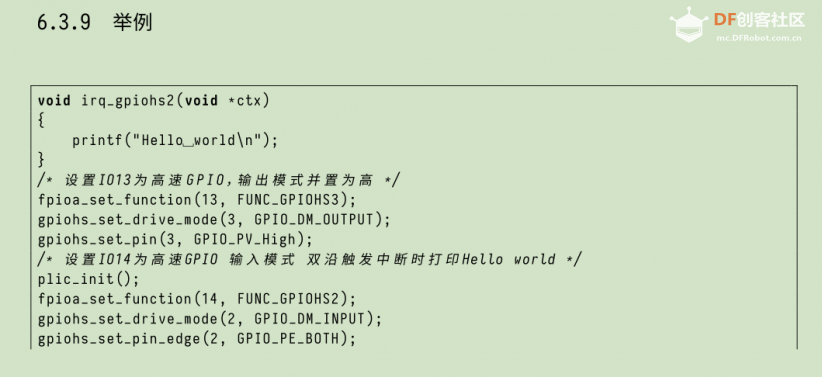
编写代码
先配置 KEY 和LED端口
因为要用到中断,所以要将KEY配置到GPIOHS高速端口
LED随便 用回之前的就好 也可以配置高速口
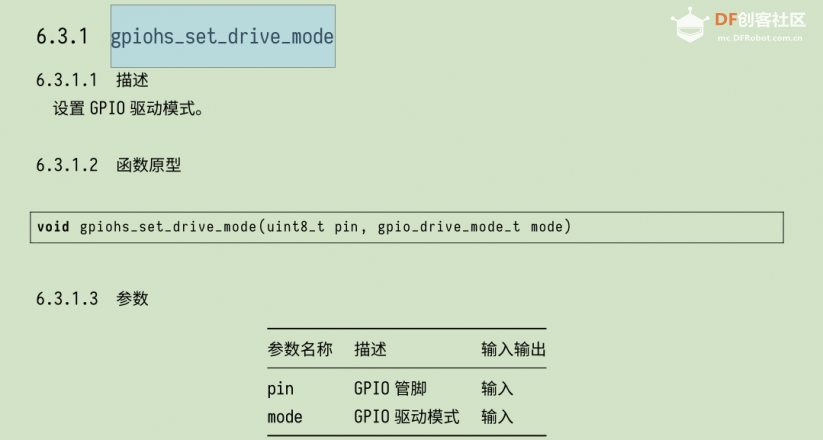
配置LED为输入端口 (低速用第五章,高速用第六章)
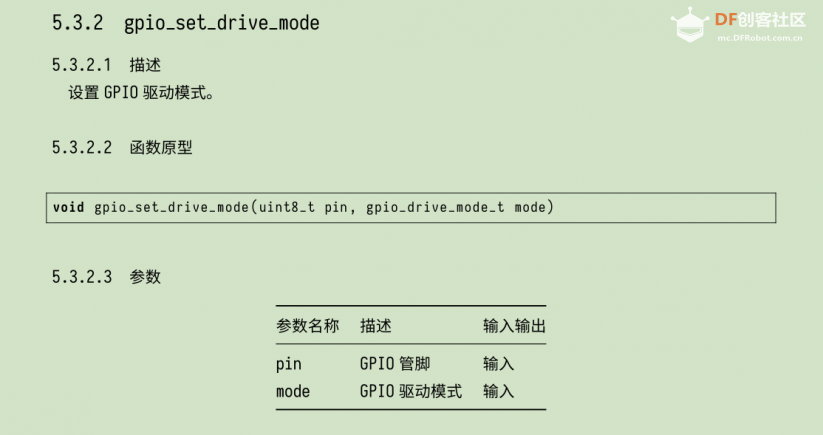
我这里用的低速的
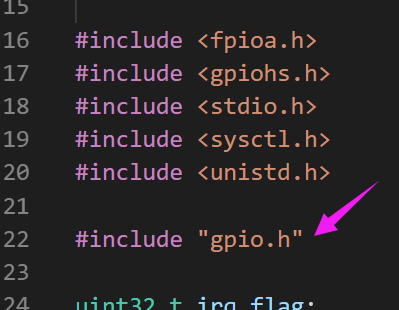
因为用到低速GPIO 所以1)添加头文件 然后 2)安装依赖 再3)清理 4)构建
熄灯

设置 按键为浮空输入(高速模式才有中断,所以用高速,浮空是因为开发板有上拉电阻了,你也可以自己改为上拉输入GPIO_DM_INPUT_PULL_UP)

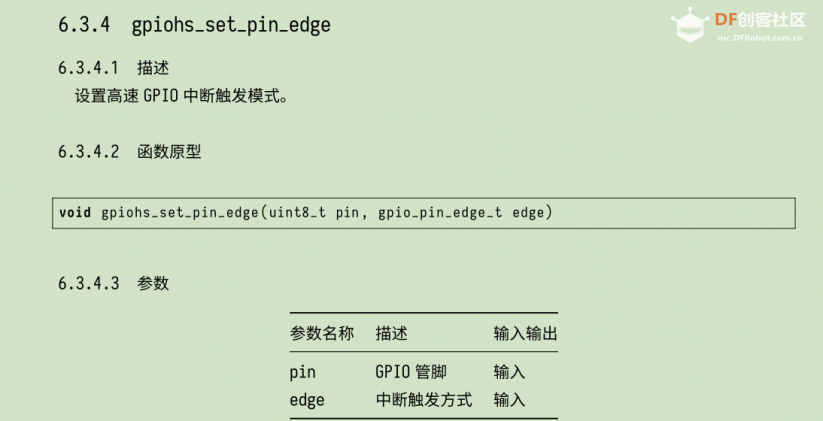
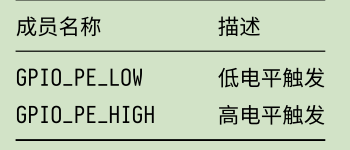
配置 中断触发方式
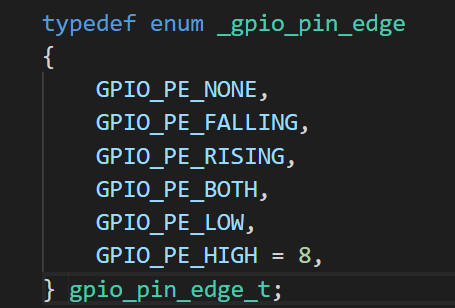
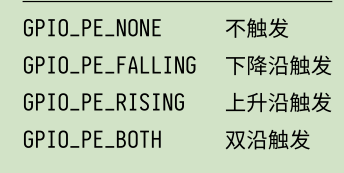
这里选择 下降沿触发(按键有上拉,平时为高电平, 当按下的时候,会被拉低 出现 1->0 即下降沿)
按键2设置为上升沿 作为对比(下面代码注释错了,falling是掉落 为下降沿的)

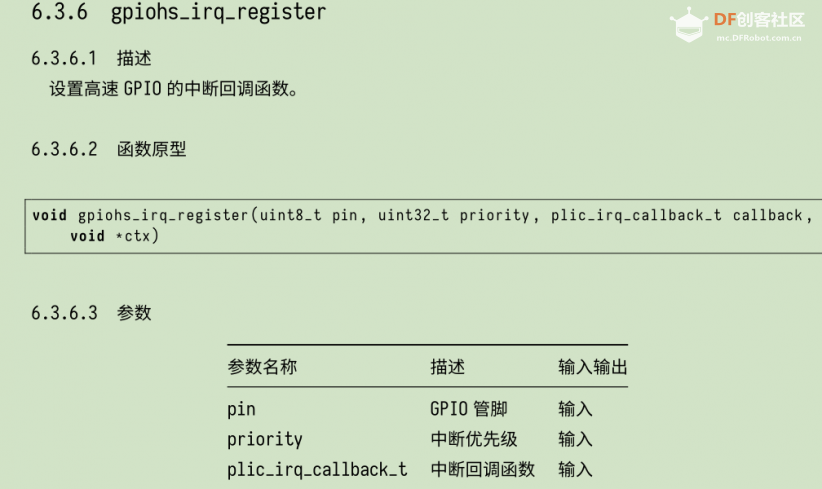
注册中断函数 以及绑定按键

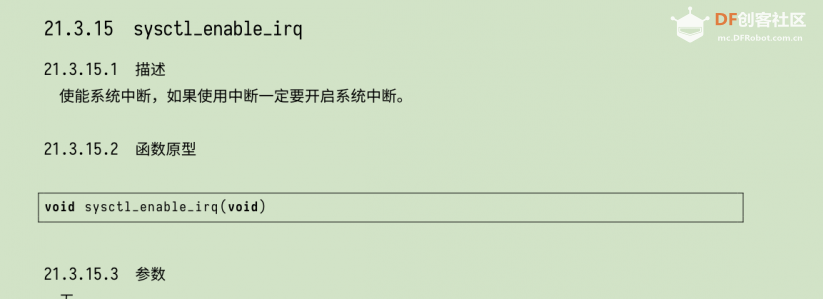
使能中断
3.编写中断服务函数
KEY1中断函数
KEY2中断函数
一条龙 清理+构建+下载

没连开发板的 先刷新,选择COM口,然后再下载

效果
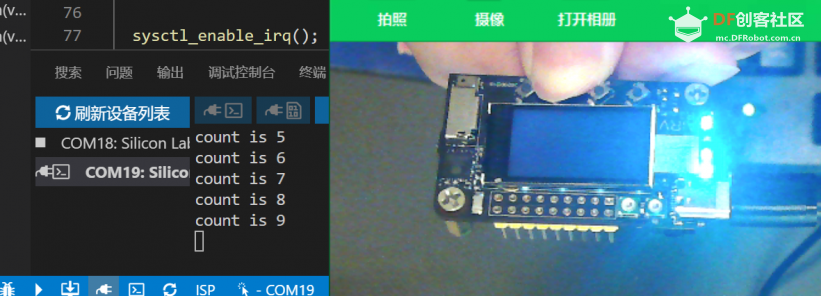
按住的时候没有反应,松开才执行(LED翻转),证明是上升沿(0->1)

这个按键 按下的瞬间就有反应了(LED翻转) 并且串口打印 count数值+1
按键学习中断完毕, 下次再见
代码
#include <fpioa.h>
#include <gpiohs.h>
#include <stdio.h>
#include <sysctl.h>
#include <unistd.h>
#include "gpio.h"
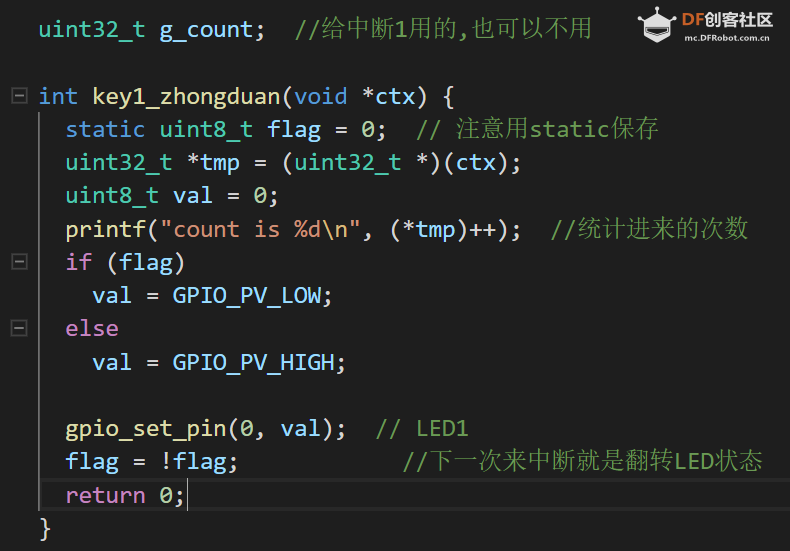
uint32_t g_count; //给中断1用的,也可以不用
int key1_zhongduan(void *ctx) {
static uint8_t flag = 0; // 注意用static保存
uint32_t *tmp = (uint32_t *)(ctx);
uint8_t val = 0;
printf("count is %d\n", (*tmp)++); //统计进来的次数
if (flag)
val = GPIO_PV_LOW;
else
val = GPIO_PV_HIGH;
gpio_set_pin(0, val); // LED1
flag = !flag; //下一次来中断就是翻转LED状态
return 0;
}
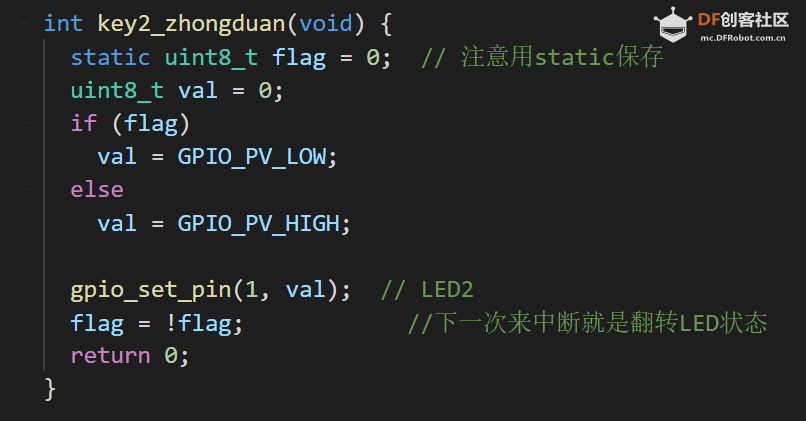
int key2_zhongduan(void) {
static uint8_t flag = 0; // 注意用static保存
uint8_t val = 0;
if (flag)
val = GPIO_PV_LOW;
else
val = GPIO_PV_HIGH;
gpio_set_pin(1, val); // LED2
flag = !flag; //下一次来中断就是翻转LED状态
return 0;
}
int main(void) {
plic_init(); // 初始化外部中断
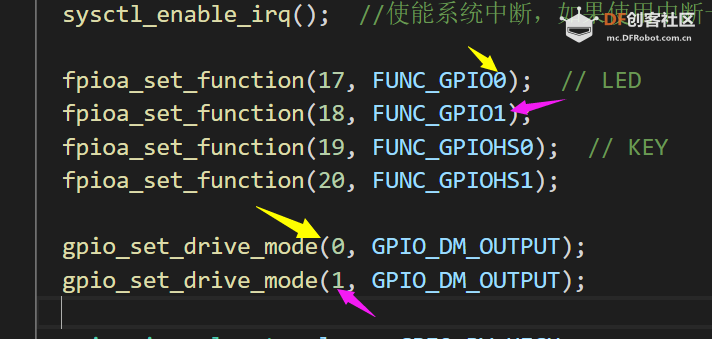
fpioa_set_function(17, FUNC_GPIO0); // LED
fpioa_set_function(18, FUNC_GPIO1);
fpioa_set_function(19, FUNC_GPIOHS0); // KEY
fpioa_set_function(20, FUNC_GPIOHS1);
gpio_set_drive_mode(0, GPIO_DM_OUTPUT); //配置低速的LED输出
gpio_set_drive_mode(1, GPIO_DM_OUTPUT);
gpio_set_pin(0, GPIO_PV_LOW); // 先让两个灯熄灭
gpio_set_pin(1, GPIO_PV_LOW);
gpiohs_set_drive_mode(0, GPIO_DM_INPUT);
gpiohs_set_drive_mode(1, GPIO_DM_INPUT);
gpiohs_set_pin_edge(0, GPIO_PE_FALLING); //下降沿
gpiohs_set_pin_edge(1, GPIO_PE_RISING); //上升沿
// 参数1 按键0(绑定了IO19),参数2中断优先级,3中断回调函数,4回调函数的形参
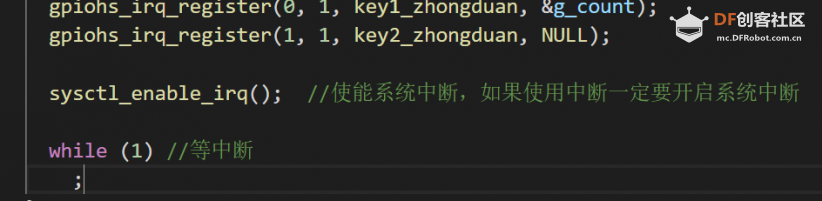
gpiohs_irq_register(0, 1, key1_zhongduan, &g_count);
gpiohs_irq_register(1, 1, key2_zhongduan, NULL);
sysctl_enable_irq(); //使能系统中断,如果使用中断一定要开启系统中断
while (1) //等中断
;
}
版权声明:本文为CSDN博主「jwdeng1995」的原创文章,遵循CC 4.0 BY-SA版权协议,转载请附上原文出处链接及本声明。
原文链接:https://blog.csdn.net/jwdeng1995/article/details/108031035


 沪公网安备31011502402448
 置顶卡
置顶卡 变色卡
变色卡 千斤顶
千斤顶


