本帖最后由 伊娃老师 于 2023-5-27 14:48 编辑
很多好玩的项目离不开一个能显示各种内容的显示屏,我为了在esp32上点亮一个TFT屏幕,折腾了10小时才成功,为了让大家不要经历我这种苦难,我把踩过的坑总结给大家,零基础也能点亮TFT。
【准备器材】
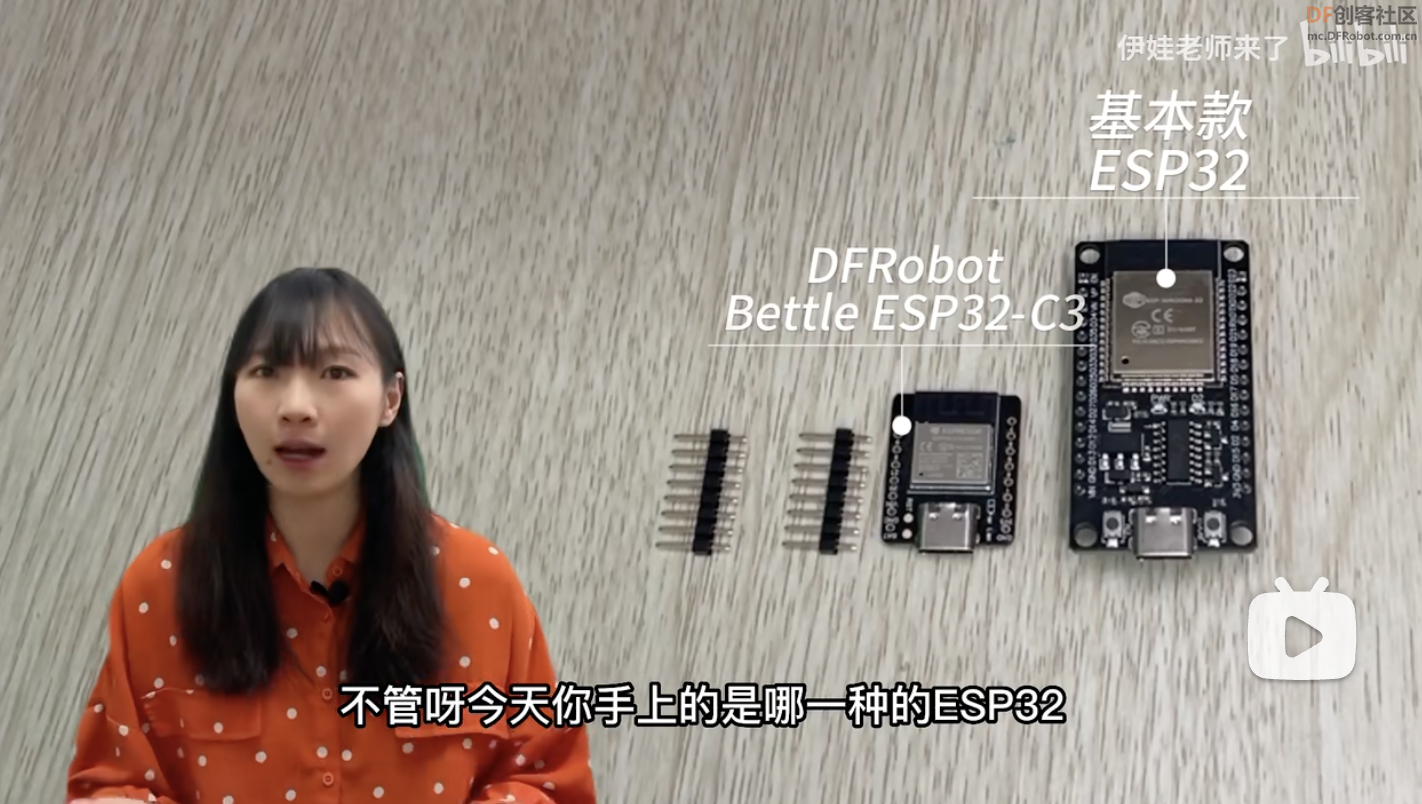
1. 主控板:
Beetle ESP32 C3:相比一般的ESP32更加小巧,也能直接插在面包板连接TFT
或者
一般的ESP32
2. TFT屏幕:我使用的是ST7735s的驱动,分享的内容不限此驱动,适用大部分TFT
3. 其他:面包板、面包线
4. 库文件: TFT_eSPI.zip TFT_eSPI.zip
 
【点亮TFT步骤】
1. 在Arduino设置ESP32环境
管理器地址:
https://dl.espressif.com/dl/package_esp32_index.json
https://github.com/Bodmer/TFT_eSPI
2. 安装TFT_eSPI库
3. 连线
脚位对应:
TFT_SCLK:对应SCL
TFT_MOSI:对应SDA
TFT_RST :对应RES
TFT_DC :对应DC
TFT_CS :对应CS
TFT_BL :对应BL
4. 更改User_setup.h中的驱动与引脚设置
5. 上传代码
6. 点亮TFT
【测试代码】
- #include <TFT_eSPI.h> // 引入 TFT_eSPI 库
-
- TFT_eSPI tft; // 创建 TFT_eSPI 对象
-
- void setup() {
- tft.init(); // 初始化 TFT 屏幕
- tft.setRotation(0)); // 调整屏幕方向,根据需要选择合适的值(0、1、2、3)
- tft.fillScreen(TFT_BLACK); // 设置屏幕背景颜色为黑色
- tft.setTextSize(1); // 设置文本大小
- tft.setTextColor(TFT_WHITE); // 设置文本颜色为白色
- }
-
- void loop() {
- tft.fillScreen(TFT_BLACK); // 清空屏幕,将屏幕填充为黑色
-
- // 绘制不同图形
-
- // 绘制一个像素点,参数:x 坐标,y 坐标,颜色
- tft.drawPixel(5, 5, TFT_RED);
-
- // 绘制一条直线,参数:起点的 x 坐标,起点的 y 坐标,终点的 x 坐标,终点的 y 坐标,颜色
- tft.drawLine(10, 20, 60, 20, TFT_GREEN);
-
- // 第一行:矩形
- // 绘制一个矩形边框,参数:左上角的 x 坐标,左上角的 y 坐标,矩形的宽度,矩形的高度,颜色
- tft.drawRect(10, 40, 15, 10, TFT_BLUE);
- // 绘制一个矩形填充,参数:左上角的 x 坐标,左上角的 y 坐标,矩形的宽度,矩形的高度,颜色
- tft.fillRect(10, 40, 15, 10, TFT_YELLOW);
-
- // 第二行:圆形
- // 绘制一个圆形边框,参数:圆心的 x 坐标,圆心的 y 坐标,圆的半径,颜色
- tft.drawCircle(65, 35, 7, TFT_MAGENTA);
- // 绘制一个圆形填充,参数:圆心的 x 坐标,圆心的 y 坐标,圆的半径,颜色
- tft.fillCircle(85, 35, 7, TFT_CYAN);
-
- // 第三行:三角形
- // 绘制一个三角形边框,参数:三个顶点的 x 坐标,三个顶点的 y 坐标,颜色
- tft.drawTriangle(75, 80, 85, 70, 85, 80, TFT_ORANGE);
- // 绘制一个三角形填充,参数:三个顶点的 x 坐标,三个顶点的 y 坐标,颜色
- tft.fillTriangle(105, 80, 115, 70, 115, 80, TFT_PURPLE);
-
- // 第四行:圆角矩形
- // 绘制一个圆角矩形边框,参数:左上角的 x 坐标,左上角的 y 坐标,矩形的宽度,矩形的高度,圆角的半径,颜色
- tft.drawRoundRect(10, 75, 20, 20, 5, TFT_PINK);
- // 绘制一个圆角矩形填充,参数:左上角的 x 坐标,左上角的 y 坐标,矩形的宽度,矩形的高度,圆角的半径,颜色
- tft.fillRoundRect(35, 75, 20, 20, 5, TFT_BLUE);
-
- // 显示文本
- tft.setCursor(10, 10); // 设置文本光标位置,参数:x 坐标,y 坐标
- tft.println("Hello, I am Eva!"); // 打印文本,参数:文本内容
-
- delay(2000); // 等待2秒钟
- }
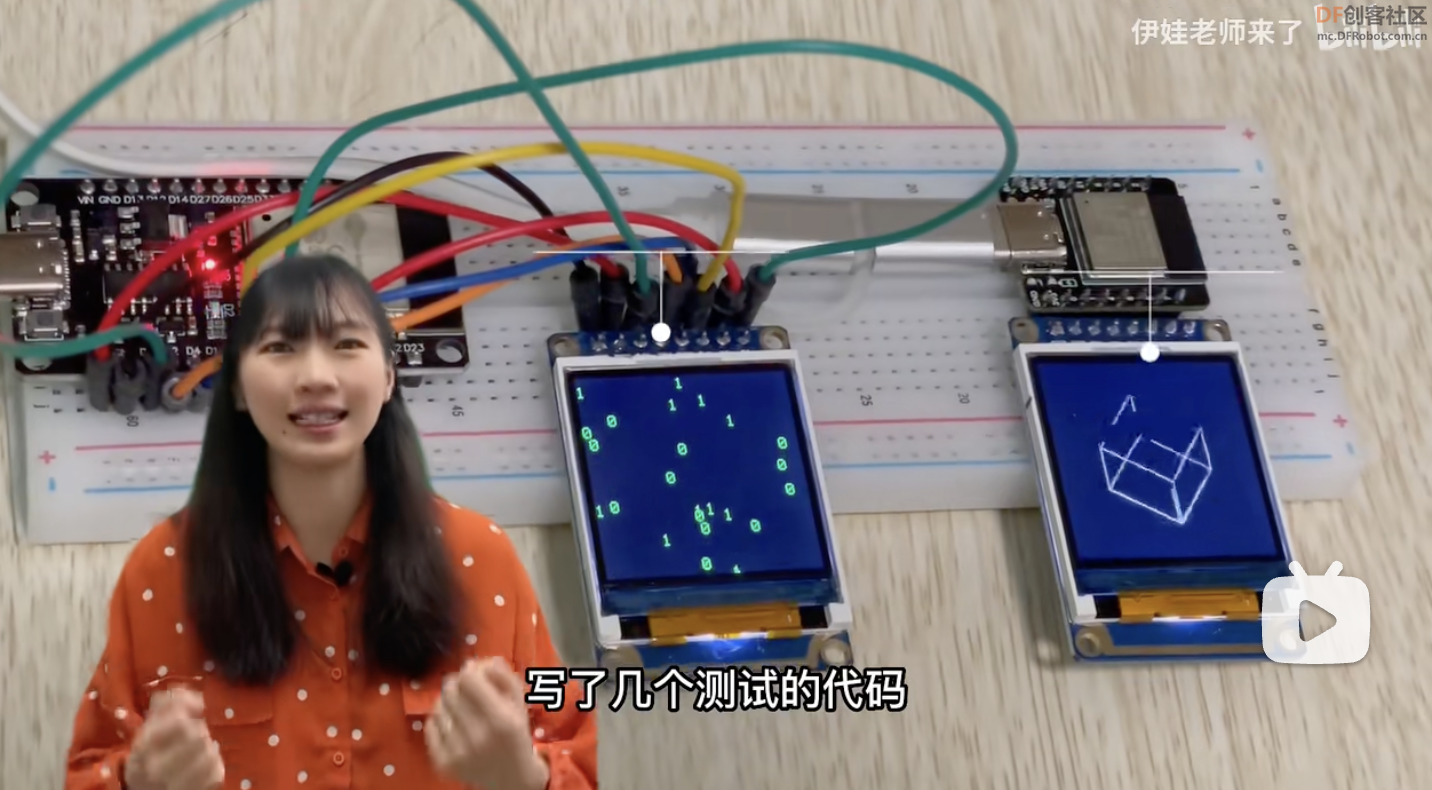
【黑客帝国特效】
- //黑客帝国画面特效
- #include <TFT_eSPI.h>
-
- TFT_eSPI tft = TFT_eSPI(); // 初始化 TFT_eSPI 对象
-
-
-
- const int dropDelay = 100; // 每个雨滴的延迟时间(毫秒)
- const int maxDrops = 30; // 最大雨滴数量
-
- int dropX[maxDrops]; // 雨滴的X坐标
- int dropY[maxDrops]; // 雨滴的Y坐标
- char dropChar[maxDrops]; // 雨滴显示的字符
- int dropSpeed[maxDrops]; // 雨滴的下落速度
-
- void setup() {
- tft.init(); // 初始化 TFT_eSPI
- tft.setRotation(0); // 旋转屏幕以适应不同的连接方式
- tft.fillScreen(TFT_BLACK); // 清空屏幕为黑色
-
- randomSeed(analogRead(0)); // 使用模拟引脚0的值作为随机种子
-
- // 初始化每个雨滴的初始值
- for (int i = 0; i < maxDrops; i++) {
- dropX[i] = random(0, tft.width());
- dropY[i] = -random(0, tft.height());
- dropChar[i] = randomChar(2);
- dropSpeed[i] = random(1, 5);
- }
-
- tft.setTextColor(TFT_GREEN); // 设置字符颜色
- tft.setTextSize(1); // 设置字符大小
- }
-
- void loop() {
- // 更新每个雨滴的位置
- for (int i = 0; i < maxDrops; i++) {
- dropY[i] += dropSpeed[i];
-
- // 如果雨滴超出屏幕底部,将其重置到屏幕顶部
- if (dropY[i] > tft.height() + 8) {
- dropY[i] = -8;
- dropX[i] = random(0, tft.width());
- dropChar[i] = randomChar(2);
- }
- }
-
- // 清空屏幕
- tft.fillScreen(TFT_BLACK);
-
- // 绘制雨滴
- for (int i = 0; i < maxDrops; i++) {
- tft.setCursor(dropX[i], dropY[i]);
- tft.print(dropChar[i]);
- }
-
- delay(dropDelay); // 等待一段时间,控制雨滴的下落速度
- }
-
- // 随机生成可显示的字符
- char randomChar(int i) {
- if (i == 1) {
- int charIndex = random(0, 95); // ASCII 32-126 可显示的字符范围
- return char(charIndex + 32);
- } else if (i == 2) {
- int charIndex = random(0, 2); // 生成随机数 0 或 1
- return char(charIndex + '0'); // 将数字转换为对应的字符
- }
- }
【三维选择立方体】
- //旋转的立方体
- #include <TFT_eSPI.h>
- #include <math.h>
-
- TFT_eSPI tft = TFT_eSPI(); // 创建 TFT_eSPI 实例
-
- // 立方体的顶点坐标
- float vertices[8][3] = {
- { -25, -25, -25 }, // 0
- { 25, -25, -25 }, // 1
- { 25, 25, -25 }, // 2
- { -25, 25, -25 }, // 3
- { -25, -25, 25 }, // 4
- { 25, -25, 25 }, // 5
- { 25, 25, 25 }, // 6
- { -25, 25, 25 } // 7
- };
-
- // 连接立方体顶点的边
- int edges[12][2] = {
- { 0, 1 },
- { 1, 2 },
- { 2, 3 },
- { 3, 0 },
- { 4, 5 },
- { 5, 6 },
- { 6, 7 },
- { 7, 4 },
- { 0, 4 },
- { 1, 5 },
- { 2, 6 },
- { 3, 7 }
- };
-
- // 画面中心坐标
- int centerX;
- int centerY;
-
- // 旋转角度
- float angle = 0.0;
-
- void setup() {
- tft.begin(); // 初始化 TFT 显示屏
- tft.setRotation(0); // 设置显示屏方向,根据需要进行调整
-
- centerX = tft.width() / 2;
- centerY = tft.height() / 2;
- }
-
- void loop() {
- tft.fillScreen(TFT_BLACK); // 清空屏幕
-
- // 更新旋转角度
- angle += 1;
- // 旋转角度取模
- angle = fmod(angle, 360.0);
-
- // 绘制立方体的线条
- for (int i = 0; i < 12; i++) {
- int v0 = edges[i][0];
- int v1 = edges[i][1];
- float x0 = vertices[v0][0];
- float y0 = vertices[v0][1];
- float z0 = vertices[v0][2];
- float x1 = vertices[v1][0];
- float y1 = vertices[v1][1];
- float z1 = vertices[v1][2];
-
- // 绕Y轴旋转
- rotateY(&x0, &z0, angle);
- rotateY(&x1, &z1, angle);
-
- // 绕X轴旋转
- rotateX(&y0, &z0, angle);
- rotateX(&y1, &z1, angle);
-
- drawLine(x0, y0, x1, y1);
- }
-
- delay(1); // 稍微延迟一下,调整旋转速度
- }
-
- // 绘制线条
- void drawLine(float x0, float y0, float x1, float y1) {
- tft.drawLine(centerX + x0, centerY + y0, centerX + x1, centerY + y1, TFT_WHITE);
- }
-
- // 绕Y轴旋转
- void rotateY(float *x, float *z, float angle) {
- float rad = angle * PI / 180.0;
- float new_x = (*x) * cos(rad) + (*z) * sin(rad);
- float new_z = (*z) * cos(rad) - (*x) * sin(rad);
- (*x) = new_x;
- (*z) = new_z;
- }
-
- // 绕X轴旋转
- void rotateX(float *y, float *z, float angle) {
- float rad = angle * PI / 180.0;
- float new_y = (*y) * cos(rad) - (*z) * sin(rad);
- float new_z = (*z) * cos(rad) + (*y) * sin(rad);
- (*y) = new_y;
- (*z) = new_z;
- }
|

 TFT_eSPI.zip

 沪公网安备31011502402448