本帖最后由 御坂10032号 于 2026-5-22 21:28 编辑
简介
我这里对C4002的具体参数不做额外的阐述,具体请参考C4002, 而是什么吸引我报名参加这次的评测活动呢? 主要是因为这个传感器的输出吸引了我。详情请参考下图。
它这里想对与传统的雷达传感器多了很多的输出参数,比如说光照的强度、运动距离(Motion distance 物体的运动距离) 运动速度(Motion speed)和移动方向(Motion direction)存在倒计时(Presence countdown)这些传感器数据的输出是比较有意思的,不同的数据的输出为不同场景的应用创造了可能。我的创意是:很多大货车司机经常会跑长途运输,在服务器或者某些地段停车休息的时候会经常出现加完一箱油然后被偷的情况。 根据C4002的参数,其探测距离是达到了10M。将C4002固定在大车窗上其前门车窗到油箱的距离正好是在10M内,所以结合对应的传感器或者设备可以做到通知报警的功能。 比如说结合蜂鸣器可以实现报警、结合MQTT可以做到远程报警通知等等。
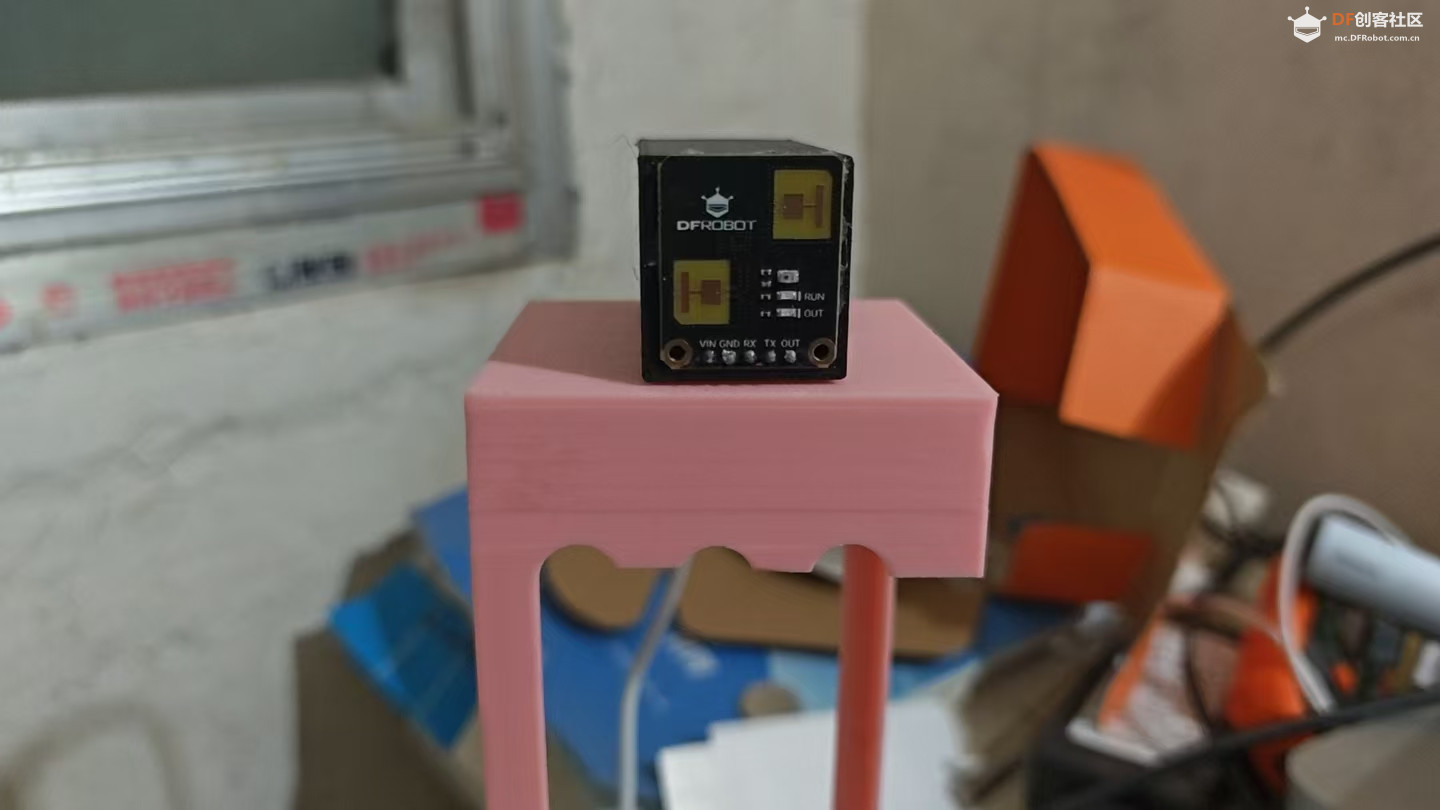
焊接好的传感器的实物拍摄
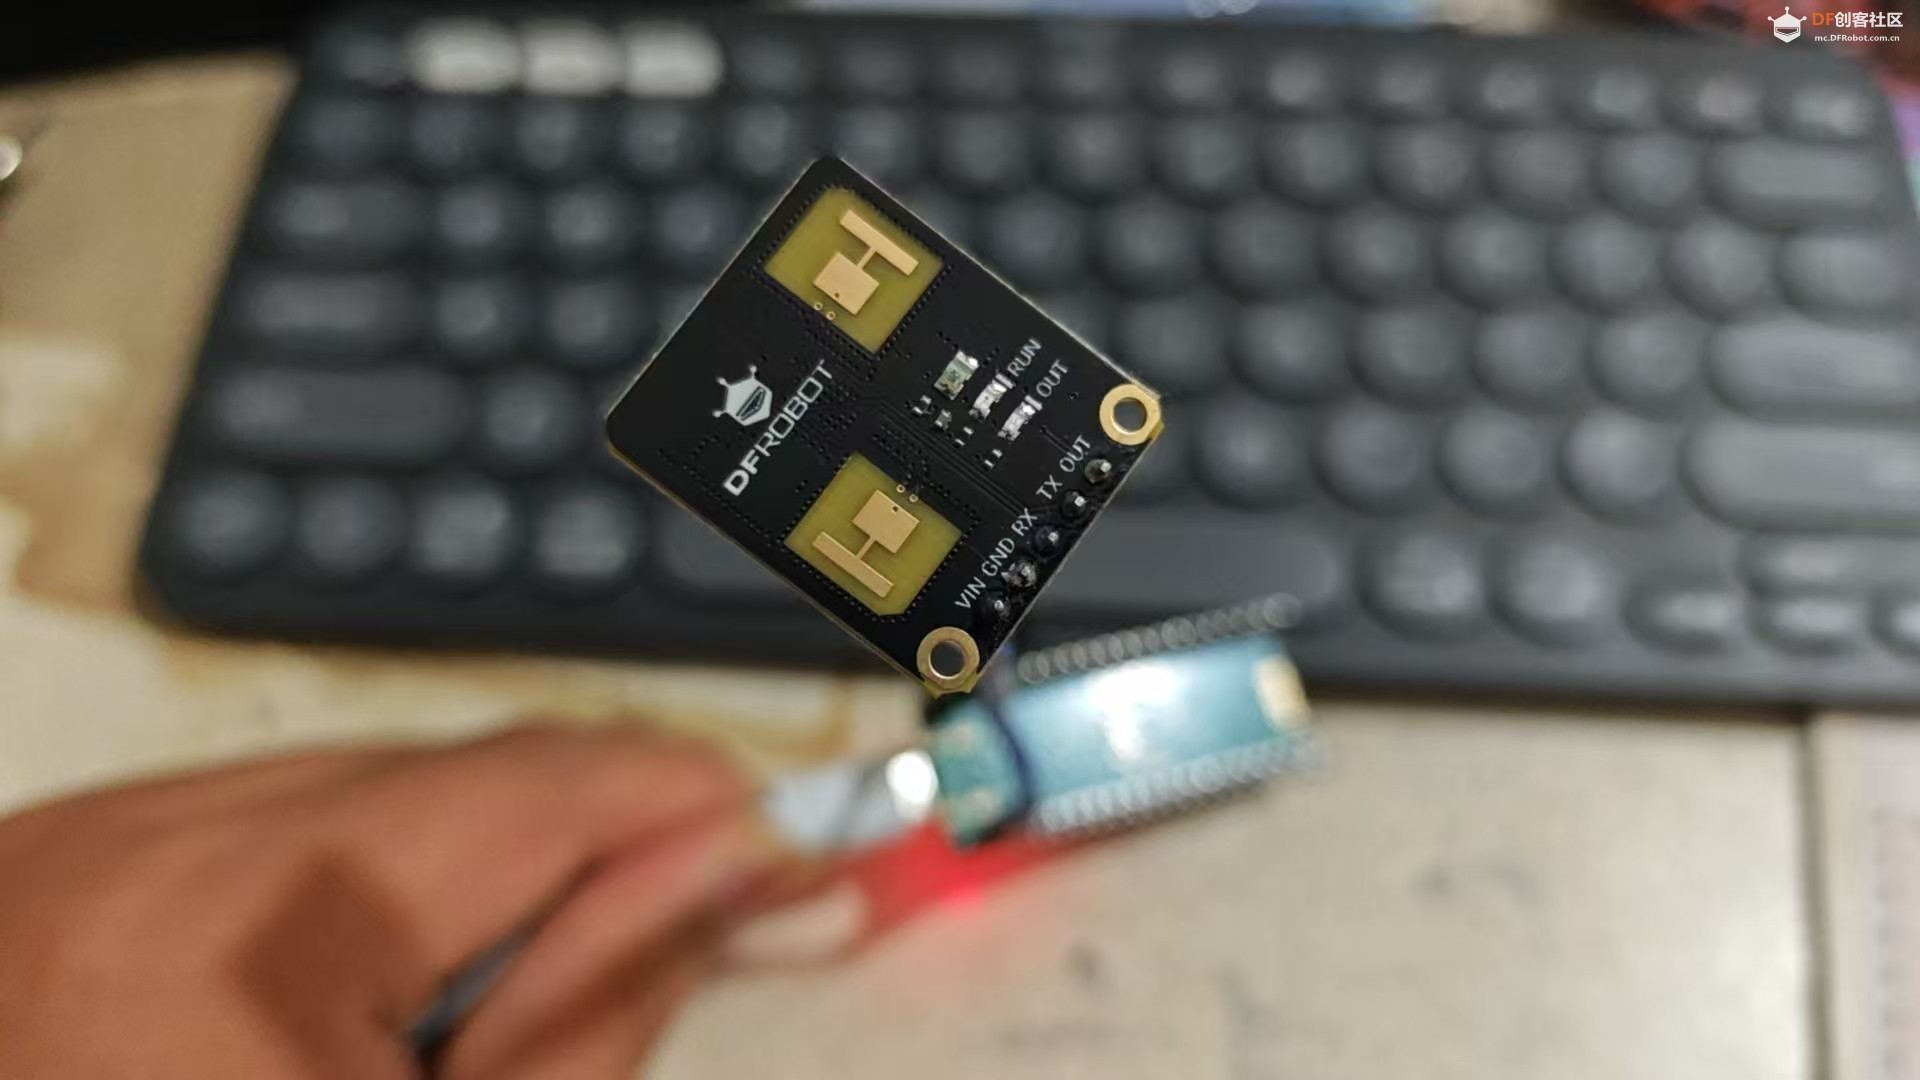
C004 上一共有5个PIN,分别是VCC,GND, RX, TX 和 OUT, VCC 支持3.6~5.5V RX和TX的默认的波特率是115200,Out的话则是高低电平输出代表了当前的被检测物体的运动状态。
官方提供的Arduino的库如下所示
由于国内在Arduino安装ESP32的库的时候经常会出现网络中断从而导致安装失败,因此我这次并没有按照C004上的教程那样使用Arduino的库,而是选择了使用树莓派Pico作为主控使用Micropython的方式进行驱动。根据上述的串口输出的图片得知,Arduino的库主要做的内容就是把串口发送的Hex数据解析****可以阅读的数据然后进行展示。
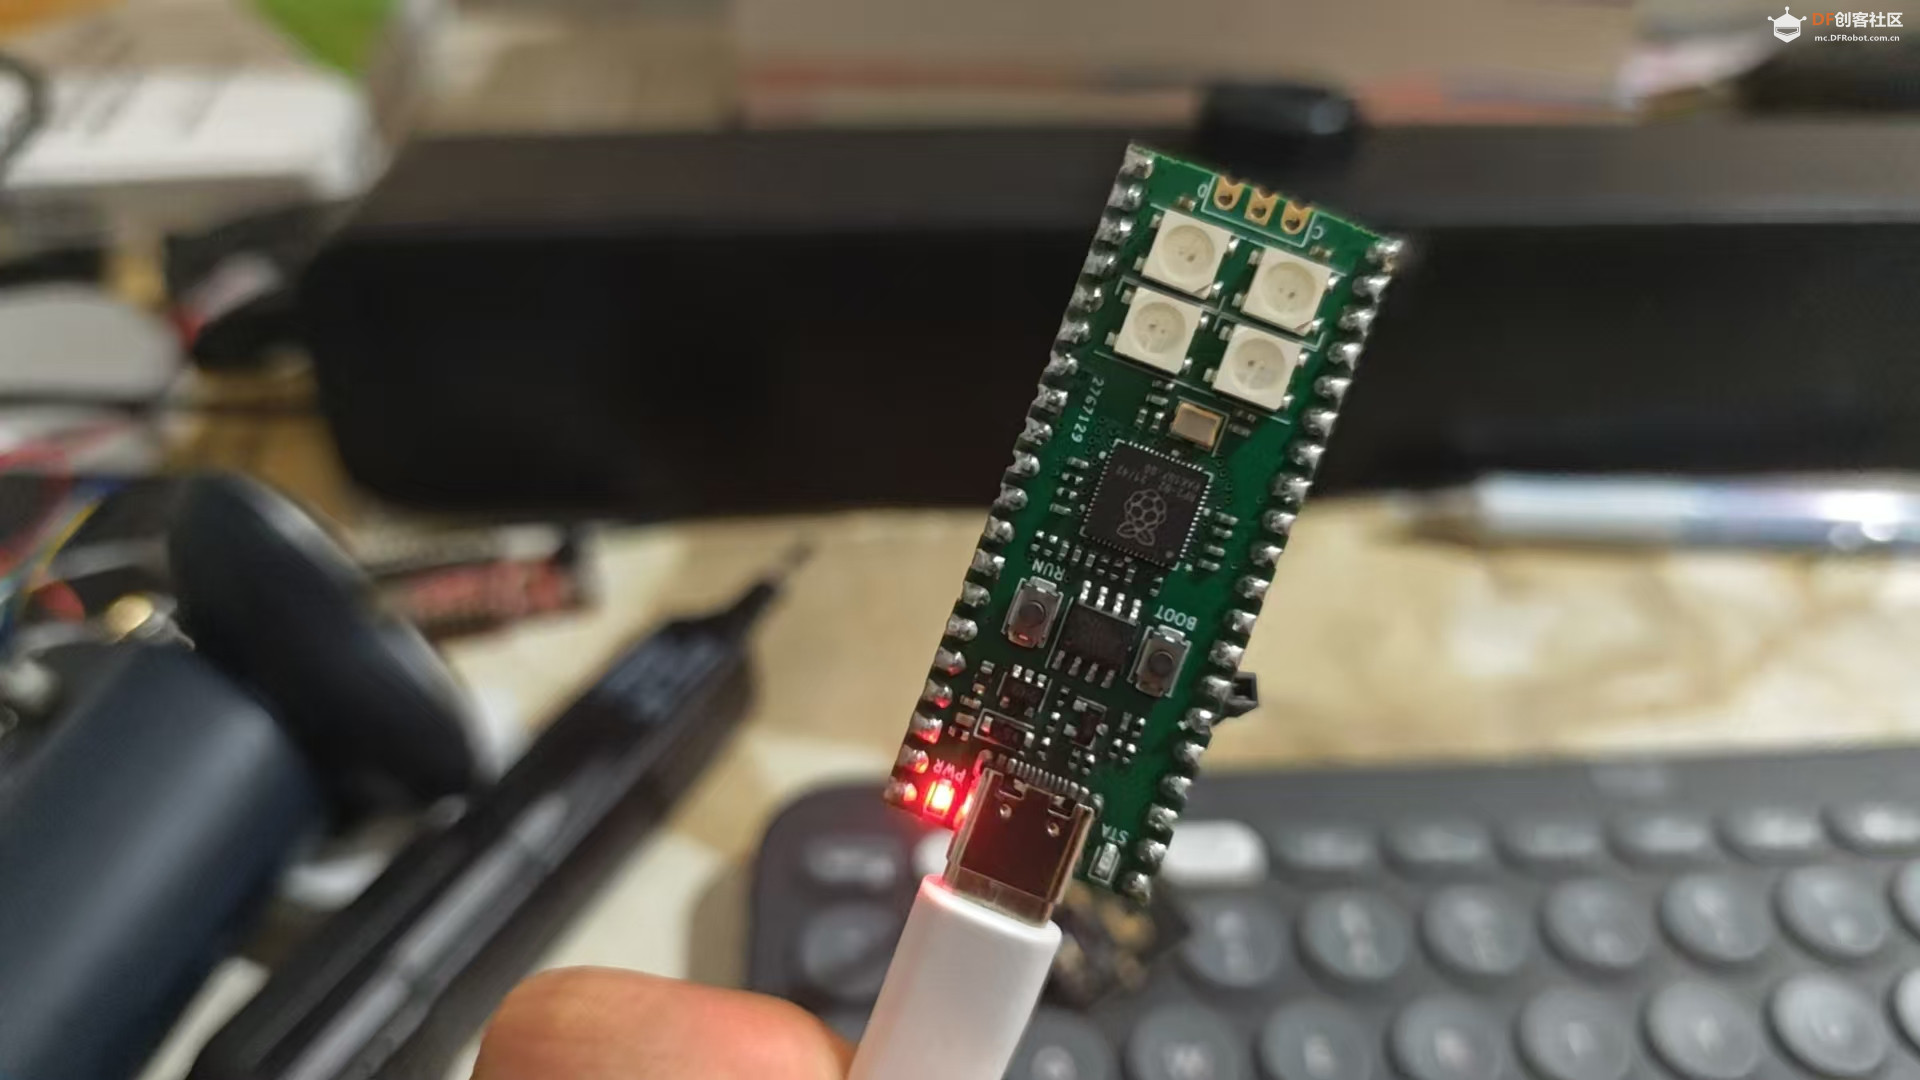
下图为这次测评使用的树莓派Pico
所以我使用了Minimax结合Claude对原本Arduino的库进行了读取并且制作出了一个Micropython的版本。如下所示
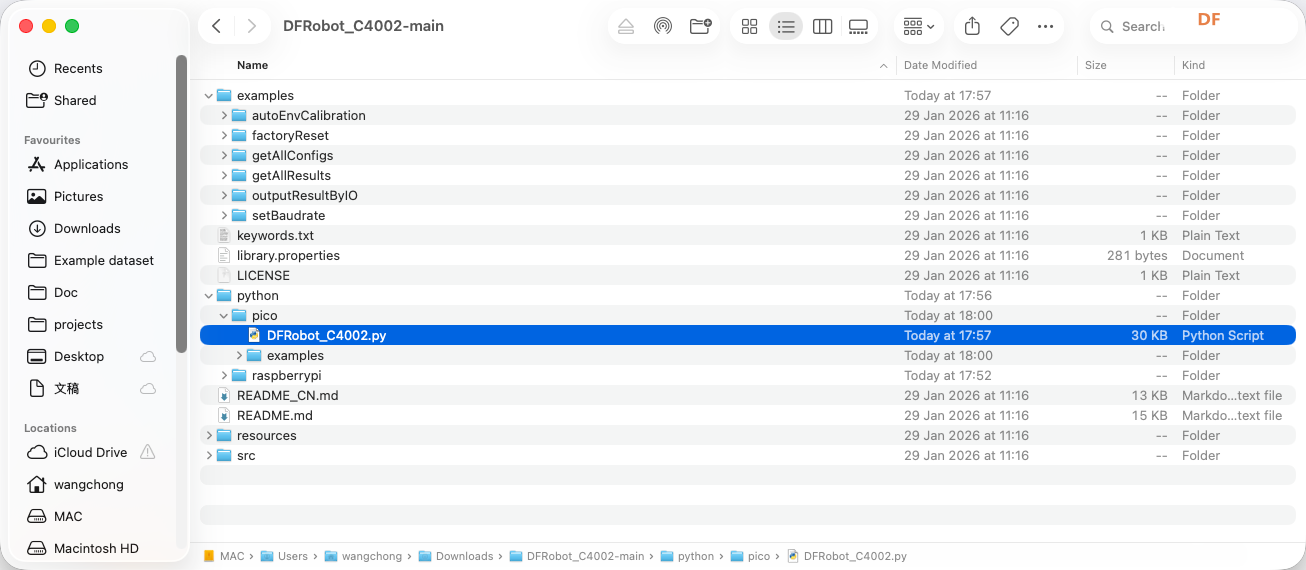
之后使用Thonny创建对应的库文件并且将库的内容复制进去,然后根据库文件的内容写好自己的main.c的代码
- import time
- import machine
-
- # Import the Pico library
- from DFRobot_C4002 import DFRobot_C4002, PresenceTarget, MotionTarget
-
- # Initialize UART0 on GP0(TX) and GP1(RX)
- # Default baudrate: 115200
- c4002 = DFRobot_C4002(uart_num=0, baud=115200, tx=0, rx=1)
-
-
- def setup():
- while c4002.begin() != True:
- print("C4002 begin failed!")
- time.sleep_ms(500)
-
- print("C4002 begin success!")
- time.sleep_ms(50)
-
- # Turn off LEDs
- if c4002.set_run_led_state(c4002.LED_OFF):
- print("Set run led success!")
- else:
- print("Set run led failed!")
-
- if c4002.set_out_led_state(c4002.LED_OFF):
- print("Set out led success!")
- else:
- print("Set out led failed!")
-
- # Set resolution mode (80cm resolution, supports 15 distance gates)
- if c4002.set_resolution_mode(c4002.RESOLUTION_80CM):
- print("Set resolution mode success!")
- else:
- print("Set resolution mode failed!")
-
- # Set detection range 0-1100cm
- if c4002.set_detect_range(0, 1100):
- print("Set detect range success!")
- else:
- print("Set detect range failed!")
-
- # Set light threshold (0 = always detect regardless of light)
- if c4002.set_light_thresh(0):
- print("Set light threshold success!")
- else:
- print("Set light threshold failed!")
-
- # Enable all distance gates
- gate_state = [
- c4002.C4002_ENABLE, c4002.C4002_ENABLE, c4002.C4002_ENABLE,
- c4002.C4002_ENABLE, c4002.C4002_ENABLE, c4002.C4002_ENABLE,
- c4002.C4002_ENABLE, c4002.C4002_ENABLE, c4002.C4002_ENABLE,
- c4002.C4002_ENABLE, c4002.C4002_ENABLE, c4002.C4002_ENABLE,
- c4002.C4002_ENABLE, c4002.C4002_ENABLE, c4002.C4002_ENABLE,
- ]
-
- if c4002.configure_gate(c4002.MOTION_DISTANCE_GATE, gate_state):
- print("Enable motion distance gate success!")
-
- if c4002.configure_gate(c4002.PRESENCE_DISTANCE_GATE, gate_state):
- print("Enable presence distance gate success!")
-
- # Set report period (10 * 0.1s = 1s)
- if c4002.set_report_period(10):
- print("Set report period success!")
-
-
- def loop():
- ret_result = c4002.get_note_info()
-
- if ret_result.note_type == c4002.RESULT:
- print("------- Get all results --------")
-
- # Light intensity (lux)
- light = c4002.get_light_intensity()
- print("Light: {:.2f} lux".format(light))
-
- # Target state
- target_state = c4002.get_target_state()
- print("Target state: ", end="")
- if target_state == c4002.NO_TARGET:
- print("No Target")
- elif target_state == c4002.PRESENCE:
- print("Static Presence")
- elif target_state == c4002.MOTION:
- print("Motion")
-
- # Presence countdown
- presence_count_down = c4002.get_presence_count_down()
- print("Presence countdown: {} s".format(presence_count_down))
-
- # Presence target info
- presence_target = c4002.get_presence_target_info()
- print("Presence distance: {:.2f} m".format(presence_target.distance))
- print("Presence energy: {}".format(presence_target.energy))
-
- # Motion target info
- motion_target = c4002.get_motion_target_info()
- print("Motion distance: {:.2f} m".format(motion_target.distance))
- print("Motion energy: {}".format(motion_target.energy))
- print("Motion speed: {:.2f} m/s".format(motion_target.speed))
- print("Motion direction: ", end="")
- if motion_target.direction == c4002.AWAY:
- print("Away!")
- elif motion_target.direction == c4002.APPROACHING:
- print("Approaching!")
- elif motion_target.direction == c4002.NODIRECTION:
- print("No Direction!")
-
- print("--------------------------------")
-
-
- def main():
- setup()
- while True:
- loop()
- time.sleep_ms(100)
-
-
- if __name__ == "__main__":
- main()
-
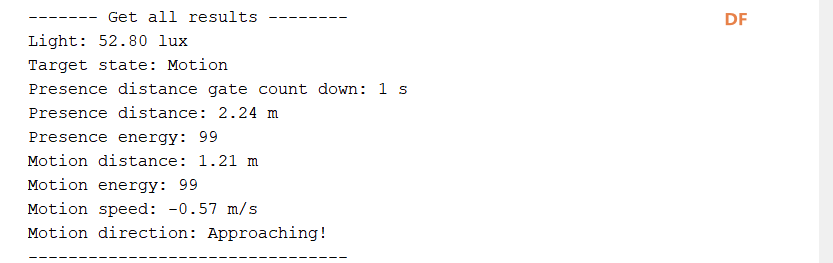
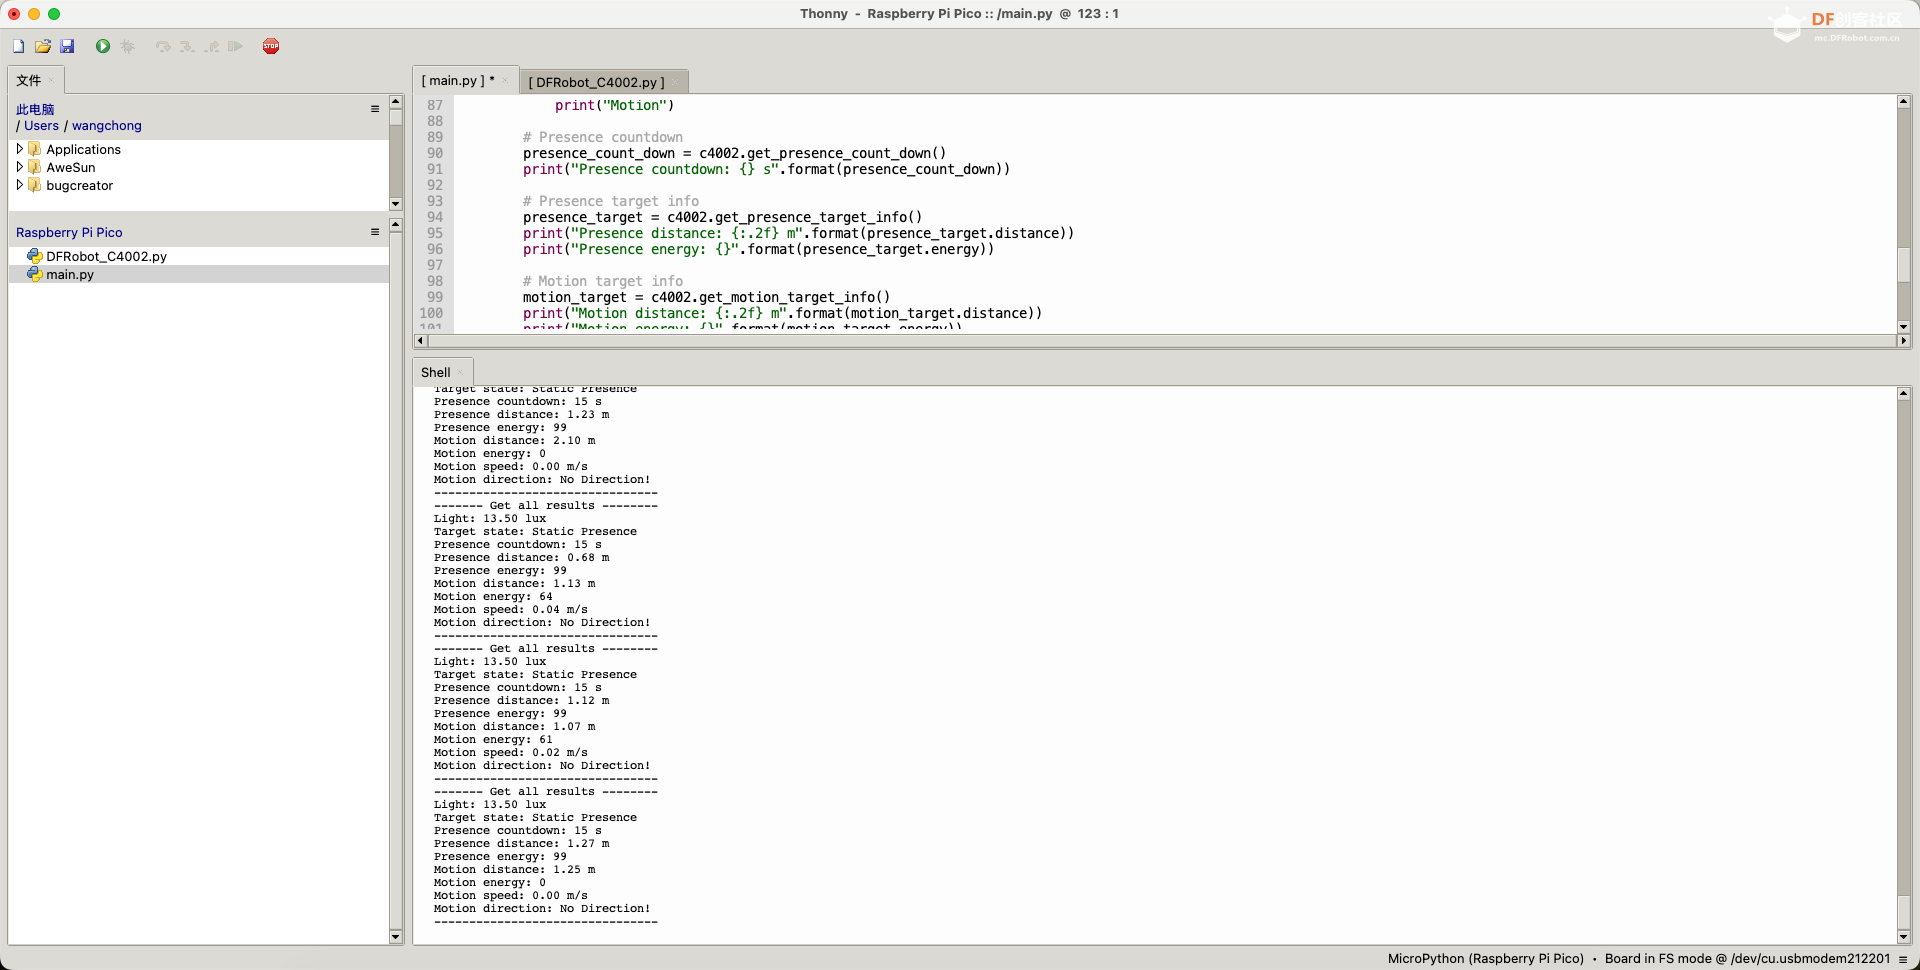
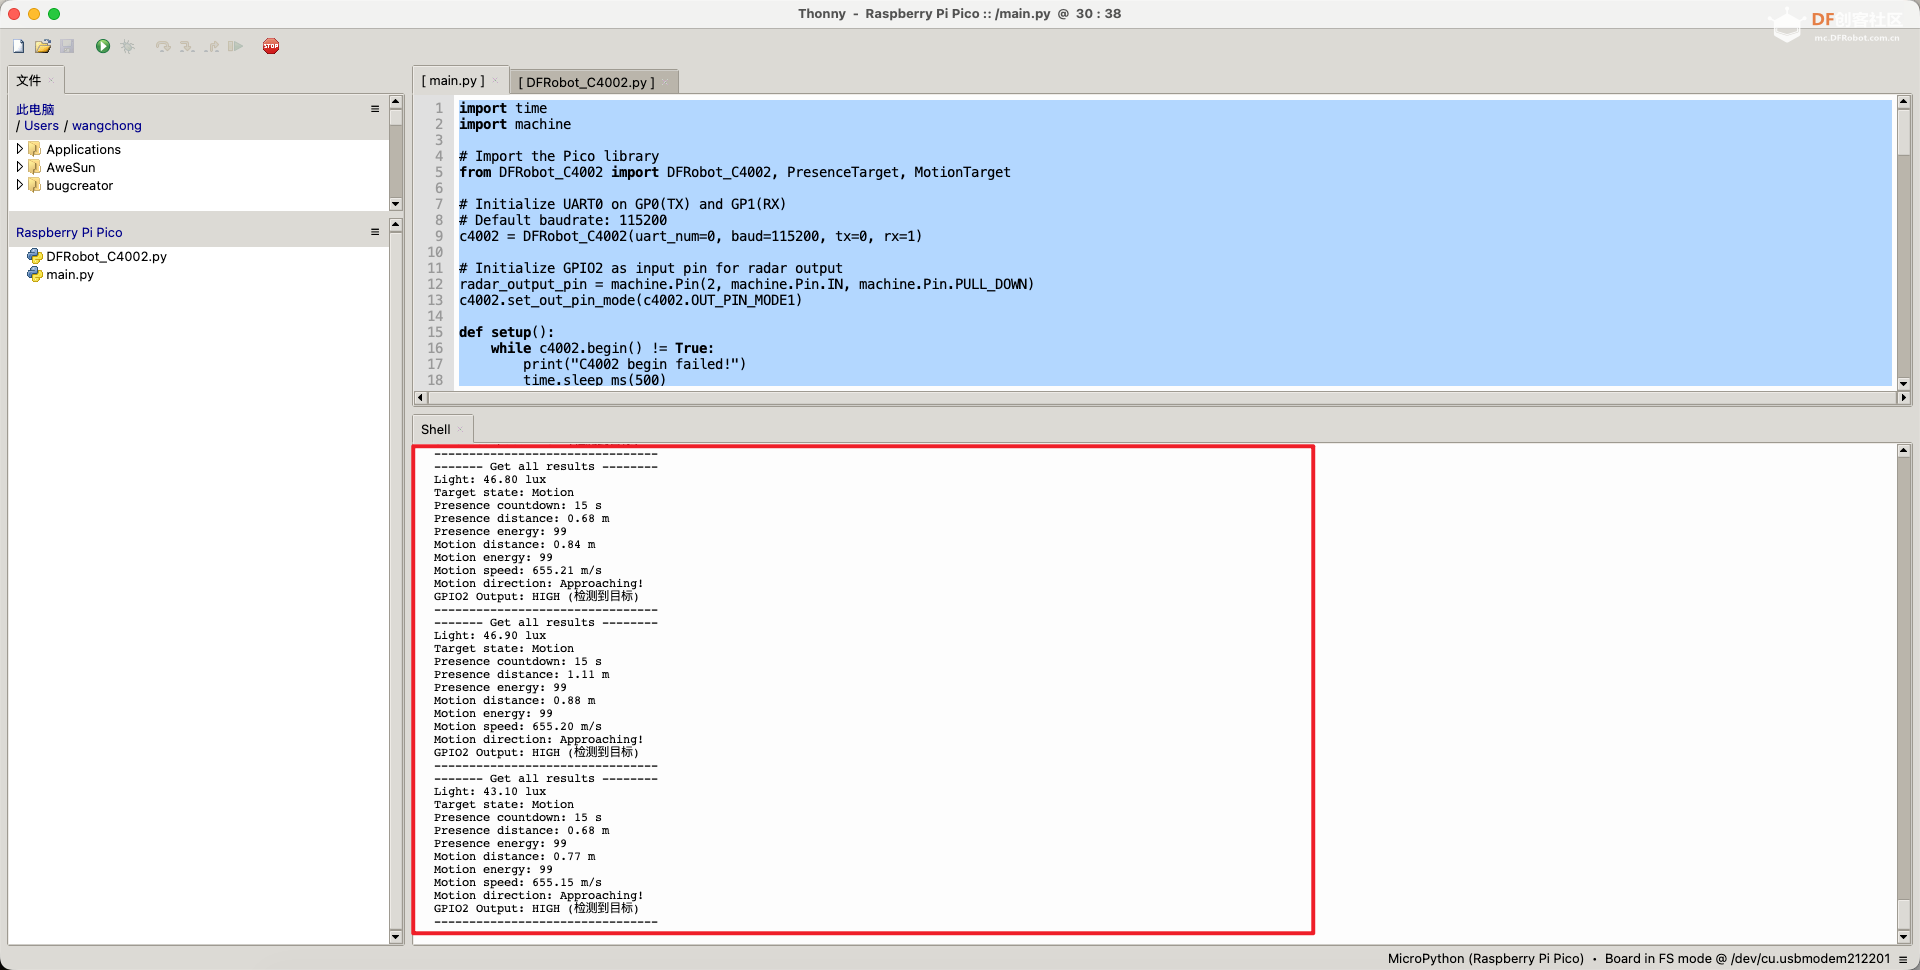
如上述代码所示,其代码的输出和Arduino的库完全保持一致。 其输出的结果如下。
3D打印外壳
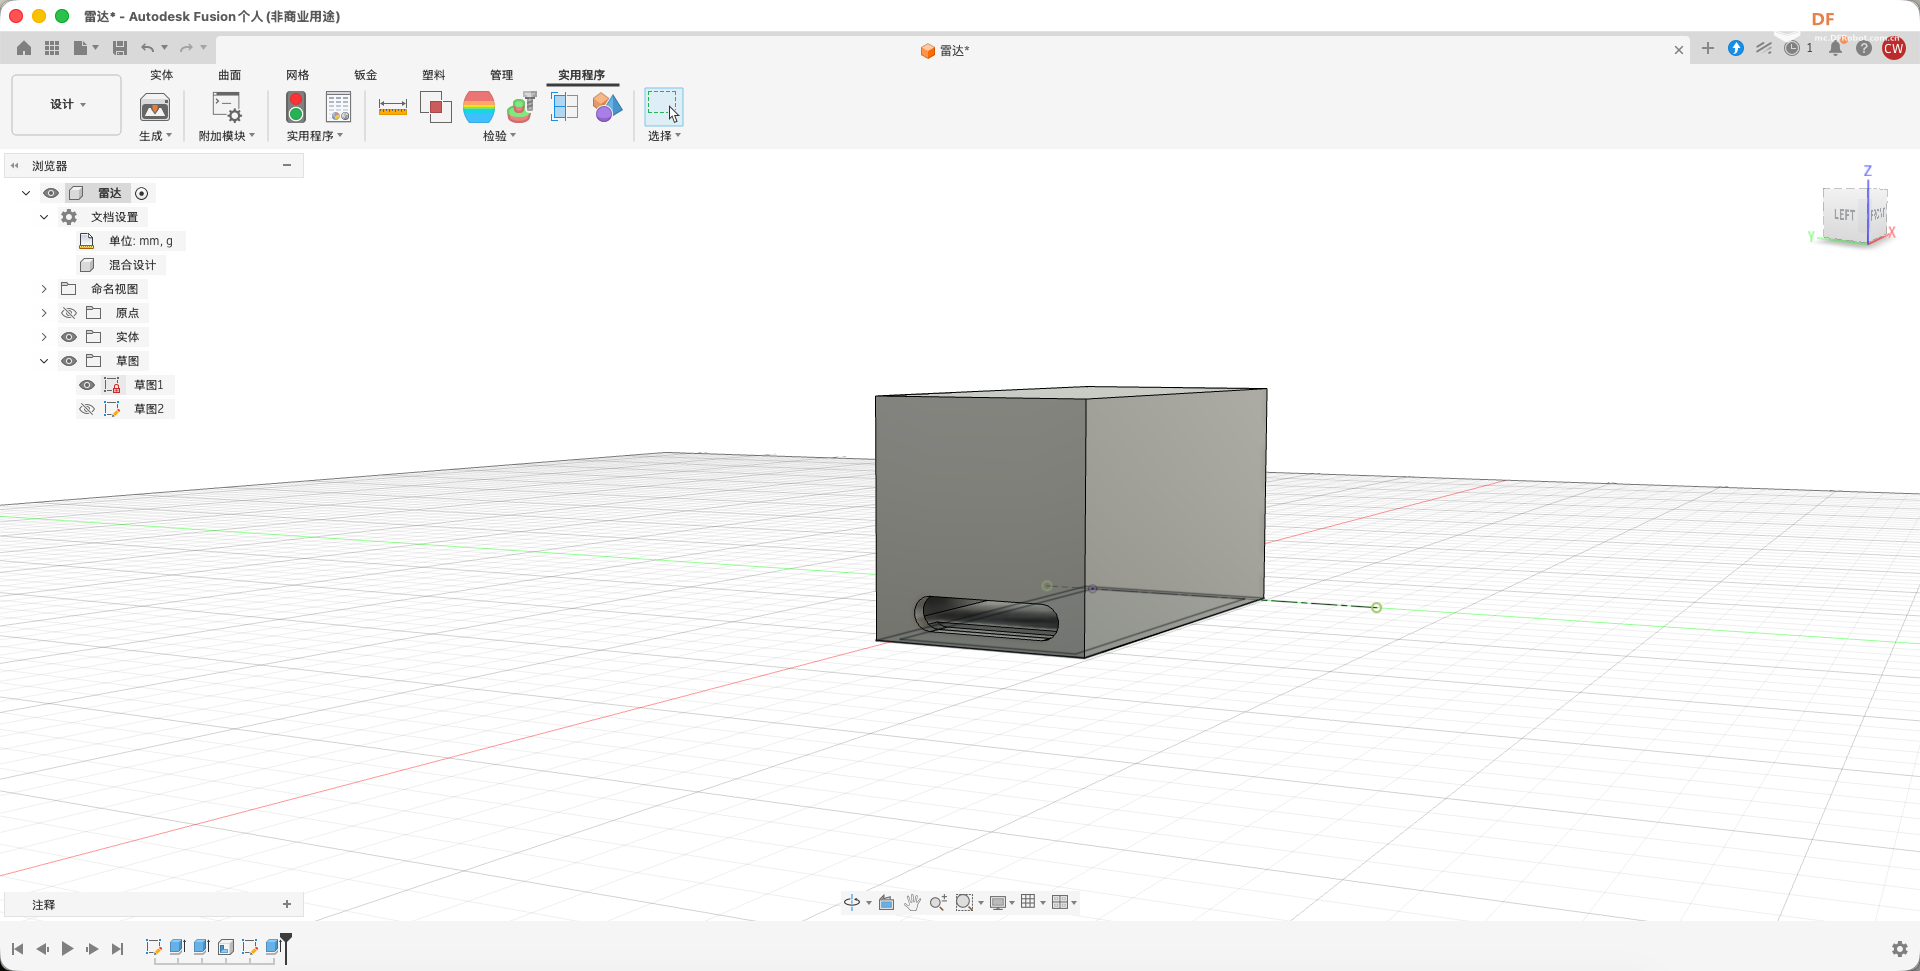
由于之前用于快速测试使用的是杜邦线把PICO进行连接的,在测试的时候经常会出现倾斜的情况。于是我便使用Fusion 360来简单的设计了一个外壳,来把传感器和PIco使用热熔胶固定
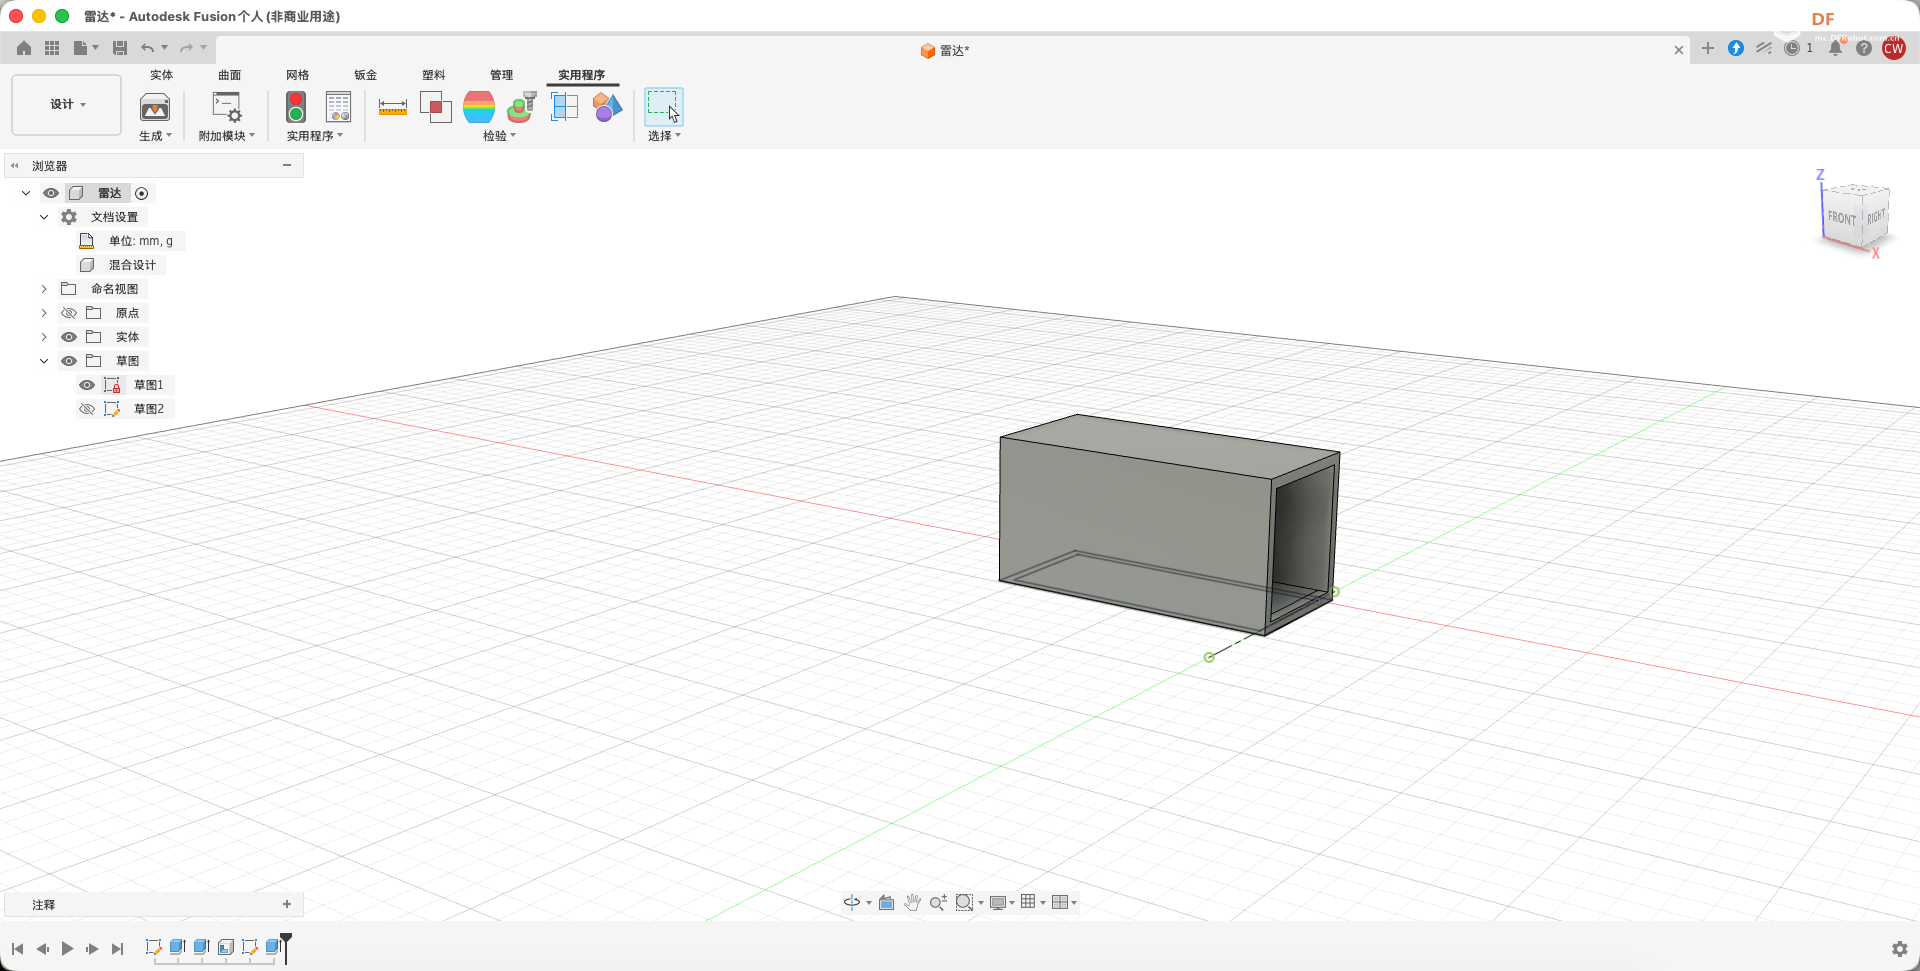
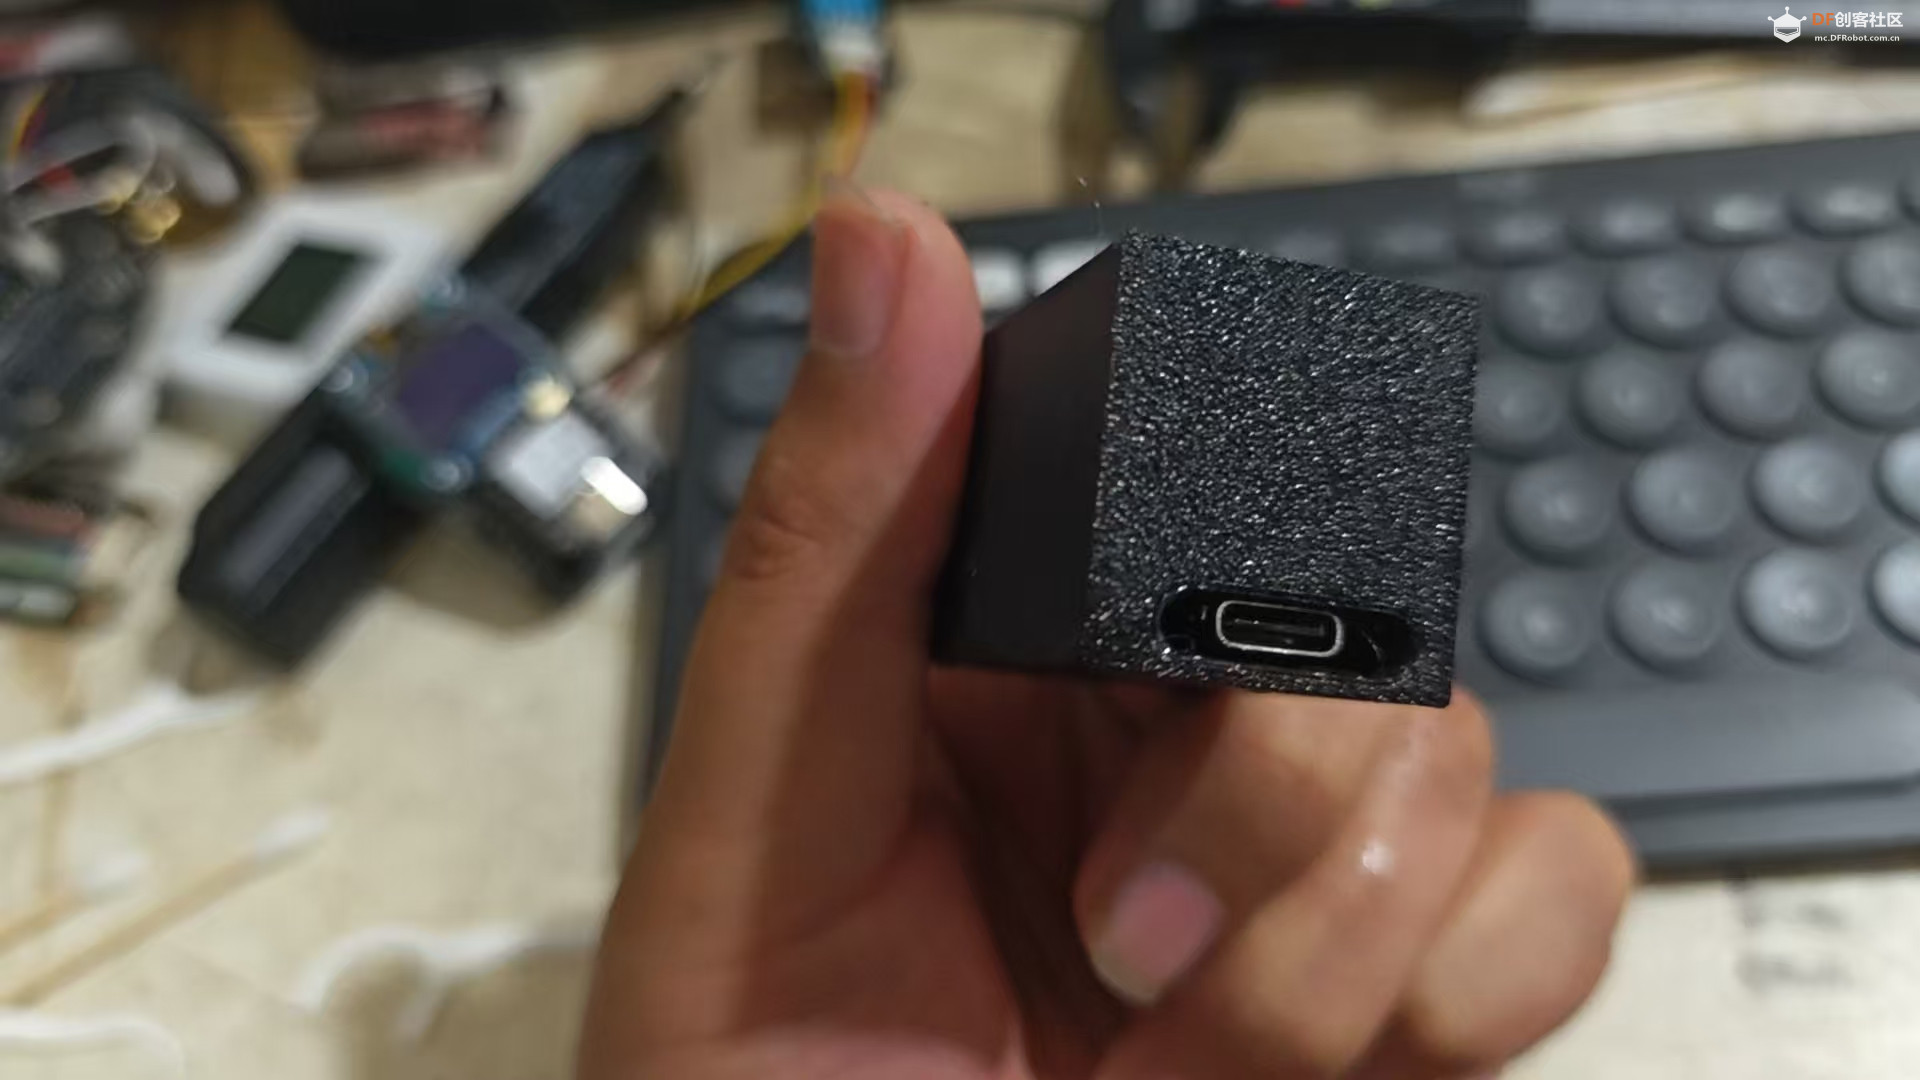
USB-Typec面
成品如下所示

Usb-typeC口方向
测试
然后进行测试,我这里测试的时候是将开发板固定到了离我距离50CM的地方。
接近
远离
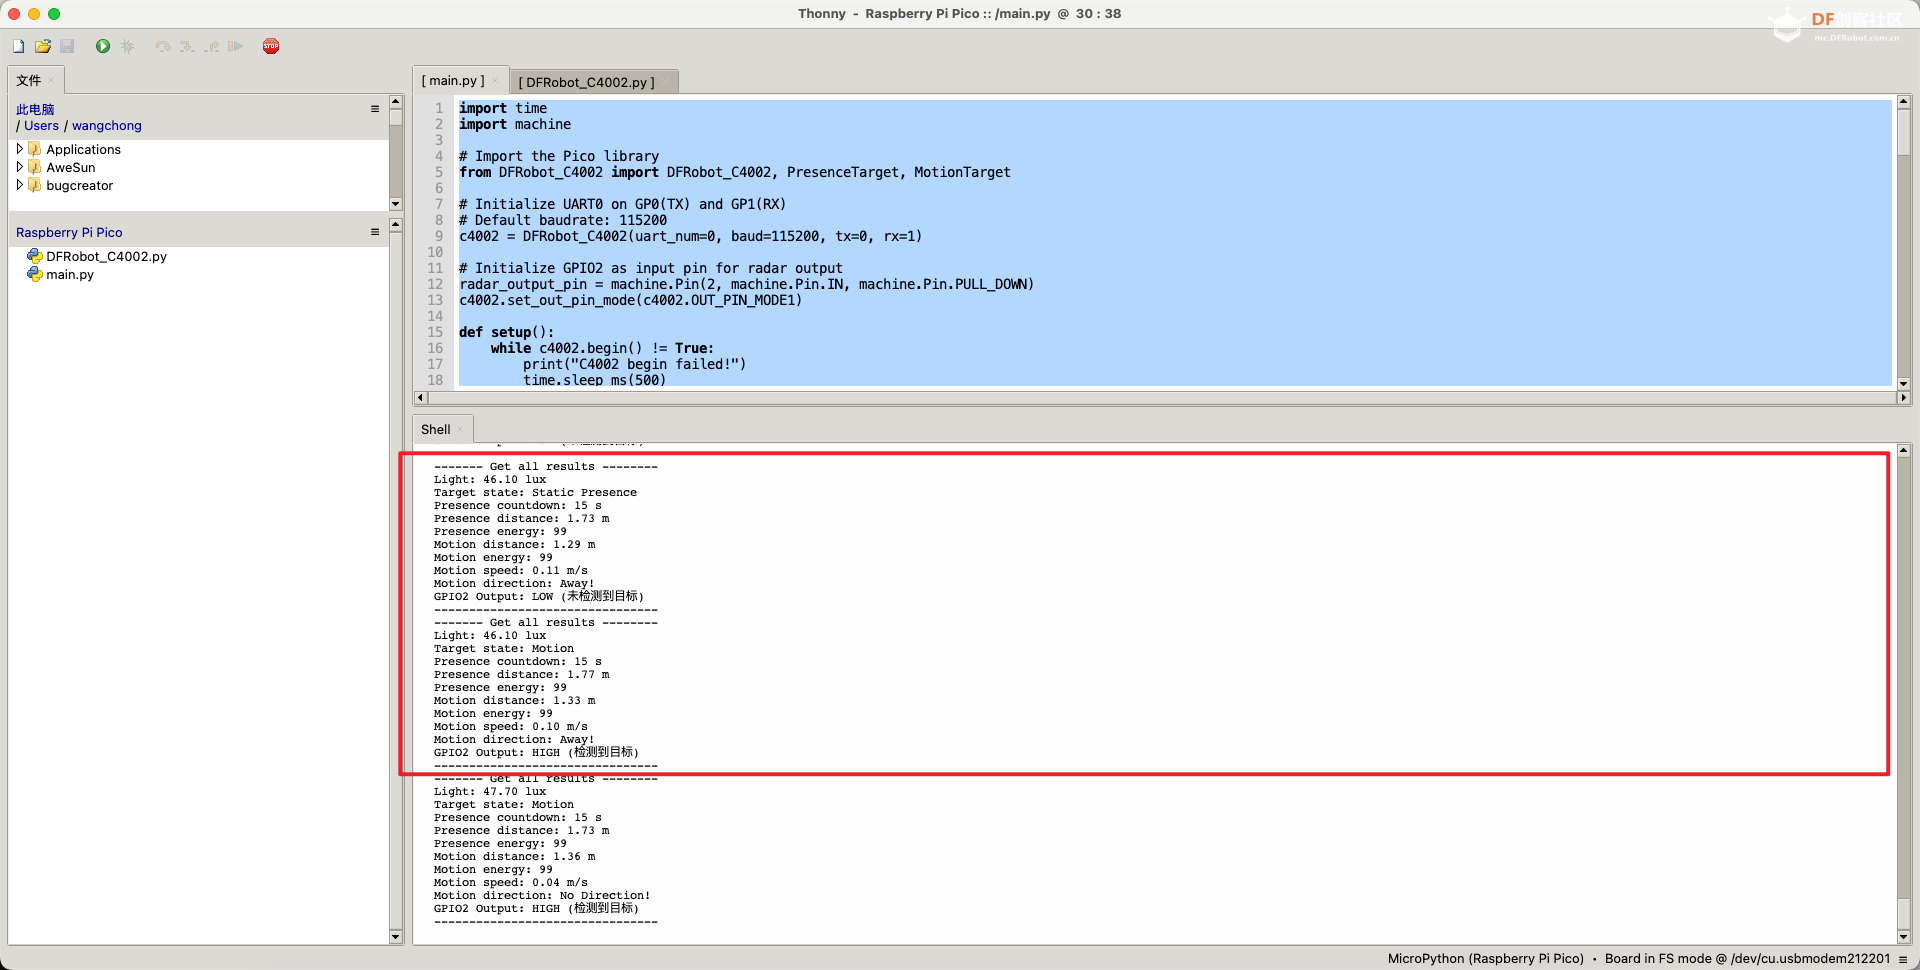
测试起来精度还是非常不错的,但是似乎数据有一点延迟,可以查看我第二个截图中的数据,当前OUT已经输出了高电平,但是移动的状态还是静止,等到下一次数据更新的话就恢复了。当然也有可能是我代码写的不是很好。
额外补充
相信大家也注意到了上述多了一个GOIO2的输出状态,这是因为我将C4002传感器的OUT接到了GPIO2上。需要注意的是由于这个IO为可以配置的IO,所以它一共支持三种输出的方式(这也是这个传感器强大的一点)
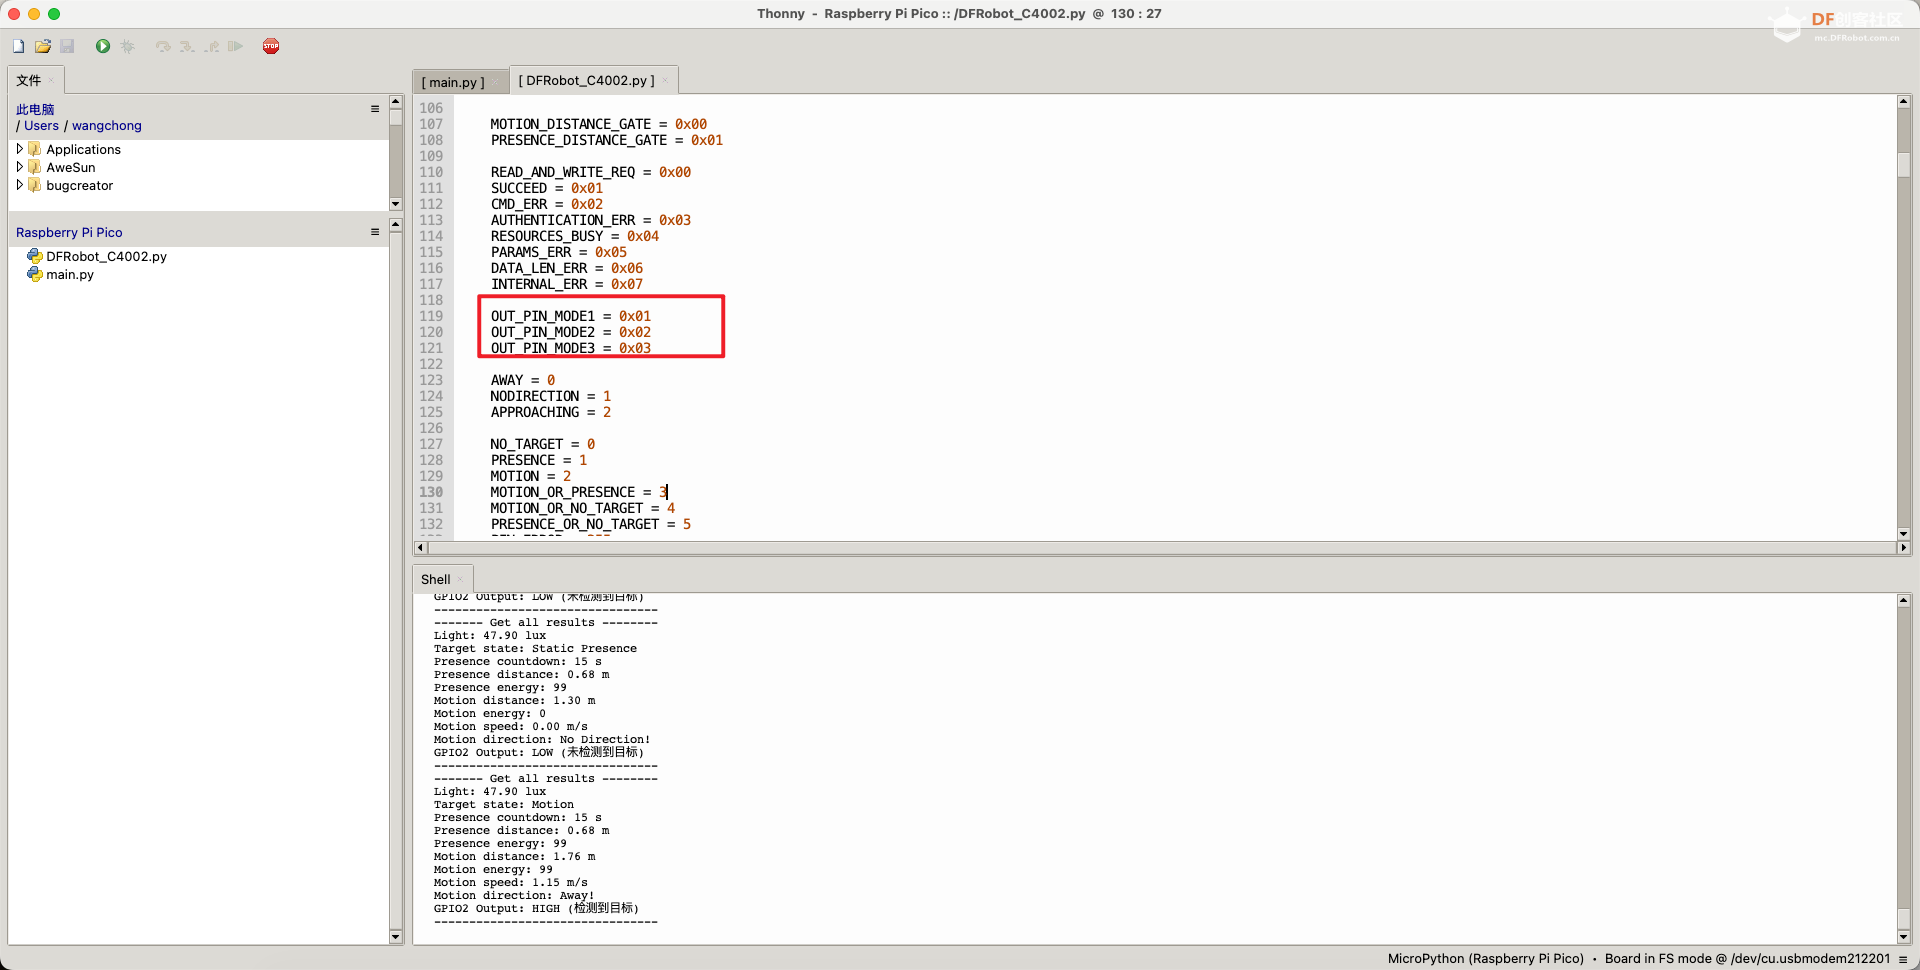
其中模式一为: 只有目标运动的时候才输出高电平,模式二为只有目标静止的时候才输出高电平。 模式三为只有目标静止和运动的时候才输出高电平。可以通过下面的函数来改变OUT的输出状态。
- c4002.set_out_pin_mode(c4002.OUT_PIN_MODE1)
带有OUT输出的main.py 代码如下所示
- import time
- import machine
-
- # Import the Pico library
- from DFRobot_C4002 import DFRobot_C4002, PresenceTarget, MotionTarget
-
- # Initialize UART0 on GP0(TX) and GP1(RX)
- # Default baudrate: 115200
- c4002 = DFRobot_C4002(uart_num=0, baud=115200, tx=0, rx=1)
-
- # Initialize GPIO2 as input pin for radar output
- radar_output_pin = machine.Pin(2, machine.Pin.IN, machine.Pin.PULL_DOWN)
- c4002.set_out_pin_mode(c4002.OUT_PIN_MODE1)
-
- def setup():
- while c4002.begin() != True:
- print("C4002 begin failed!")
- time.sleep_ms(500)
-
- print("C4002 begin success!")
- time.sleep_ms(50)
-
- # Turn off LEDs
- if c4002.set_run_led_state(c4002.LED_OFF):
- print("Set run led success!")
- else:
- print("Set run led failed!")
-
- if c4002.set_out_led_state(c4002.LED_OFF):
- print("Set out led success!")
- else:
- print("Set out led failed!")
-
- # Set resolution mode (80cm resolution, supports 15 distance gates)
- if c4002.set_resolution_mode(c4002.RESOLUTION_80CM):
- print("Set resolution mode success!")
- else:
- print("Set resolution mode failed!")
-
- # Set detection range 0-1100cm
- if c4002.set_detect_range(0, 1100):
- print("Set detect range success!")
- else:
- print("Set detect range failed!")
-
- # Set light threshold (0 = always detect regardless of light)
- if c4002.set_light_thresh(0):
- print("Set light threshold success!")
- else:
- print("Set light threshold failed!")
-
- # Enable all distance gates
- gate_state = [
- c4002.C4002_ENABLE, c4002.C4002_ENABLE, c4002.C4002_ENABLE,
- c4002.C4002_ENABLE, c4002.C4002_ENABLE, c4002.C4002_ENABLE,
- c4002.C4002_ENABLE, c4002.C4002_ENABLE, c4002.C4002_ENABLE,
- c4002.C4002_ENABLE, c4002.C4002_ENABLE, c4002.C4002_ENABLE,
- c4002.C4002_ENABLE, c4002.C4002_ENABLE, c4002.C4002_ENABLE,
- ]
-
- if c4002.configure_gate(c4002.MOTION_DISTANCE_GATE, gate_state):
- print("Enable motion distance gate success!")
-
- if c4002.configure_gate(c4002.PRESENCE_DISTANCE_GATE, gate_state):
- print("Enable presence distance gate success!")
-
- # Set report period (10 * 0.1s = 1s)
- if c4002.set_report_period(10):
- print("Set report period success!")
-
-
- def get_gpio2_status():
- """读取GPIO2的状态并返回描述"""
- pin_value = radar_output_pin.value()
- if pin_value == 1:
- return "HIGH (检测到目标)"
- else:
- return "LOW (未检测到目标)"
-
-
- def loop():
- ret_result = c4002.get_note_info()
-
- if ret_result.note_type == c4002.RESULT:
- print("------- Get all results --------")
-
- # Light intensity (lux)
- light = c4002.get_light_intensity()
- print("Light: {:.2f} lux".format(light))
-
- # Target state
- target_state = c4002.get_target_state()
- print("Target state: ", end="")
- if target_state == c4002.NO_TARGET:
- print("No Target")
- elif target_state == c4002.PRESENCE:
- print("Static Presence")
- elif target_state == c4002.MOTION:
- print("Motion")
-
- # Presence countdown
- presence_count_down = c4002.get_presence_count_down()
- print("Presence countdown: {} s".format(presence_count_down))
-
- # Presence target info
- presence_target = c4002.get_presence_target_info()
- print("Presence distance: {:.2f} m".format(presence_target.distance))
- print("Presence energy: {}".format(presence_target.energy))
-
- # Motion target info
- motion_target = c4002.get_motion_target_info()
- print("Motion distance: {:.2f} m".format(motion_target.distance))
- print("Motion energy: {}".format(motion_target.energy))
- print("Motion speed: {:.2f} m/s".format(motion_target.speed))
- print("Motion direction: ", end="")
- if motion_target.direction == c4002.AWAY:
- print("Away!")
- elif motion_target.direction == c4002.APPROACHING:
- print("Approaching!")
- elif motion_target.direction == c4002.NODIRECTION:
- print("No Direction!")
-
- # GPIO2 status
- print("GPIO2 Output: {}".format(get_gpio2_status()))
-
- print("--------------------------------")
-
-
- def main():
- setup()
- while True:
- loop()
- time.sleep_ms(10)
-
-
- if __name__ == "__main__":
- main()
总结
总体测试下来C4002的可配置性、精度、实用性、易用度都表现不错。在传感器参数输出的方面上支持多种格式的数据输出,在不同应用场景下支持简单到负责的传感器读取模式(配置输出寄存器读取OUT或者直接解码UART)。由于灵活性较高,相信在应用选型上也会占有一席之地。
附件
 code.zip code.zip
|


 沪公网安备31011502402448
 置顶卡
置顶卡 变色卡
变色卡 千斤顶
千斤顶


