|
11886| 10
|
我是如何修改字母塔的 -df论坛建模软件OpenScad学习第一帖。 |

|
常去的3D打印网站,国内是df,国外就是thingiverse了。 df论坛里面第一火的建模软件,是solidworks。 thingiverse上第一火的建模软件,是Openscad。 我翻了翻df论坛,居然没有发现介绍openscad的帖子。  很多大神级别的作品,都是openscad做的 比如这个: 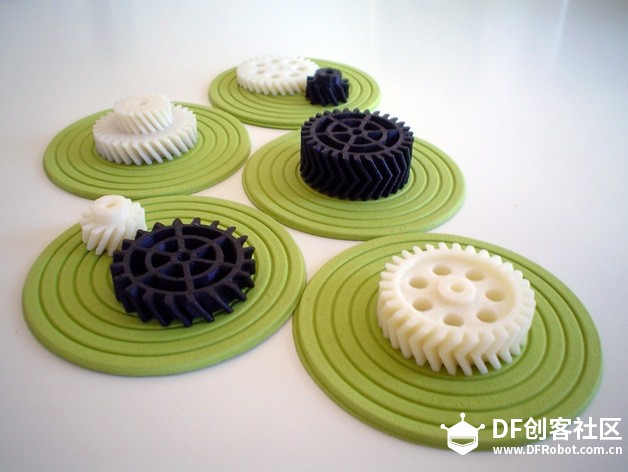 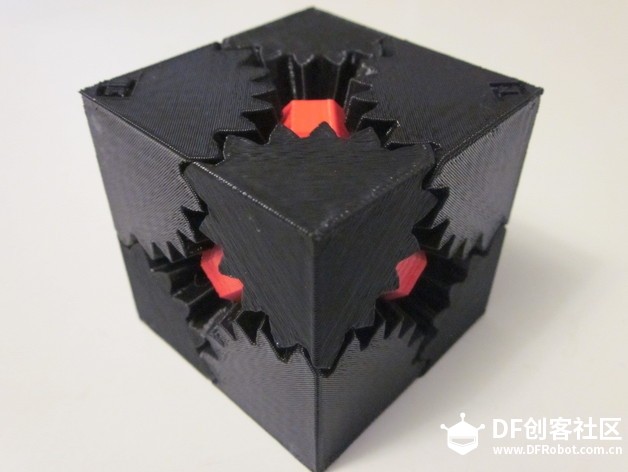 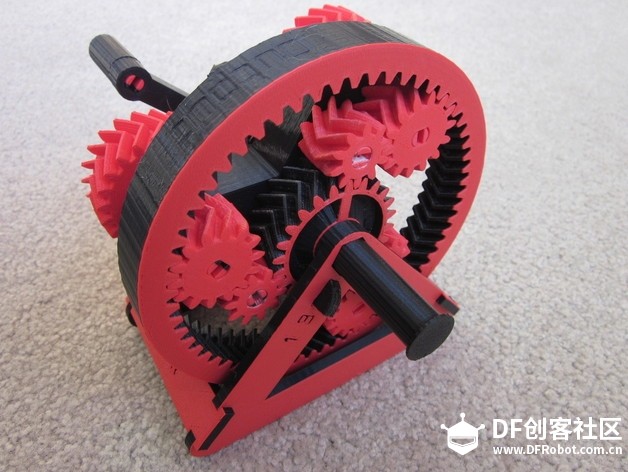 合集看这里 http://www.openscad.org/gallery.html 或者去http://www.thingiverse.com 搜openscad,可以搜出一堆。基本每个都可以定制的。 OpenScad为什么在国外这么火啊? 1. 开源,免费。这在重视版权的国外,很重要哦! 2. 定制超方便,比如说同样一个盒子,你要方一点,扁一点,上面字符改改。改变参数就可以了。分分钟变为自己想要的口味。 3 比较符合很多理工狗的习惯,短短几行代码变成漂亮的三维模型。 数学之美,简单纯粹,连我这伪理工都觉得好赞,好赞。 在国内似乎不算火: 我想无外乎的3点: 1. 有很多更好用的“免费”软件,你懂的,比如“免费”的sw,maya,3dmax。 2. 入门稍难,其实这点不同意。 其实语法还是很直白的,偶看了2天语法手册,在这里: https://en.wikibooks.org/wiki/Op ... e_OpenSCAD_Language 基本就有思路了。 3. 渲染慢。 这个是硬伤,因为渲染是单线程的。 渲染之后,才能生成stl供打印,所以渲染这个过程,复杂的模型要数小时。 好了。下面实战时间,我结合我如何修改这个模型的,来简单介绍下Openscad。 原始设计是这样: 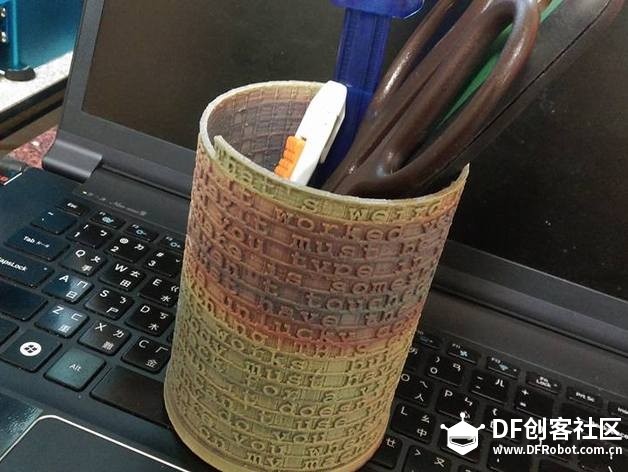 我记得luna也打印过,这个pi版本。http://www.thingiverse.com/thing:1241377 但是我打印时,碰到了塌陷问题,凸出的数字,比如,7.8,最上面一横塌的一塌糊涂。 痛定思痛,我决定把凸字改成凹字。 我修改的结果是这样的:  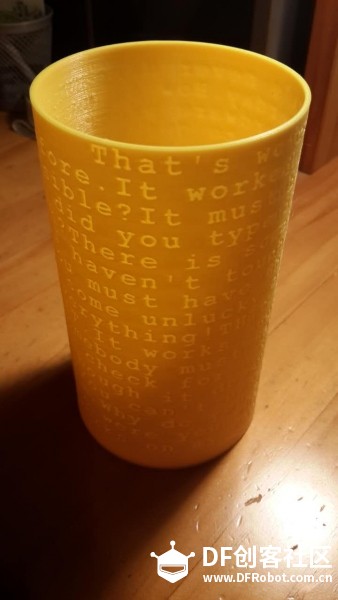 下面是我thingiverse的第二帖:  http://www.thingiverse.com/thing:1525957 和塌陷彻底说拜拜啦。 大家如果喜欢,去点个“like”哦  !:lol:lol:lol !:lol:lol:lol前方高能预警  ,我开始解释代码了,基本思路是原作者的,我修改了大概30%的代码。 ,我开始解释代码了,基本思路是原作者的,我修改了大概30%的代码。黄色为注释,帮助大家理解Openscad软件哦。 /*******************************************************华丽的分割线************************************************************/ button_symbol = ";"; //这个是底部的字符 characters = "That's weird.It's never done that before.It worked yesterday.How is that possible?It must be a hardware problem.What did you type in wrong to get it to crash?There is something funky in your data.I haven't touched that module in weeks!You must have the wrong version.It's just some unlucky coincidence.I can't test everything!THIS can't be the source of THAT.It works, but it hasn't been tested.Somebody must have changed my code.Did you check for a virus on your system?Even though it doesn't work, how does it feel?You can't use that version on your system.Why do you want to do it that way?Where were you when the program blew up?It works on my machine. // 这个是墙壁上的话,据说是程序员推诿责任常用的20句,当然大家可以换中文。但字体要改改,原来字体不支持中文。 "; //characters = "aa"; thickness = 1; //笔筒壁厚 Bottom_thickness=2; //笔筒底部厚度 radius = 40; // 直径 characters_of_a_circle = 40; //一圈多少字 arc_angle = 360 / characters_of_a_circle; // 每个字对应的弧度 half_arc_angle = arc_angle / 2; font_size = 2 * radius * sin(half_arc_angle); // 根据分配的弧度,用sin投影,算出字体大小 z_desc = font_size / characters_of_a_circle*1.2;// 1.2 avoid vertical overlapping // 字体是螺线上升了,这里定义每个字相对隔壁字的高度变化 len_of_characters = len(characters); // 总的字体个数 Height = z_desc * (len_of_characters -1);// Highest font decides height// 根据最高的字,算出筒的高度 function PI() = 3.14159; //a_quarter_arc 是第一个模块,任务是画一个1/4以内,任意角度的弧出来,方法是画一个圆,然后画个多个多边形(用sin cos定义下位置),2者的交集就是弧啦。 // Given a `radius` and `angle`, draw an arc from zero degree to `angle` degree. The `angle` ranges from 0 to 90. // Parameters: // radius - the radius of arc // angle - the angle of arc // width - the width of arc module a_quarter_arc(radius, angle, width = 1) { outer = radius + width; intersection() { // 这一行开始 intersection就是交集啦 difference() { offset(r = width) circle(radius, $fn=48); circle(radius, $fn=48); // 这里负责画弧,精度48面 } polygon([[0, 0], [outer, 0], [outer, outer * sin(angle)], [outer * cos(angle), outer * sin(angle)]]); //这里负责画多边形,多边形的位置由提供的角度决定。其实可以理解过用sin,cos函数,在x,y轴的投影。 } } // arc()是可以画 360以内任意角度的弧度,这里用了迭代方法。大家可以看到,arc函数里面嵌套的arc函数。这也是openScad灵活的地方 // 大致算法是,将弧度大于90的部分先单独画出来,然后调用a_quarter_arc 画小于90度的弧。 // Given a `radius` and `angle`, draw an arc from zero degree to `angle` degree. The `angle` ranges from 0 to 360. // Parameters: // radius - the radius of arc // angle - the angle of arc // width - the width of arc module arc(radius, angles, width = 1) { angle_from = angles[0]; angle_to = angles[1]; angle_difference = angle_to - angle_from; outer = radius + width; rotate(angle_from) if(angle_difference <= 90) { a_quarter_arc(radius, angle_difference, width); } else if(angle_difference > 90 && angle_difference <= 180) { arc(radius, [0, 90], width); rotate(90) a_quarter_arc(radius, angle_difference - 90, width); } else if(angle_difference > 180 && angle_difference <= 270) { arc(radius, [0, 180], width); rotate(180) a_quarter_arc(radius, angle_difference - 180, width); } else if(angle_difference > 270 && angle_difference <= 360) { arc(radius, [0, 270], width); rotate(270) a_quarter_arc(radius, angle_difference - 270, width); } } // 下面就是生成一个一个围着圆弧的字,依然是用交集的方法,把字的投影和圆弧投影相交取交集,字就出来啦。 // Create a 3D character around a cylinder. The `radius` and `arc_angle` determine the font size of the character. // Parameters: // character - 3D character you want to create // arc_angle - angle which the character go across // radius - the cylinder radius // font - the character font // thickness - the character thickness // font_factor - use this parameter to scale the calculated font if necessary module cylinder_character(character, arc_angle, radius, font = "Courier New:style=Bold", thickness = 1, font_factor = 1) { half_arc_angle = arc_angle / 2; font_size = 2 * radius * sin(half_arc_angle) * font_factor; rotate([0, 0, -half_arc_angle]) intersection () { translate([0, 0, -font_size *0.35]) linear_extrude(font_size*1.6 ) arc(radius, [0, arc_angle], thickness); rotate([90, 0, 90 + half_arc_angle]) // 然后x方向和z轴方向旋转,就变成从中心轴向外发散的字的了。 linear_extrude(radius + thickness+1) // 然后拉伸 text(character, font = font, size = font_size, halign = "center"); // 这里先生成字 } // } } // tower_of_characters 模块就是把字一个个像螺旋一样,放到圆柱的壁上去。这里呢,用了for的循环语句,边生成字,边定位。 module tower_of_characters(characters, thickness = 1) { // characters for(i = [0 : len_of_characters - 1]) { translate([0, 0, -z_desc * i]) // 就靠translate 在z轴升高 rotate([0, 0, i * arc_angle]) // 靠rotate旋转 cylinder_character(characters, arc_angle, radius, thickness = thickness, font_factor = 1.0); // change it somehow echo(-z_desc * i); } } // Wall_And_Bottom 是我后来加的,因为原来模型最上是有个缺口的,不是个完整的圆柱型。所以我有点不爽,这个函数就是生成圆柱中空的筒。 module Wall_And_Bottom() { difference() // difference函数好比模型的减法,用语句后第一行模型,分别减去第二个,第三个。 { //Cylinder 生成个圆柱体,拉伸 translate([0,0,-Height-Bottom_thickness]) linear_extrude(Height+font_size+Bottom_thickness) circle(radius + thickness -0.5, $fn=500); // -0.5 helps clear fonts.500 HIGH RESOLUTION //Shell the cylinder // 定义要减掉的模型 translate([0,0,-Height]) linear_extrude(Height+font_size) circle(radius-1, $fn=500); //Text on the bottom // 底部刻字 translate([0,0,-Height-Bottom_thickness/4*3]) // 3/4 decides depth of font linear_extrude(font_size) text(button_symbol, font = "Courier New:style=Bold", size = font_size * 5, halign = "center", valign = "center"); } } // 好啦,这里开始就是主程序了,也是凸体字变凹体字的关键, 用differenrce函数,圆柱体为被减数,螺旋字体为减数,刻字成功!! difference() { Wall_And_Bottom(); //Text on the wall tower_of_characters(characters, thickness); } /*******************************************************华丽的分割线************************************************************/ 大家是不是觉得很简单。 其实,如果不理解,把代码片段copy出来,一渲染(按F6),一下子就理解了! 谢谢观赏!! |
 活跃会员
活跃会员
 创作达人
创作达人


 沪公网安备31011502402448
© 2013-2026 Comsenz Inc. Powered by Discuz! X3.4 Licensed

 置顶卡
置顶卡 变色卡
变色卡 千斤顶
千斤顶