序言
各位小伙伴,不管是在办公室还是学校里,你们是不是有的时候总觉得头晕目眩,感觉非常的难受。
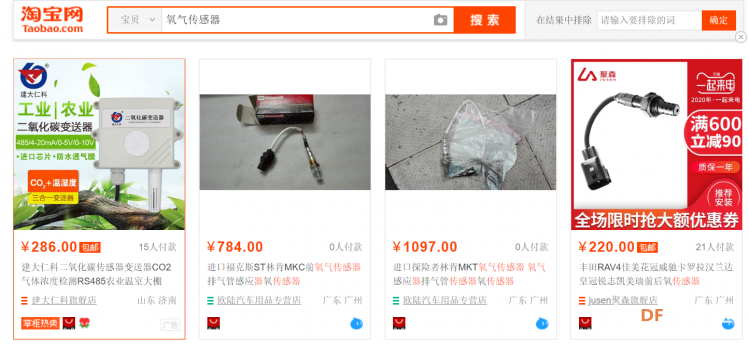
好在我现在拿到了由DFRobot开发的氧气传感器。由于我拿到的这款传感器是还在开发的样板,因此还没有经典的DFRobot配色,但相信很快大家就能拿到这块有趣的氧气传感器了。
和传统的DFRobot Gravity™传感器一样,该传感器采用的是IIC的接口,因此通过提供的IIC传感器接线就可以直接接在支持IIC的主板上,通过提供的样例就可以直接读取相应数据。
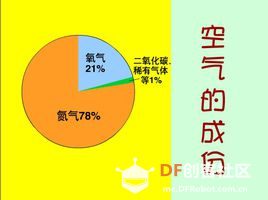
回到一开始的问题,你会在办公室昏昏沉沉吗?当然会的,而且大概率我们是因为缺氧造成的。
我们不仅需要了解当前的氧气含量,我们更希望能通过连续的数据来找到相应的规律,通过这些数据来建立模型,并提出有效的建议和意见。
好了说了那么多,让我们开始项目的制作吧。
项目分析
项目需求
根据以上的分析,我将我们项目的一些需求整理了一下,可以发现大致,我们需要一个具有以下功能的设备。
监测实时的氧气含量
氧气含量通过物联网上传
低功耗
氧气含量低提醒
氧气含量现场读取
外观在办公室不突兀
可移动使用
让我觉得非常满意的点如下。
有NB-IoT的模块,我可以直接联网。物联网功能完美符合要求。
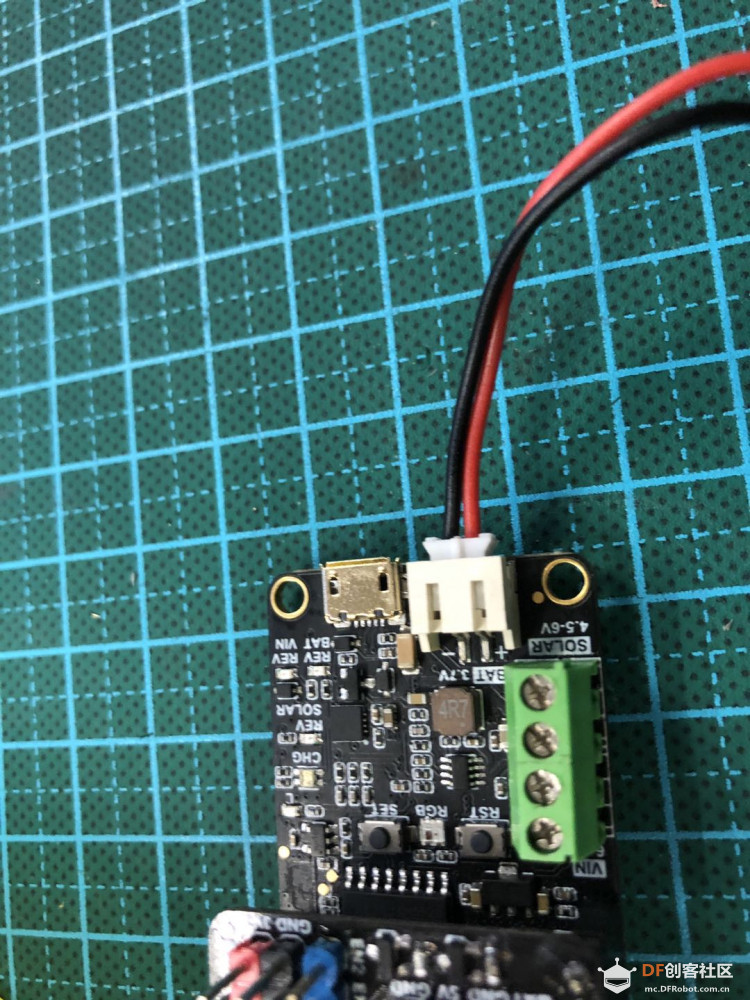
有电源管理模块,我不需要考虑供电的选择,随便找各种电池。满足可移动使用。
低功耗集成,满足低功耗满足需求。
和阿里云高度结合,可以直接调用相应模型,省的自己写代码。氧气含量低报警的功能可以通过钉钉来实现,而钉钉是阿里旗下产品,可以很方便的打通。
I2C接口支持,直接就可以读取氧气传感器数据
材料表
氧气传感器 1个
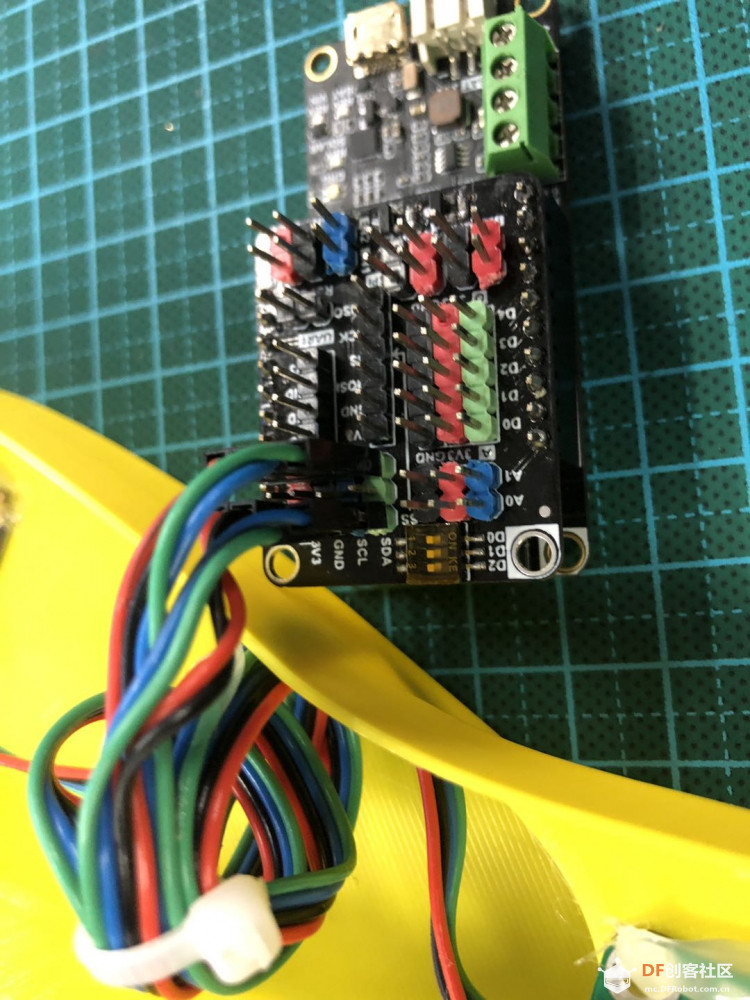
TinkerNode主板 1个
TinkerNode扩展板 1个(如果不想焊接,我还是强烈建议用扩展板)
12864LCD屏幕
锂电池
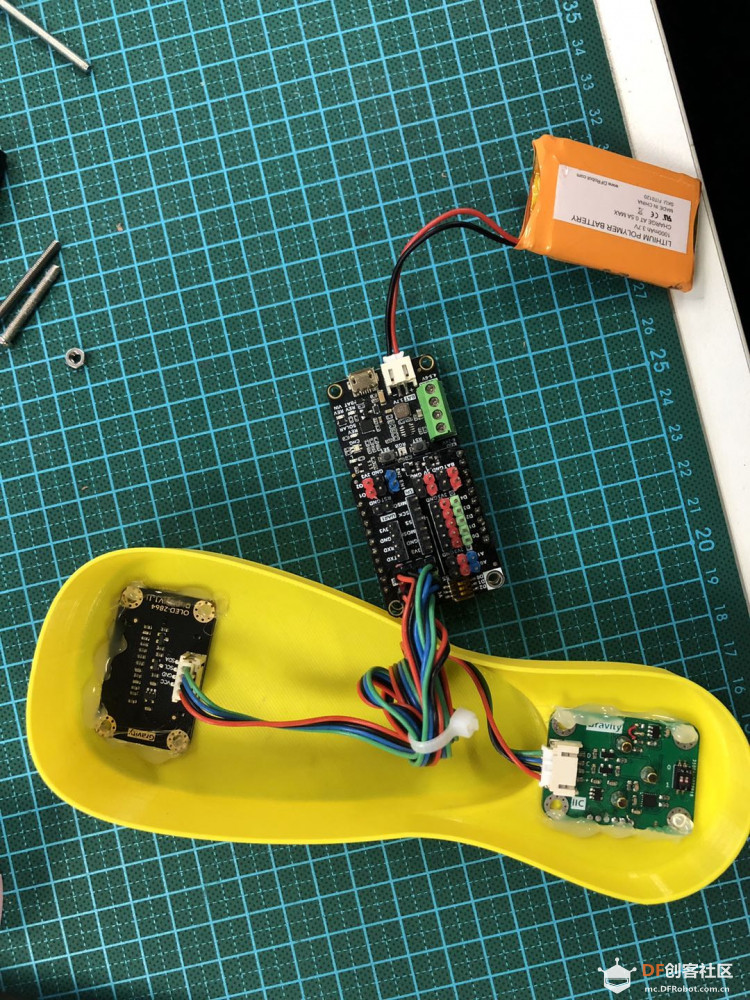
原本我认为不需要现场显示检测的数据,因为氧气的变化可能没有想象中的那么,可能引起人不适的含量会在小数点后一位二位而已,但考虑到一个检测设备如果不能在现场反应器数据,还是让人觉得有点不可思议。于是还是到处找了下显示的设备,正好手头有一个12864的小型的LCD屏幕,就这样使用吧。好在这块LCD屏也是I2C的,所以点亮他也不是很麻烦。
材料准备好了,就可以开干了,总体来说,通过Gravity™的接口,其实连接这些传感器和主板是非常简单的。特别是由于采用了扩展板,我只要将I2C的接口接在扩展板上对应的I2C接口上,连接就完成了。
好了,接下来就看看怎么设计外观了。
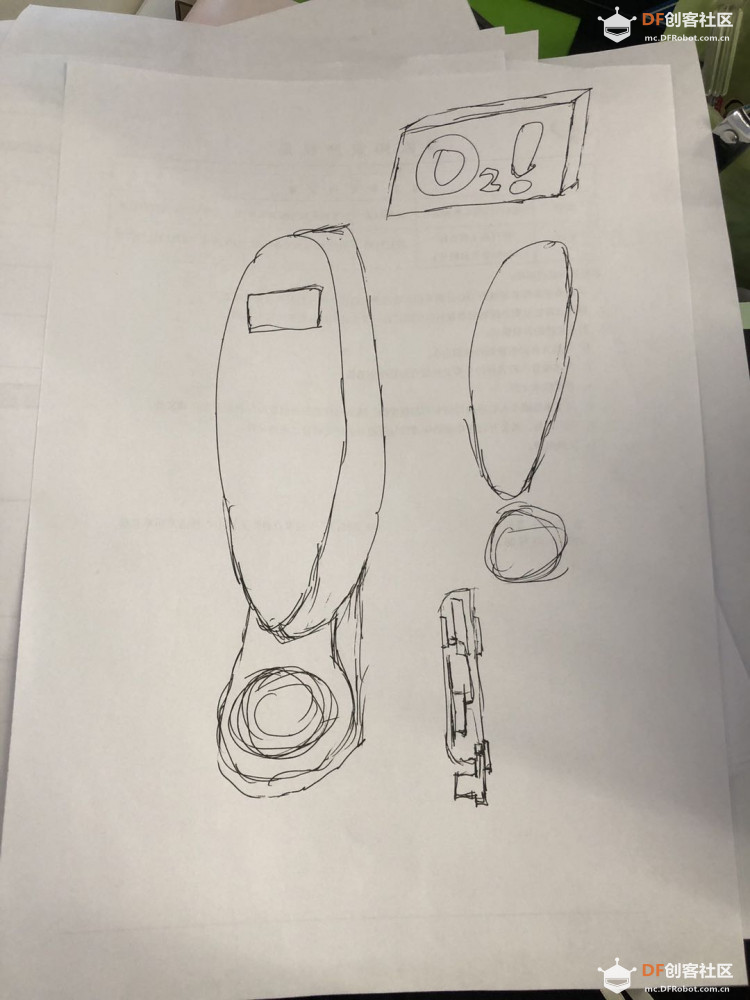
外观设计
正如前面所叙述的,我希望这个装置能不那么突兀。所以需要对其进行下设计。
问了下大部分人,还是喜欢大图中的感叹号,而不需要将O2也加上。
三维设计 一直以来我用的三维设计软件是sketchup,但随着sketchup被谷歌卖掉,后面的厂家对他的管理让我很难用到免费的版本,我不得不换软件。
先把代码放上来,大家先慢慢的看一下。
<font face="微软雅黑"><font face="微软雅黑">[mw_shl_code=cpp,false]
#include "DFRobot_Iot.h"
#include "DFRobot_BC20.h"
#include "DFRobot_GasSensor.h"
#include "DFRobot_OLED12864.h"
DFRobot_OLED12864 display(0x3c);
DFRobot_GasSensor Oxygen;
DFRobot_Iot myDevice;
DFRobot_BC20 myBC20;
/*Configure device certificate information*/
String ProductKey = "Your_Product_Key";
String ClientId = "12345";/*Custom id*/
String DeviceName = "Your_Device_Name";
String DeviceSecret = "Your_Device_Secret";
/*Configure the domain name and port number*/
String ALIYUN_SERVER = "iot-as-mqtt.cn-shanghai.aliyuncs.com";
uint16_t PORT = 1883;
/*Product identifier that needs to be operated*/
String Identifier = "Your_Identifier";
/*TOPIC that need to be published and subscribed*/
const char * subTopic = "Your_subTopic";//****set
const char * pubTopic = "Your_pubTopic";//******post
DFRobot_Iot myIot;
void ConnectCloud() {
while (!myBC20.connected()) {
Serial.print("Attempting MQTT connection...");
if (myBC20.connect(myDevice._clientId, myDevice._username, myDevice._password)) {
Serial.println("Connect Server OK");
}
else {
myBC20.getQMTCONN();
}
}
}
void setup(){
Serial.begin(115200);
display.init();
display.setContrast(255);
display.flipScreenVertically();
display.clear();
delay(1000);
display.drawString(16,24,"Oxygen:");
display.drawString(96,24,"%");
display.display();
while(!Oxygen.begin(ADDRESS_3)) {
Serial.println("I2c device number error !");
delay(1000);
}
Serial.println("I2c connect success !");
/* Pass in the key value marked on the oxygen sensor */
Oxygen.SetKeys(20.9 / 90);
Serial.print("Starting the BC20.Please wait. . . ");
while(!myBC20.powerOn()){
delay(1000);
Serial.print(".");
}
Serial.println("BC20 started successfully !");
Serial.println("check OK");
while (!myBC20.checkNBCard()) {
Serial.println("Please insert the NB card !");
delay(1000);
}
Serial.println("Waitting for access ...");
while (myBC20.getGATT() == 0) {
Serial.print(".");
delay(1000);
}
myDevice.init(ALIYUN_SERVER, ProductKey, ClientId, DeviceName, DeviceSecret);
myBC20.setServer(myDevice._mqttServer, PORT);
//myBC20.setCallback(callback);
ConnectCloud();
}
void loop(){
float oxygenData = Oxygen.ReadOxygenData();
display.clear();
delay(1000);
display.drawString(16,24,"Oxygen:");
display.drawString(96,24,"%");
display.drawString(64,24,String(oxygenData));
display.display();
Serial.print(" Oxygen concentration is ");
Serial.print(oxygenData);
Serial.println(" %vol(mv)");
myBC20.getCLK(); // Get CLK from BC20
myBC20.loop();
myBC20.publish(pubTopic, ("{"id":"+ClientId+","params":{""+Identifier+"":"+(String)oxygenData+"},"method":"thing.event.property.post"}"));
Serial.println("Data is published to cloud.");
delay(10000);
}[/mw_shl_code]
</font></font> 复制代码 代码框架 代码主要分为几个部分
<font face="微软雅黑"><font face="微软雅黑">[mw_shl_code=cpp,false]
while(!Oxygen.begin(ADDRESS_3)) {
Serial.println("I2c device number error !");
delay(1000);
}
Serial.println("I2c connect success !");
/* Pass in the key value marked on the oxygen sensor */
Oxygen.SetKeys(20.9 / 90);
[/mw_shl_code]</font></font> 复制代码 由于氧气传感器是I2C的,因此只需要在找到合适地址后就可以使用了。
然后接下来是屏幕,采用的12864的屏幕,因此直接加载#include "DFRobot_OLED12864.h" 这个库,如果找不到这个库的,可以到DFRobot的wiki里去找
<font face="微软雅黑">[mw_shl_code=cpp,false]
display.init();
display.setContrast(255);
display.flipScreenVertically();
display.clear();
delay(1000);
display.drawString(16,24,"Oxygen:");
display.drawString(96,24,"%");
display.display();
[/mw_shl_code]</font></font> 复制代码 通过这段代码就可以把想要显示的内容显示出来了。 这里需要注意的是,每次需要采用display.display();来显示上面的设置内容。否则可能会和你想象的不一样。 display.drawString(16,24,"Oxygen:");这里的16和24分别代表了行和列,可以根据实际需要进行调整。 display.setContrast(255);可以调整屏幕的对比度,使显示不那么亮或者刺眼。 display.flipScreenVertically();可以翻转屏幕,如果反过来了,那就用这行来翻转过来。 这两部分完成后,只需要把相关的信息给到NB-IoT部分即可,NB-IoT部分的代码也是现成的。 loop()函数中 [mw_shl_code=cpp,false] float oxygenData = Oxygen.ReadOxygenData(); myBC20.getCLK(); // Get CLK from BC20 myBC20.loop(); myBC20.publish(pubTopic, ("{\"id\":"+ClientId+",\"params\":{\""+Identifier+"\":"+(String)oxygenData+"},\"method\":\"thing.event.property.post\"}")); Serial.println("Data is published to cloud."); delay(10000);[/mw_shl_code] 用Oxygen.ReadOxygenData()获取氧气的含量值。用oxygenData来存储。
在测试的时候,可以分别对这些代码进行处理。
记得串口监视器是硬件调试的好帮手。
好了,硬件上的这个代码就是非常的简单明了。
致谢 @DFSH_Faith提供了巨大的支持。


 沪公网安备31011502402448


 置顶卡
置顶卡 变色卡
变色卡 千斤顶
千斤顶


 活跃会员
活跃会员
 老版主限定
老版主限定
 小蘑菇
小蘑菇
 蘑菇人
蘑菇人
 蘑菇老人
蘑菇老人
 编辑选择奖
编辑选择奖


