第20课:Vibration微型振动模块
前言
导语
前面我们已经介绍了数字大按钮模块,今天我们利用数字大按钮模块加上Vibration
微型振动模块控制其震动来给大家做一个简单项目。
介绍Vibration微型振动模块
振动模块采用振动电机作为激振源,振动电机是在转子轴一端安装一组可调偏心块,利用轴及偏心块高速旋转产生的离心力得到激振力。
学习准备
所需原件
学习内容
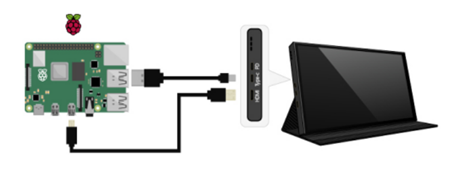
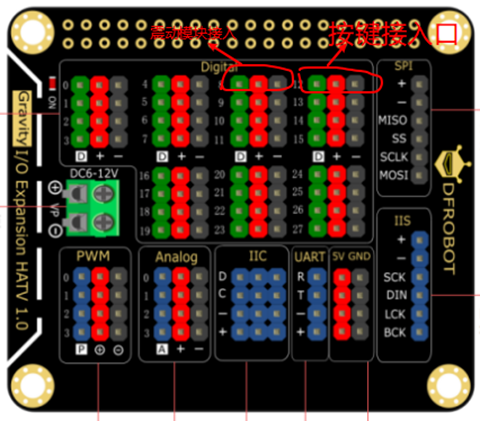
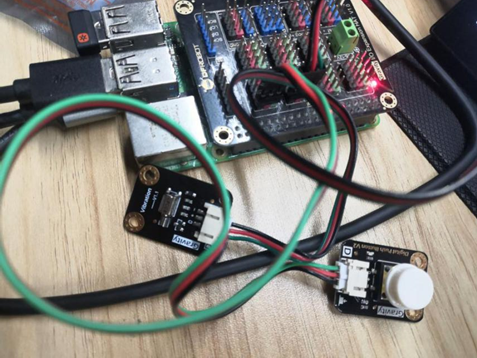
硬件连接
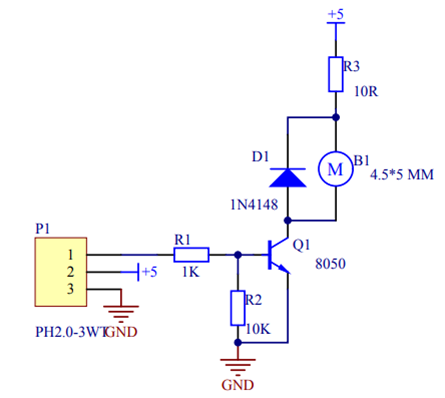
原理图
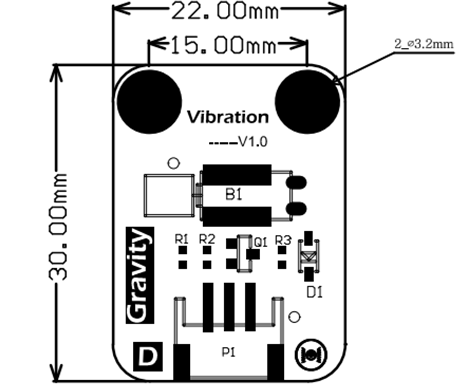
原件布局图
- 当我们按下开关后,振动器开始振动,时间为5s,然后停止,等待下一次的按键触发。
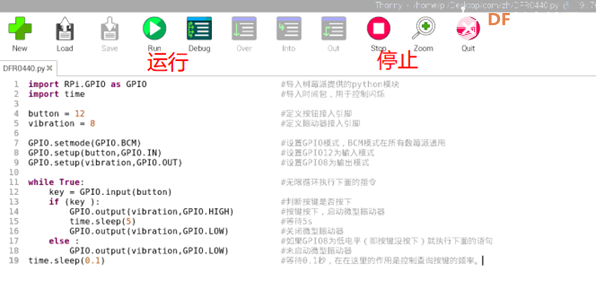
软件程序
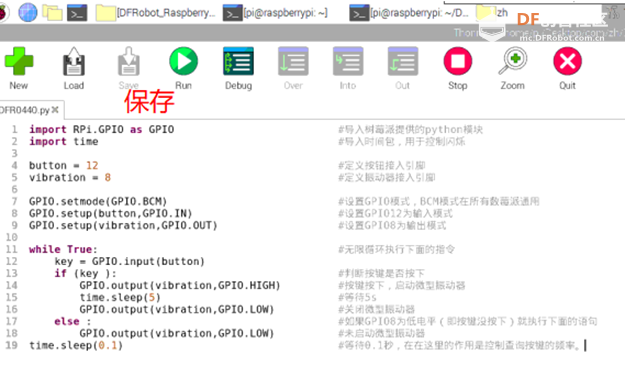
import RPi.GPIO as GPIO                          #导入树莓派提供的python模块
import time                                      #导入时间包,用于控制闪烁

button = 12                                      #定义按钮接入引脚
vibration = 8                                    #定义振动器接入引脚

GPIO.setmode(GPIO.BCM)                    #设置GPIO模式,BCM模式在所有数莓派通用
GPIO.setup(button,GPIO.IN)                       #设置GPIO12为输入模式
GPIO.setup(vibration,GPIO.OUT)                   #设置GPIO8为输出模式
while True:                                      #无限循环执行下面的指令
    key = GPIO.input(button)
    if (key ):                                   #判断按键是否按下
        GPIO.output(vibration,GPIO.HIGH)         #按键按下,启动微型振动器
        time.sleep(5)                            #等待5s
        GPIO.output(vibration,GPIO.LOW)          #关闭微型振动器
    else :                                       #如果GPIO8为低电平(即按键没按下)就执行下面的语句
        GPIO.output(vibration,GPIO.LOW)          #未启动微型振动器
time.sleep(0.1)                                  #等待0.1秒,在在这里的作用是控制查询按键的频率
-
保存文件。
-
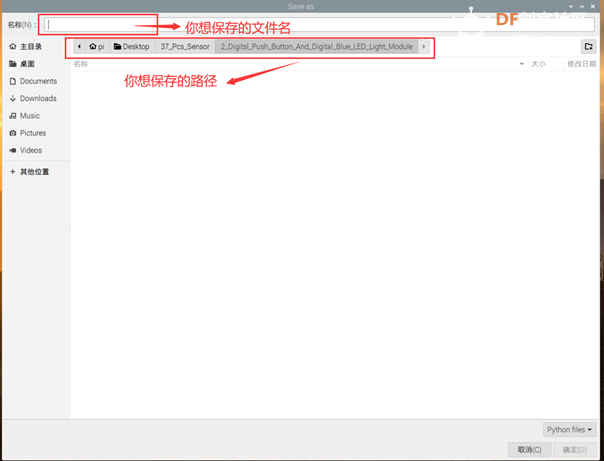
选择保存路径和文件名。
-
点击运行,通过测试,可以看到效果。
| 


 沪公网安备31011502402448
 置顶卡
置顶卡 变色卡
变色卡 千斤顶
千斤顶