基于 ESPHome 的 3D 打印机舱内控制系统(2): FireBeetle 2 ESP32-C6 + Moonraker Sensor + Fluidd
前言
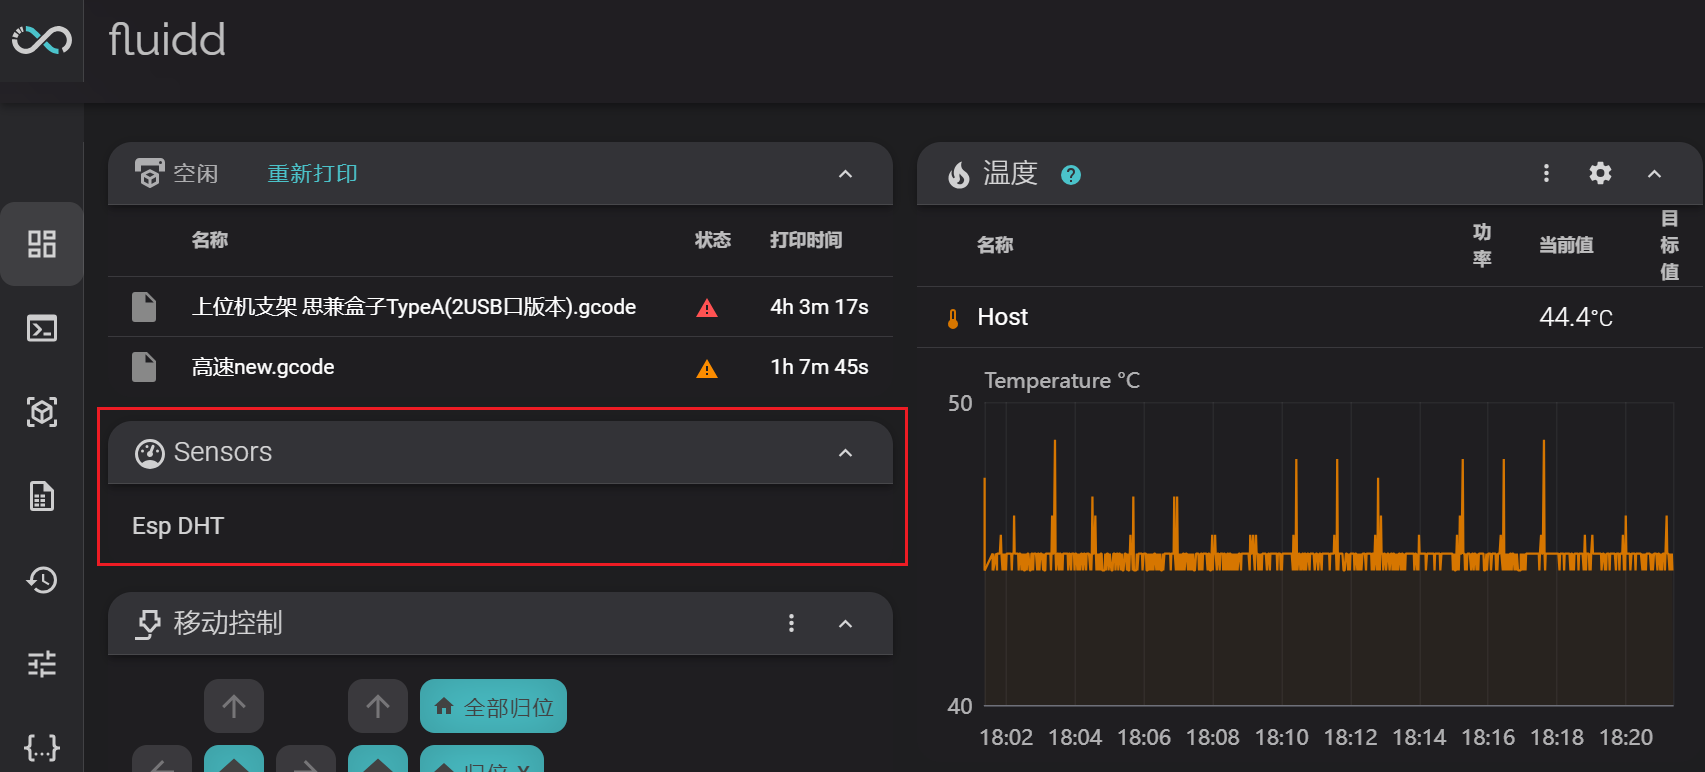
前文配置好了开发环境,本文测试 Moonraker 的 Sensor 组件,通过 MQTT 读取 FireBeetle 2 的 DHT 温湿度传感器数据并显示到 Fluidd 网页上。
本文涉及的硬件:
- DFRobor FireBeetle2 ESP32-C6 迷你开发板
- DHT22 温湿度传感器
- IIC OLED 单色显示屏
本文涉及的软件:
- ESPHome 2024.3.2 -> 2024.4.1(写作过程中已发布新版)
- Windows11 with WSL2(Debian Bookworm)
本文涉及的问题:
- ESPHome 读取 DHT22 传感器数值
- ESPHome 使用墨水屏、IIC OLED屏、SPI 彩色触摸屏
- 本地部署 MQTT Broker
- Moonraker 启用 MQTT Sensor
1、读取 DHT22 温湿度传感器数据
使用 logs 终端(网页或者串口)显示读取的温度信息
sensor:
  - platform: dht
    model: DHT22
    pin:
      # Connected to GPI20(SCL) on the ESP32-C6.
      number: 20
      mode:
        input: true
        pullup: false

    temperature:
      name: "DHT Temperature"
      id: dht_temperature_sensor
      state_class: "measurement"

      # filters:
      #   - heartbeat: 1.0s

    humidity:
      name: "DHT Humidity"
      id: dht_humidity_sensor
      state_class: "measurement"

      # filters:
      #   - heartbeat: 1.0s
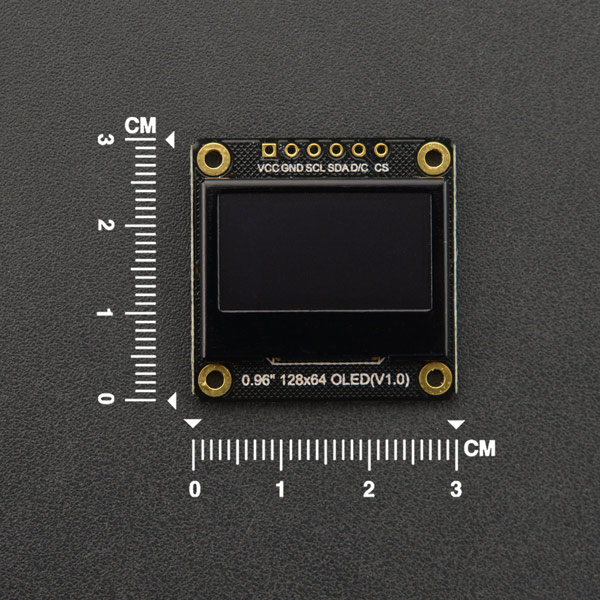
2、使用 OLED 单色显示屏显示温湿度信息
0.96”128x64 IIC/SPI OLED单色显示屏产品链接:https://www.dfrobot.com.cn/goods-2688.html
i2c:
  sda: 13
  scl: 14
  frequency: 400kHz

font:
  - file: '/home/pi/esphome_conf/fonts/segoeui.ttf'
  # - file: '/home/pi/esphome_conf/fonts/stxihei.ttf'
    id: font1
    size: 12
    # glyphs: 年月日思兼!"%()+,-_.:°0123456789ABCDEFGHIJKLMNOPQRSTUVWXYZ abcdefghijklmnopqrstuvwxyz

# 板载 0.96 寸显示屏
display:
  - platform: ssd1306_i2c
    model: "SSD1306 128x64"
    address: 0x3C
    auto_clear_enabled: False
    id: my_display
    pages:
      - id: page1
        lambda: |-
          it.print(0, 10, id(font1), "This is page 1!");
      - id: page2
        lambda: |-
          // it.print(0, 10, id(font1), "This is page 2!");
          it.image(0, 0, id(my_animation), COLOR_OFF, COLOR_ON);

# 切换页面后立即刷新显示
interval:
#   - interval: 5s
#     then:
#       - display.page.show_next: my_display
#       - component.update: my_display
  - interval: 40ms
    then:
      animation.next_frame: my_animation

# 添加动画
animation:
  - file: "/home/pi/esphome_conf/imgs/tkr.gif"
    id: my_animation
#    resize: 64x32
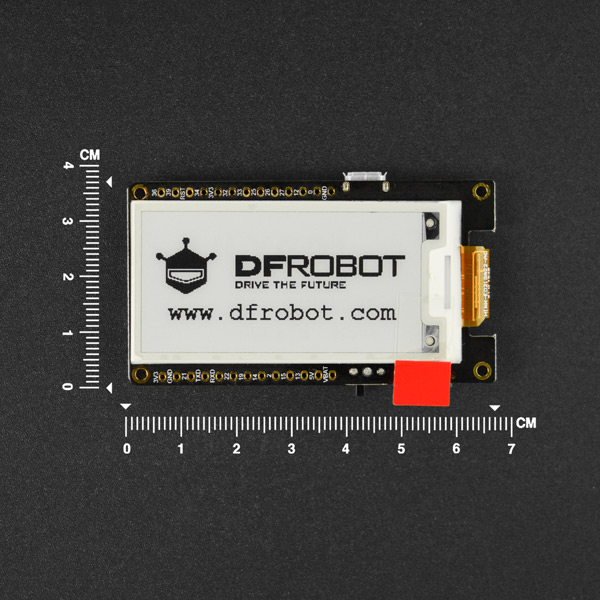
3、使用墨水屏显示信息
这里以ESP32墨水屏开发板为例,因为我没有独立的墨水屏模块。产品链接:https://www.dfrobot.com.cn/goods-2880.html
font:
#  - file: '/home/pi/esphome_conf/fonts/segoeui.ttf'
  - file: '/home/pi/esphome_conf/fonts/stxihei.ttf'
    id: font1
    size: 24
    glyphs: 年月日思兼!"%()+,-_.:°0123456789ABCDEFGHIJKLMNOPQRSTUVWXYZ abcdefghijklmnopqrstuvwxyz

spi:
  clk_pin: 18
  mosi_pin: 23

display:
  - platform: waveshare_epaper
    cs_pin: 5
    dc_pin: 17
    busy_pin: 4
    reset_pin: 16
    model: 2.13in-ttgo
    full_update_every: 30
    rotation: 270°
    lambda: |-
      it.print(0, 0, id(font1), "Klipper State: Printing");
      it.print(50, 25, id(font1), "demo by 思兼");
      it.print(50, 50, id(font1), " 2024年4月23日");
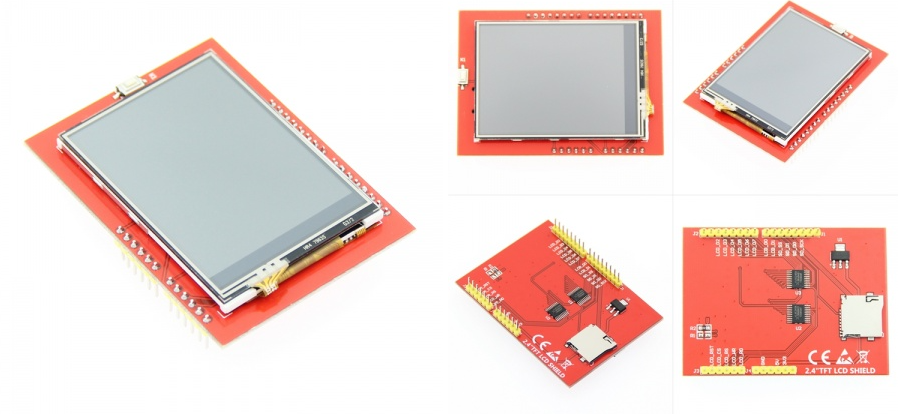
4、使用 SPI 彩色触摸屏显示信息(TBD)
我有一块 Arduino 用的 SPI 彩色显示触摸屏,2.4 寸 320*240 分辨率,采用 ILI9341 显示芯片 + XT2046 触摸芯片,ESPHome 也是直接支持,配置一下即可使用。配置信息:https://esphome.io/components/display/ili9xxx
5、ESPHome与Moonraker
5.1 本地部署 MQTT Broker
# 安装 MQTT Broker 的 mosquitto 实现
sudo apt update && sudo apt upgrade
sudo apt install -y mosquitto mosquitto-clients
sudo systemctl enable mosquitto.service
mosquitto -v

# 配置 mosquitto
sudo mosquitto_passwd -c /etc/mosquitto/passwd [YOUR_USERNAME]
sudo nano /etc/mosquitto/mosquitto.conf
per_listener_settings true
allow_anonymous false
listener 1883
password_file /etc/mosquitto/passwd

# 测试并启用
/usr/sbin/mosquitto -c /etc/mosquitto/mosquitto.conf
sudo systemctl restart mosquitto
sudo systemctl status mosquitto

## 更多配置选项解释
# zcat /usr/share/doc/mosquitto/examples/mosquitto.conf.gz
# The default behaviour is for this to be set to false, which maintains the
# setting behaviour from previous versions of mosquitto.
#per_listener_settings false
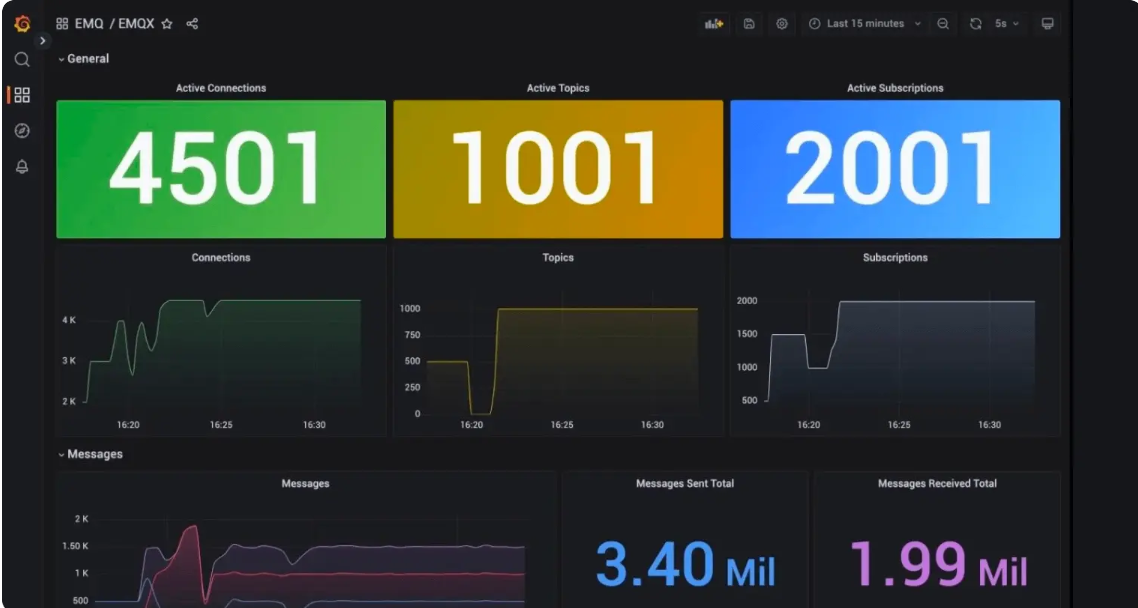
也可以使用 EMQX 这个开源企业级 Broker,不过我们目前用不到。
5.2 Moonraker 启用 MQTT
## moonraker.conf
[mqtt]
address: 127.0.0.1 # 设置 MQTT Broker 地址
port: 1883
username: [用户名]
password: [密码]
mqtt_protocol: v3.1.1 # v3.1, v3.1.1, and v5
enable_moonraker_api: True
instance_name: test_machine
#   实例名称,默认为 hostname,不支持通配符如 +、# 等。
#   {instance_name}/moonraker/api/{request|response}
status_objects:
  webhooks
  # temperature_sensor host=temperature
  # 仅有变化才会push,每次检查、发布间隔约250ms
#   A newline separated list of Klipper objects whose state will be
#   published.  There are two different ways to publish the states - you
#   can use either or both depending on your need.  See the
#   "publish_split_status" options for details.
#
#   For example, this option could be set as follows:
#
#     status_objects:
#       webhooks
#       toolhead=position,print_time,homed_axes
#       extruder=temperature
#
#   In the example above, all fields of the "webhooks" object will be tracked
#   and changes will be published.  Only the "position", "print_time", and
#   "homed_axes" fields of the "toolhead" will be tracked.  Likewise, only the
#   "temperature" field of the extruder will be tracked. See the
#   "Printer Objects" section of the documentation for an overview of the most
#   common objects available.
#
#   Note that Klipper will only push an update to an object/field if the field
#   has changed.  An object with no fields that have changed will not be part
#   of the payload.  Object state is checked and published roughly every 250 ms.
#
#   If not configured then no objects will be tracked and published to
#   the klipper/status topic.
publish_split_status: False
#   Configures how to publish status updates to MQTT.
#
#   When set to False (default), all Klipper object state updates will be
#   published to a single mqtt state with the following topic:
#     {instance_name}/klipper/status
#
#   When set to True, all Klipper object state updates will be published to
#   separate mqtt topics derived from the object and item in the following
#   format:
#     {instance_name}/klipper/state/{objectname}/{statename}
#
#   The actual value of the state is published as "value" to the topic above.
#   For example, if the heater_bed temperature was 24.0, this is the payload:
#     {"eventtime": {timestamp}, "value": 24.0}
#   It would be published to this topic:
#     {instance_name}/klipper/state/heater_bed/temperature
default_qos: 0
#   QOS 等级,取值范围 0-2,默认为 0
# api_qos:
#   API topics QOS 等级,默认和 "default_qos" 相同
我们可以使用 Android 软件 MQTT Dashboard 与 Moonraker/Klipper 进行交互。不过 MQTT 更适合传感器,控制可以使用 WebSocket。
5.3 Moonraker 添加 MQTT 传感器并在 Fluidd 上显示
# 添加 sensor 组件
[sensor esp-dht11t]
type: mqtt
name: espDHT
# qos:
# MQTT QOS 等级,默认和 [mqtt] 设置相同

# state_topic: nodemcu/sensor/enclosure_temperature/state
state_topic: nodemcu/dht11
#  The mqtt topic to subscribe to for sensor state updates.  This parameter
#  must be provided.
state_response_template:
  # {set_result("temperature", payload)}
   {% set notification = payload|fromjson %}
   {set_result("temperature", notification["temperature"]|float)}
   {set_result("humidity", notification["humidity"]|float)}
#  A template used to parse the payload received with the state topic.  A
#  "payload" variable is provided the template's context. This template must
#  call the provided set_result() method to pass sensor values to Moonraker.
#  `set_result()` expects two parameters, the name of the measurement (as
#  string) and the value of the measurement (either integer or float number).
#
#  This allows for sensor that can return multiple readings (e.g. temperature/
#  humidity sensors or powermeters).
#  For example:
#    {% set notification = payload|fromjson %}
#    {set_result("temperature", notification["temperature"]|float)}
#    {set_result("humidity", notification["humidity"]|float)}
#    {set_result("pressure", notification["pressure"]|float)}
#
#  The above example assumes a json response with multiple fields in a struct
#  is received. Individual measurements are extracted from that struct, coerced
#  to a numeric format and passed to Moonraker. The default is the payload.
我们也可以添加智能插座,显示实时功率和历史功耗信息。如果 MQTT Broker 位于公网,就可以实现公网控制智能插座。
参考信息:
小结
本文简介如何使用 ESPHome 通过 MQTT 协议与 Moonraker 进行交互,为后面的控制系统打下基础。部分内容需要完善重新验证。

 萌萌哒新人
萌萌哒新人
 活跃会员
活跃会员
 宣传大使
宣传大使
 版主限定
版主限定
 牛X认证
牛X认证
 老版主限定
老版主限定
 创作达人
创作达人
 小蘑菇
小蘑菇
 编辑选择奖
编辑选择奖
 ARD DAY
 编辑选择奖
编辑选择奖
 摸鱼团员
摸鱼团员
 编辑选择奖
编辑选择奖
 志“童”道合
 编辑选择奖
编辑选择奖
 编辑选择奖
编辑选择奖
 编辑选择奖
编辑选择奖


 沪公网安备31011502402448
 置顶卡
置顶卡 变色卡
变色卡 千斤顶
千斤顶


