摇骰代码
- /*
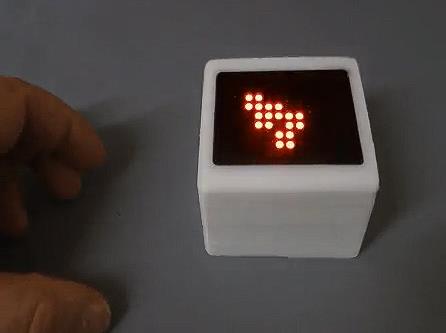
- Blog-Artikel: Schttel-Wrfel mit LED Matrix und Bewegungssimulation
-
- https://techpluscode.de/schuettel-wuerfel-mit-led-matrix-und-bewegungssimulation/
-
- techpluscode.de
- Copyright 2019 von Thomas Angielsky
- */
-
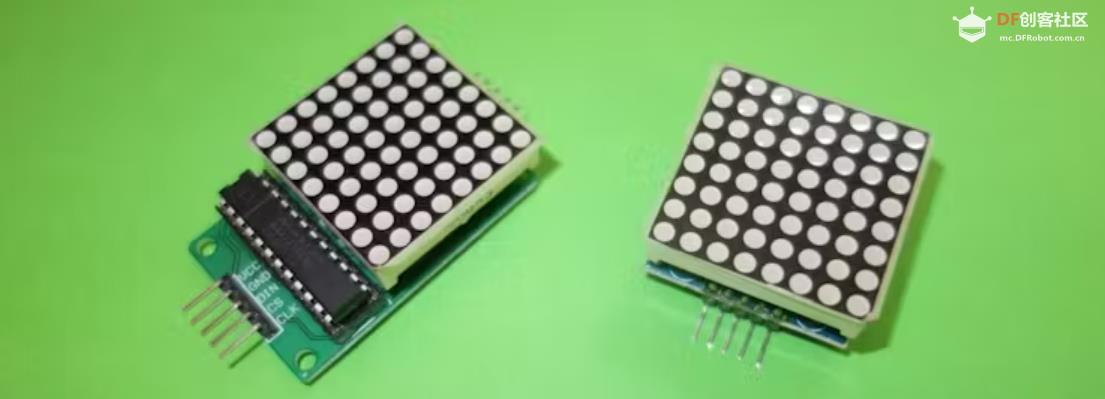
- //Bibliothek fr die Ansteuerung der 8x8 LED-Matrix einbinden
- //Include lib for the 8x8 LED matrix
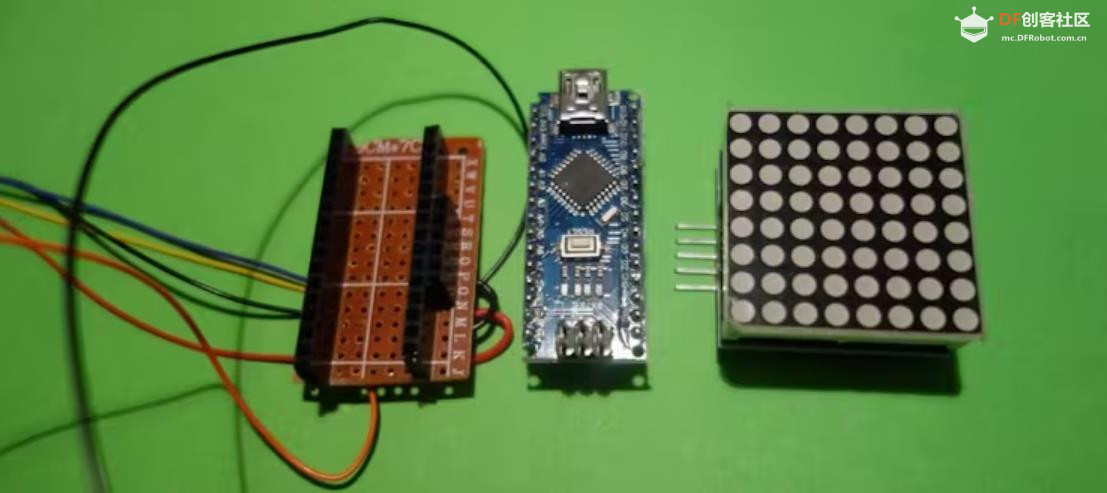
- #include "LedControl.h"
-
-
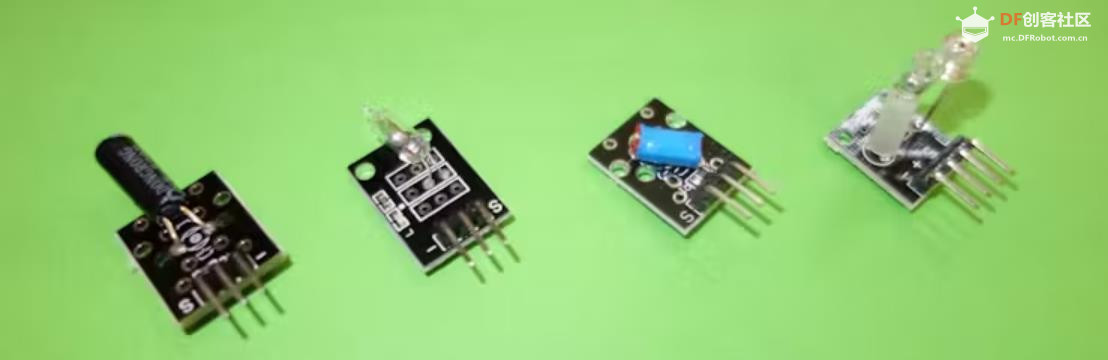
- int PinTiltX = 2; //Pin fr Tiltsensor X
- int PinTiltY = 3; //Pin fr Tiltsensor Y
-
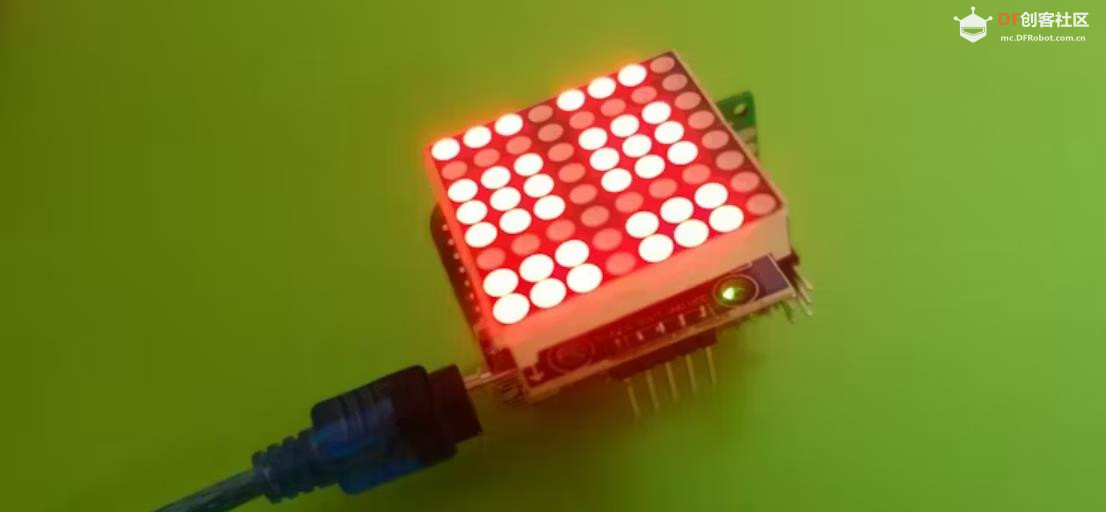
- //Pins der LED-Matrix
- //Pins of the LED matrix
- int PinCLK = 7;
- int PinCS = 6;
- int PinDIN = 5;
-
- LedControl lc = LedControl(PinDIN, PinCLK, PinCS, 1);
-
- //Koordinaten der Wrfelaugen in der LED-Matrix
- //Coordinates of the Dice points in the LED matrix
- int DicePic[8][6][2] =
- {
- { //leere Matrix und Startposition:
- {9,9}, //1. Punkt
- {9,8}, //2. Punkt
- {9,7}, //3. Punkt
- {9,6}, //4. Punkt
- {9,5}, //5. Punkt
- {9,4} //6. Punkt
- },
- { //1:
- {4,4}, //1. Punkt
- {-1,-1}, //2. Punkt
- {-1,-1}, //3. Punkt
- {-1,-1}, //4. Punkt
- {-1,-1}, //5. Punkt
- {-1,-1} //6. Punkt
- },
- { //2:
- {2,2}, //1. Punkt
- {6,6}, //2. Punkt
- {-1,-1}, //3. Punkt
- {-1,-1}, //4. Punkt
- {-1,-1}, //5. Punkt
- {-1,-1} //6. Punkt
- },
- { //3:
- {2,6}, //1. Punkt
- {6,2}, //2. Punkt
- {4,4}, //3. Punkt
- {-1,-1}, //4. Punkt
- {-1,-1}, //5. Punkt
- {-1,-1} //6. Punkt
- },
- { //4:
- {2,2}, //1. Punkt
- {2,6}, //2. Punkt
- {6,2}, //3. Punkt
- {6,6}, //4. Punkt
- {-1,-1}, //5. Punkt
- {-1,-1} //6. Punkt
- },
- { //5:
- {2,2}, //1. Punkt
- {2,6}, //2. Punkt
- {6,2}, //3. Punkt
- {6,6}, //4. Punkt
- {4,4}, //5. Punkt
- {-1,-1} //6. Punkt
- },
- { //6:
- {2,1}, //1. Punkt
- {2,4}, //2. Punkt
- {2,7}, //3. Punkt
- {6,1}, //4. Punkt
- {6,4}, //5. Punkt
- {6,7} //6. Punkt
- },
- { //Start:
- {-1,-1}, //1. Punkt
- {-1,-1}, //2. Punkt
- {-1,-1}, //3. Punkt
- {-1,-1}, //4. Punkt
- {-1,-1}, //5. Punkt
- {-1,-1} //6. Punkt
- }
- };
-
-
- //Variablen der Wrfelaugen: Position, Richtung, Geschwindigkeit fr X und Y
- //Variables of the dice: position, direction, speed for X and Y
- float DiceXpos[6];
- float DiceXdir[6];
- volatile byte DiceXspeed[6];
- float DiceYpos[6];
- float DiceYdir[6];
- volatile byte DiceYspeed[6];
-
-
- int DiceValue;
- unsigned long timestamp;
- byte Mode;
- int volatile shakes;
- int ShakesPerSecond;
- int step;
-
- void InterruptChecks() {
- //Schttel-Anzahl zhlen
- //Count Shakes
- shakes=shakes+1;
- //Serial.println(millis());
- timestamp=millis();
- }
-
- void SetSpeedX() {
- if (Mode==0) {
- //alle Wrfel in X beschleunigen
- //Speed-up dice in X
- for (int i = 0; i < 6; i++) {
- if (DiceXspeed[i]<255) {DiceXspeed[i]=DiceXspeed[i]+5;}
- }
- }
- InterruptChecks();
- }
-
- void SetSpeedY() {
- if (Mode==0) {
- //alle Wrfel in Y beschleunigen
- //Speed-up dice in Y
- for (int i = 0; i < 6; i++) {
- if (DiceYspeed[i]<255) {DiceYspeed[i]=DiceYspeed[i]+5;}
- }
- }
- InterruptChecks();
- }
-
- void ShowLed(int x, int y, bool onoff) {
- //LED nur anzeigen, wenn im sichtbaren Bereich
- //show only, when x/y in matrix
- if ((x<8) and (y<8) and (x>=0) and (y>=0)) {
- lc.setLed(0, x, y, onoff);
- }
- }
-
- void ShowDot(int x, int y, bool onoff) {
- //Wrfel-Auge anzeigen oder ausblenden
- //Show or hide dice point
- ShowLed(x-1, y-1, onoff);
- ShowLed(x, y-1, onoff);
- ShowLed(x-1, y, onoff);
- ShowLed(x, y, onoff);
- }
-
- void ShowDicePic(int value) {
- //Wurf anzeigen
- //Show dice
-
- boolean done;
-
- //alle Punkte von der aktuellen Position aus zur Zielposition von DiceValue bewegen
- //move all points from current position to destination of DiceValue
- for (int i = 0; i < 6; i++) {
- DiceXspeed[i]=100;
- DiceYspeed[i]=100;
-
- //Werte fr X berechnen
- //Calc x values
- DiceXdir[i]=0;
- if (int(DiceXpos[i])>DicePic[value][i][0]) {DiceXdir[i]=-1;}
- else if (int(DiceXpos[i])<DicePic[value][i][0]) {DiceXdir[i]=1;}
-
- DiceYdir[i]=0;
- if (int(DiceYpos[i])>DicePic[value][i][1]) {DiceYdir[i]=-1;}
- else if (int(DiceYpos[i])<DicePic[value][i][1]) {DiceYdir[i]=1;}
- }
-
- //Serial.println(value);
- //Serial.println("Bewegung Start // Start moving");
- //Punkte bewegen
- do {
- //Serial.println("Bewegung // Moving");
- for (int i = 0; i < 6; i++) {
- if (int(DiceXpos[i])!=DicePic[value][i][0]) {
- DoStep(DiceXpos[i],DiceXdir[i],DiceXspeed[i],false);
- }
- if (int(DiceYpos[i])!=DicePic[value][i][1]) {
- DoStep(DiceYpos[i],DiceYdir[i],DiceYspeed[i],false);
- }
- }
-
- lc.clearDisplay(0);
- for (int i = 0; i < 6; i++) {
- ShowDot(int(DiceXpos[i]), int(DiceYpos[i]), true);
- }
-
- delay(50);
-
- //Sind alle Augen an ihrer Zielposition
- //Dice points are on destition position
- done=true;
- for (int i = 0; i < 6; i++) {
- if (int(DiceXpos[i])!=DicePic[value][i][0]) {done=false;}
- if (int(DiceYpos[i])!=DicePic[value][i][1]) {done=false;}
- }
-
- } while (done==false);
- //Serial.println("Bewegung Ende // End moving");
-
- lc.clearDisplay(0);
- for (int i = 0; i < 6; i++) {
- ShowDot(DicePic[value][i][0],DicePic[value][i][1], true);
- }
- }
-
-
- void DoStep(float &pos, float &dir, volatile byte &sp, bool check) {
- pos=pos+float(sp)/255*dir;
-
- if (check==true) {
- if (pos>7) {
- pos=7;
- dir=dir*(-1);
- }
- if (pos<1) {
- pos=1;
- dir=dir*(-1);
- }
-
- }
- // Geschwindigkeit wird pro Schritt langsamer
- // Velocity decreases every step
- if (sp>0) {sp=sp-1;}
- }
-
- void MoveDots() {
- //alle Wrfel einen Schritt weiter bewegen
- //move dice points one step further
- for (int i = 0; i < 6; i++) {
- //neue Koordinaten berechnen
- //calc new coordinates
- DoStep(DiceXpos[i],DiceXdir[i],DiceXspeed[i],true);
- DoStep(DiceYpos[i],DiceYdir[i],DiceYspeed[i],true);
- }
-
- //Wrfel-Augen anzeigen
- //show dice points
- lc.clearDisplay(0);
- for (int i = 0; i < 6; i++) {
- ShowDot(int(DiceXpos[i]), int(DiceYpos[i]), true);
- }
-
- }
-
-
-
- void setup() {
- //Der MAX7219 ist beim Starten im Power-Saving Modus,
- //er muss aufgeweckt werden.
- //The MAX7219 is in power-saving mode on startup,
- //we have to do a wakeup call
- lc.shutdown(0, false);
- //Helligkeit auf einen Mittelwert
- //Set the brightness to a medium values
- lc.setIntensity(0, 8);
- //und Display lschen
- //and clear the display
- lc.clearDisplay(0);
-
- randomSeed(analogRead(0));
- DiceValue=0;
-
- for (int i = 0; i < 6; i++) {
- DiceXpos[i]=DicePic[7][i][0];
- DiceYpos[i]=DicePic[7][i][1];
-
- DiceXdir[i]=random(3)-1;
- DiceYdir[i]=random(3)-1;
- DiceXspeed[i]=random(126)+120;
- DiceYspeed[i]=random(126)+120;
- }
-
- //Pins einstellen
- //Setup the pins
- pinMode(PinTiltX, INPUT_PULLUP);
- pinMode(PinTiltY, INPUT_PULLUP);
- attachInterrupt(digitalPinToInterrupt(PinTiltX),SetSpeedX,CHANGE);
- attachInterrupt(digitalPinToInterrupt(PinTiltY),SetSpeedY,CHANGE);
-
- lc.clearDisplay(0);
-
- timestamp=millis();
- Mode=1;
-
- ShowDicePic(6);
- delay(1000);
-
- lc.clearDisplay(0);
- Mode=0;
- Serial.begin(9600);
- step=0;
- shakes=0;
- }
-
- void loop() {
- delay(50);
- step=step+1;
- if (step>20) {
- //1 sek ist vorbei
- //1 sec is over
- step=0;
- ShakesPerSecond=shakes;
- shakes=0;
- }
-
- if (Mode==0) {
- MoveDots();
- if (millis()-timestamp>2000) {
- //seit 2 sek kein Schtteln mehr
- //there is no shaking since 2 sec
- Mode=1;
- DiceValue=random(6)+1;
- ShowDicePic(DiceValue);
- }
- }
-
- if (ShakesPerSecond>5) {
- //Es wird wieder geschttelt
- //shaking again
- Mode=0;
- }
-
- }
|


 沪公网安备31011502402448

 置顶卡
置顶卡 变色卡
变色卡 千斤顶
千斤顶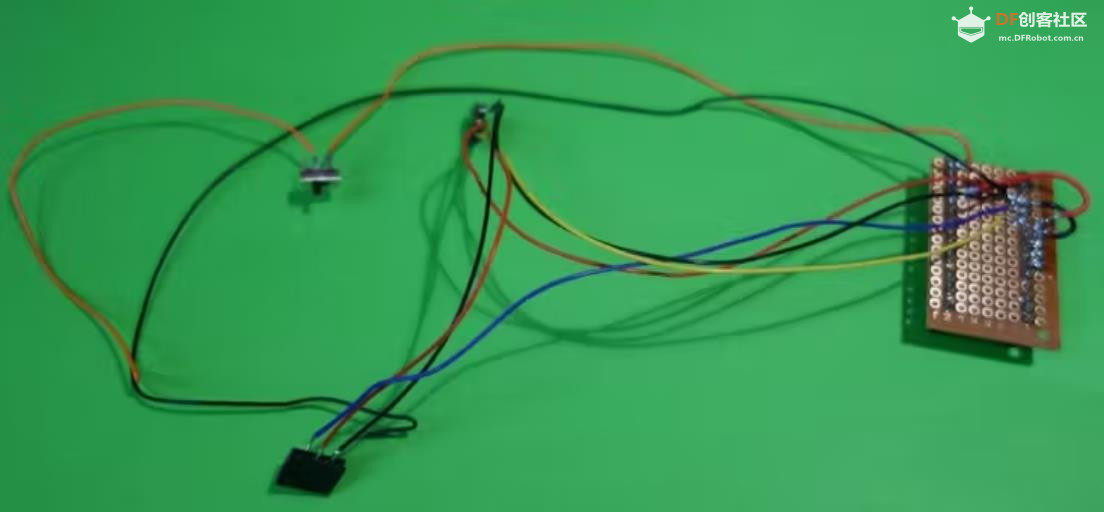


 萌萌哒新人
萌萌哒新人
 活跃会员
活跃会员
 宣传大使
宣传大使
 牛X认证
牛X认证
 创作达人
创作达人
 ARD DAY
 摸鱼团员
摸鱼团员
 志“童”道合
 编辑选择奖
编辑选择奖


