|
4224| 1
|
[教程] 虚谷号+扩展板体验 |

|
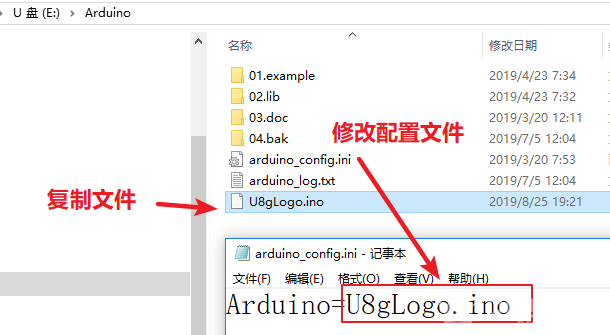
虚谷教育版+扩展板体验 演示视频(附部分操作): 器材: 虚谷号教育版裸板 厚物-虚谷号扩展板 参考资料: https://wiki.dfrobot.com.cn/index.php?title=(SKU:_DFR0593)_%E5%8E%9A%E7%89%A9%E2%80%94%E2%80%94%E8%99%9A%E8%B0%B7%E5%8F%B7%E6%89%A9%E5%B1%95%E6%9D%BF,虚谷扩展版wiki 扩展板引脚图: 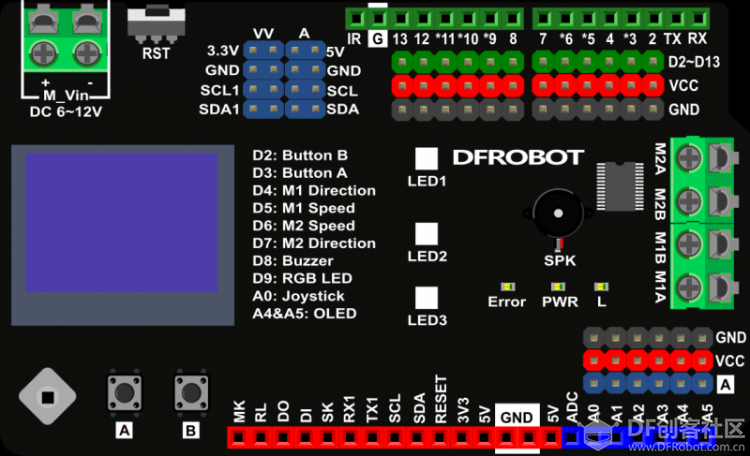  准备: 将厚物扩展板插到虚谷号上,虚谷号通电(推荐5V@2A USB供电),启动虚谷号U盘模式 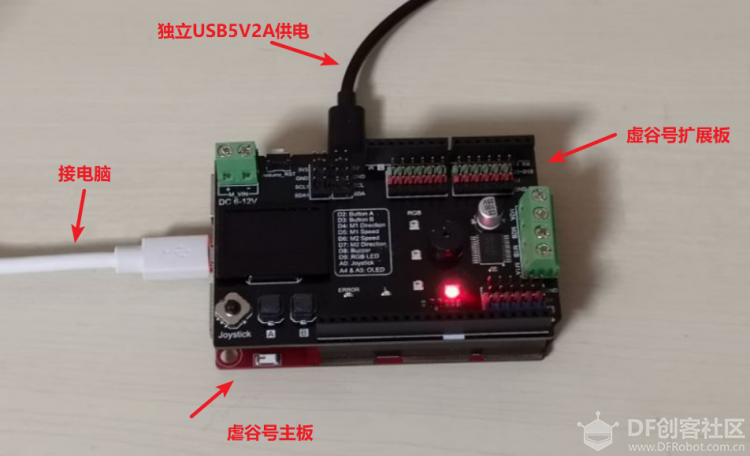 一、U盘方式运行 1. 点亮OLED屏

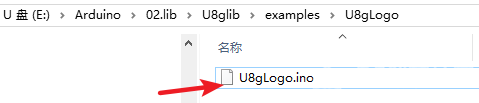 查找 //U8GLIB_SSD1306_128X64 u8g(U8G_I2C_OPT_NONE|U8G_I2C_OPT_DEV_0); 取消注释 
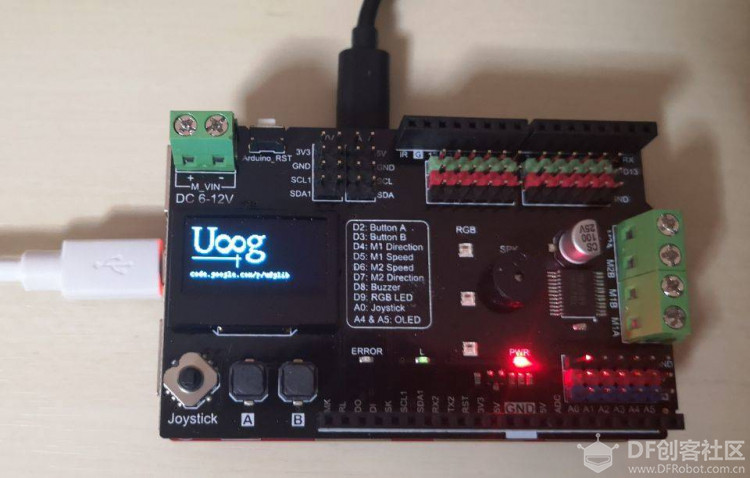 其他演示: 显示HelloWorld  旋转Hello 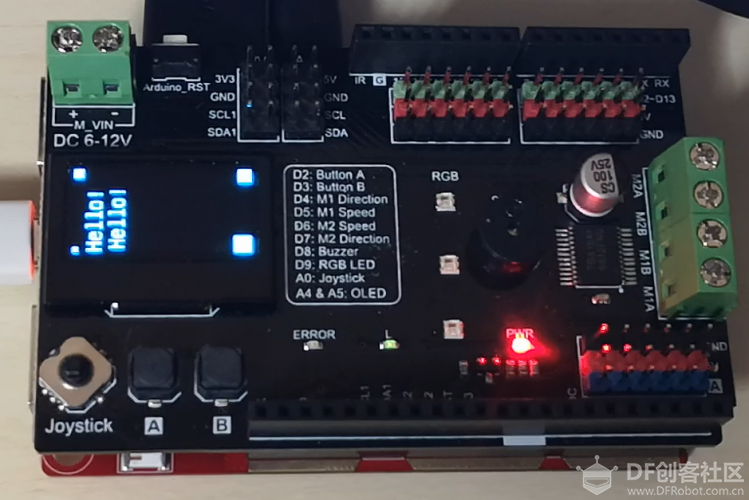 2. RGB全彩LED灯
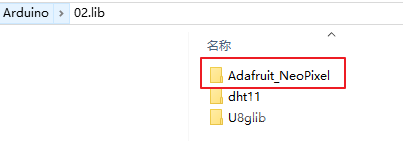
[mw_shl_code=cpp,true]#include <Adafruit_NeoPixel.h> #ifdef __AVR__ #include <avr/power.h> #endif #define PIN 9 //注意修改LED驱动管脚!!! // Parameter 1 = number of pixels in strip // Parameter 2 = Arduino pin number (most are valid) // Parameter 3 = pixel type flags, add together as needed: // NEO_KHZ800 800 KHz bitstream (most NeoPixel products w/WS2812 LEDs) // NEO_KHZ400 400 KHz (classic 'v1' (not v2) FLORA pixels, WS2811 drivers) // NEO_GRB Pixels are wired for GRB bitstream (most NeoPixel products) // NEO_RGB Pixels are wired for RGB bitstream (v1 FLORA pixels, not v2) // NEO_RGBW Pixels are wired for RGBW bitstream (NeoPixel RGBW products) Adafruit_NeoPixel strip = Adafruit_NeoPixel(64, PIN, NEO_GRB + NEO_KHZ800); // IMPORTANT: To reduce NeoPixel burnout risk, add 1000 uF capacitor across // pixel power leads, add 300 - 500 Ohm resistor on first pixel's data input // and minimize distance between Arduino and first pixel. Avoid connecting // on a live circuit...if you must, connect GND first. void setup() { // This is for Trinket 5V 16MHz, you can remove these three lines if you are not using a Trinket #if defined (__AVR_ATtiny85__) if (F_CPU == 16000000) clock_prescale_set(clock_div_1); #endif // End of trinket special code strip.begin(); strip.show(); // Initialize all pixels to 'off' } void loop() { // Some example procedures showing how to display to the pixels: //colorWipe(strip.Color(255, 0, 0), 50); // Red // colorWipe(strip.Color(0, 255, 0), 50); // Green //colorWipe(strip.Color(0, 0, 255), 50); // Blue //colorWipe(strip.Color(0, 0, 0, 255), 50); // White RGBW // Send a theater pixel chase in... // theaterChase(strip.Color(127, 127, 127), 50); // White //theaterChase(strip.Color(127, 0, 0), 50); // Red //theaterChase(strip.Color(0, 0, 127), 50); // Blue rainbow(20); //rainbowCycle(20); //theaterChaseRainbow(50); } // Fill the dots one after the other with a color void colorWipe(uint32_t c, uint8_t wait) { for(uint16_t i=0; i<strip.numPixels(); i++) { strip.setPixelColor(i, c); strip.show(); delay(wait); } } void rainbow(uint8_t wait) { uint16_t i, j; for(j=0; j<256; j++) { for(i=0; i<strip.numPixels(); i++) { strip.setPixelColor(i, Wheel((i+j) & 255)); } strip.show(); delay(wait); } } // Slightly different, this makes the rainbow equally distributed throughout void rainbowCycle(uint8_t wait) { uint16_t i, j; for(j=0; j<256*5; j++) { // 5 cycles of all colors on wheel for(i=0; i< strip.numPixels(); i++) { strip.setPixelColor(i, Wheel(((i * 256 / strip.numPixels()) + j) & 255)); } strip.show(); delay(wait); } } //Theatre-style crawling lights. void theaterChase(uint32_t c, uint8_t wait) { for (int j=0; j<10; j++) { //do 10 cycles of chasing for (int q=0; q < 3; q++) { for (uint16_t i=0; i < strip.numPixels(); i=i+3) { strip.setPixelColor(i+q, c); //turn every third pixel on } strip.show(); delay(wait); for (uint16_t i=0; i < strip.numPixels(); i=i+3) { strip.setPixelColor(i+q, 0); //turn every third pixel off } } } } //Theatre-style crawling lights with rainbow effect void theaterChaseRainbow(uint8_t wait) { for (int j=0; j < 256; j++) { // cycle all 256 colors in the wheel for (int q=0; q < 3; q++) { for (uint16_t i=0; i < strip.numPixels(); i=i+3) { strip.setPixelColor(i+q, Wheel( (i+j) % 255)); //turn every third pixel on } strip.show(); delay(wait); for (uint16_t i=0; i < strip.numPixels(); i=i+3) { strip.setPixelColor(i+q, 0); //turn every third pixel off } } } } // Input a value 0 to 255 to get a color value. // The colours are a transition r - g - b - back to r. uint32_t Wheel(byte WheelPos) { WheelPos = 255 - WheelPos; if(WheelPos < 85) { return strip.Color(255 - WheelPos * 3, 0, WheelPos * 3); } if(WheelPos < 170) { WheelPos -= 85; return strip.Color(0, WheelPos * 3, 255 - WheelPos * 3); } WheelPos -= 170; return strip.Color(WheelPos * 3, 255 - WheelPos * 3, 0); }[/mw_shl_code]
 如果需要有其他的效果,可以将代码中的相关函数下的注释部分取消。 二、主机方式运行 3. 无源蜂鸣器 主机方式下运行桌面的Arduino IDE,新建一个文件,将下面的代码复制粘贴,将代码上传到虚谷号  厚物扩展板采用无源蜂鸣器,内部硬件连接到Arduino D8管脚,可用于播放音乐,以下是儿歌“两只老虎”的音乐(网友分享) 程序代码: [mw_shl_code=cpp,true]#define C_0 -1 #define C_1 262 #define C_2 294 #define C_3 330 #define C_4 350 #define C_5 393 #define C_6 441 #define C_7 495 //音符数组 int yinfu[]= { C_1,C_2,C_3,C_1, C_1,C_2,C_3,C_1, C_3,C_4,C_5, C_3,C_4,C_5, C_5,C_6,C_5,C_4,C_3,C_1, C_5,C_6,C_5,C_4,C_3,C_1, C_1,C_5,C_1, C_1,C_5,C_1, }; //音拍数组,每一行代表4拍 float yinpai[]= { 1,1,1,1, 1,1,1,1, 1,1,2, 1,1,2, 0.75,0.25,0.75,0.25,1,1, 0.75,0.25,0.75,0.25,1,1, 1,1,2, 1,1,2 }; int length;//音符数量 int tonepin=8;//8号输出口 void setup() { // put your setup code here, to run once: pinMode(tonepin,OUTPUT); length=sizeof(yinfu)/sizeof(yinfu[0]); } int t; void loop() { // put your main code here, to run repeatedly: for(t=0;t<length;t++) { tone(tonepin,yinfu[t]); //发出声音 delay(400*yinpai[t]); //发音时间,用户可自调 noTone(tonepin); //停止发声 } delay(3000); }[/mw_shl_code] 4. 按键 程序上传成功后,在串口监视器可以显示按钮按下情况: 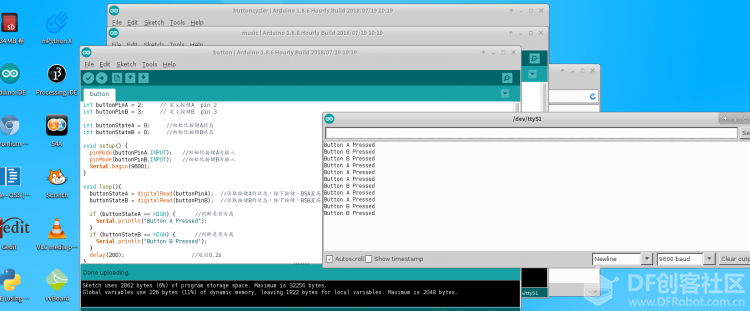 代码如下: [mw_shl_code=cpp,true]int buttonPinA = 2; // 定义按键A pin 2 int buttonPinB = 3; // 定义按键B pin 3 int buttonStateA = 0; //初始化按键A状态 int buttonStateB = 0; //初始化按键B状态 void setup() { pinMode(buttonPinA,INPUT); //初始化按键A为输入 pinMode(buttonPinB,INPUT); //初始化按键B为输入 Serial.begin(9600); } void loop(){ buttonStateA = digitalRead(buttonPinA); //读取按键A的状态,按下按键,BSA置高 buttonStateB = digitalRead(buttonPinB); //读取按键B的状态,按下按键,BSB置高 if (buttonStateA == HIGH) { //判断是否为高 Serial.println("Button A Pressed"); } if (buttonStateB == HIGH) { //判断是否为高 Serial.println("Button B Pressed"); } delay(200); //延迟0.2s }[/mw_shl_code] 体验总结:
后续再继续体验扩展板的各个引脚、接口等。 |
珠峰 发表于 2020-5-14 13:53 可参考:https://learn.adafruit.com/monoc ... outs/python-usage-2 https://learn.adafruit.com/pages/17419/elements/3041225/download |


© 2013-2024 Comsenz Inc. Powered by Discuz! X3.4 Licensed

 置顶卡
置顶卡 变色卡
变色卡 千斤顶
千斤顶


 版主限定
版主限定
 创作达人
创作达人
 编辑选择奖
编辑选择奖
 ARD DAY
 编辑选择奖
编辑选择奖
 编辑选择奖
编辑选择奖
 编辑选择奖
编辑选择奖


