|
4163| 1
|
[教程] 手机点亮Genuino 101 CurieBLE LED |
|
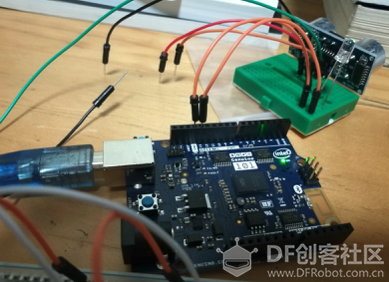
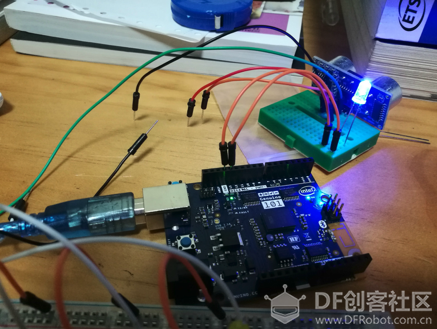
本帖最后由 szjuliet 于 2019-3-13 23:42 编辑 本贴写于2016-8-1,由QQ日志迁移过来。 本人动手能力着实一般,请忽略接线。另外nRF Toolbox相当好玩,很多有趣的BLE传感器都可以玩起来。 一个简单的LED灯点亮和熄灭的小实验,可以在手机上进行控制,但是我们这次介绍的不是用App Inventor来编写程序,而是使用nRF Connect来测试。 官方教程地址:https://www.arduino.cc/en/Tutorial/Genuino101CurieBLELED 硬件: Arduino/Genuino 101板 LED灯 手机 软件: * nRF Master Control Panel (BLE) for Android and iOS 手机上用Play Store搜索后安装 步骤 1. 接线:将LED灯接在101板的13引脚。  2. 安装nRF Master Control Panel 在Play Store搜索并安装,安装后运行。 点击SCAN,应用开始搜索可用的蓝牙设备,发现LED灯,点CONNECT连接。 连接成功后出现几个服务,点击Unknown Service,出现了读READ和写WRITE的属性。点击向上的箭头,打开写的属性。 在NEW下面,点击下拉箭头,呼出UNIT 8。 在Write value处输入“1”,点SEND,发送开灯指令。同理,输入0,点SEND,发送关灯指令。 成功发送1后,可以看到LED灯亮了(见下图)。再发送0,灯灭(见本页第一张图)。  以下为源代码。 [mw_shl_code=applescript,true]#include <CurieBle.h> BLEPeripheral blePeripheral; // BLE Peripheral Device (the board you're programming) BLEService heartRateService("180D"); // BLE Heart Rate Service // BLE Heart Rate Measurement Characteristic" BLECharacteristic heartRateChar("2A37", // standard 16-bit characteristic UUID BLERead | BLENotify, 2); // remote clients will be able to get notifications if this characteristic changes // the characteristic is 2 bytes long as the first field needs to be "Flags" as per BLE specifications // https://developer.bluetooth.org/ ... ate_measurement.xml int oldHeartRate = 0; // last heart rate reading from analog input long previousMillis = 0; // last time the heart rate was checked, in ms void setup() { Serial.begin(9600); // initialize serial communication pinMode(13, OUTPUT); // initialize the LED on pin 13 to indicate when a central is connected /* Set a local name for the BLE device This name will appear in advertising packets and can be used by remote devices to identify this BLE device The name can be changed but maybe be truncated based on space left in advertisement packet */ blePeripheral.setLocalName("HeartRateSketch"); blePeripheral.setAdvertisedServiceUuid(heartRateService.uuid()); // add the service UUID blePeripheral.addAttribute(heartRateService); // Add the BLE Heart Rate service blePeripheral.addAttribute(heartRateChar); // add the Heart Rate Measurement characteristic /* Now activate the BLE device. It will start continuously transmitting BLE advertising packets and will be visible to remote BLE central devices until it receives a new connection */ blePeripheral.begin(); Serial.println("Bluetooth device active, waiting for connections..."); } void loop() { // listen for BLE peripherals to connect: BLECentral central = blePeripheral.central(); // if a central is connected to peripheral: if (central) { Serial.print("Connected to central: "); // print the central's MAC address: Serial.println(central.address()); // turn on the LED to indicate the connection: digitalWrite(13, HIGH); // check the heart rate measurement every 200ms // as long as the central is still connected: while (central.connected()) { long currentMillis = millis(); // if 200ms have passed, check the heart rate measurement: if (currentMillis - previousMillis >= 200) { previousMillis = currentMillis; updateHeartRate(); } } // when the central disconnects, turn off the LED: digitalWrite(13, LOW); Serial.print("Disconnected from central: "); Serial.println(central.address()); } } void updateHeartRate() { /* Read the current voltage level on the A0 analog input pin. This is used here to simulate the heart rate's measurement. */ int heartRateMeasurement = analogRead(A0); int heartRate = map(heartRateMeasurement, 0, 1023, 0, 100); if (heartRate != oldHeartRate) { // if the heart rate has changed Serial.print("Heart Rate is now: "); // print it Serial.println(heartRate); const unsigned char heartRateCharArray[2] = { 0, (char)heartRate }; heartRateChar.setValue(heartRateCharArray, 2); // and update the heart rate measurement characteristic oldHeartRate = heartRate; // save the level for next comparison } } [/mw_shl_code] |
 沪公网安备31011502402448
© 2013-2026 Comsenz Inc. Powered by Discuz! X3.4 Licensed