虚谷号入手配置指南
虚谷号:创客板 2020-12-16固件
一、配置无线连接
1. U盘模式
通过OTG接口连接电脑,进入U盘模式
2. 配置无线
打开 vvBoard 文件夹下面的 vvBoard_config.ini ,配置无线连接:SSID=wifi名称,SSID_PSD=wifi密码
例如:
# set 1 to open and set 0 to close#
Jupyter=1
Siot=1
#wifi账号#
SSID=Tenda_2324
#wifi密码#
SSID_PSD=rb123456
保存并关闭 vvBoard_config.ini 文件,短按 reset 按钮
3. 查看ip地址
打开 vvBoard 文件夹下的 wifi_log.txt 文件,其中 wlan0 中的 inet地址:192.168.1.xxx 即为ip地址
二、操作系统更新
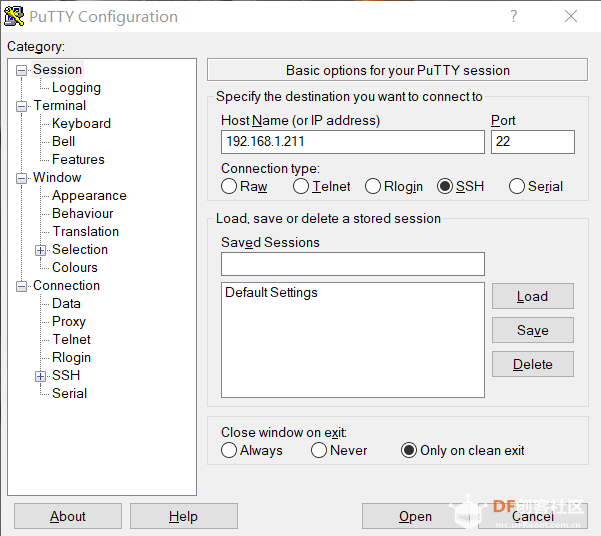
1. 通过SSH连接虚谷号
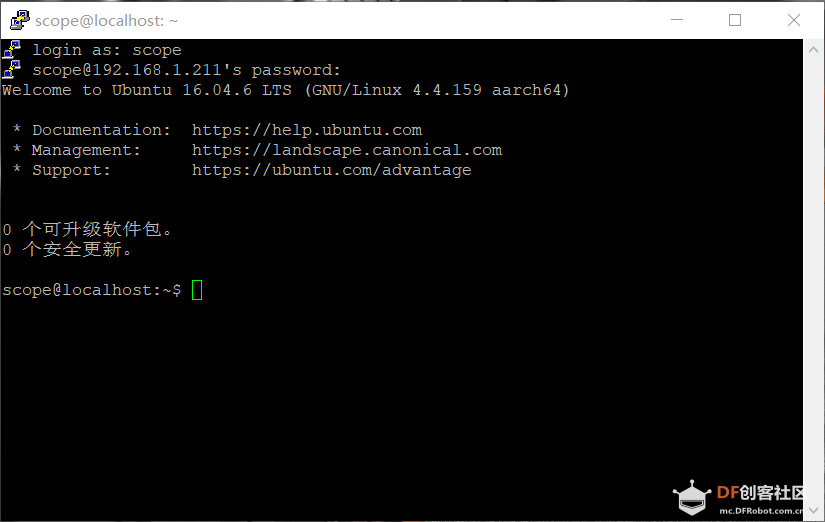
打开putty软件,输入虚谷号分配到的ip地址,用户名和密码均为 scope
2. 更新系统
scope@localhost:~$ sudo apt-get update
scope@localhost:~$ sudo apt-get upgrade
3. 更新pip
'''
先配置 pip 的清华源
再更新 pip
'''
scope@localhost:~$ pip config set global.index-url https://pypi.tuna.tsinghua.edu.cn/simple
scope@localhost:~$ pip install --upgrade pip --user
4. 安装轻度编辑器
系统自带 vim ,轻度编辑需要可以安装 nano
scope@localhost:~$ sudo apt-get install nano
5. 安装浏览器
系统自带谷歌浏览器,觉着略卡,安装轻度浏览器 midori
scope@localhost:~$ sudo apt-get install midori
6. 关闭系统
scope@localhost:~$ sudo poweroff
三、 安装VNC软件
1. 安装远程连接所需软件
scope@localhost:~$ sudo apt-get install xrdp
# 注意到安装 xrdp 的时候会一并安装:
# vnc4server,xbase-clients
# 此时 vncserver 其实就一起安装好了
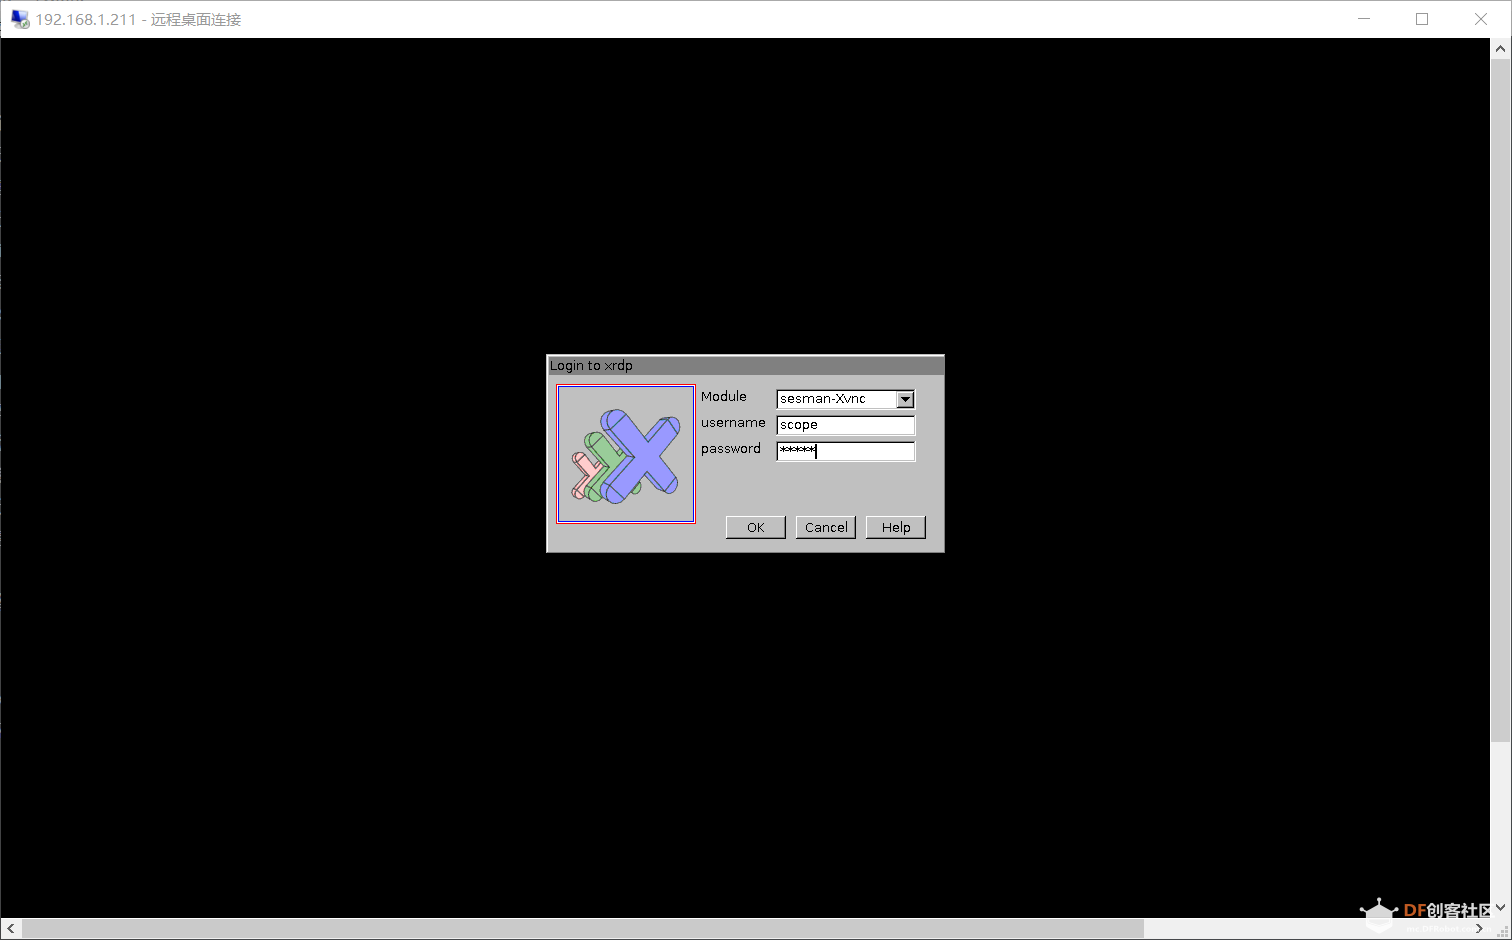
2. Win系统远程桌面
3. VNC 文件设置
-
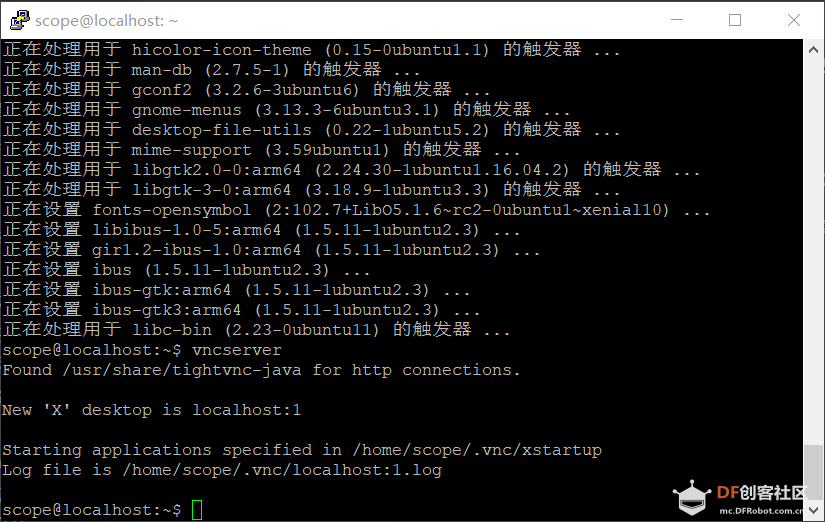
结束掉开启的端口
scope@localhost:~$ vncserver -kill :1 # 上图所示开启的端口号为1
-
简单设置VNC配置文件
如上图所示,VNC的配置文件位置为 /home/scope/.vnc/xstartup
scope@localhost:~$ sudo nano /home/scope/.vnc/xstartup
根据提示,去掉默认的 # 号
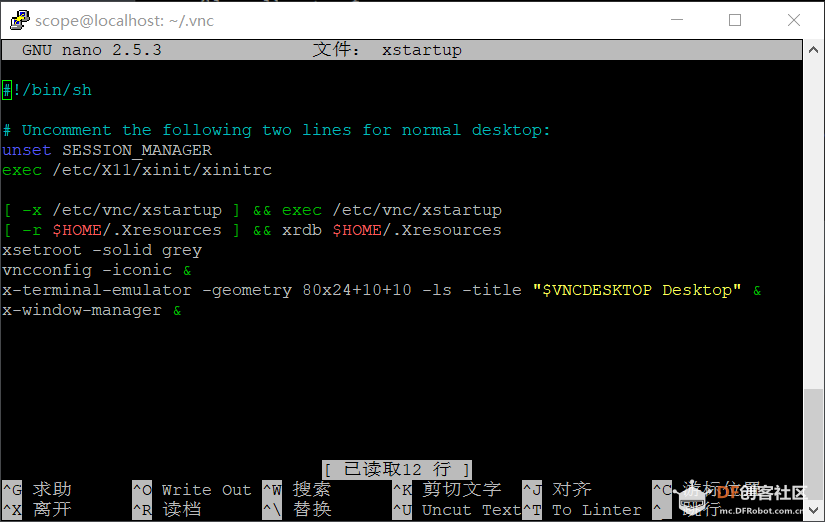
CTRL+O 保存, CTRL+X 退出
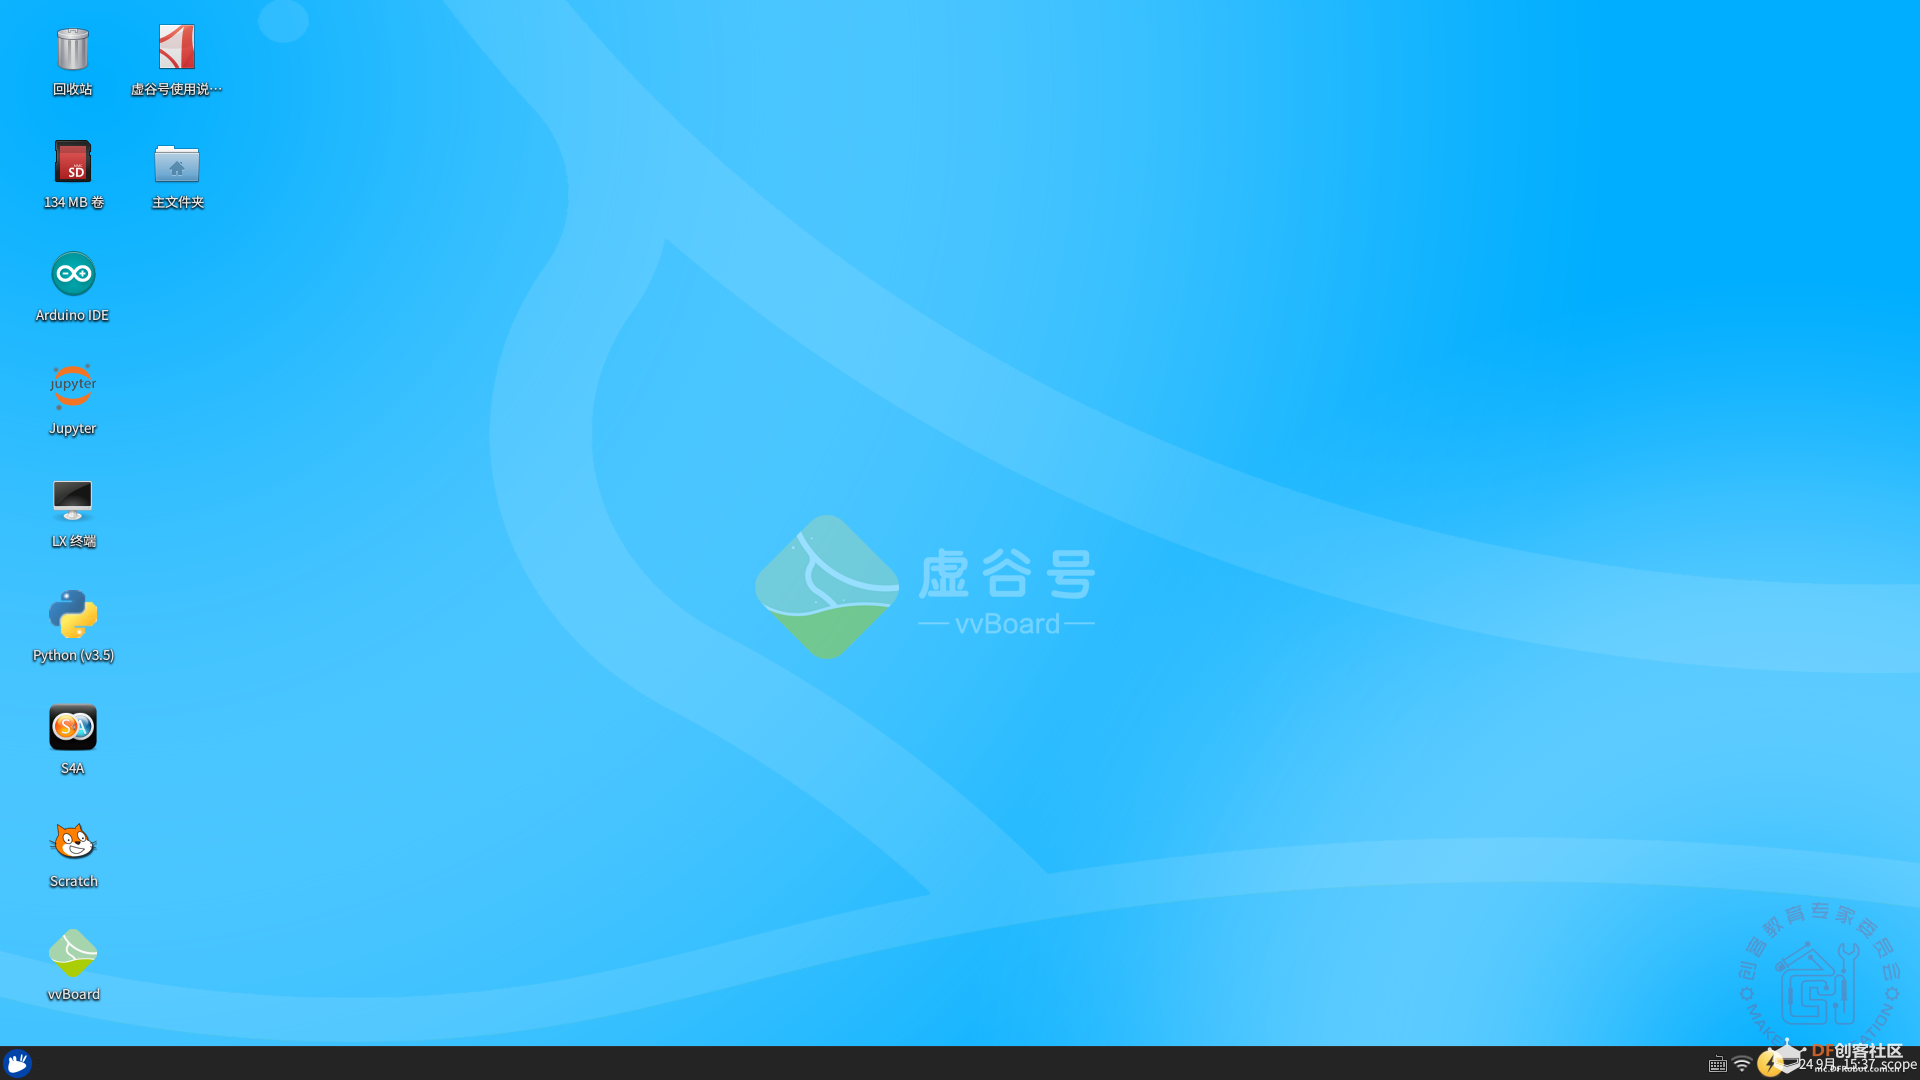
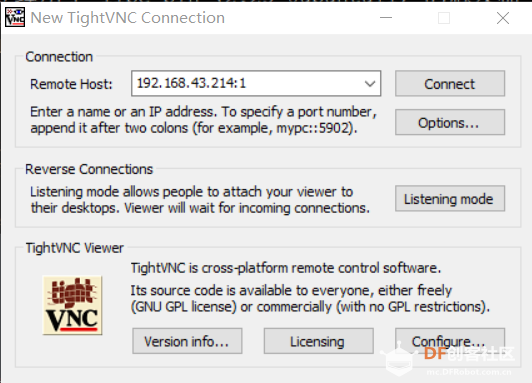
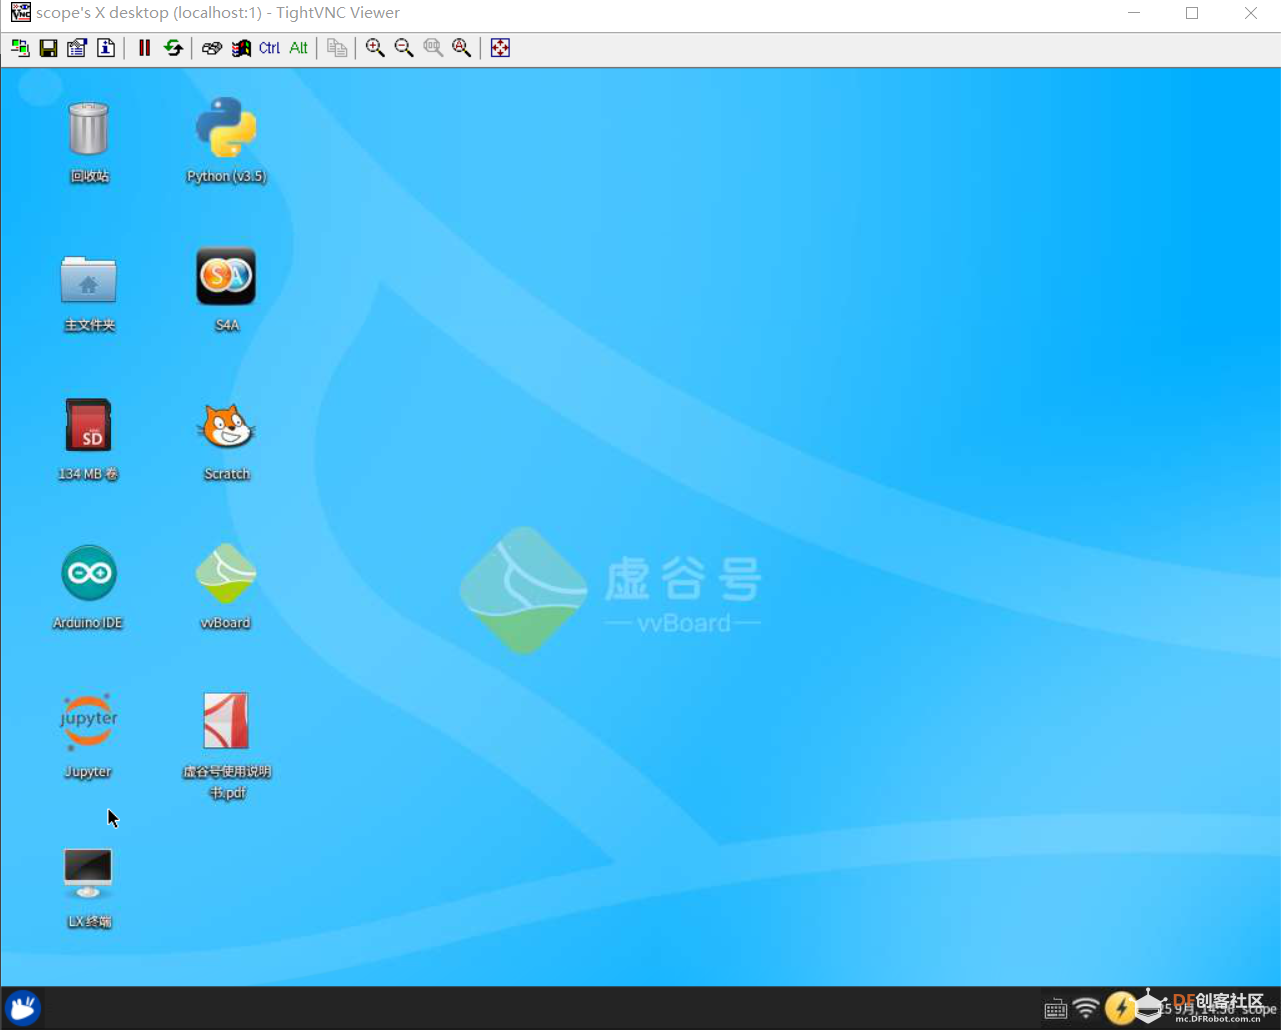
4. VNC连接
四、安装编程软件
1. 安装 Thonny
scope@localhost:~$ pip3 install thonny --user
scope@localhost:~$ python3 -m thonny
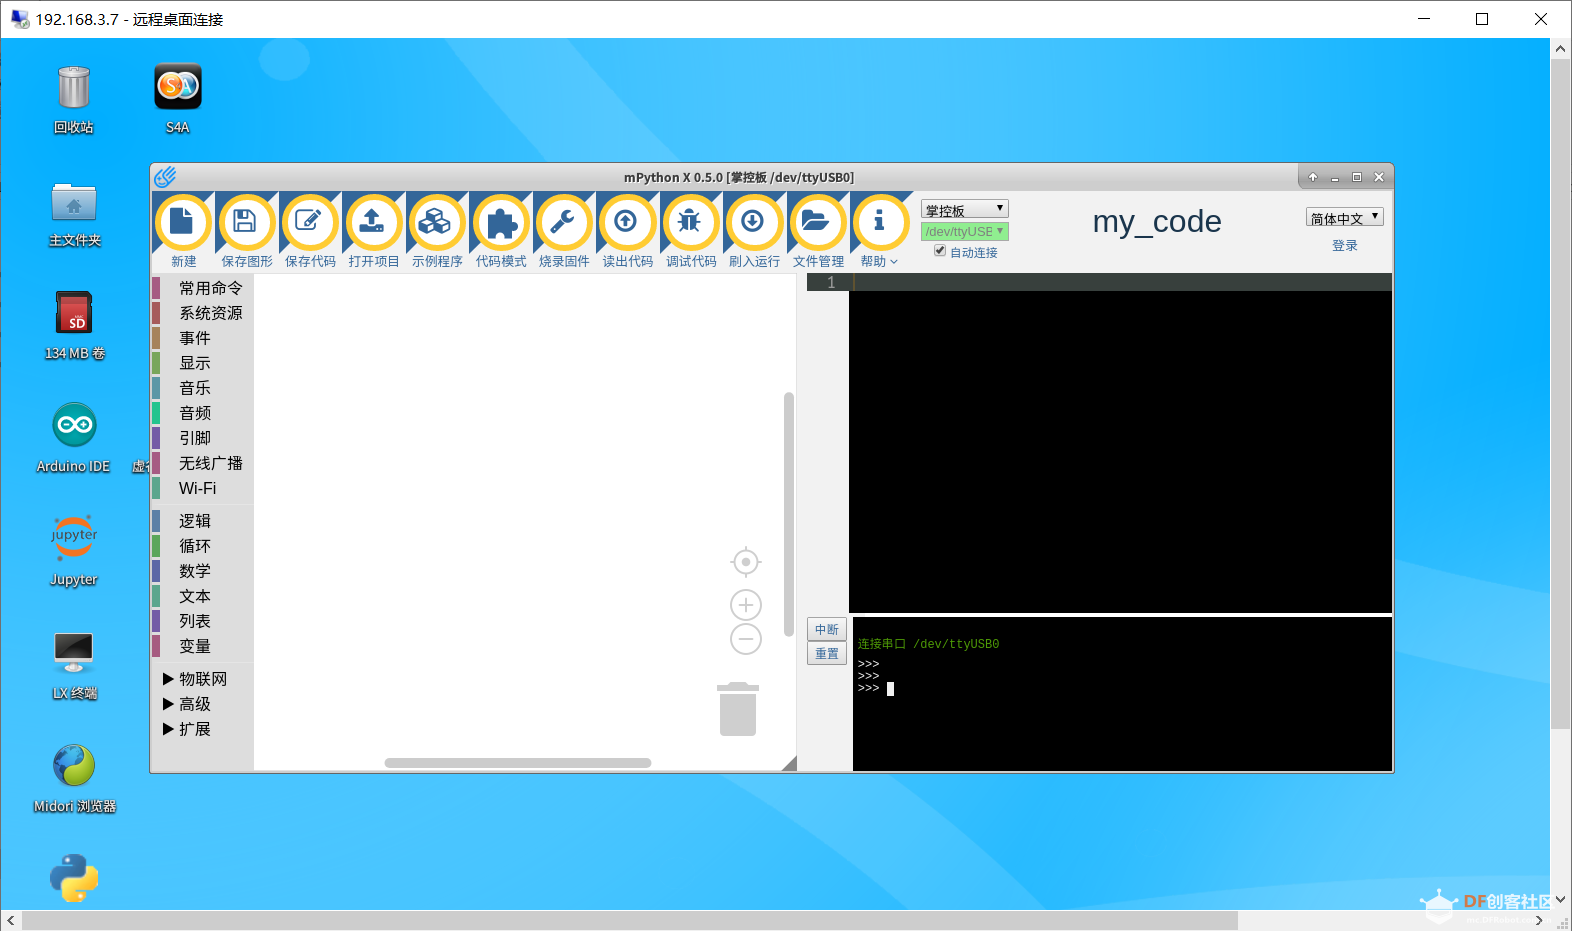
2. 安装 mPythonX
scope@localhost:~$ cd /home/scope/Downloads
scope@localhost:~/Downloads$ wget http://static.steamaker.cn/files/mpythonx-0.5.1-arm64.tar.gz
scope@localhost:~/Downloads$ tar -zxvf mpythonx-0.5.1-arm64.tar.gz  # 解压压缩包
桌面远程连接虚谷号
进入mPythonX 的文件夹,右键点击在此处打开终端

输入 ./mpythonx.sh
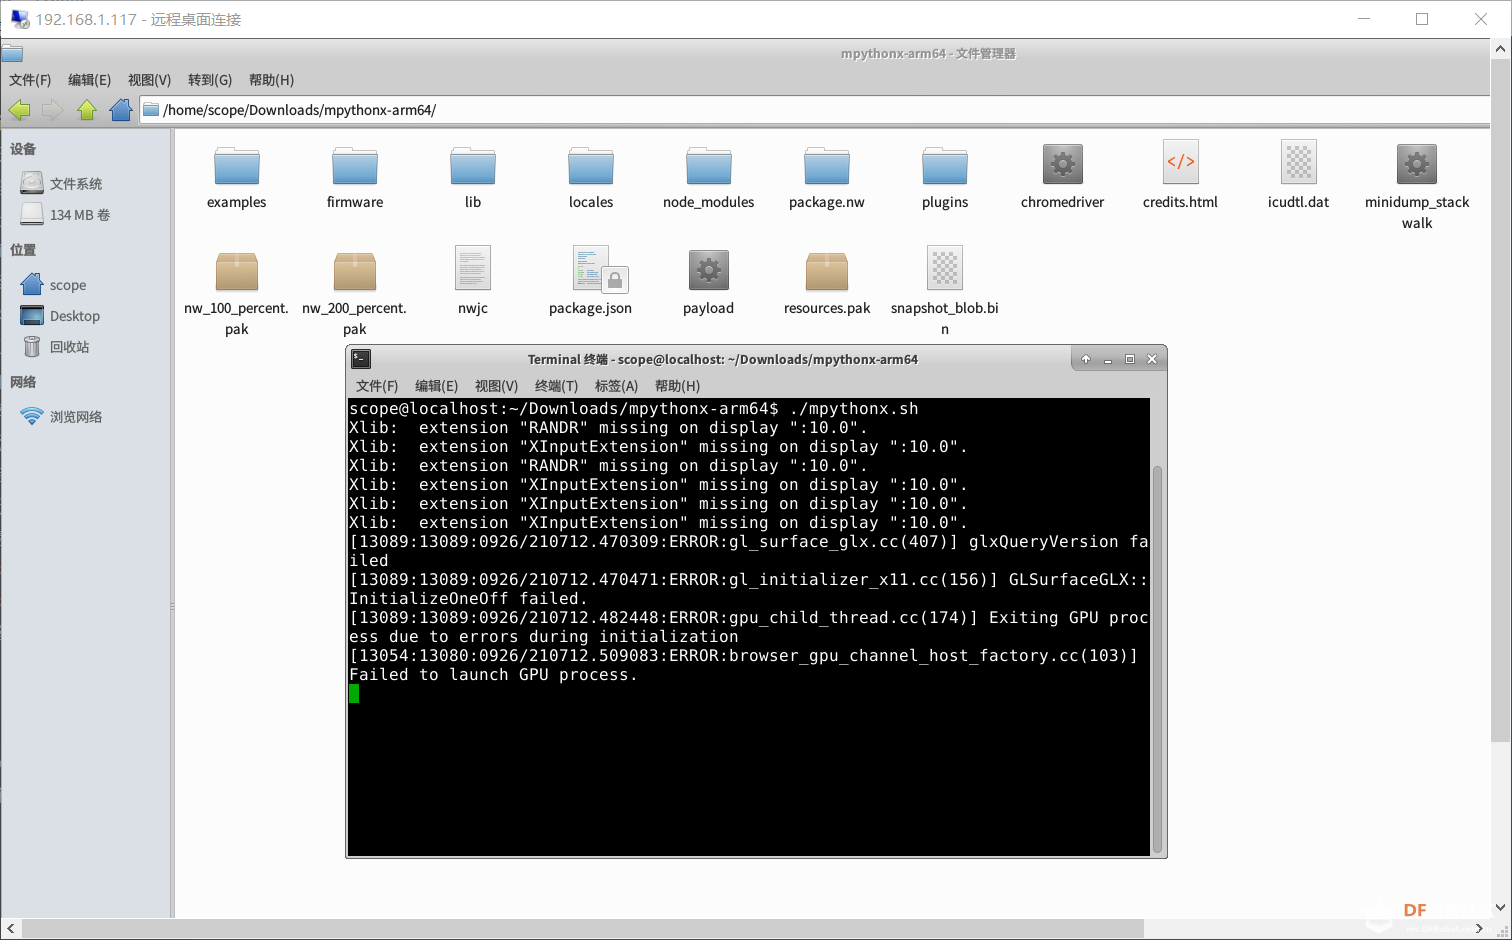
稍等片刻,便看到熟悉的 mPythonX 程序界面
scope@localhost:~$ cd /home/scope/Downloads
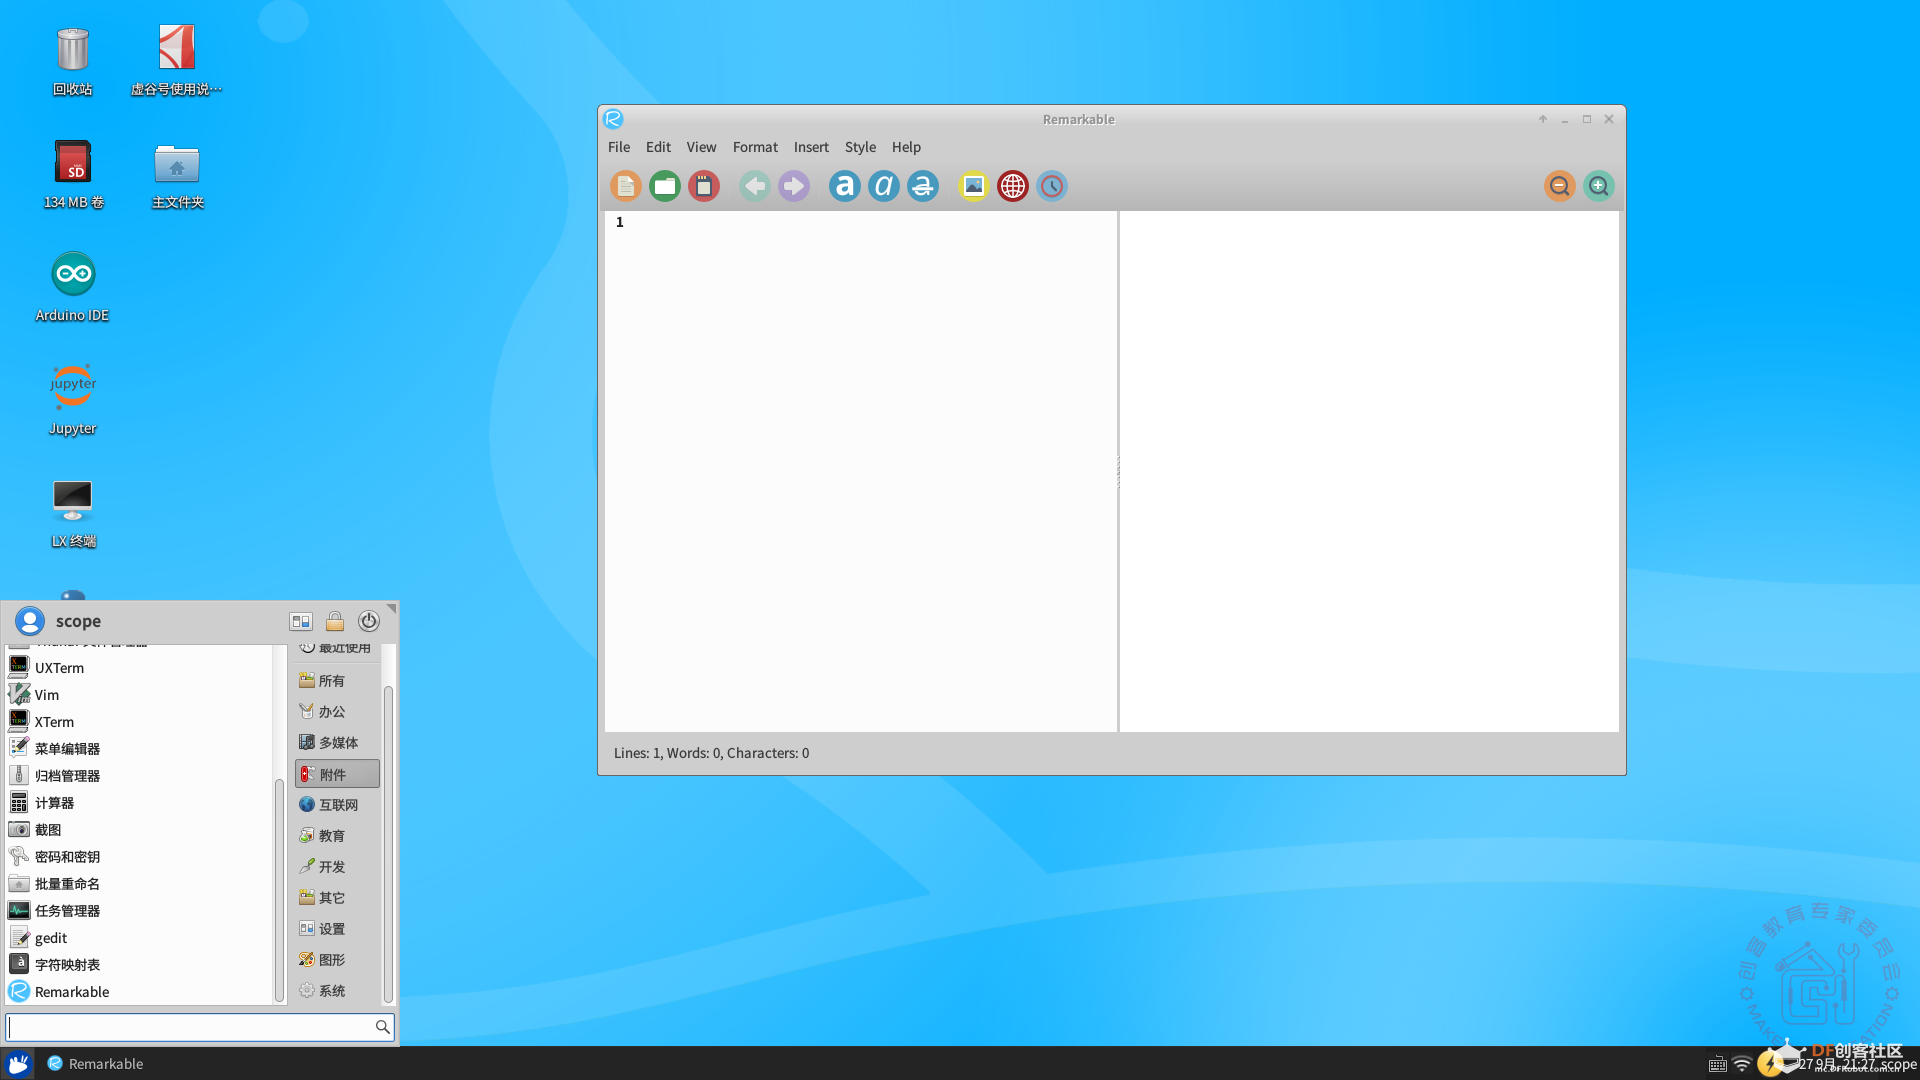
scope@localhost:~/Downloads$ wget https://remarkableapp.github.io/files/remarkable_1.87_all.deb
scope@localhost:~/Downloads$ sudo dpkg -i remarkable_1.87_all.deb # 安装 deb 安装包
scope@localhost:~/Downloads$ sudo apt install -f # 安装依赖包
4. 安装终端环境
scope@localhost:~$ sudo apt install screen
scope@localhost:~$ sudo pip install esptool  # 用于ESP系列芯片烧录固件
scope@localhost:~$ sudo pip install ampy
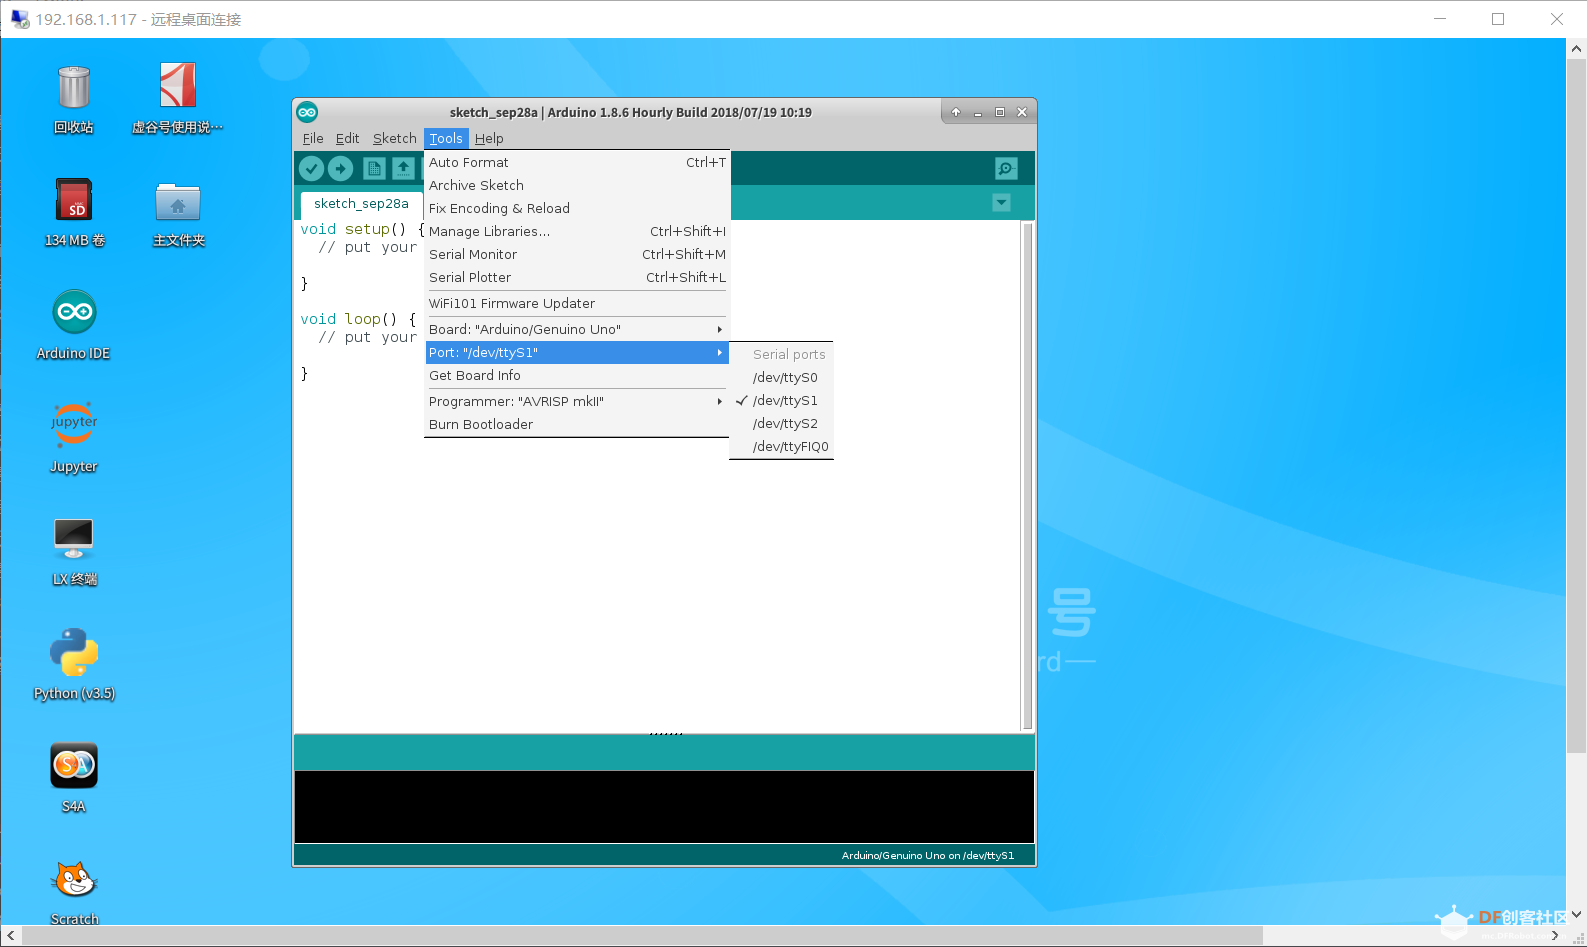
1. 设置端口号
虚谷号系统内置 Arduino IDE 编程软件,当编程控制板载标准的 Arduino 引脚时,端口需要选择 /dev/ttyS1
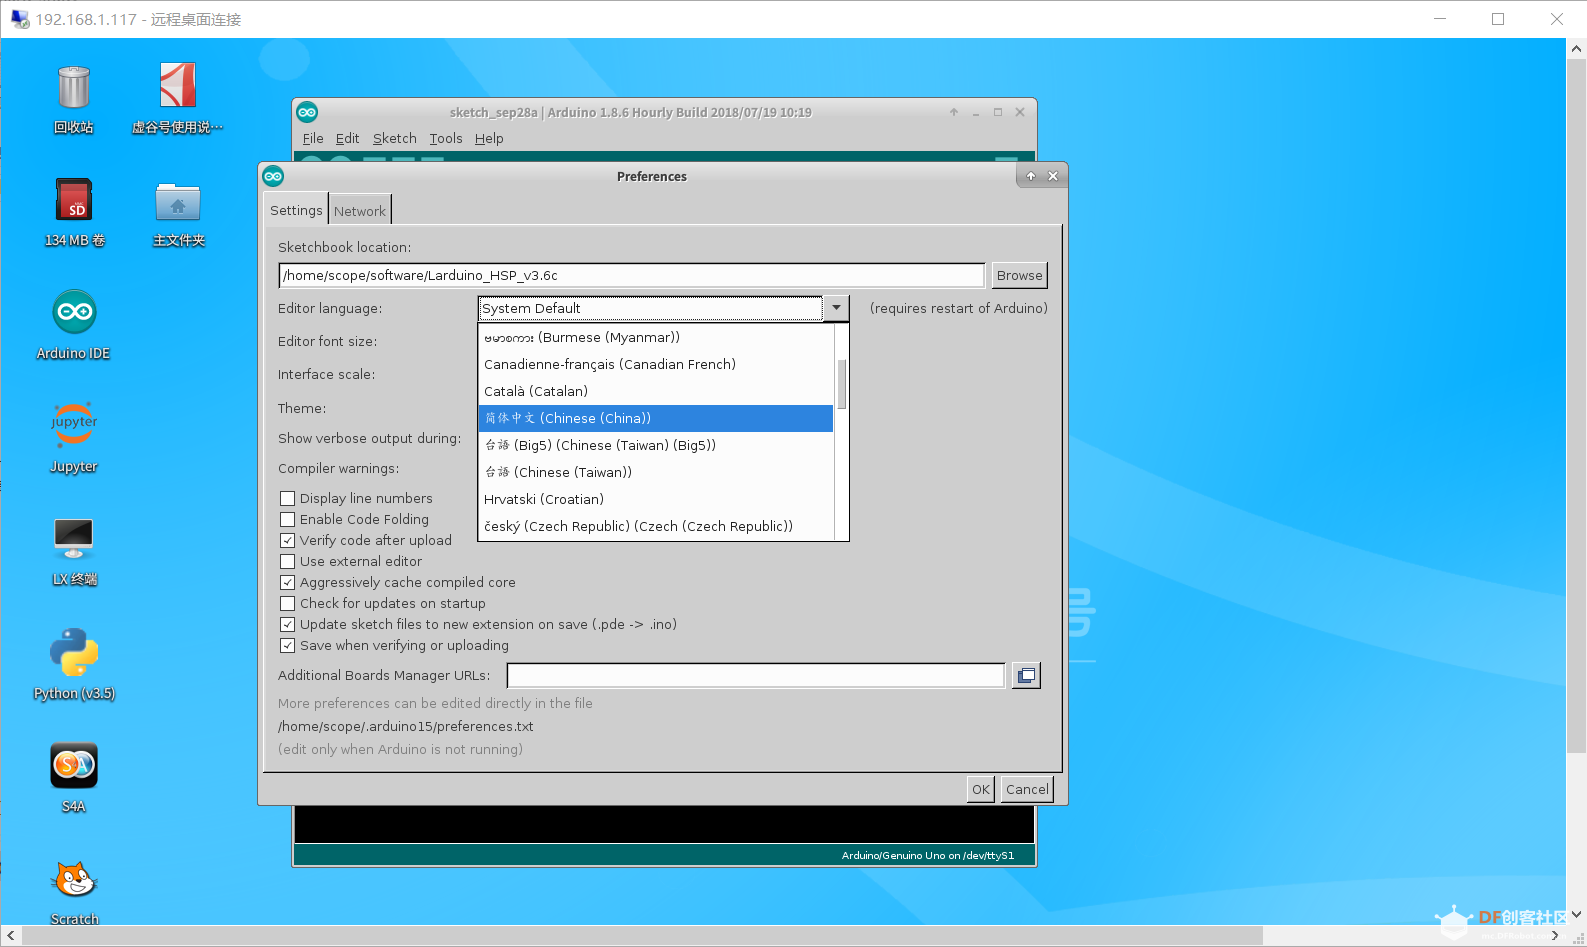
2. 设置中文显示环境
依次点击 File (文件) --> Preferences (首选项)
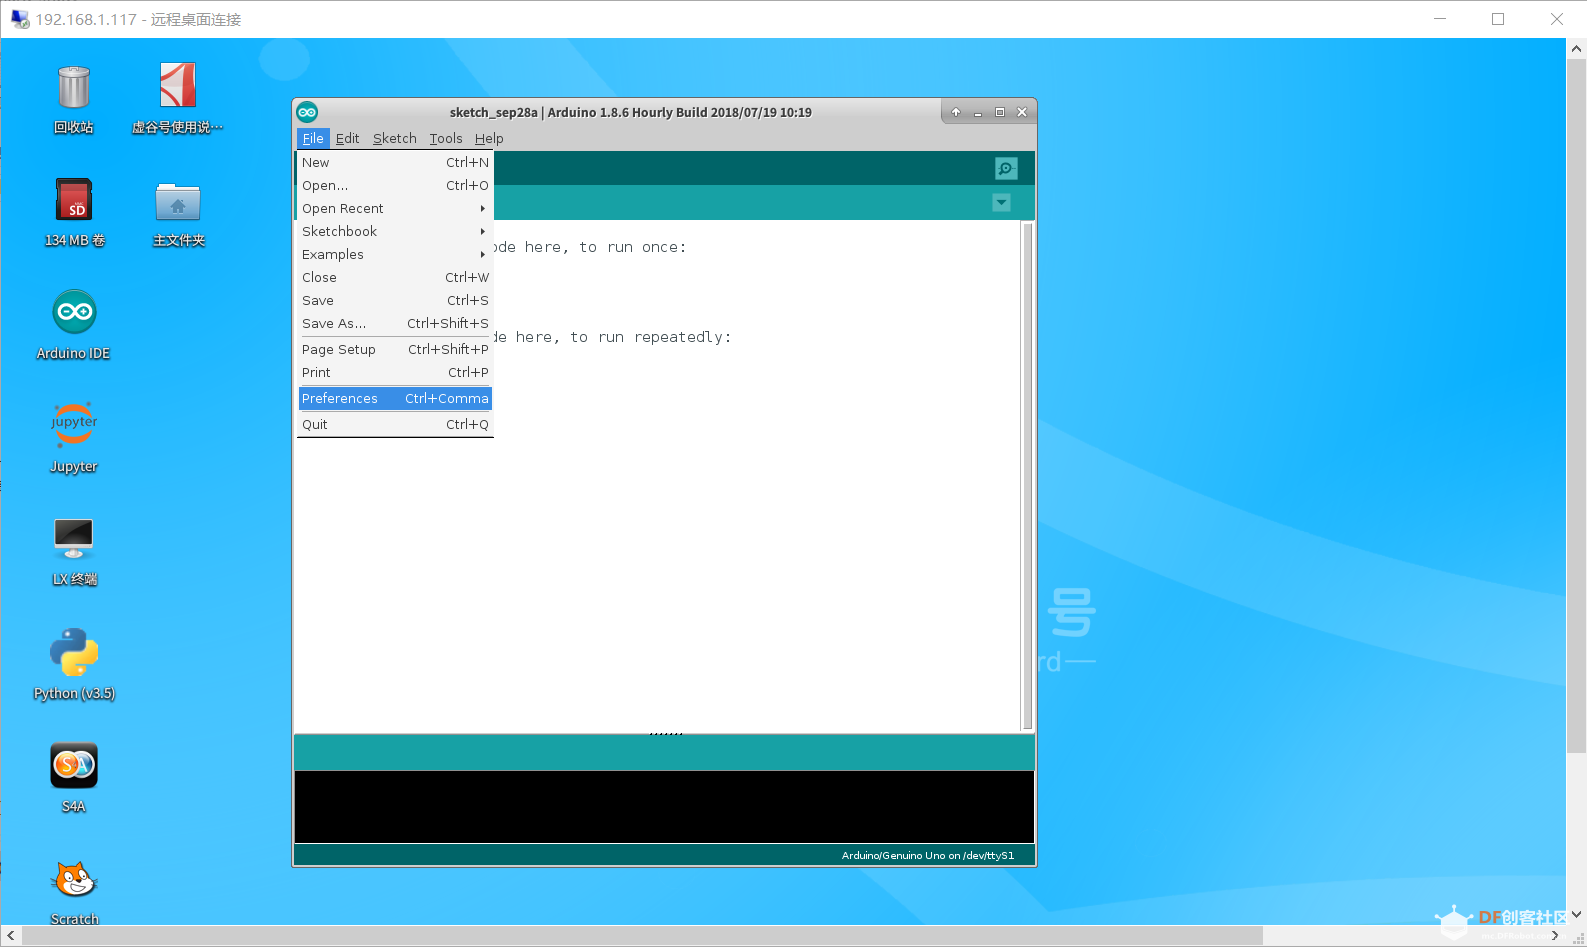
Settings (设置) --> Editor language (编辑器语言) --> 简体中文
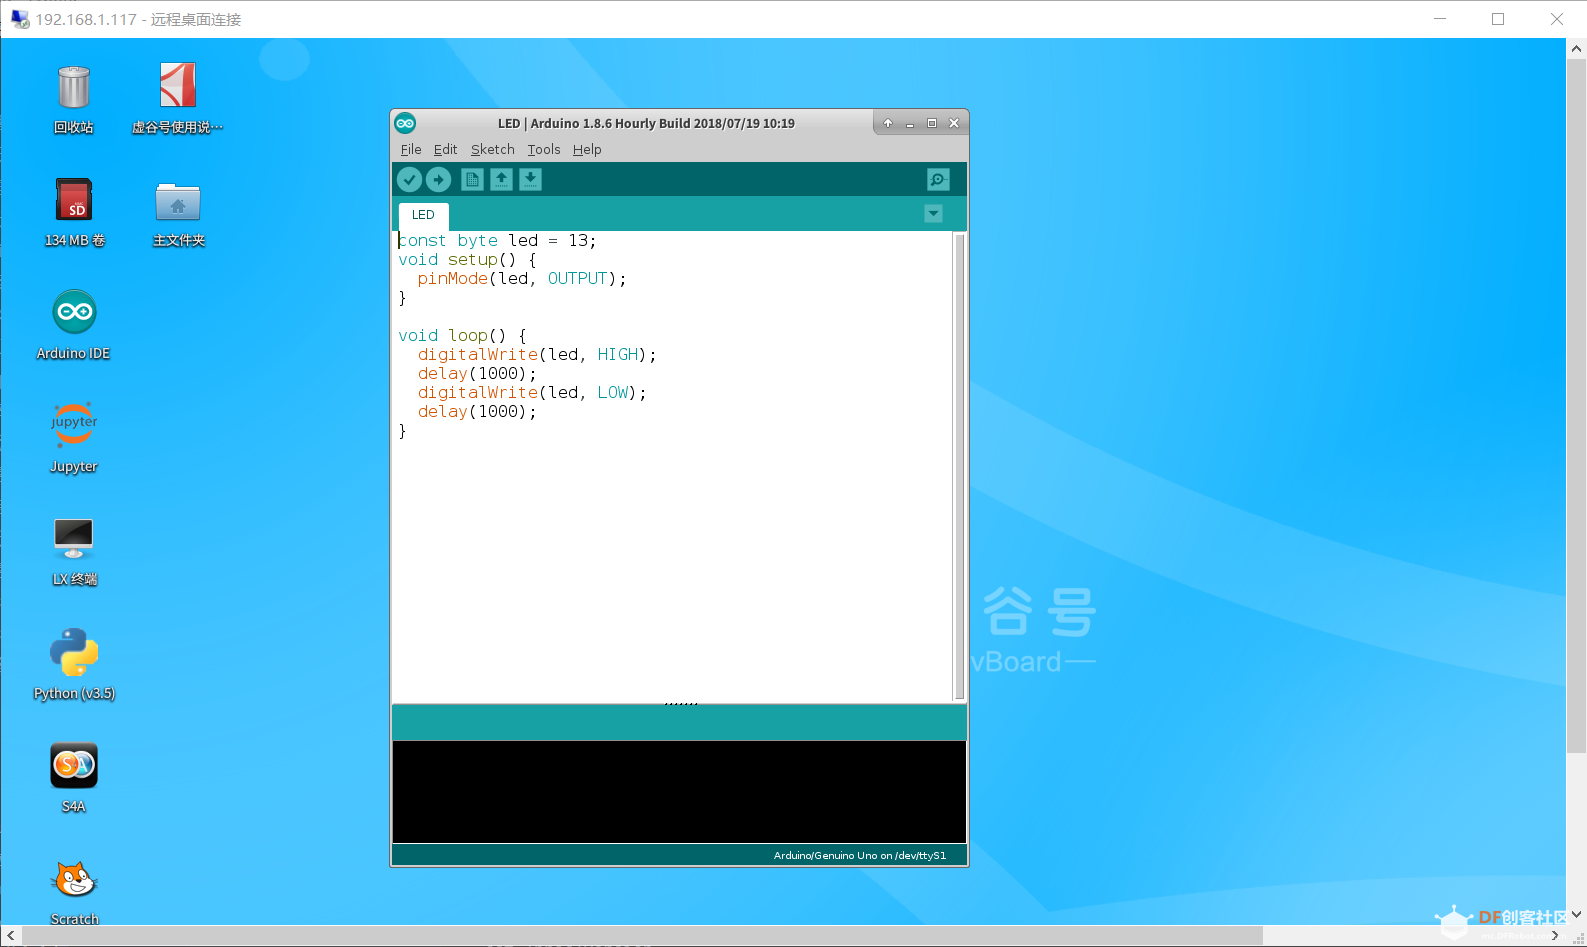
3. 经典的 blink 程序
const byte led = 13;
void setup() {
    pinMode(led, OUTPUT);
}
void loop() {
    digitalWrite(led, HIGH);
    delay(1000);
    digitalWrite(led, LOW);
    delay(1000);
}
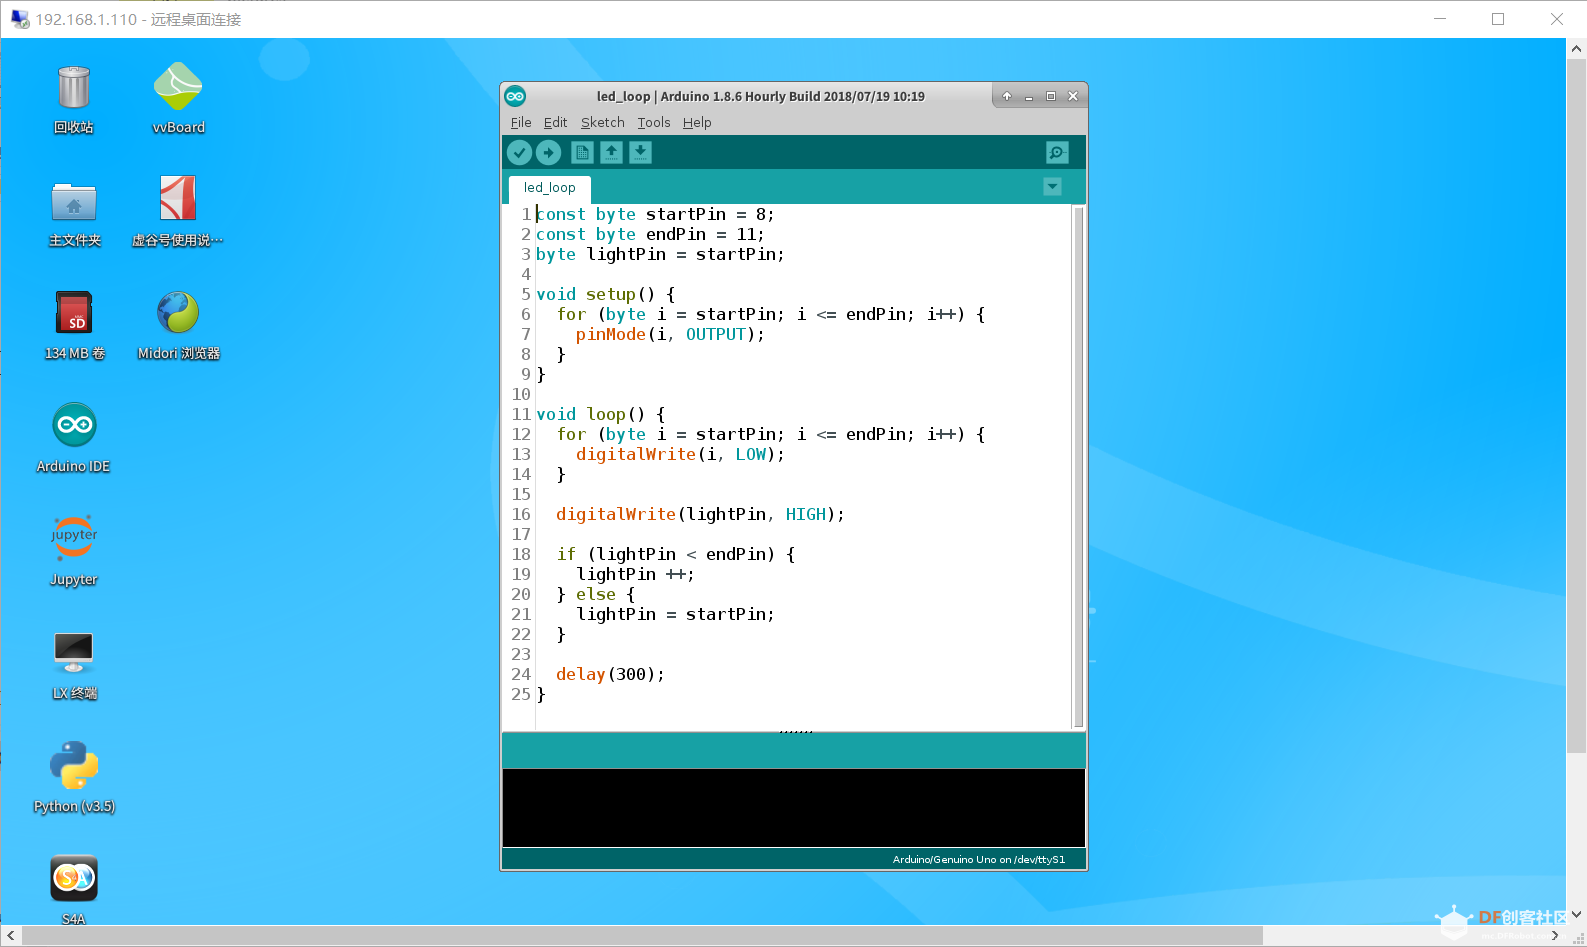
4. 跑马灯程序
```c++
const byte startPin = 8;
const byte endPin = 11;
byte lightPin = startPin;
void setup() {
for (byte i = startPin; i <= endPin; i++) {
pinMode(i, OUTPUT);
}
}
void loop() {
for (byte i = startPin; i <= endPin; i++) {
digitalWrite(i, LOW);
}
digitalWrite(lightPin, HIGH);

if (lightPin < endPin) {
    lightPin ++;
} else {
    lightPin = startPin;
}

delay(300);
}
```c++
const byte LEDs[] = {8, 9, 10, 11};
const byte total = sizeof(LEDs);
byte index = 0;
void setup() {
for (byte i = 0; i < total; i++) {
pinMode(LEDs[i], OUTPUT);
}
}
void loop() {
for (byte i = 0; i < total; i++) {
digitalWrite(LEDs[i], LOW);
}
digitalWrite(LEDs[index], HIGH);
index++;
if (index == total) {
index = 0;
}
delay(300);
}


 沪公网安备31011502402448

 置顶卡
置顶卡 变色卡
变色卡 千斤顶
千斤顶


