|
10857| 4
|
[入门] 【在 Arduino 上使用机器学习】(二)Tensorflow上构建及训练... |

|
【在 Arduino 上使用机器学习】(一)在 Arduino 开发板上安装库及添加测试样本 【在 Arduino 上使用机器学习】(二)Tensorflow上构建及训练模型 【在 Arduino 上使用机器学习】(三)在Arduino上使用自定义手势识别模型 在 TensorFlow 中训练 我们将通过 Google Colab,使用我们在上一部分从 Arduino 开发板收集的数据训练我们的机器学习模型。Colab 提供 Jupyter 笔记本,可让我们在网络浏览器中运行自己的 TensorFlow 训练。 在 Colab 中打开笔记本:https://colab.research.google.co ... nyml_workshop.ipynb 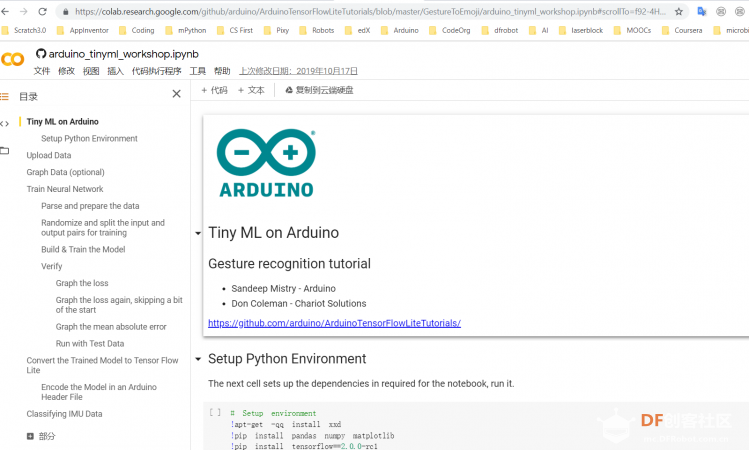 运行时会弹出警告,点击“仍然运行”  在 Colab中按照Jupyter笔记本文件逐步完成以下步骤:
1. 设置Python环境 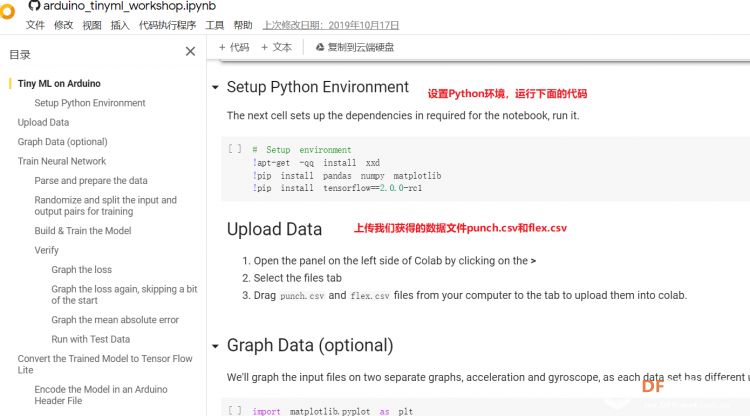 成功设置环境: 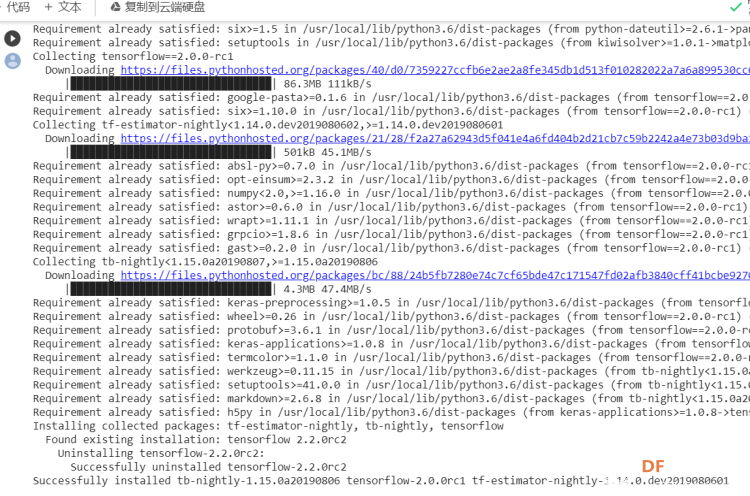 2. 上传CSV文件 我们需要将上一节获取的样本文件punch.csv和flex.csv上传workshop中对模型进行训练 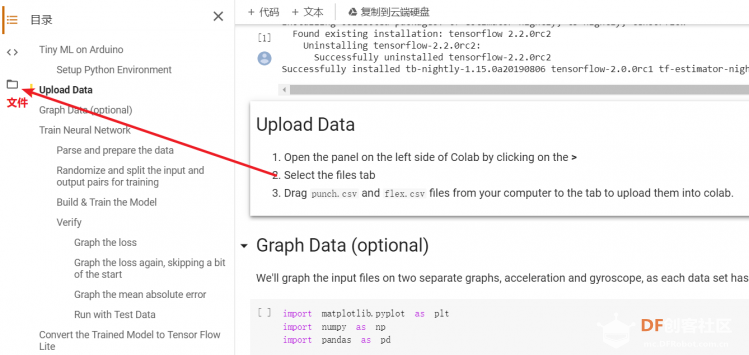 点击”上传“,选择文件后上传  上传成功: 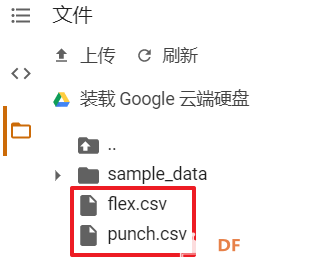 3. 图形化数据(可选) [mw_shl_code=python,false]import matplotlib.pyplot as plt import numpy as np import pandas as pd filename = "punch.csv" df = pd.read_csv("/content/" + filename) index = range(1, len(df['aX']) + 1) plt.rcParams["figure.figsize"] = (20,10) plt.plot(index, df['aX'], 'g.', label='x', linestyle='solid', marker=',') plt.plot(index, df['aY'], 'b.', label='y', linestyle='solid', marker=',') plt.plot(index, df['aZ'], 'r.', label='z', linestyle='solid', marker=',') plt.title("Acceleration") plt.xlabel("Sample #") plt.ylabel("Acceleration (G)") plt.legend() plt.show() plt.plot(index, df['gX'], 'g.', label='x', linestyle='solid', marker=',') plt.plot(index, df['gY'], 'b.', label='y', linestyle='solid', marker=',') plt.plot(index, df['gZ'], 'r.', label='z', linestyle='solid', marker=',') plt.title("Gyroscope") plt.xlabel("Sample #") plt.ylabel("Gyroscope (deg/sec)") plt.legend() plt.show() [/mw_shl_code] 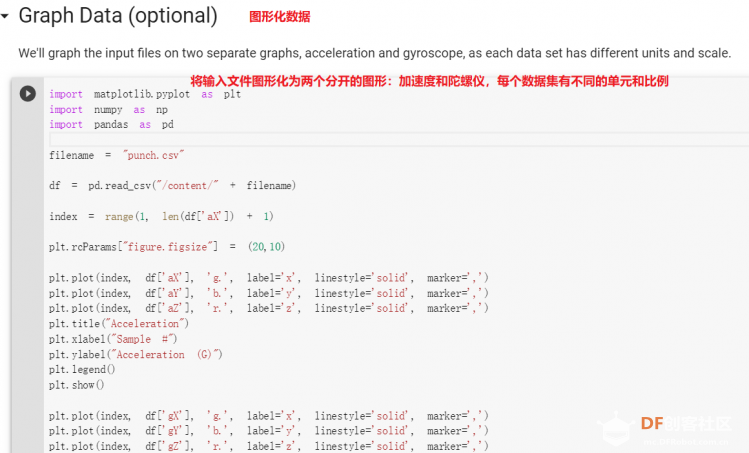 第一次图形化结果不正常,导入的数据有问题。 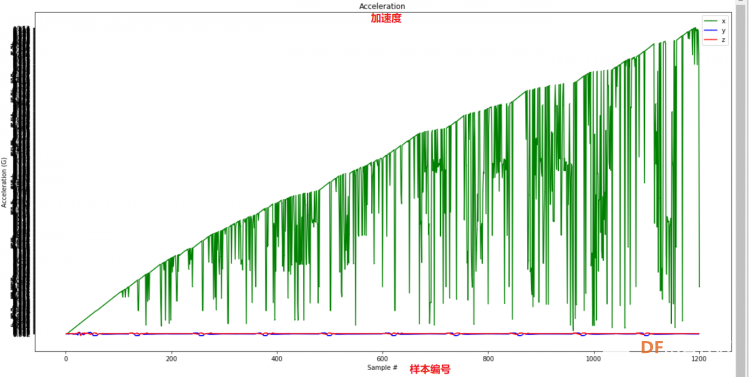 修正错误后重新图形化数据: 加速度: 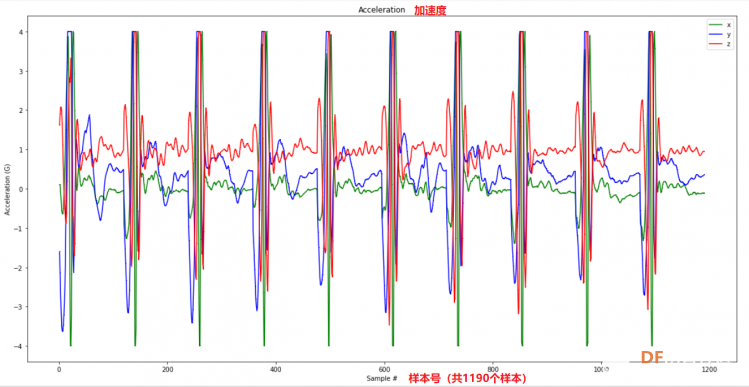 陀螺仪: 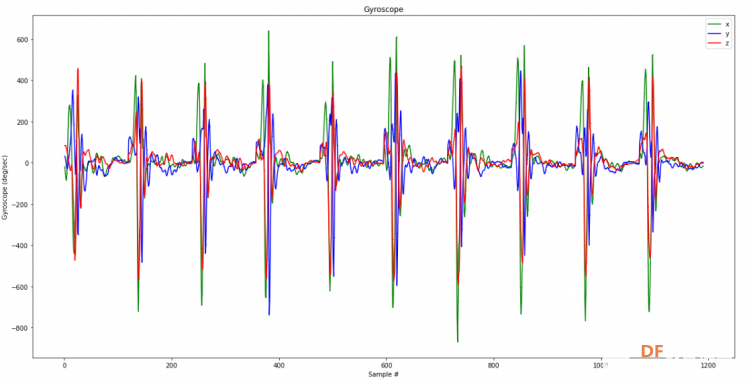 4. 训练神经网络 1) 解析和准备数据 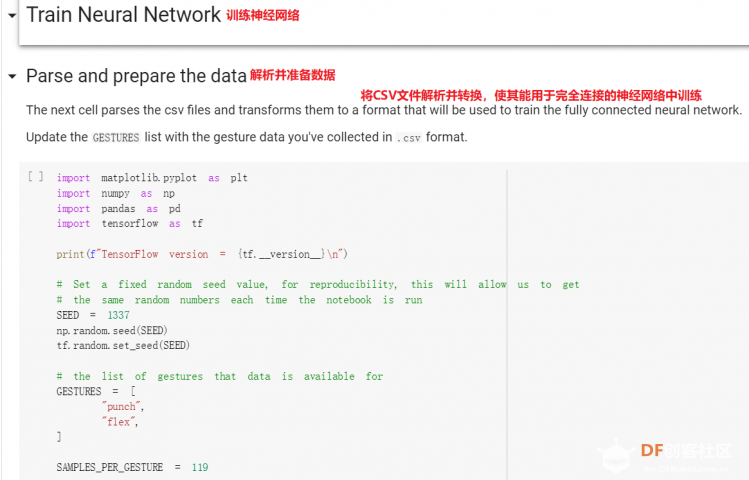 解析程序如下:[mw_shl_code=python,false]import matplotlib.pyplot as plt import numpy as np import pandas as pd import tensorflow as tf print(f"TensorFlow version = {tf.__version__}\n") # Set a fixed random seed value, for reproducibility, this will allow us to get # the same random numbers each time the notebook is run SEED = 1337 np.random.seed(SEED) tf.random.set_seed(SEED) # the list of gestures that data is available for GESTURES = [ "punch", "flex", ] SAMPLES_PER_GESTURE = 119 NUM_GESTURES = len(GESTURES) # create a one-hot encoded matrix that is used in the output ONE_HOT_ENCODED_GESTURES = np.eye(NUM_GESTURES) inputs = [] outputs = [] # read each csv file and push an input and output for gesture_index in range(NUM_GESTURES): gesture = GESTURES[gesture_index] print(f"Processing index {gesture_index} for gesture '{gesture}'.") output = ONE_HOT_ENCODED_GESTURES[gesture_index] df = pd.read_csv("/content/" + gesture + ".csv") # calculate the number of gesture recordings in the file num_recordings = int(df.shape[0] / SAMPLES_PER_GESTURE) print(f"\tThere are {num_recordings} recordings of the {gesture} gesture.") for i in range(num_recordings): tensor = [] for j in range(SAMPLES_PER_GESTURE): index = i * SAMPLES_PER_GESTURE + j # normalize the input data, between 0 to 1: # - acceleration is between: -4 to +4 # - gyroscope is between: -2000 to +2000 # print(df) tensor += [ (df['aX'][index] + 4) / 8, (df['aY'][index] + 4) / 8, (df['aZ'][index] + 4) / 8, (df['gX'][index] + 2000) / 4000, (df['gY'][index] + 2000) / 4000, (df['gZ'][index] + 2000) / 4000 ] inputs.append(tensor) outputs.append(output) # convert the list to numpy array inputs = np.array(inputs) outputs = np.array(outputs) print("Data set parsing and preparation complete.")[/mw_shl_code] 解析出现错误: 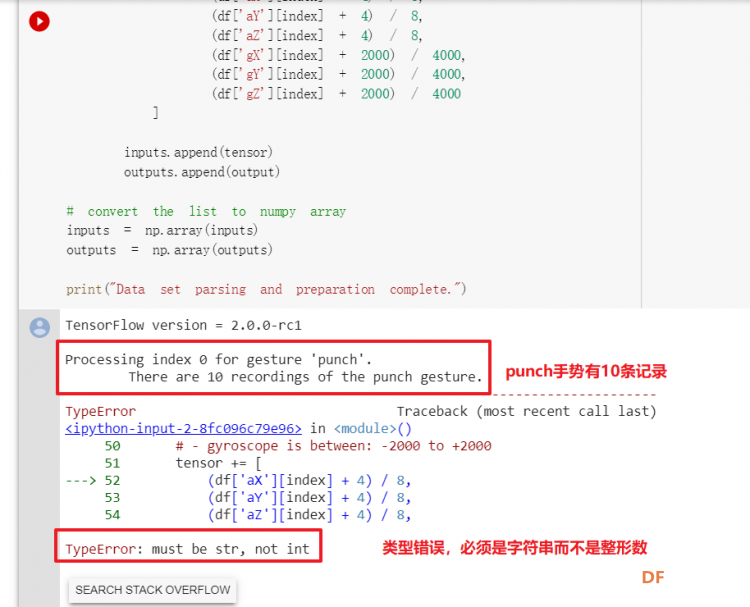 通过调试程序发现,多出来一行数据: 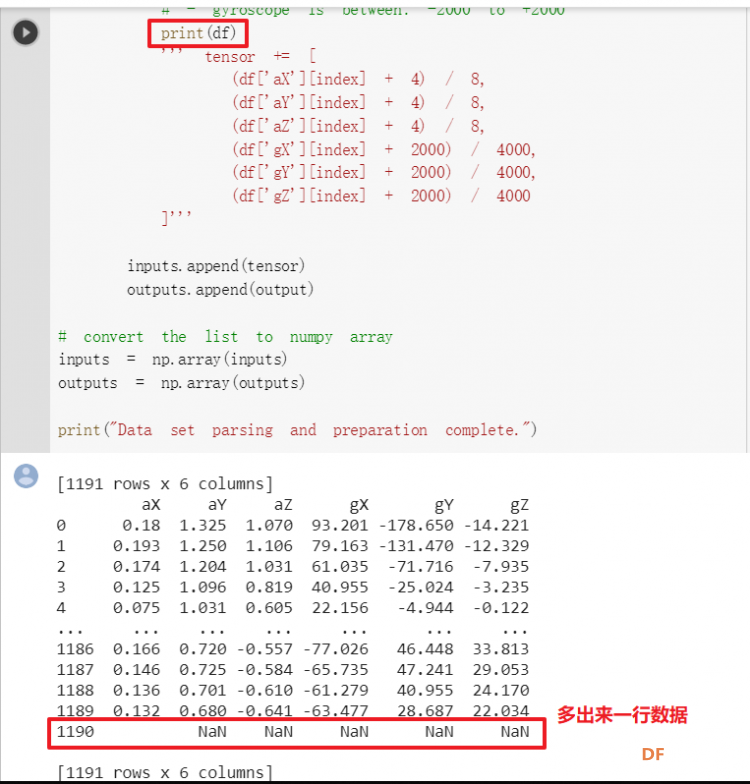 通过输出提示punch正常完成,是flex.csv的数据有问题,打开文件仔细检查,发现第1192行的第一列有一个空格,应该是全选串口监视器的内容时把最后没有数据的一行也选中了,复制到CSV中多出来一行(哭!) 解析顺利完成,没有报语法错误,完成这一步就接下来继续了。当时没有发现问题,后面在其他步骤出现问题的时候再回过头来看发现只对punch.csv进行了解析,没有对flex.csv进行解析。当时调试程序的时候把gesture的长度减了1,所以解析一个文件。这也直接导致后面的步骤频频出现问题。 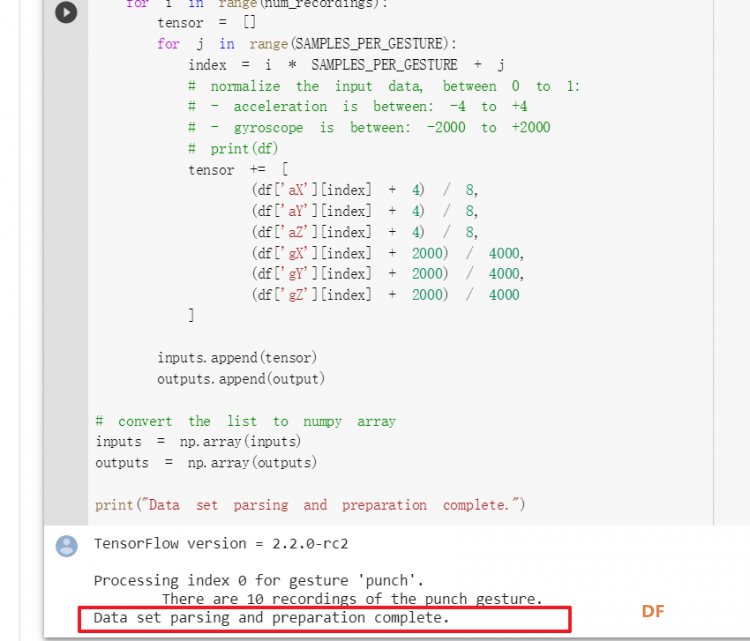 正确完成提示如下: 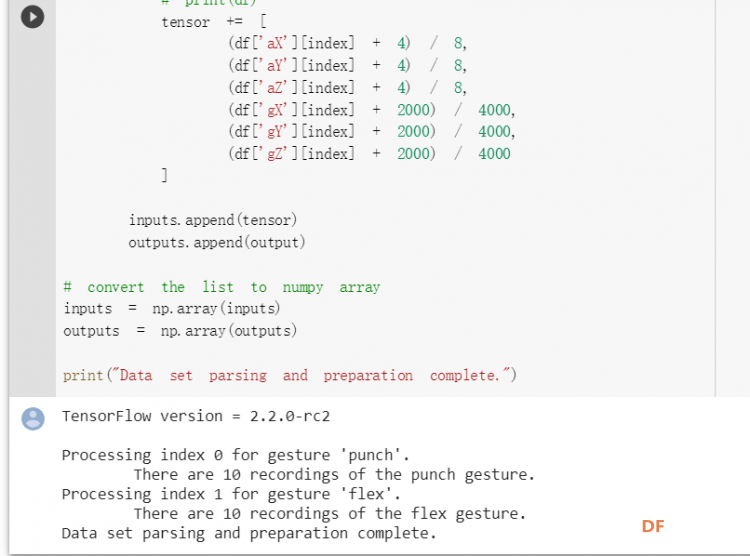 2) 随机分配和拆分输入和输出对以进行训练: [mw_shl_code=python,false]# Randomize the order of the inputs, so they can be evenly distributed for training, testing, and validation # https://stackoverflow.com/a/37710486/2020087 num_inputs = len(inputs) randomize = np.arange(num_inputs) np.random.shuffle(randomize) # Swap the consecutive indexes (0, 1, 2, etc) with the randomized indexes inputs = inputs[randomize] outputs = outputs[randomize] # Split the recordings (group of samples) into three sets: training, testing and validation TRAIN_SPLIT = int(0.6 * num_inputs) TEST_SPLIT = int(0.2 * num_inputs + TRAIN_SPLIT) inputs_train, inputs_test, inputs_validate = np.split(inputs, [TRAIN_SPLIT, TEST_SPLIT]) outputs_train, outputs_test, outputs_validate = np.split(outputs, [TRAIN_SPLIT, TEST_SPLIT]) print("Data set randomization and splitting complete.")[/mw_shl_code] 将输入、输出随机化和分割以进行训练 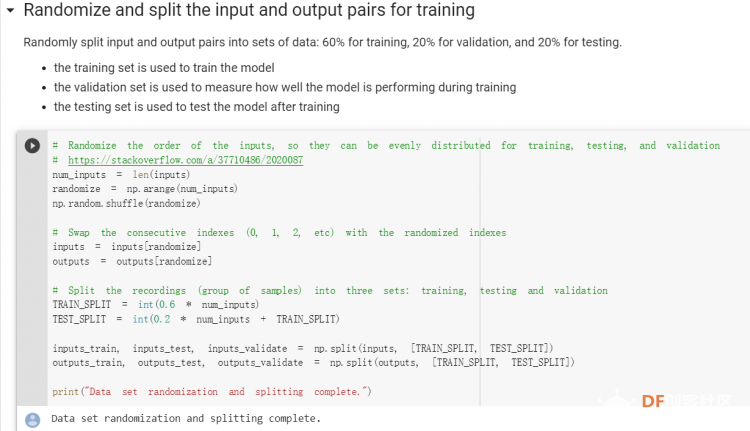 3) 构建和训练模型 [mw_shl_code=python,false]# build the model and train it model = tf.keras.Sequential() model.add(tf.keras.layers.Dense(50, activation='relu')) # relu is used for performance model.add(tf.keras.layers.Dense(15, activation='relu')) model.add(tf.keras.layers.Dense(NUM_GESTURES, activation='softmax')) # softmax is used, because we only expect one gesture to occur per input model.compile(optimizer='rmsprop', loss='mse', metrics=['mae']) history = model.fit(inputs_train, outputs_train, epochs=600, batch_size=1, validation_data=(inputs_validate, outputs_validate)) [/mw_shl_code] 一共600个epoch 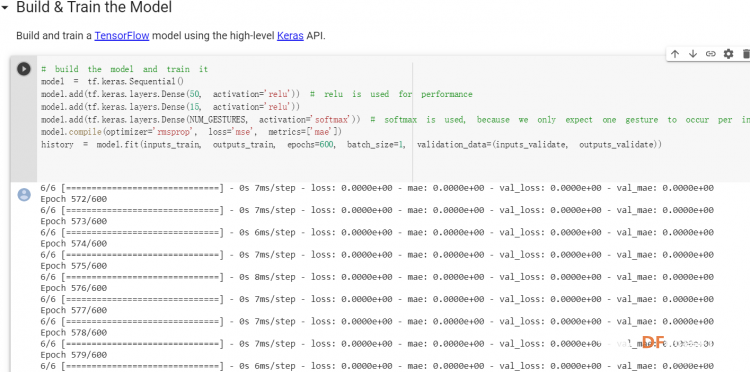 训练时发现loss为0(也是上面同样的原因),重新解析数据后再次训练loss显示正常了。 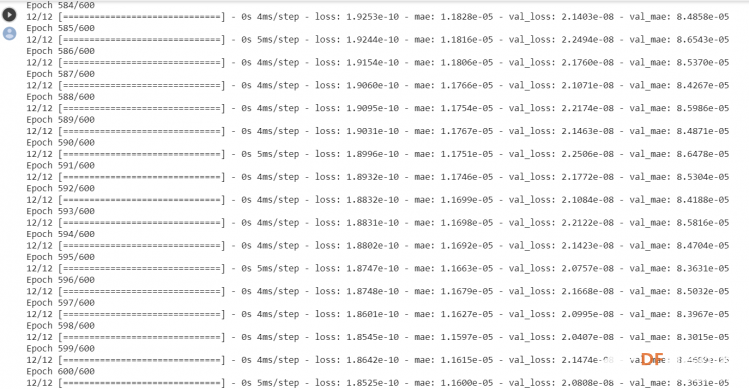 4) 图形化损失 [mw_shl_code=python,false]# increase the size of the graphs. The default size is (6,4). plt.rcParams["figure.figsize"] = (20,10) # graph the loss, the model above is configure to use "mean squared error" as the loss function loss = history.history['loss'] val_loss = history.history['val_loss'] epochs = range(1, len(loss) + 1) plt.plot(epochs, loss, 'g.', label='Training loss') plt.plot(epochs, val_loss, 'b', label='Validation loss') plt.title('Training and validation loss') plt.xlabel('Epochs') plt.ylabel('Loss') plt.legend() plt.show() print(plt.rcParams["figure.figsize"])[/mw_shl_code] 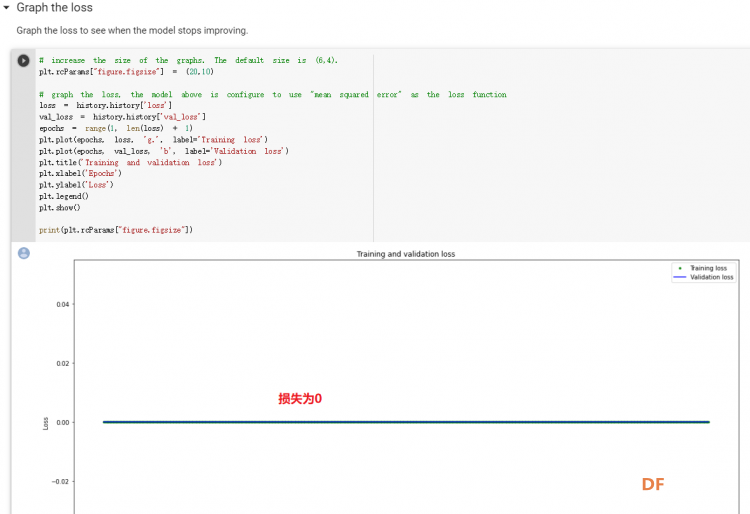 5) 验证 a. 图形化损失 [mw_shl_code=python,false]# increase the size of the graphs. The default size is (6,4). plt.rcParams["figure.figsize"] = (20,10) # graph the loss, the model above is configure to use "mean squared error" as the loss function loss = history.history['loss'] val_loss = history.history['val_loss'] epochs = range(1, len(loss) + 1) plt.plot(epochs, loss, 'g.', label='Training loss') plt.plot(epochs, val_loss, 'b', label='Validation loss') plt.title('Training and validation loss') plt.xlabel('Epochs') plt.ylabel('Loss') plt.legend() plt.show() print(plt.rcParams["figure.figsize"])[/mw_shl_code] 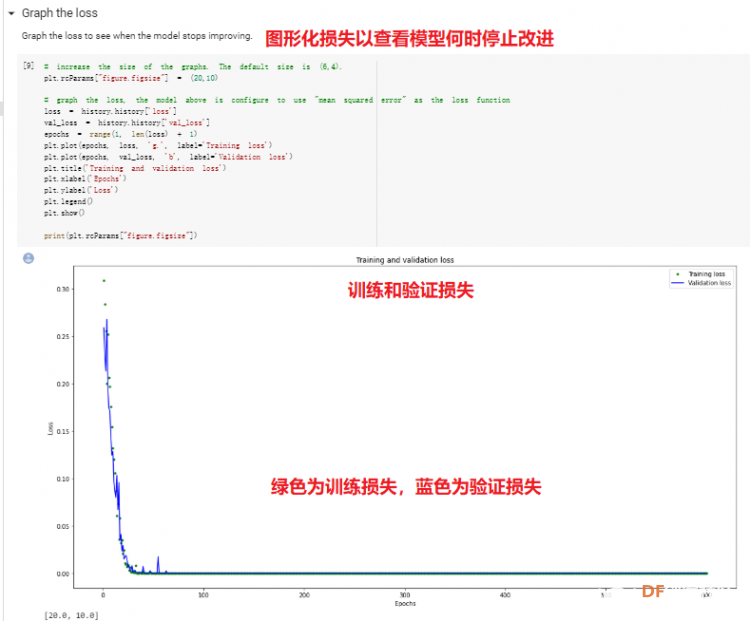 b. 再次图形化损失,跳过开头部分 [mw_shl_code=python,false]# graph the loss again skipping a bit of the start SKIP = 100 plt.plot(epochs[SKIP:], loss[SKIP:], 'g.', label='Training loss') plt.plot(epochs[SKIP:], val_loss[SKIP:], 'b.', label='Validation loss') plt.title('Training and validation loss') plt.xlabel('Epochs') plt.ylabel('Loss') plt.legend() plt.show()[/mw_shl_code] 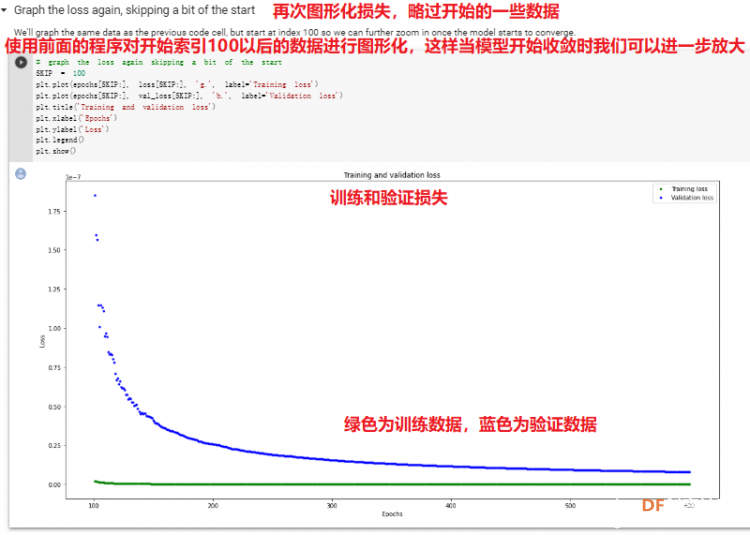 c. 图形化平均绝对误差 [mw_shl_code=python,false]# graph of mean absolute error mae = history.history['mae'] val_mae = history.history['val_mae'] plt.plot(epochs[SKIP:], mae[SKIP:], 'g.', label='Training MAE') plt.plot(epochs[SKIP:], val_mae[SKIP:], 'b.', label='Validation MAE') plt.title('Training and validation mean absolute error') plt.xlabel('Epochs') plt.ylabel('MAE') plt.legend() plt.show()[/mw_shl_code] 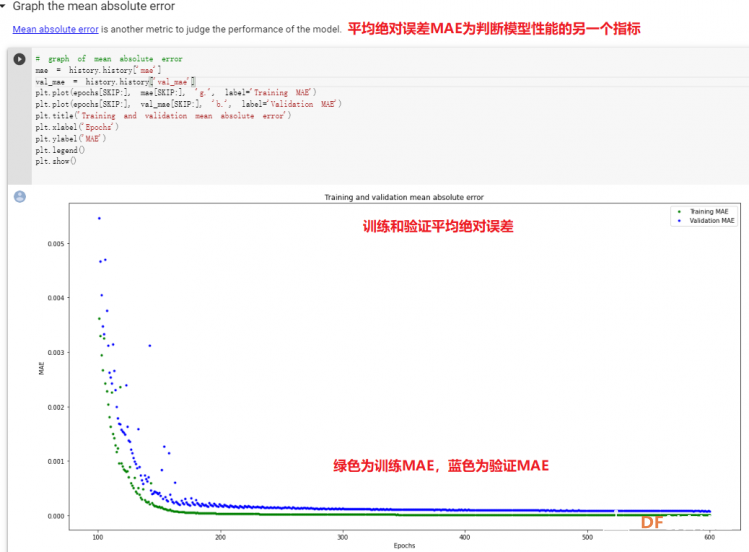 d. 运行测试数据 [mw_shl_code=python,false]# use the model to predict the test inputs predictions = model.predict(inputs_test) # print the predictions and the expected ouputs print("predictions =\n", np.round(predictions, decimals=3)) print("actual =\n", outputs_test) # Plot the predictions along with to the test data plt.clf() plt.title('Training data predicted vs actual values') plt.plot(inputs_test, outputs_test, 'b.', label='Actual') plt.plot(inputs_test, predictions, 'r.', label='Predicted') plt.show()[/mw_shl_code] 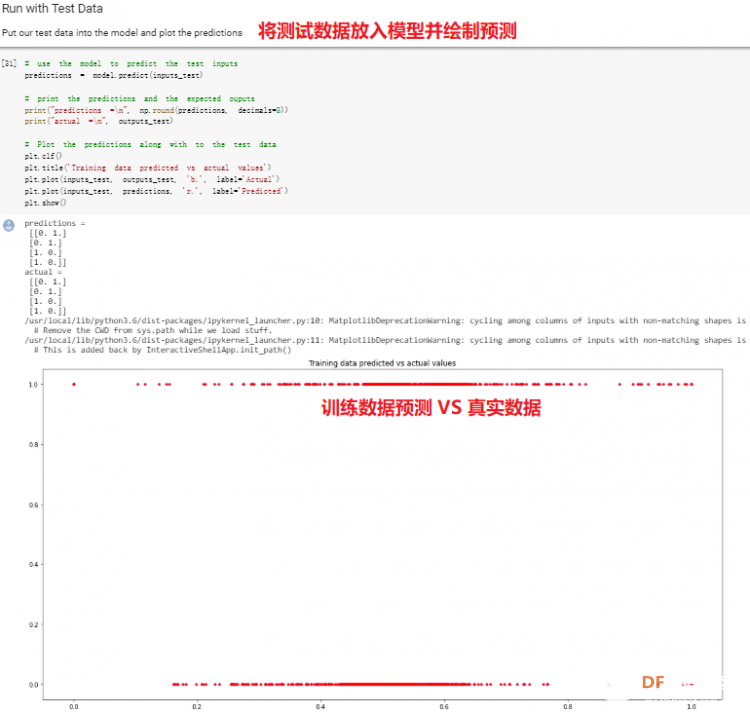 5. 转换训练模型到Tensor Flow Lte [mw_shl_code=python,false]# Convert the model to the TensorFlow Lite format without quantization converter = tf.lite.TFLiteConverter.from_keras_model(model) tflite_model = converter.convert() # Save the model to disk open("gesture_model.tflite", "wb").write(tflite_model) import os basic_model_size = os.path.getsize("gesture_model.tflite") print("Model is %d bytes" % basic_model_size) [/mw_shl_code] 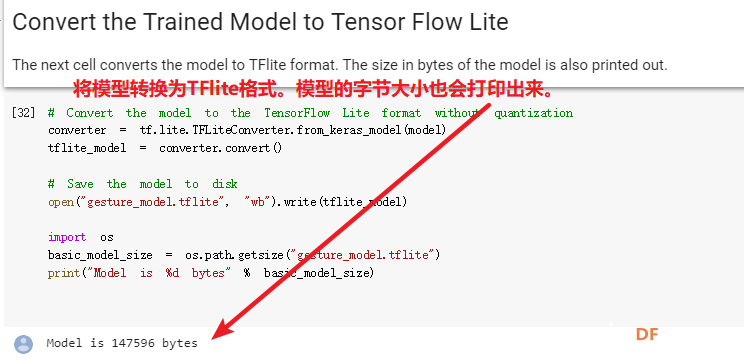 7. 将模型编码到Arduino头文件中 [mw_shl_code=python,false]!echo "const unsigned char model[] = {" > /content/model.h !cat gesture_model.tflite | xxd -i >> /content/model.h !echo "};" >> /content/model.h import os model_h_size = os.path.getsize("model.h") print(f"Header file, model.h, is {model_h_size:,} bytes.") print("\nOpen the side panel (refresh if needed). Double click model.h to download the file.")[/mw_shl_code] 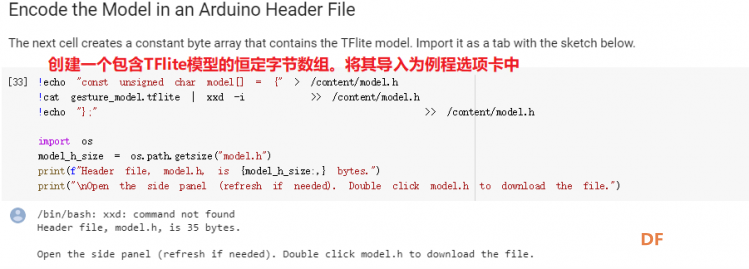 头文件生成后,将文件下载到本地: 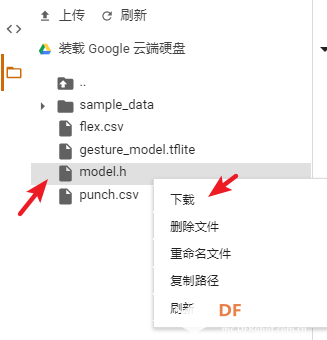 下一节我们回到ARDUINO NANO 33 BLE SENSE使用我们训练好的模型。 |
 沪公网安备31011502402448
© 2013-2026 Comsenz Inc. Powered by Discuz! X3.4 Licensed