|
11325| 2
|
[ESP8266/ESP32] 利用Phyphox和ESP32蓝牙做分压电路实验 |
|
【本文经焦作创客张怀华老师授权转发】 原文链接: 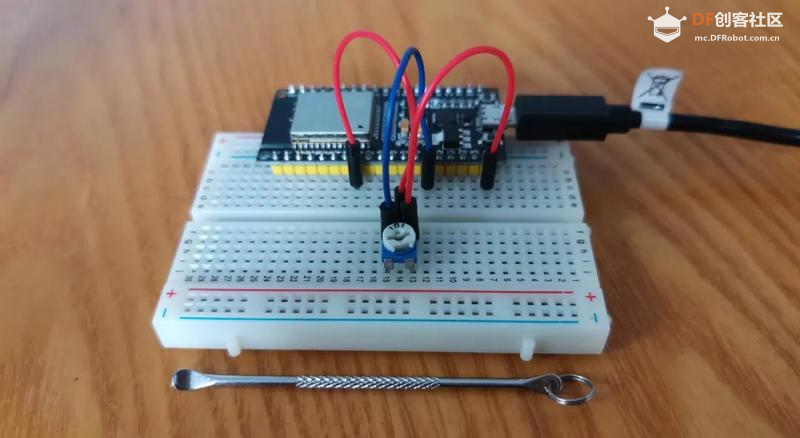 近日,微主刚刚学会了利用蓝牙技术将开发板采集的数据传输给Phyphox的方法,就趁热打铁,复习巩固,做了一个电位计的分压实验。 实验中用到的面包板、杜邦线和电位计都是焦作市创客教育名师工作室指导专家、顺时针魔方俱乐部技术总监李璐老师赠送的。 用杜邦线将电位计的两侧固定引脚与开发板ESP32的V5脚和GND脚相连,将可动引脚与IO33脚相连。 套用上次“电容器充放电实验”的Phyphox实验程序和ESP32源码,将它们修改成适合“分压电路实验”的需要。然后将实验的ESP32源码编译烧录到开发板上,将Phyphox实验程序加载到Phyphox系统内。 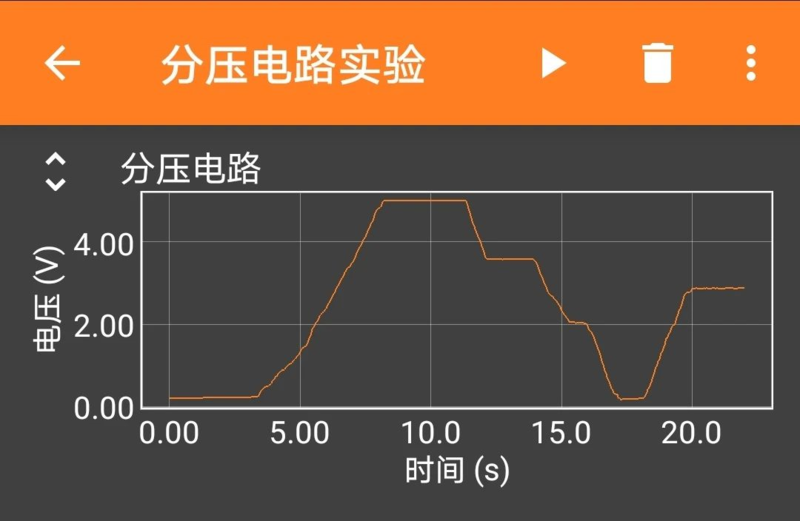 然后,将智能手机中的Phyphox实验与开发板ESP32建立蓝牙连接,Phyphox就可以接受和处理ESP32传来的电压数据了。 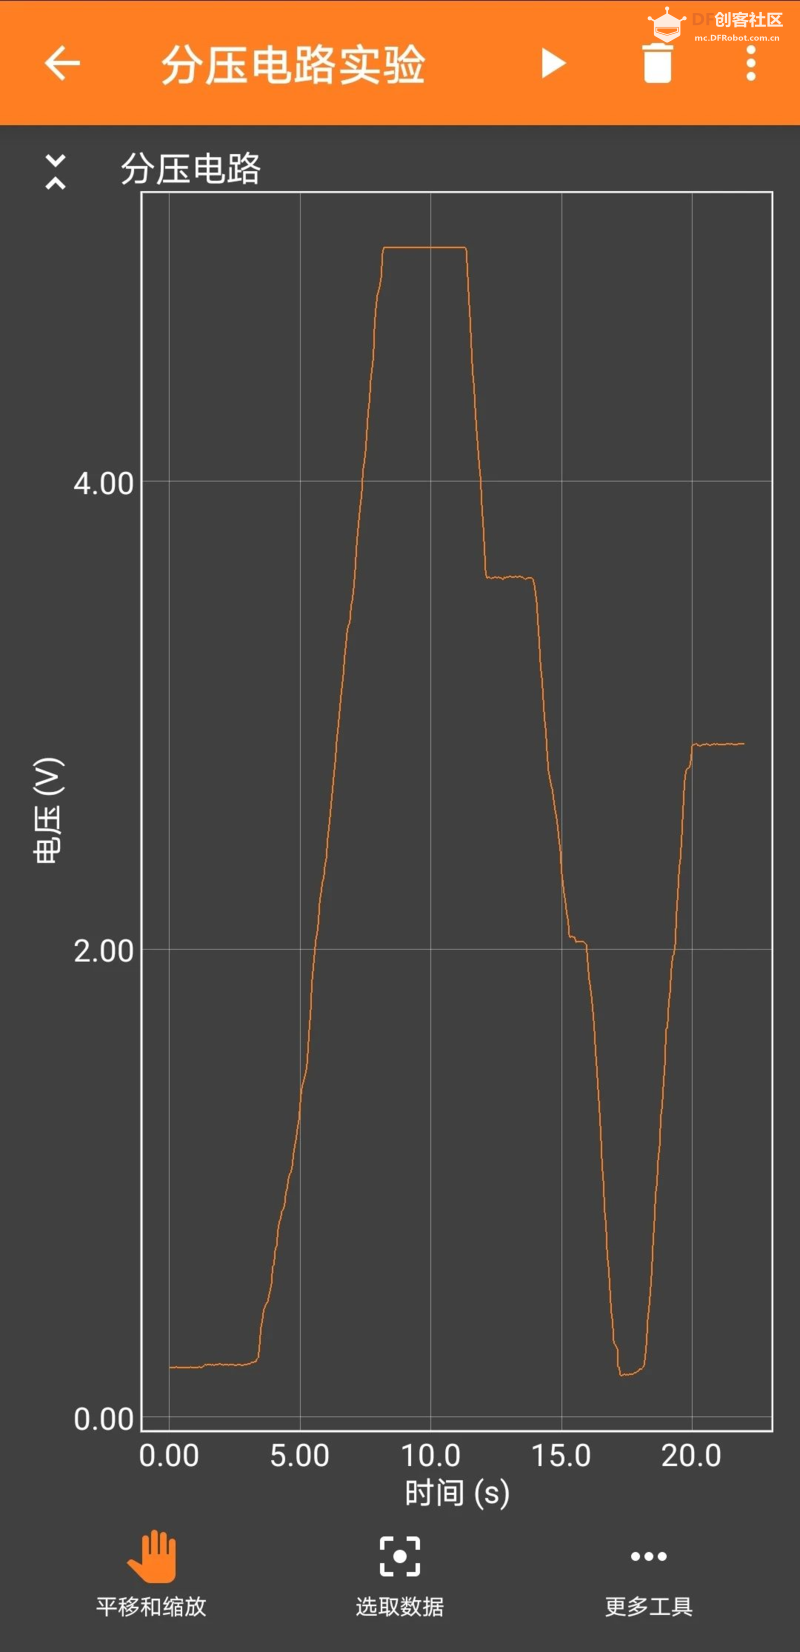 有了蓝牙技术的支持,Phyphox可以将智能手机转化为一台可以随身携带的数据分析器和图形显示器。 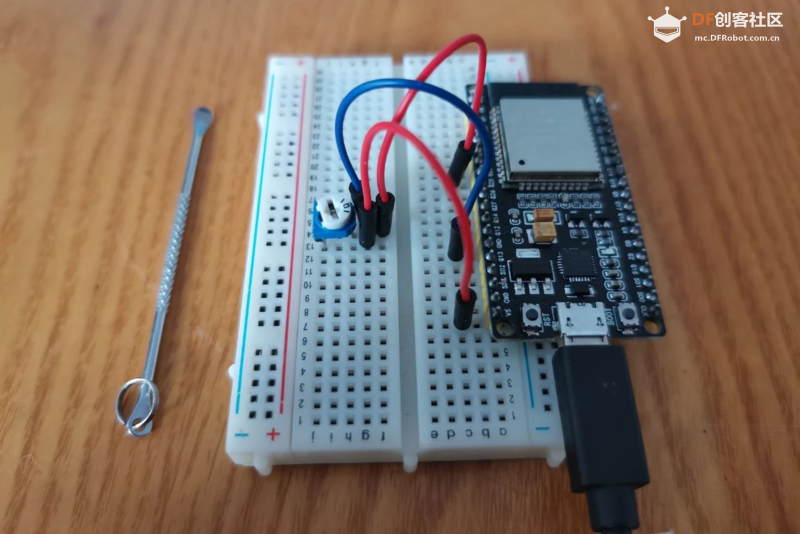 【转发后记】 张怀华老师是我在河南省中小学信息能力提升2.0工程专家培训中认识的,张老师任教于焦作十一中学,在教学中不断进行创新技术与课堂教学整合探索与实践。开源电子与学科融合的创新学科教学是创客教育的一个发展方向,张老师的探索为我们指明了方向。 张老师的探索是为了解决Phyphox内置传感器不足而采取的一种补救措施,其实除了电学实验以外,Phyphox的应用范围已经非常广了,基本上把手机的科学探究能力发挥到了极限。 张老师说:phyphox是目前智能手机做科学实验最好的app。高中传感器部分是专门的一章,教材上有,但是从来不讲,直接跳过。以后传感器这部分,就不要跳过去了,可以好好地讲一讲。  【相关资源】 phyphoxWIKI: 以下复制自WIKI,仅供参考,请以原文为准。 Using a ESP32: In this example we use the HIMALAYA ESP32 Dev Board. Since the ESP32 isn't an official Arduino Board, a library to support this micro-controller in the Arduino-IDE has to be used. To do so start the Arduino-IDE and open: File > Preferences Then past the following link into the Field “Additional Board Manager URLs:” Afterwards open the Board Manager: Tools > Board > Boardmanager 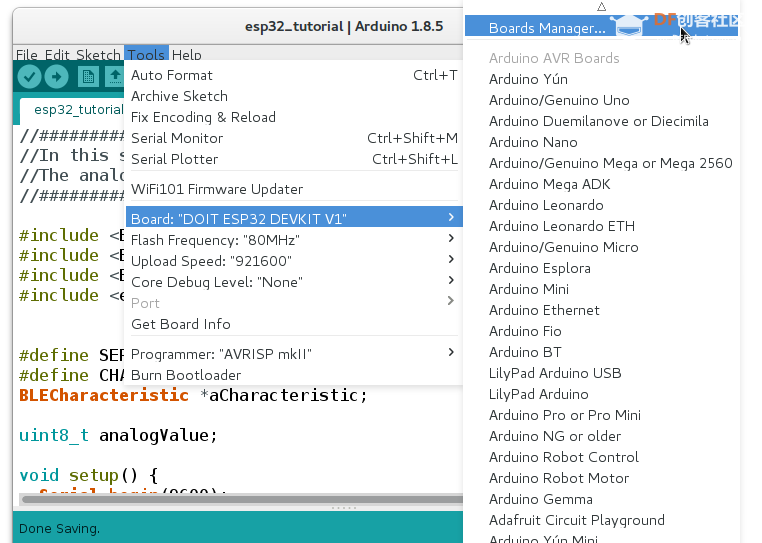 Search for ESP32 platform and install the library. Choose the Board DOIT ESP32 DEVKIT V1 Tools > Board: ”DOIT ESP32 DEVKIT V1” To check if the library is installed correctly, flash one of the basic examples on the micro-controller: File > Examples > Basic > Blink After the sketch is flashed on the ESP32 the LED should start flashing. Afterwards a library has to be installed in order to use BLE on the ESP32. For Example the BLE library by Neil Kolban which can be found on github: Download the library as a zip file. These zip file can be included directly via (In the Arduino IDE) Sketch > Include Library > Add .ZIP Library... > select the downloaded file > Open After both libraries are installed the following sketch can be used to initialize a Bluetooth Low Energy server with one service and one characteristic. In this sketch the analog input on Pin 36 is readout and the value is written into the characteristic. The additional phyphox file subscribes to notifications from this characteristic and plots the received values. |
 沪公网安备31011502402448
© 2013-2026 Comsenz Inc. Powered by Discuz! X3.4 Licensed

 置顶卡
置顶卡 变色卡
变色卡 千斤顶
千斤顶

 活跃会员
活跃会员
 宣传大使
宣传大使
 版主限定
版主限定
 牛X认证
牛X认证
 老版主限定
老版主限定
 创作达人
创作达人
 小蘑菇
小蘑菇
 蘑菇人
蘑菇人
 蘑菇老人
蘑菇老人
 荣誉教师
荣誉教师
 编辑选择奖
编辑选择奖
 物联网挑战
物联网挑战
 编辑选择奖
编辑选择奖
 ARD DAY
 编辑选择奖
编辑选择奖
 创客造
创客造
 志“童”道合
 编辑选择奖
编辑选择奖


