|
12361| 5
|
[ESP8266/ESP32] DFRobot ESP32 S3 模组的最小系统 |
|
前一段入手了 ESP32-S3-WROOM-1-N4模组(DFR0896),拿到手之后发现包装非常有意思:类似于糖果。 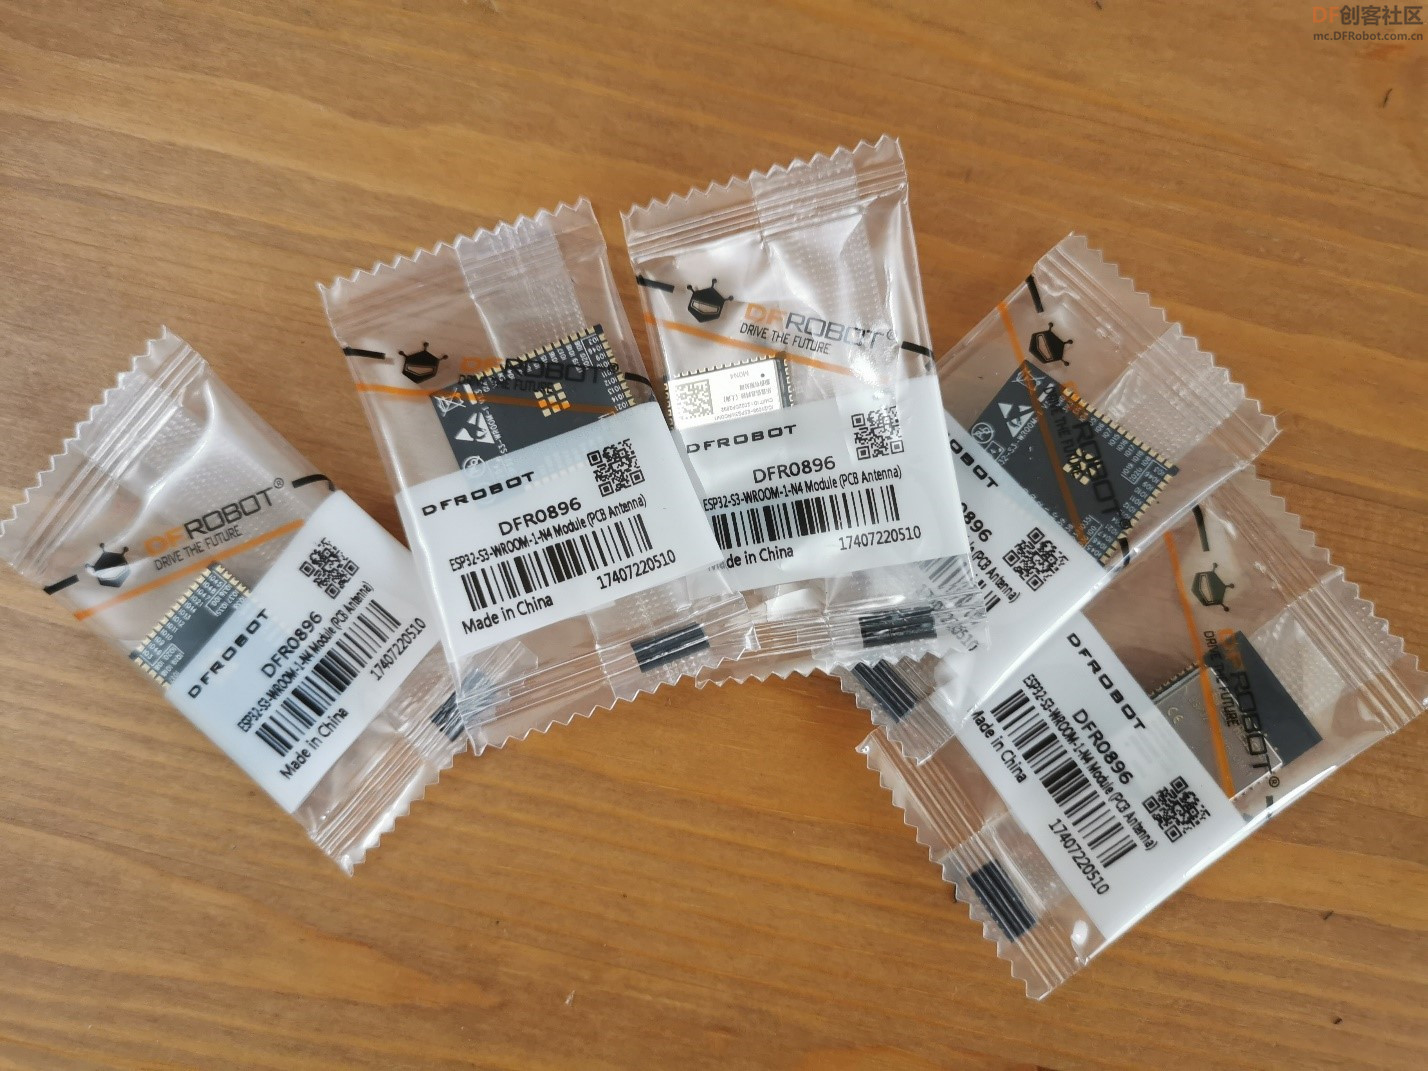 接下来就开始研究如何使用它们。经过研究电路部分和之前的 ESP32 S3非常类似,同时参考之前 ESP32 S2 的设计,绘制一个最小系统的电路图。因为这是ESP32S3 模块,工作需要的晶振已经集成在模块内部中,所以外围只需要很少的元件即可工作: 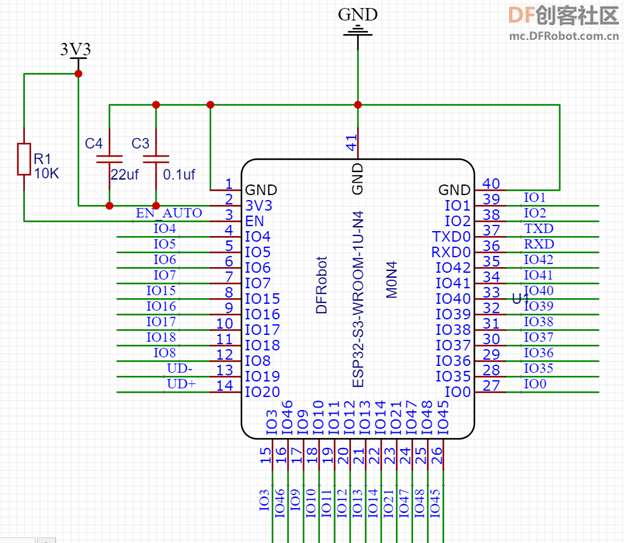 其余部分是特别预留的USB接口,以及串口下载部分和供电部分(POWER): 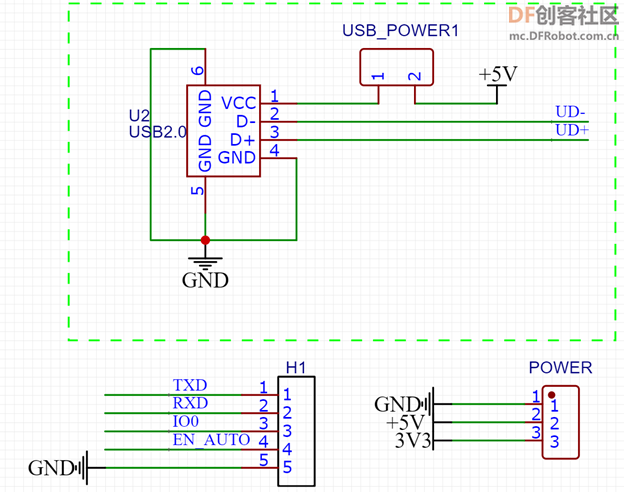 下载部分提供了 TX 和 RX, 此外 IO0和 EN_AUTO 配合能够实现自动下载。供电部分由外部引入3.3V和5V 电源,后者是专门给USB设备进行供电的。 特别注意:嘉立创库中的 ESP32 S3 模块绘制有问题,元件引脚和PAD对应错误,因此我自己修改出一个命名为 DFROBOT ESP32-S3-WROOM-1U-N4。另外,ESP32S3 和 S2 模组虽然都是邮票孔,但是引脚间距不同,在使用中如果使用 S2作为参考务必注意这一点。 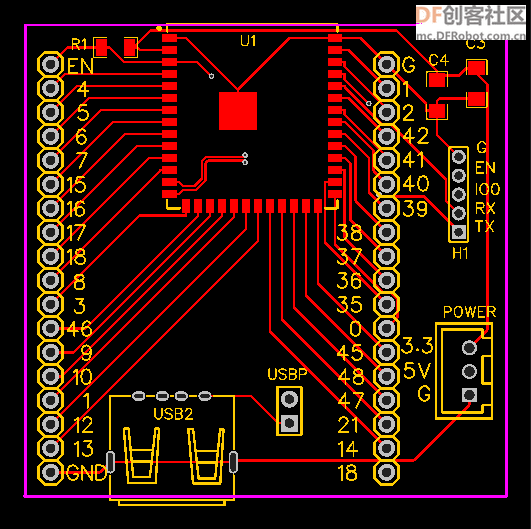 此外,上图和手册相比中间EPAD稍微有些差别,我是直接将他们放在一起的没有分开成9个方块,这个PAD更多是为了散热考虑,所以修改不会由影响。 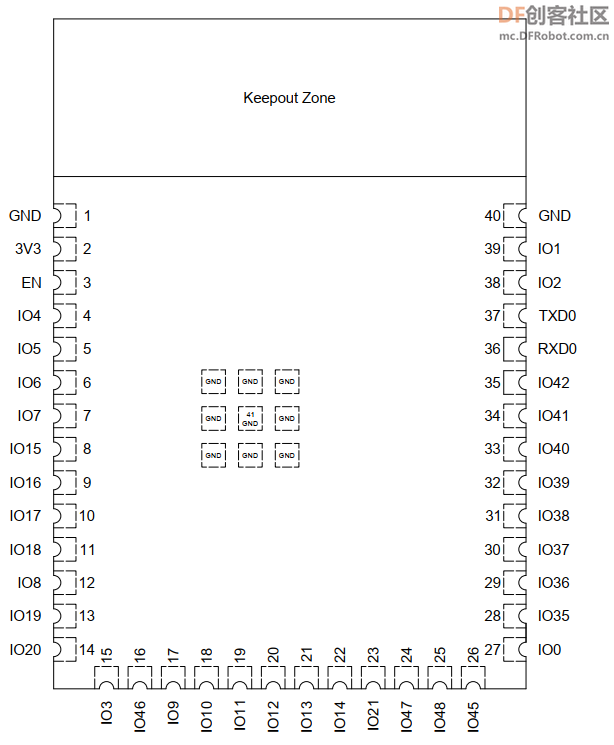 拿到手的板子是这样的: 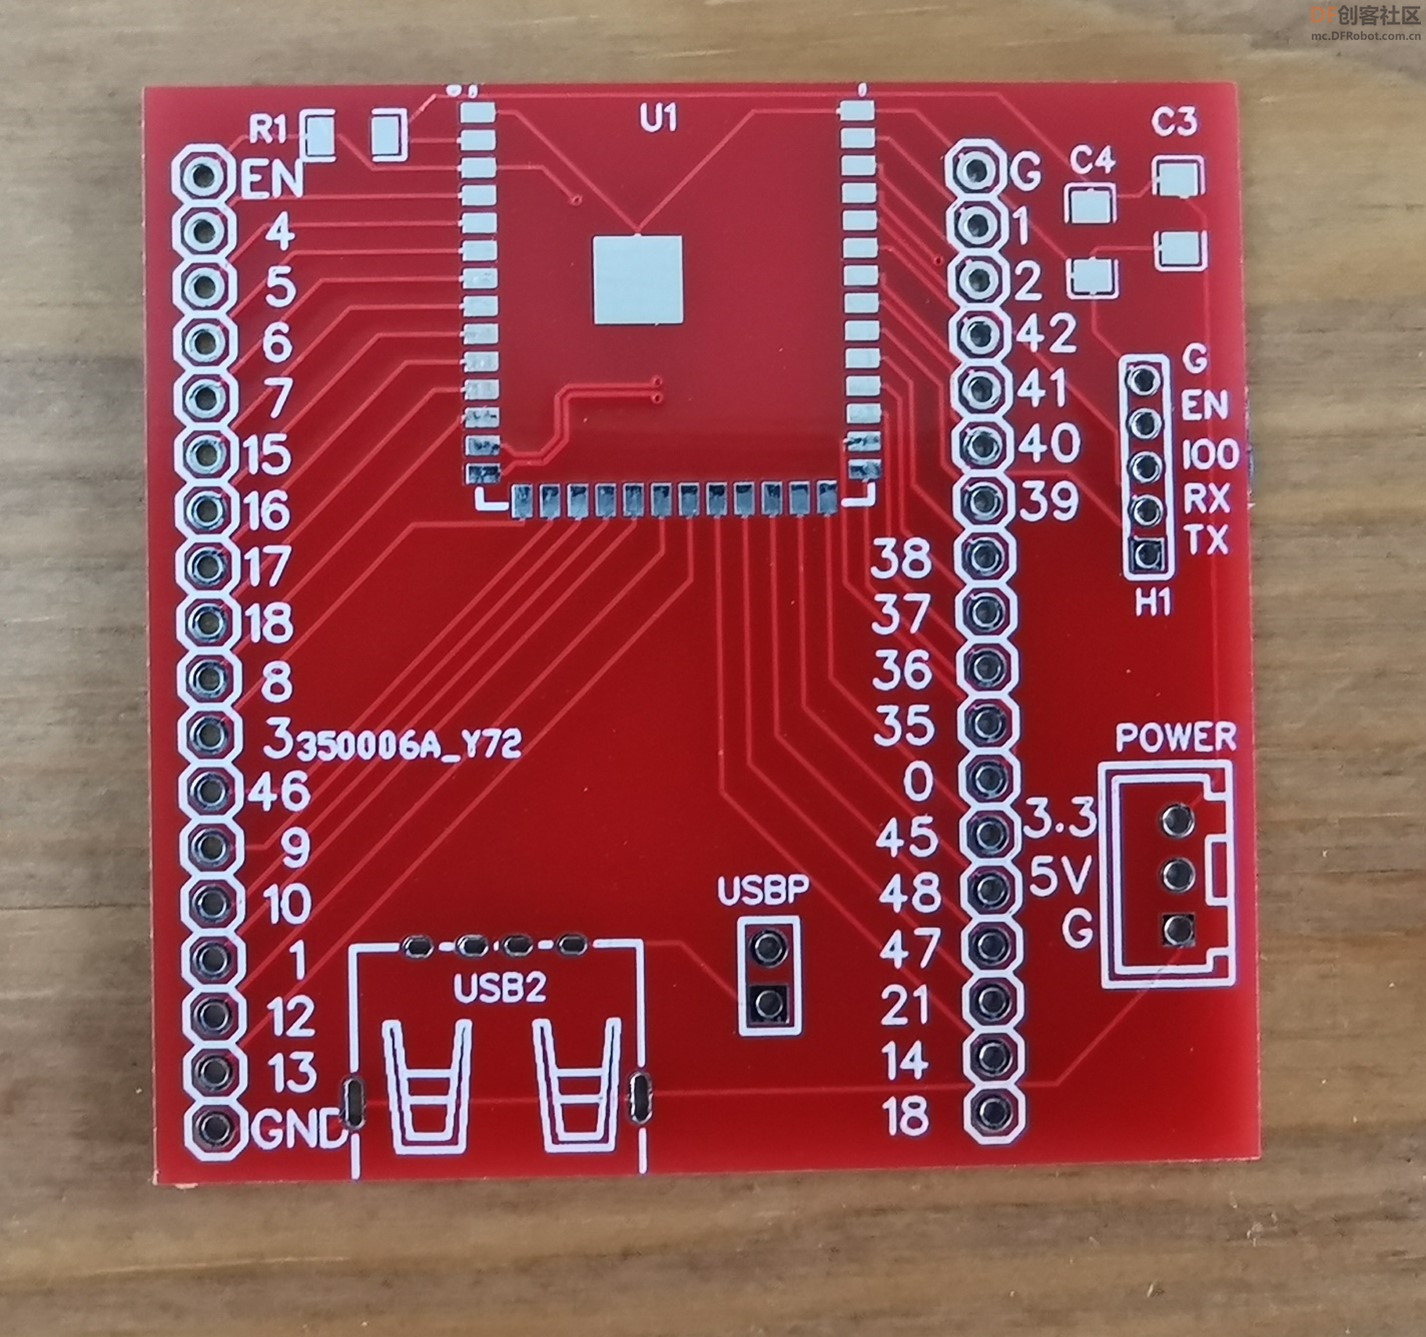 焊接之后是这样的: 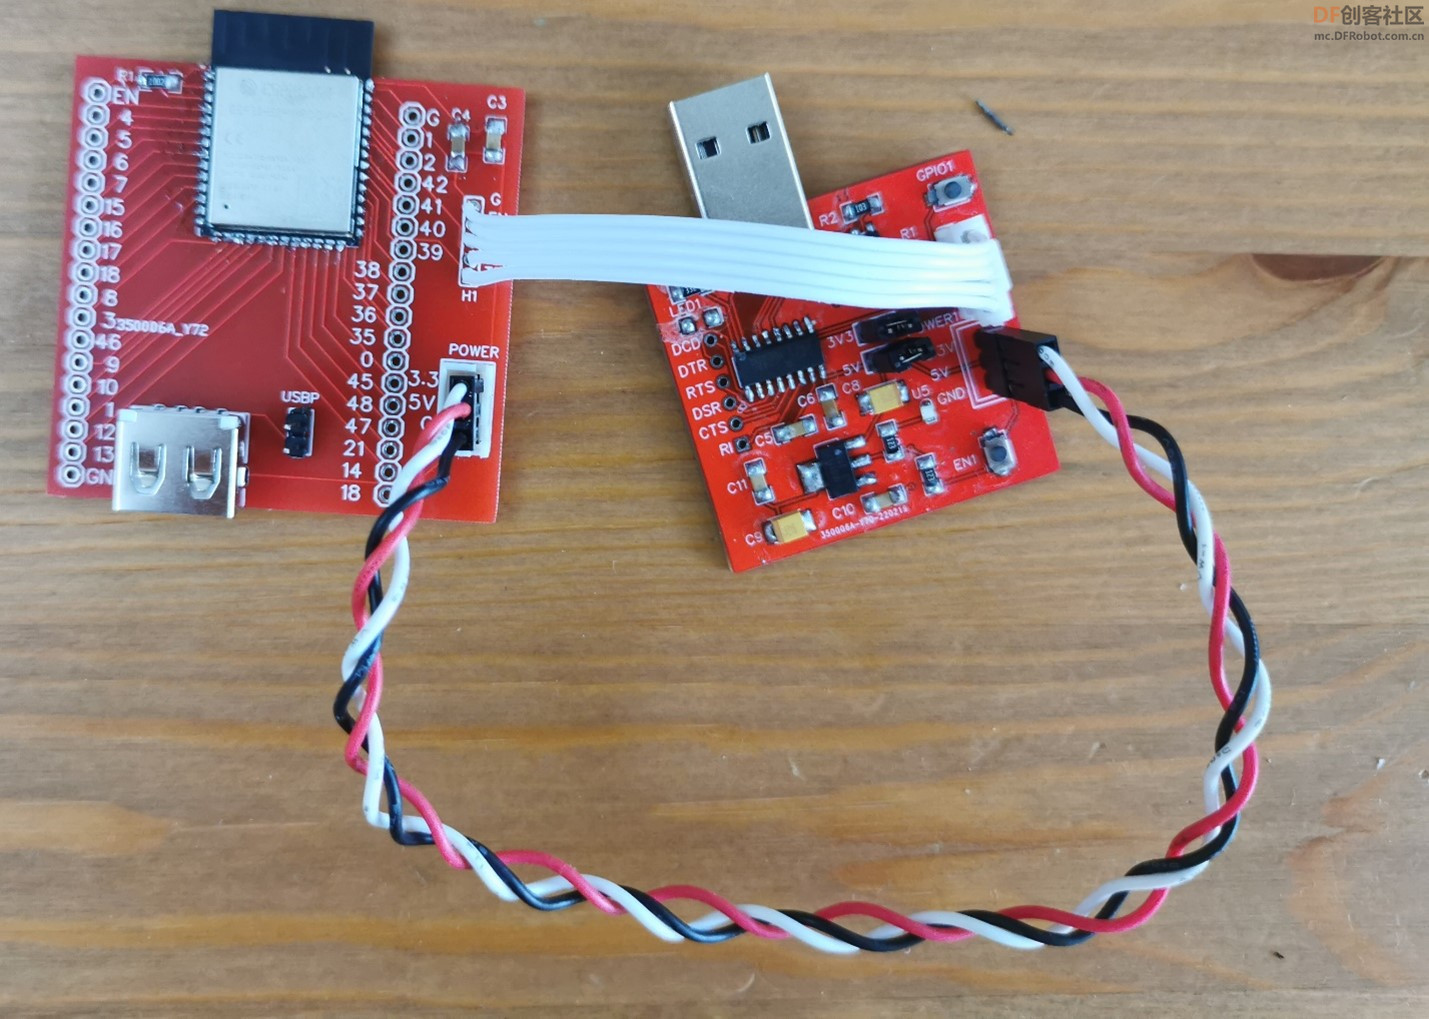 烧写代码是位于C:\Users\Username\AppData\Local\Arduino15\packages\esp32\hardware\esp32\2.0.3\libraries\USB\examples\Keyboard\KeyboardMessage的ESP32 示例代码: 特别注意还需要设置编译选项: 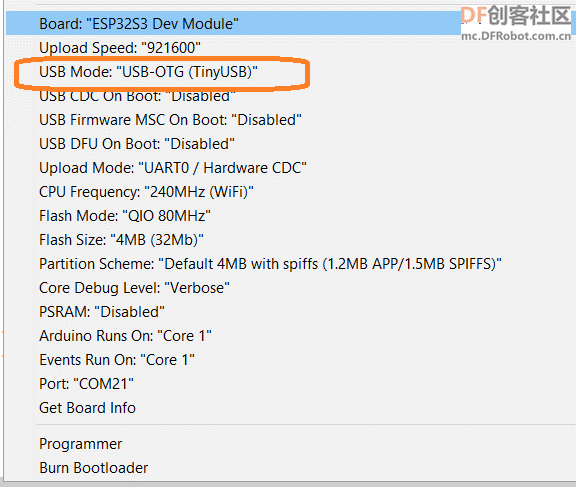 之后可以看到 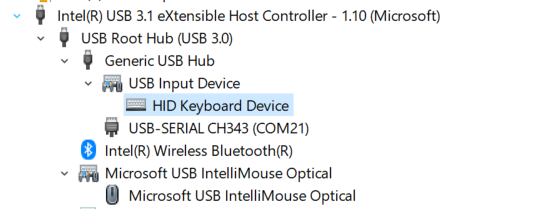 有了最小系统,用户可以方便的移植到自身的设计中。 完整的电路图和 PCB:  ESP32S3MINI.zip ESP32S3MINI.zip用于下载和供电的小板设计可以在 https://mc.dfrobot.com.cn/thread-312276-1-1.html 这篇文章中找到。 |
Shuuei 发表于 2022-12-2 15:01 那个是CH343 下载板,在 https://mc.dfrobot.com.cn/thread-312276-1-1.html 帖子中有介绍,自己做 |
 创客造
创客造
 编辑选择奖
编辑选择奖
 编辑选择奖
编辑选择奖


 沪公网安备31011502402448
© 2013-2026 Comsenz Inc. Powered by Discuz! X3.4 Licensed

 置顶卡
置顶卡 变色卡
变色卡 千斤顶
千斤顶


