前一段在商城购买了“麦克风模块”(SEN0327),拿到收之后发现没有例子。于是开始一番探索,配合ESP32进行一下测试。
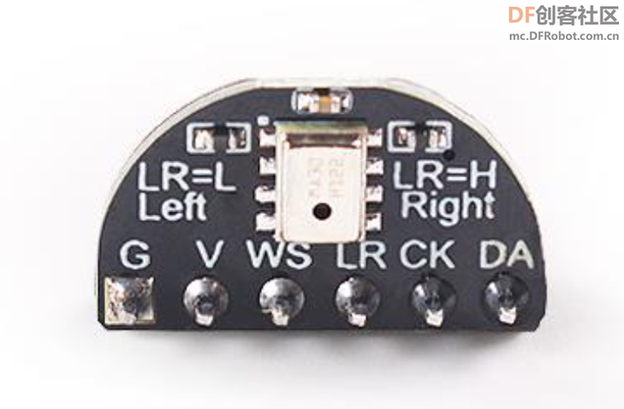
这款麦克风是基于 MSM261S4030H0传感器的 I2S 接口麦克风(数字麦克风)。经过研究 可以使用Arduino-audio-tools 这个Library 进行驱动。接线如下: 安装好库之后在arduino-audio-tools-0.8.7\src\AudioConfig.h做一点修改,修改的原因是 FireBeetle ESP32 32 Pin 已经被占用。
- #define PWM_FREQENCY 30000
- #define PIN_PWM_START 12
- #define PIN_I2S_BCK 14
- #define PIN_I2S_WS 15
- //LABZDebug #define PIN_I2S_DATA_IN 32
- #define PIN_I2S_DATA_IN 4
复制代码
之后按照上述要求连接好。加载 arduino-audio-tools-0.8.7\examples\examples-webserver\streams-i2s-webserver_wav这个代码,在其中下面的位置填写你家的 WIFI SSID 和密码:
- AudioWAVServer server("ssid","password");
复制代码
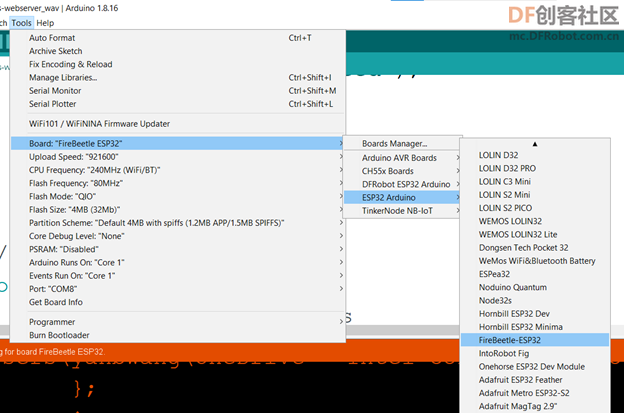
这个示例的作用是从I2S的麦克风中读取数据,然后展示在网页上。启动之后从串口调试器中能够看到当前的 IP ,用浏览器访问这个地址即可。还需要注意的是:需要使用esp32package 中的 FireBeetle 进行编译(如果使用 DFRobot ESP32 Arduino 中的 FireBeetle 会出现错误):
完整代码: - #include "AudioTools.h"
-
- AudioWAVServer server("ssid","password"); // the same a above
-
- I2SStream i2sStream; // Access I2S as stream
- ConverterFillLeftAndRight<int16_t> filler(LeftIsEmpty); // fill both channels - or change to RightIsEmpty
-
- void setup(){
- Serial.begin(115200);
- AudioLogger::instance().begin(Serial, AudioLogger::Info);
-
- // start i2s input with default configuration
- Serial.println("starting I2S...");
- auto config = i2sStream.defaultConfig(RX_MODE);
- config.i2s_format = I2S_STD_FORMAT; // if quality is bad change to I2S_LSB_FORMAT https://github.com/pschatzmann/arduino-audio-tools/issues/23
- config.sample_rate = 22050;
- config.channels = 2;
- config.bits_per_sample = 16;
- i2sStream.begin(config);
- Serial.println("I2S started");
-
- // start data sink
- server.begin(i2sStream, config, &filler);
- }
-
- // Arduino loop
- void loop() {
- // Handle new connections
- server.doLoop();
- }
复制代码
测试的视频:
|