绘制线条的draw_arrow()方法
- image.draw_arrow(x0, y0, x1, y1[, color[, thickness=1]])
在图像上绘制从 (x0, y0) 到 (x1, y1) 的箭头。参数可以分别传入 x0, y0, x1, y1,也可以作为元组 (x0, y0, x1, y1) 一起传递。
color: 表示颜色的 RGB888 元组,适用于灰度或 RGB565 图像,默认为白色。对于灰度图像,还可以传递像素值(范围 0-255);对于 RGB565 图像,可以传递字节翻转的 RGB565 值。
thickness: 控制箭头线条的像素宽度,默认为 1。
该方法返回图像对象,允许通过链式调用其他方法。
不支持压缩图像和 Bayer 格式图像。
项目测试实验代码
- #【花雕动手做】CanMV K230 AI视觉识别模块之使用draw_arrow()方法绘制箭头
-
- # Import required modules
- # 导入所需的模块
- import time, os, urandom, sys, math
-
- # Import display and media related modules
- # 导入显示和媒体相关模块
- from media.display import *
- from media.media import *
-
- # Define display resolution constants
- # 定义显示分辨率常量
- DISPLAY_WIDTH = 640 # 显示宽度:640像素
- DISPLAY_HEIGHT = 480 # 显示高度:480像素
-
- def display_test():
- """
- Function to test display functionality
- 测试显示功能的函数
- 主要功能:在屏幕上绘制多个不同方向、大小和颜色的箭头,展示draw_arrow()方法的用法
- """
-
- # Create main background image with white color
- # 创建白色背景的主图像
- # ARGB8888格式:每个像素32位(Alpha透明通道+RGB各8位)
- img = image.Image(DISPLAY_WIDTH, DISPLAY_HEIGHT, image.ARGB8888)
- img.clear() # 清空图像缓冲区
- # 绘制白色填充矩形作为背景,fill=True表示填充
- img.draw_rectangle(0, 0, DISPLAY_WIDTH, DISPLAY_HEIGHT, color=(255,255,255), fill=True)
-
- # Initialize display with ST7701 driver
- # 使用ST7701驱动初始化显示器
- # ST7701是常见的LCD屏幕驱动芯片
- # to_ide=True表示将显示输出同时发送到IDE和硬件屏幕
- Display.init(Display.ST7701, width=DISPLAY_WIDTH, height=DISPLAY_HEIGHT, to_ide=True)
-
- # Initialize media manager
- # 初始化媒体管理器 - 负责管理摄像头、显示等媒体资源
- MediaManager.init()
-
- try:
- # ========== 第一组:中央主要箭头 ==========
- # 绘制水平向右的主箭头,象征前进方向
- # 参数说明:
- # 320, 200: 箭头起点坐标(x1, y1)
- # 400, 200: 箭头终点坐标(x2, y2)
- # color=(0, 191, 255): 天蓝色 (RGB值)
- # thickness=5: 线宽5像素(最粗,突出主箭头)
- img.draw_arrow(320, 200, 400, 200, color=(0, 191, 255), thickness=5)
-
- # ========== 第二组:辅助箭头 ==========
- # 在主箭头上方和下方绘制两个平行的辅助箭头
- # 上方的辅助箭头(比主箭头细且颜色浅)
- img.draw_arrow(300, 180, 380, 180, color=(135, 206, 235), thickness=3)
- # 下方的辅助箭头
- img.draw_arrow(340, 220, 420, 220, color=(135, 206, 235), thickness=3)
-
- # ========== 第三组:对角线箭头 ==========
- # 绘制两个对角线方向的箭头,增加画面的动感和立体感
- # 左上到右下的对角线箭头
- img.draw_arrow(250, 150, 350, 250, color=(0, 191, 255), thickness=3)
- # 右上到左下的对角线箭头(实际上是另一个方向的斜箭头)
- img.draw_arrow(350, 150, 450, 250, color=(0, 191, 255), thickness=3)
-
- # ========== 第四组:反向箭头 ==========
- # 绘制与主箭头方向相反的箭头,形成对比效果
- # 与主箭头完全反向(从右向左)
- img.draw_arrow(400, 200, 320, 200, color=(173, 216, 230), thickness=3)
- # 与上方辅助箭头反向
- img.draw_arrow(380, 180, 300, 180, color=(173, 216, 230), thickness=2)
- # 与下方辅助箭头反向
- img.draw_arrow(420, 220, 340, 220, color=(173, 216, 230), thickness=2)
-
- # ========== 第五组:垂直箭头 ==========
- # 绘制垂直方向的箭头,丰富箭头的方向变化
- # 左侧垂直向下的箭头
- img.draw_arrow(320, 150, 320, 250, color=(0, 191, 255), thickness=3)
- # 右侧垂直向下的箭头
- img.draw_arrow(400, 150, 400, 250, color=(0, 191, 255), thickness=3)
-
- # ========== 第六组:点缀小箭头 ==========
- # 绘制两个小尺寸的装饰性箭头,增加画面的细节
- # 左下角的小箭头
- img.draw_arrow(300, 220, 310, 230, color=(135, 206, 235), thickness=2)
- # 右上角的小箭头
- img.draw_arrow(330, 170, 340, 180, color=(135, 206, 235), thickness=2)
-
- # Update display with background image
- # 更新显示背景图像 - 将绘制好的箭头图案显示在屏幕上
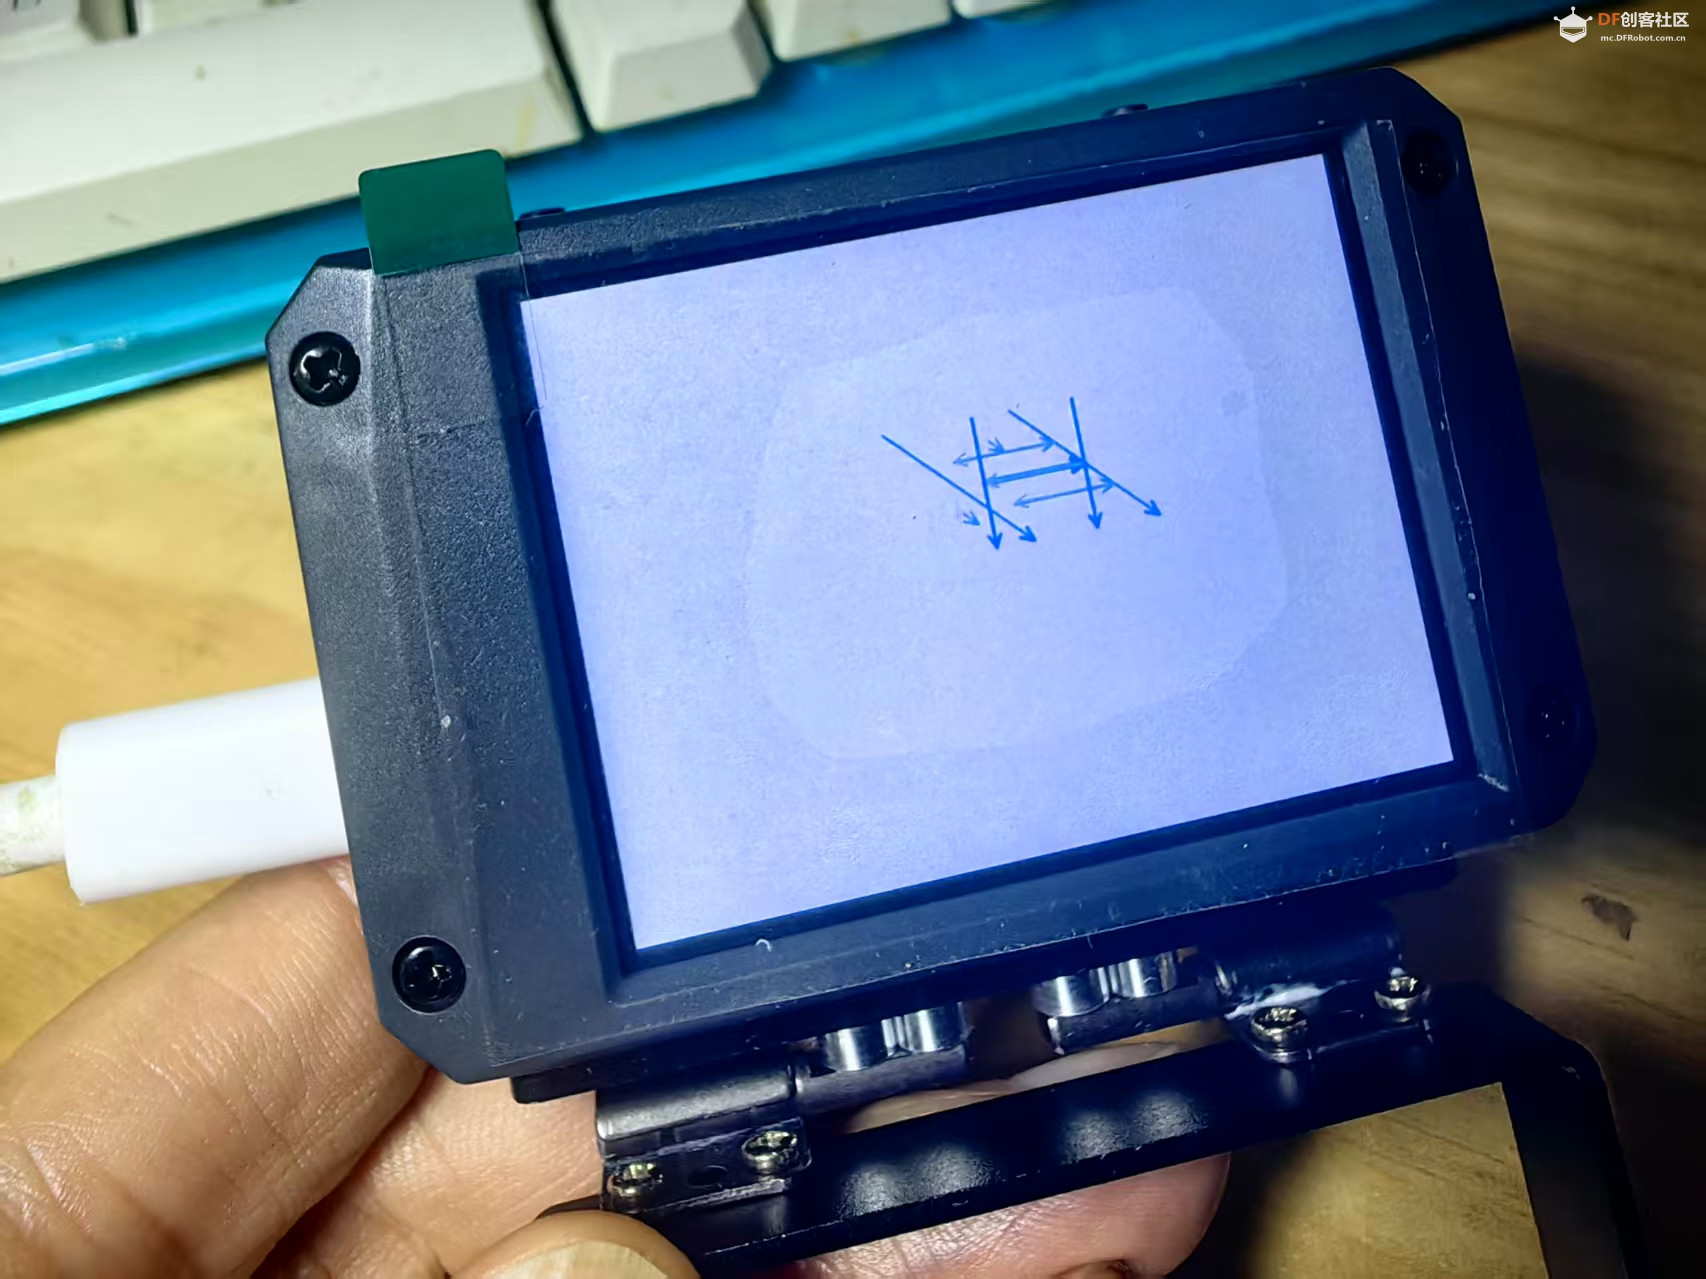
- Display.show_image(img)
-
- # 主循环保持显示
- while True:
- time.sleep(2) # 每2秒循环一次,保持程序运行
-
- except KeyboardInterrupt as e:
- # 捕获键盘中断(如Ctrl+C),优雅退出
- print("user stop: ", e)
- except BaseException as e:
- # 捕获其他所有异常,防止程序崩溃
- print(f"Exception {e}")
-
- # Cleanup and deinitialize display
- # 清理并反初始化显示器
- Display.deinit()
- # 启用睡眠退出点,允许系统进入低功耗模式
- os.exitpoint(os.EXITPOINT_ENABLE_SLEEP)
- time.sleep_ms(100) # 短暂延时确保资源释放完成
-
- # Release media resources
- # 释放媒体资源
- MediaManager.deinit()
-
- if __name__ == "__main__":
- # Enable exit points and run display test
- # 启用退出点并运行显示测试
- # EXITPOINT_ENABLE允许通过IDE停止程序执行
- os.exitpoint(os.EXITPOINT_ENABLE)
- display_test() # 调用显示测试函数
|


 沪公网安备31011502402448
 置顶卡
置顶卡 变色卡
变色卡 千斤顶
千斤顶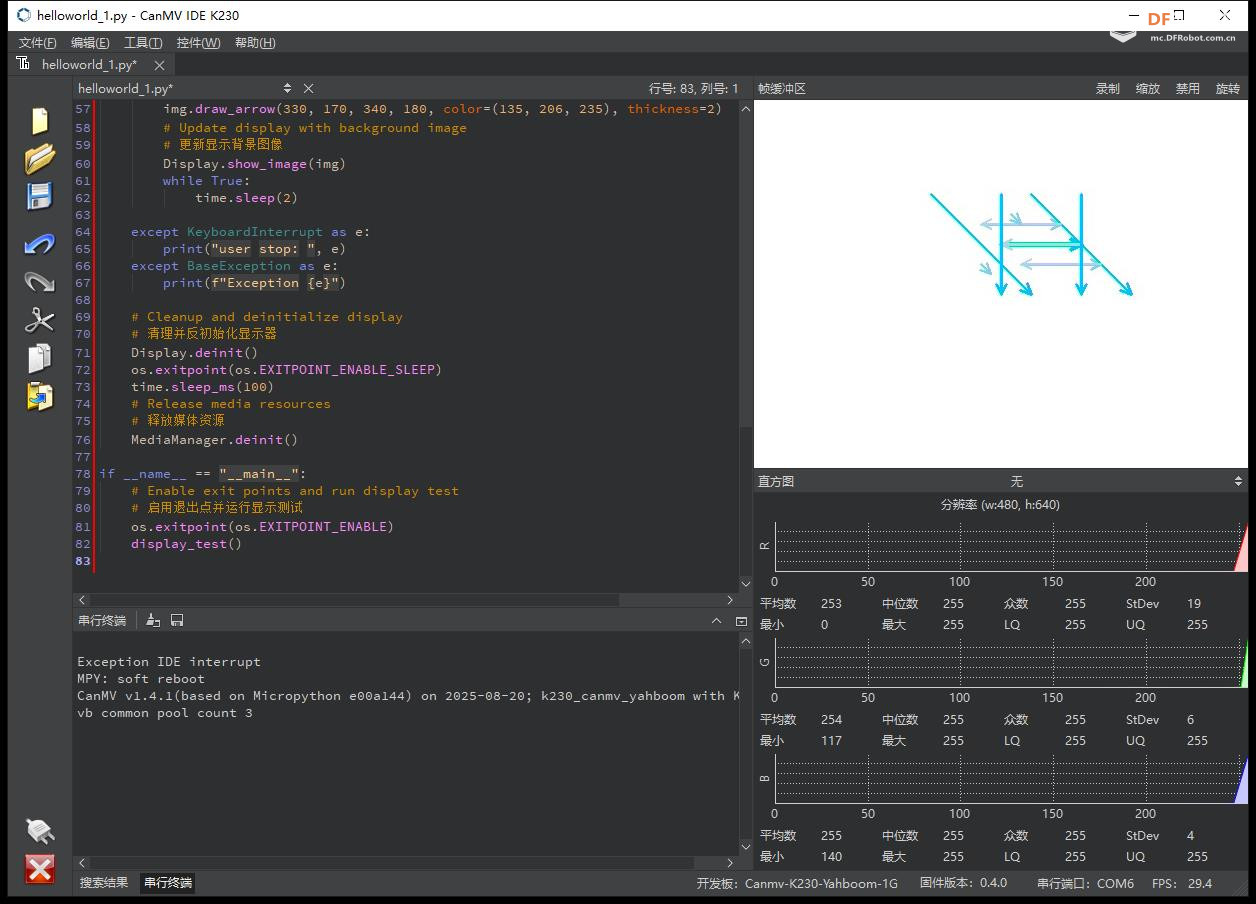

 萌萌哒新人
萌萌哒新人
 活跃会员
活跃会员
 宣传大使
宣传大使
 牛X认证
牛X认证
 创作达人
创作达人
 ARD DAY
 摸鱼团员
摸鱼团员
 志“童”道合
 编辑选择奖
编辑选择奖


