手机端蓝牙软件查看101开发板发送过来的数据:我们通过手机端蓝牙软件连接101开发板,通过可视化界面显示从板子模拟口读到的数据变化。
【产品链接】: Arduino 101
操作步骤:
1.下载必要的手机端软件 nRF Toolbox ,我这里下的是ios板本!(顺便可以载下载一个软件: lightBlue,下一个教程会用到哦)
 
2.下载Arduino IDE程序
- /*
- Copyright (c) 2015 Intel Corporation. All rights reserved.
-
- This library is free software; you can redistribute it and/or
- modify it under the terms of the GNU Lesser General Public
- License as published by the Free Software Foundation; either
- version 2.1 of the License, or (at your option) any later version.
-
- This library is distributed in the hope that it will be useful,
- but WITHOUT ANY WARRANTY; without even the implied warranty of
- MERCHANTABILITY or FITNESS FOR A PARTICULAR PURPOSE. See the GNU
- Lesser General Public License for more details.
-
- You should have received a copy of the GNU Lesser General Public
- License along with this library; if not, write to the Free Software
- Foundation, Inc., 51 Franklin Street, Fifth Floor, Boston, MA 02110-1301 USA
- */
-
- /*
- This sketch example partially implements the standard Bluetooth Low-Energy Heart Rate service.
- For more information: https://developer.bluetooth.org/gatt/services/Pages/ServicesHome.aspx
- */
-
- #include <CurieBle.h>
-
- BLEPeripheral blePeripheral; // BLE Peripheral Device (the board you're programming)
- BLEService heartRateService("180D"); // BLE Heart Rate Service
-
- // BLE Heart Rate Measurement Characteristic"
- BLECharacteristic heartRateChar("2A37", // standard 16-bit characteristic UUID
- BLERead | BLENotify, 2); // remote clients will be able to get notifications if this characteristic changes
- // the characteristic is 2 bytes long as the first field needs to be "Flags" as per BLE specifications
- // https://developer.bluetooth.org/gatt/characteristics/Pages/CharacteristicViewer.aspx?u=org.bluetooth.characteristic.heart_rate_measurement.xml
-
- int oldHeartRate = 0; // last heart rate reading from analog input
- long previousMillis = 0; // last time the heart rate was checked, in ms
-
- void setup() {
- Serial.begin(9600); // initialize serial communication
- pinMode(13, OUTPUT); // initialize the LED on pin 13 to indicate when a central is connected
-
- /* Set a local name for the BLE device
- This name will appear in advertising packets
- and can be used by remote devices to identify this BLE device
- The name can be changed but maybe be truncated based on space left in advertisement packet */
- blePeripheral.setLocalName("HeartRateSketch");
- blePeripheral.setAdvertisedServiceUuid(heartRateService.uuid()); // add the service UUID
- blePeripheral.addAttribute(heartRateService); // Add the BLE Heart Rate service
- blePeripheral.addAttribute(heartRateChar); // add the Heart Rate Measurement characteristic
-
- /* Now activate the BLE device. It will start continuously transmitting BLE
- advertising packets and will be visible to remote BLE central devices
- until it receives a new connection */
- blePeripheral.begin();
- Serial.println("Bluetooth device active, waiting for connections...");
- }
-
- void loop() {
- // listen for BLE peripherals to connect:
- BLECentral central = blePeripheral.central();
-
- // if a central is connected to peripheral:
- if (central) {
- Serial.print("Connected to central: ");
- // print the central's MAC address:
- Serial.println(central.address());
- // turn on the LED to indicate the connection:
- digitalWrite(13, HIGH);
-
- // check the heart rate measurement every 200ms
- // as long as the central is still connected:
- while (central.connected()) {
- long currentMillis = millis();
- // if 200ms have passed, check the heart rate measurement:
- if (currentMillis - previousMillis >= 200) {
- previousMillis = currentMillis;
- updateHeartRate();
- }
- }
- // when the central disconnects, turn off the LED:
- digitalWrite(13, LOW);
- Serial.print("Disconnected from central: ");
- Serial.println(central.address());
- }
- }
-
- void updateHeartRate() {
- /* Read the current voltage level on the A0 analog input pin.
- This is used here to simulate the heart rate's measurement.
- */
- int heartRateMeasurement = analogRead(A0);
- int heartRate = map(heartRateMeasurement, 0, 1023, 0, 100);
- if (heartRate != oldHeartRate) { // if the heart rate has changed
- Serial.print("Heart Rate is now: "); // print it
- Serial.println(heartRate);
- const unsigned char heartRateCharArray[2] = { 0, (char)heartRate };
- heartRateChar.setValue(heartRateCharArray, 2); // and update the heart rate measurement characteristic
- oldHeartRate = heartRate; // save the level for next comparison
- }
- }
3,可以在开发板的模拟口A0连接一个模拟量传感器,可以是光线传感器,声音传感器等,我这里直接在模拟口A0接了一根杜邦线。
4,打开手机蓝牙,再打开软件nRF Toolbox
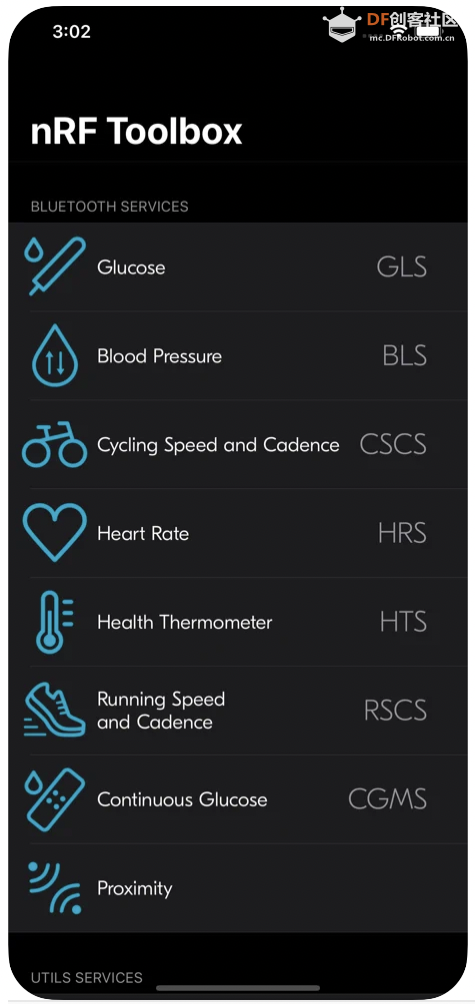
5.点击上面图片中的爱心图标,会出现下面的界面:
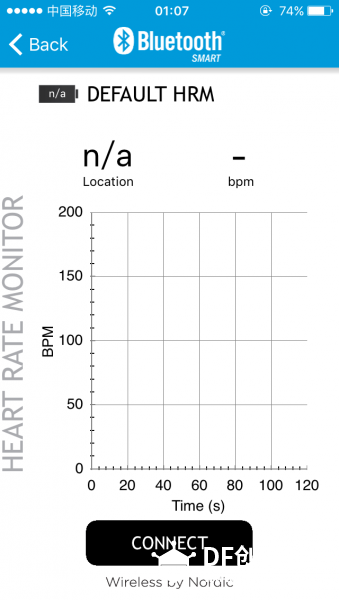
6.点击上面界面下面的CONNECT,会出现下面101开发板的蓝牙设备名称,点击名称连接即可!

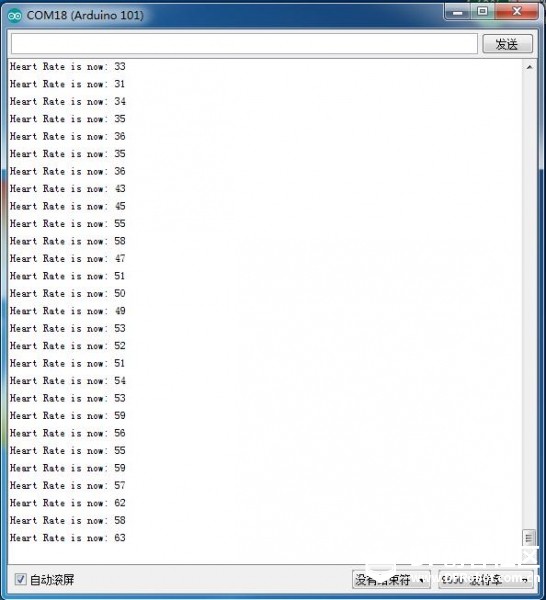
7.连接成功后,模拟口A0的数据就会在手机端显示出来,也能在IDE串口中查看读到的数据:

8.电脑端串口对应的数据:
9.OK,基本操作已经做完了,要玩出什么花样就看你了!
看累了没,开心一刻:
某晚,一裸男叫了一辆出租车,女司机目不转睛盯着看他,裸男大怒,吼道:你他妈没见过裸男呀!女司机也大怒:我看你他妈从哪儿掏钱!
【Arduino/Genuino 101 入门教程】
* DF创客社区版权所有,欢迎转载。
转载请务必标注来源: DF创客社区+作者姓名+原文网址。 |
|
|
|
|
|
|
|
|
|


 沪公网安备31011502402448
 置顶卡
置顶卡 变色卡
变色卡 千斤顶
千斤顶