|
3302| 0
|
[用户分享] TinkerNode NB-IoT 物联网开发板 测评第三弹 物联网初体验 |
|
在了解了NB板的基本功能后,我们现在来试试它的物联网功能吧。 如果想了解前面的内容,请访问: TinkerNode NB-IoT 物联网开发板 测评第二弹 功能全览 TinkerNode NB-IoT 物联网开发板 测评第一弹 开箱即用 本文假设你已经配置好NB板的相关开发环境,如果还没有请先看 第一弹 我们打开Arduino IDE在相应位置找到示例代码,这里要吐槽下,NB板的MQTT代码里面, 竟然没有自己的 IoT服务器 https://iot.dfrobot.com.cn 相关的代码文件。 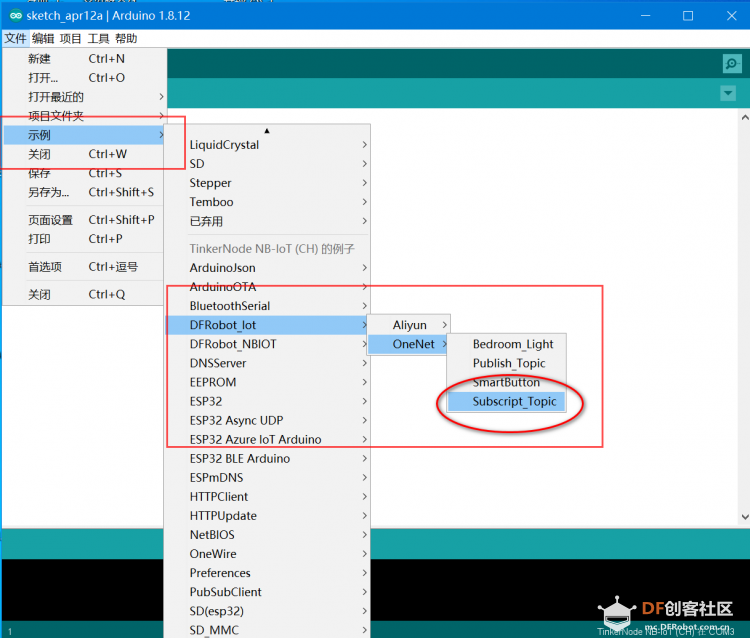 那我们只能选择这个,手工修改下代码。[mw_shl_code=c,false]/*! * @file Subscript_Topic.ino * * @brief Subscribe to a Topic. When the Topic receives the message, * @brief it will execute a callback function to print out the message of the Topic. * * @copyright Copyright (c) 2010 DFRobot Co.Ltd (http://www.dfrobot.com) * @licence The MIT License (MIT) * @author [Wuxiao](xiao.wu@dfrobot.com) * @version V1.0 * @date 2019-02-20 * @get from https://www.dfrobot.com */ #include <WiFi.h> #include <PubSubClient.h> #include "DFRobot_Iot.h" /*Set WIFI name and password*/ const char * WIFI_SSID = "WIFI_SSID"; const char * WIFI_PASSWORD = "WIFI_PASSWORD"; /*Configure device certificate information*/ String ProductID = "you_ProductID"; String DeviceId = "you_DeviceId"; String ApiKey = "you_ApiKey"; /*Configure the domain name and port number*/ String ONENET_SERVER = "mqtt.heclouds.com"; uint16_t PORT = 6002; /*Set the Topic you need to subscribe to*/ const char * subTopic = "you_subscribe_Topic"; DFRobot_Iot myIot; WiFiClient espClient; PubSubClient client(espClient); void connectWiFi(){ Serial.print("Connecting to "); Serial.println(WIFI_SSID); WiFi.begin(WIFI_SSID,WIFI_PASSWORD); while(WiFi.status() != WL_CONNECTED){ delay(500); Serial.print("."); } Serial.println(); Serial.println("WiFi connected"); Serial.print("IP Adderss: "); Serial.println(WiFi.localIP()); } void callback(char * topic, byte * payload, unsigned int len){ Serial.print("Recevice ["); Serial.print(topic); Serial.print("] "); for (int i = 0; i < len; i++){ Serial.print((char)payload); } Serial.println(); } void ConnectCloud(){ while(!client.connected()){ Serial.print("Attempting MQTT connection..."); /*A device connected to the cloud platform based on an automatically calculated username and password*/ if(client.connect(myIot._clientId, myIot._username, myIot._password)){ Serial.println("connected"); client.subscribe(subTopic); }else{ Serial.print("failed, rc="); Serial.print(client.state()); Serial.println(" try again in 5 seconds"); delay(5000); } } } void setup(){ Serial.begin(115200); /*Connect to WIFI*/ connectWiFi(); /*Initialize the configuration of OneNet*/ myIot.init(ONENET_SERVER, ProductID, DeviceId, ApiKey); client.setServer(myIot._mqttServer,PORT); /*Set the callback function to execute the callback function when receiving the subscription information*/ client.setCallback(callback); /*Connect to the cloud platform*/ ConnectCloud(); } void loop(){ if(!client.connected()){ ConnectCloud(); } client.loop(); }[/mw_shl_code] 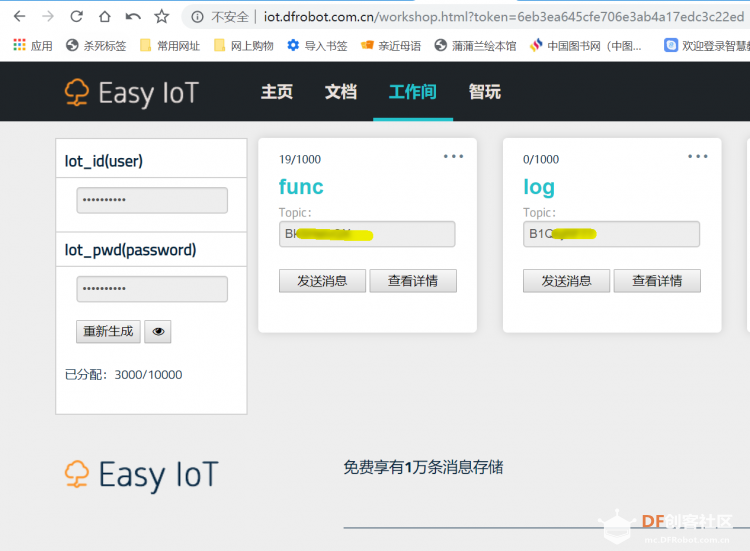 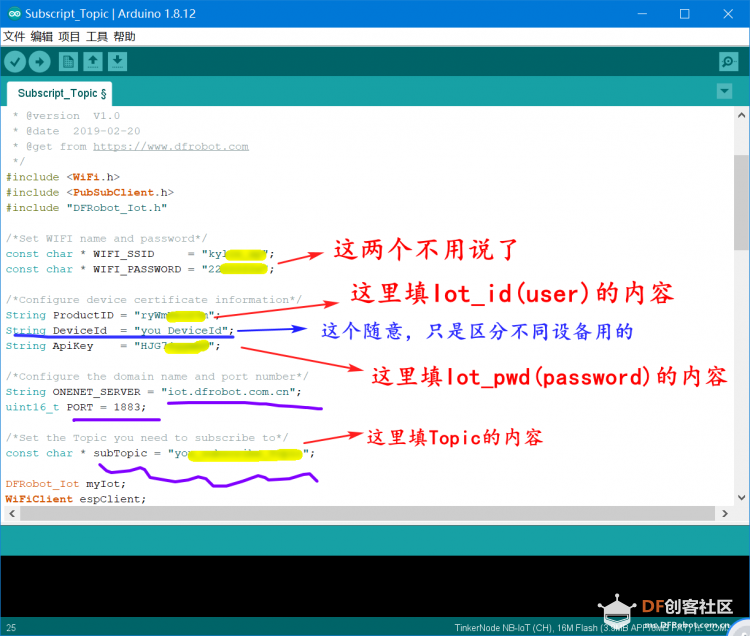 相应的修改内容,请参考 DFROBOT的IoT服务器上相应的配置信息。因为还不能使用流量卡,我们这里用的是WIFI模式的物联。 现在让我们愉快地刷入,然后打开串口看看: 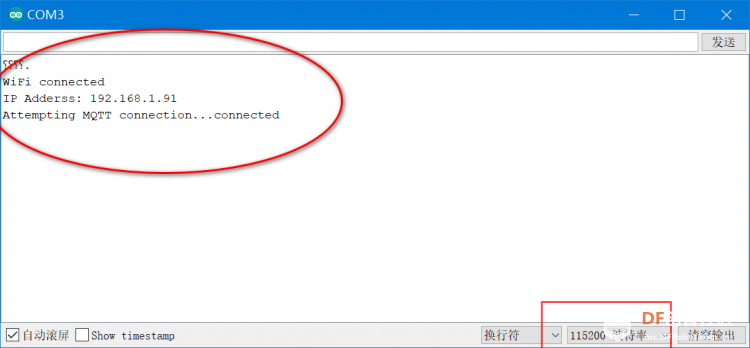 注意设置好波特率115200,然后我们在dfrobot的IoT web端输入信息: 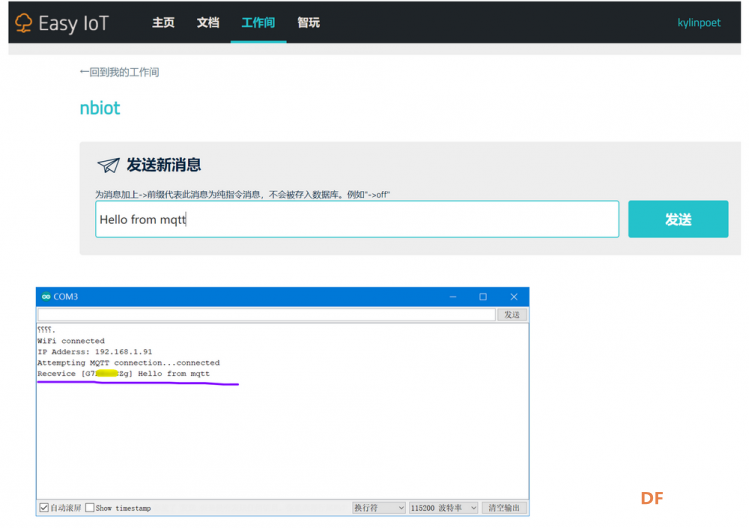 已然正确连通了信息。接下来我们再修改下代码,通过IoT的Web端信息发送,点亮NB板上自带的小灯吧。 开始之前我们需要修改下 MQTT的 callback回调函数,你可参照我的代码进行覆盖。 [mw_shl_code=c,false]void callback(char * topic, byte * payload, unsigned int len){ Serial.print("Recevice ["); Serial.print(topic); Serial.print("] "); for (int i = 0; i < len; i++){ Serial.print((char)payload); } Serial.println(); uint8_t LED_PIN = 2; pinMode(LED_PIN, OUTPUT); if((char)payload[0]=='1'){ digitalWrite(LED_PIN, HIGH); } else if((char)payload[0]=='0'){ digitalWrite(LED_PIN, LOW); } else{ Serial.println((char)payload[0]); } }[/mw_shl_code] 完成后,我们重新刷入代码,BINGO,测试成功! 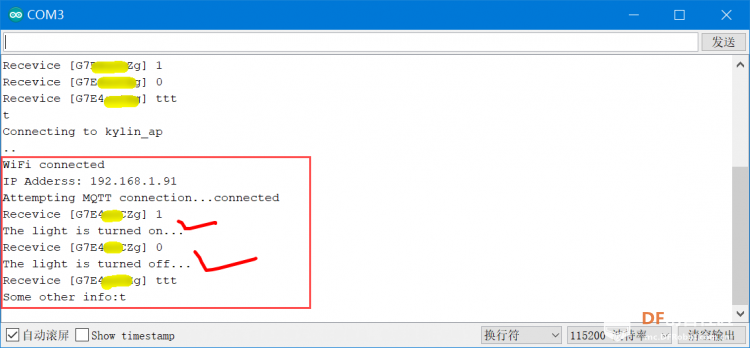 |
 沪公网安备31011502402448
© 2013-2026 Comsenz Inc. Powered by Discuz! X3.4 Licensed