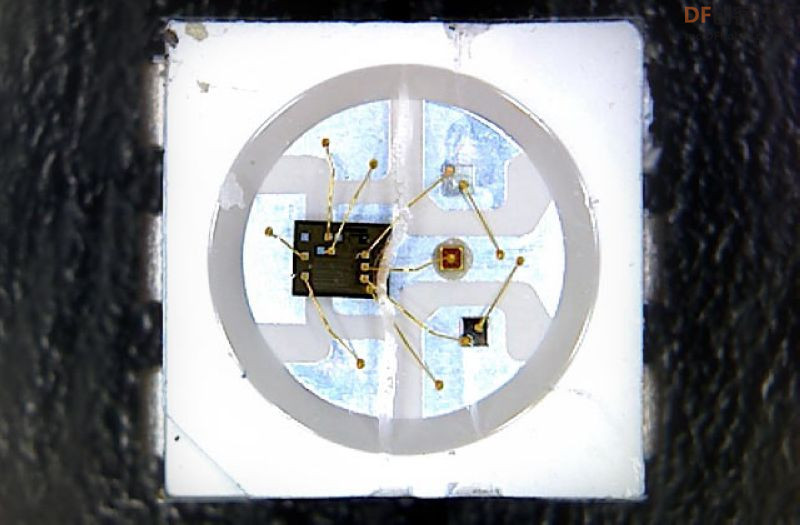
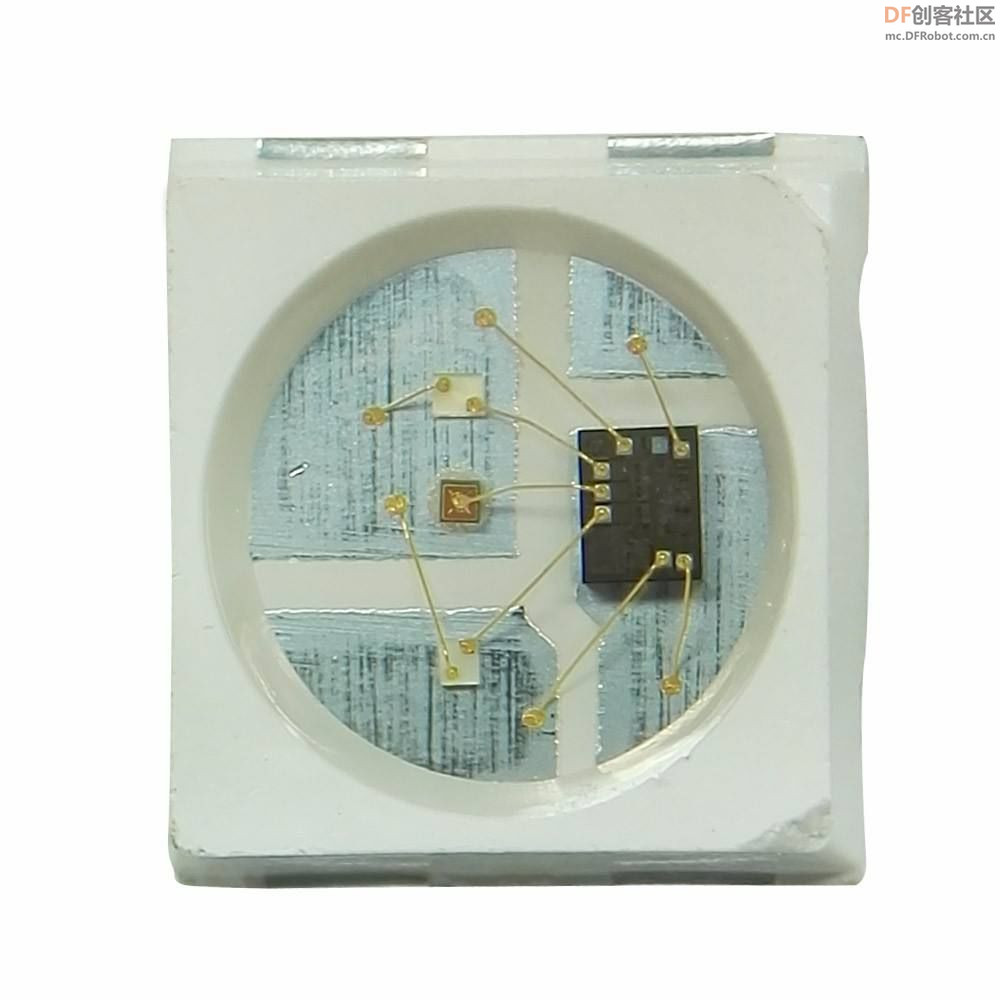
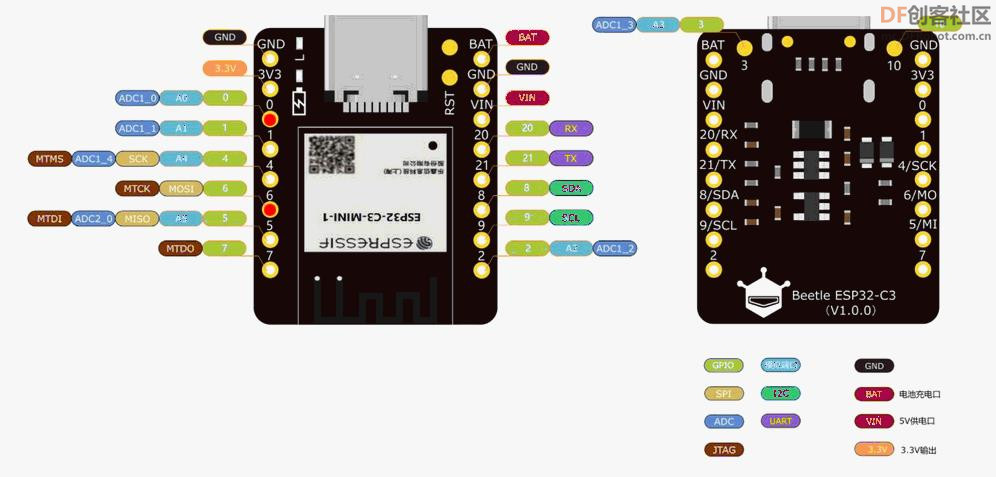
【花雕体验】16 使用Beetle ESP32 C3控制8X32位WS2812灯板
实验程序五:FastLED的八种动态颜色的配色板
- /*
- 【花雕体验】16 使用Beetle ESP32 C3控制8X32位WS2812灯板
- 实验程序五:FastLED的八种动态颜色的配色板
- */
-
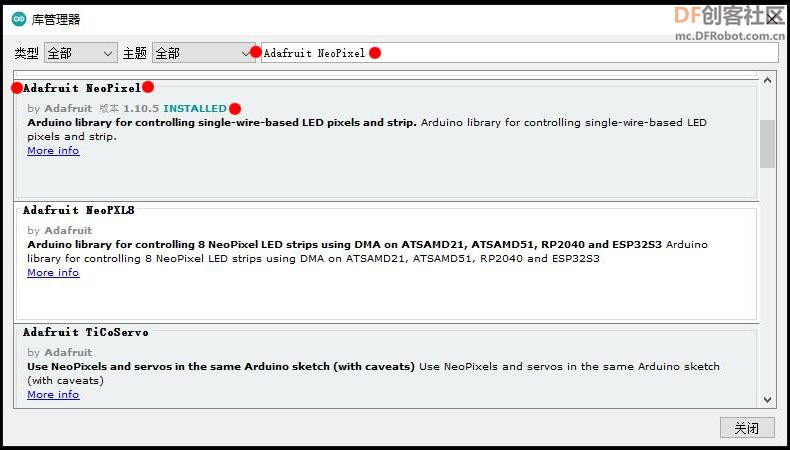
- #include <FastLED.h>
-
- #define LED_PIN 6
- #define NUM_LEDS 256
- #define BRIGHTNESS 22
- #define LED_TYPE WS2811
- #define COLOR_ORDER GRB
- CRGB leds[NUM_LEDS];
-
- #define UPDATES_PER_SECOND 100 //定义每秒更新数
-
- // This example shows several ways to set up and use 'palettes' of colors
- // with FastLED.
- //
- // These compact palettes provide an easy way to re-colorize your
- // animation on the fly, quickly, easily, and with low overhead.
- //
- // USING palettes is MUCH simpler in practice than in theory, so first just
- // run this sketch, and watch the pretty lights as you then read through
- // the code. Although this sketch has eight (or more) different color schemes,
- // the entire sketch compiles down to about 6.5K on AVR.
- //
- // FastLED provides a few pre-configured color palettes, and makes it
- // extremely easy to make up your own color schemes with palettes.
- //
- // Some notes on the more abstract 'theory and practice' of
- // FastLED compact palettes are at the bottom of this file.
-
-
-
- CRGBPalette16 currentPalette;
- TBlendType currentBlending;
-
- extern CRGBPalette16 myRedWhiteBluePalette;
- extern const TProgmemPalette16 myRedWhiteBluePalette_p PROGMEM;
-
-
- void setup() {
- delay( 3000 ); // power-up safety delay
- FastLED.addLeds<LED_TYPE, LED_PIN, COLOR_ORDER>(leds, NUM_LEDS).setCorrection( TypicalLEDStrip );
- FastLED.setBrightness( BRIGHTNESS );
- currentPalette = RainbowColors_p;
- currentBlending = LINEARBLEND;
- }
-
-
- void loop(){
- ChangePalettePeriodically();
-
- static uint8_t startIndex = 0;
- startIndex = startIndex + 1; /* motion speed */
-
- FillLEDsFromPaletteColors( startIndex);
-
- FastLED.show();
- FastLED.delay(1000 / UPDATES_PER_SECOND);
- }
-
- void FillLEDsFromPaletteColors( uint8_t colorIndex)
- {
- uint8_t brightness = 255;
-
- for( int i = 0; i < NUM_LEDS; ++i) {
- leds[i] = ColorFromPalette( currentPalette, colorIndex, brightness, currentBlending);
- colorIndex += 3;
- }
- }
-
-
- // There are several different palettes of colors demonstrated here.
- //
- // FastLED provides several 'preset' palettes: RainbowColors_p, RainbowStripeColors_p,
- // OceanColors_p, CloudColors_p, LavaColors_p, ForestColors_p, and PartyColors_p.
- //
- // Additionally, you can manually define your own color palettes, or you can write
- // code that creates color palettes on the fly. All are shown here.
-
- void ChangePalettePeriodically()
- {
- uint8_t secondHand = (millis() / 1000) % 60;
- static uint8_t lastSecond = 99;
-
- if( lastSecond != secondHand) {
- lastSecond = secondHand;
- if( secondHand == 0) { currentPalette = RainbowColors_p; currentBlending = LINEARBLEND; }
- if( secondHand == 10) { currentPalette = RainbowStripeColors_p; currentBlending = NOBLEND; }
- if( secondHand == 15) { currentPalette = RainbowStripeColors_p; currentBlending = LINEARBLEND; }
- if( secondHand == 20) { SetupPurpleAndGreenPalette(); currentBlending = LINEARBLEND; }
- if( secondHand == 25) { SetupTotallyRandomPalette(); currentBlending = LINEARBLEND; }
- if( secondHand == 30) { SetupBlackAndWhiteStripedPalette(); currentBlending = NOBLEND; }
- if( secondHand == 35) { SetupBlackAndWhiteStripedPalette(); currentBlending = LINEARBLEND; }
- if( secondHand == 40) { currentPalette = CloudColors_p; currentBlending = LINEARBLEND; }
- if( secondHand == 45) { currentPalette = PartyColors_p; currentBlending = LINEARBLEND; }
- if( secondHand == 50) { currentPalette = myRedWhiteBluePalette_p; currentBlending = NOBLEND; }
- if( secondHand == 55) { currentPalette = myRedWhiteBluePalette_p; currentBlending = LINEARBLEND; }
- }
- }
-
- // This function fills the palette with totally random colors.
- void SetupTotallyRandomPalette()
- {
- for( int i = 0; i < 16; ++i) {
- currentPalette[i] = CHSV( random8(), 255, random8());
- }
- }
-
- // This function sets up a palette of black and white stripes,
- // using code. Since the palette is effectively an array of
- // sixteen CRGB colors, the various fill_* functions can be used
- // to set them up.
- void SetupBlackAndWhiteStripedPalette()
- {
- // 'black out' all 16 palette entries...
- fill_solid( currentPalette, 16, CRGB::Black);
- // and set every fourth one to white.
- currentPalette[0] = CRGB::White;
- currentPalette[4] = CRGB::White;
- currentPalette[8] = CRGB::White;
- currentPalette[12] = CRGB::White;
-
- }
-
- // This function sets up a palette of purple and green stripes.
- void SetupPurpleAndGreenPalette()
- {
- CRGB purple = CHSV( HUE_PURPLE, 255, 255);
- CRGB green = CHSV( HUE_GREEN, 255, 255);
- CRGB black = CRGB::Black;
-
- currentPalette = CRGBPalette16(
- green, green, black, black,
- purple, purple, black, black,
- green, green, black, black,
- purple, purple, black, black );
- }
-
-
- // This example shows how to set up a static color palette
- // which is stored in PROGMEM (flash), which is almost always more
- // plentiful than RAM. A static PROGMEM palette like this
- // takes up 64 bytes of flash.
- const TProgmemPalette16 myRedWhiteBluePalette_p PROGMEM =
- {
- CRGB::Red,
- CRGB::Gray, // 'white' is too bright compared to red and blue
- CRGB::Blue,
- CRGB::Black,
-
- CRGB::Red,
- CRGB::Gray,
- CRGB::Blue,
- CRGB::Black,
-
- CRGB::Red,
- CRGB::Red,
- CRGB::Gray,
- CRGB::Gray,
- CRGB::Blue,
- CRGB::Blue,
- CRGB::Black,
- CRGB::Black
- };
-
- // Additional notes on FastLED compact palettes:
- //
- // Normally, in computer graphics, the palette (or "color lookup table")
- // has 256 entries, each containing a specific 24-bit RGB color. You can then
- // index into the color palette using a simple 8-bit (one byte) value.
- // A 256-entry color palette takes up 768 bytes of RAM, which on Arduino
- // is quite possibly "too many" bytes.
- //
- // FastLED does offer traditional 256-element palettes, for setups that
- // can afford the 768-byte cost in RAM.
- //
- // However, FastLED also offers a compact alternative. FastLED offers
- // palettes that store 16 distinct entries, but can be accessed AS IF
- // they actually have 256 entries; this is accomplished by interpolating
- // between the 16 explicit entries to create fifteen intermediate palette
- // entries between each pair.
- //
- // So for example, if you set the first two explicit entries of a compact
- // palette to Green (0,255,0) and Blue (0,0,255), and then retrieved
- // the first sixteen entries from the virtual palette (of 256), you'd get
- // Green, followed by a smooth gradient from green-to-blue, and then Blue.
|


 沪公网安备31011502402448

 置顶卡
置顶卡 变色卡
变色卡 千斤顶
千斤顶


 萌萌哒新人
萌萌哒新人
 活跃会员
活跃会员
 宣传大使
宣传大使
 牛X认证
牛X认证
 创作达人
创作达人
 ARD DAY
 摸鱼团员
摸鱼团员
 志“童”道合
 编辑选择奖
编辑选择奖


