本帖最后由 云天 于 2022-9-20 12:06 编辑
【项目背景】
现在很多家庭都安装有监控,并可以利用手机进行查看。方便自己不在家时,查看家中情况,及时发现老人幼儿发生的危险情况。同时安装监控好处是可以全天候和多方位的进行监视,节省人力物力,实时监控录像,可以随时调出记录,方便对不法活动进行举报,起到震慑作用等等。
【项目设计】
本项目使用“行空板”结合USB摄像头,利用Mind+Python模式下编程,使用Easy IOT物联网平台,向手机发送实时图像。手机端使用App Inventor2编程,连接物联网,实时查看图像,并发送指令控制摄像头旋转、点亮彩灯等。
【演示视频】
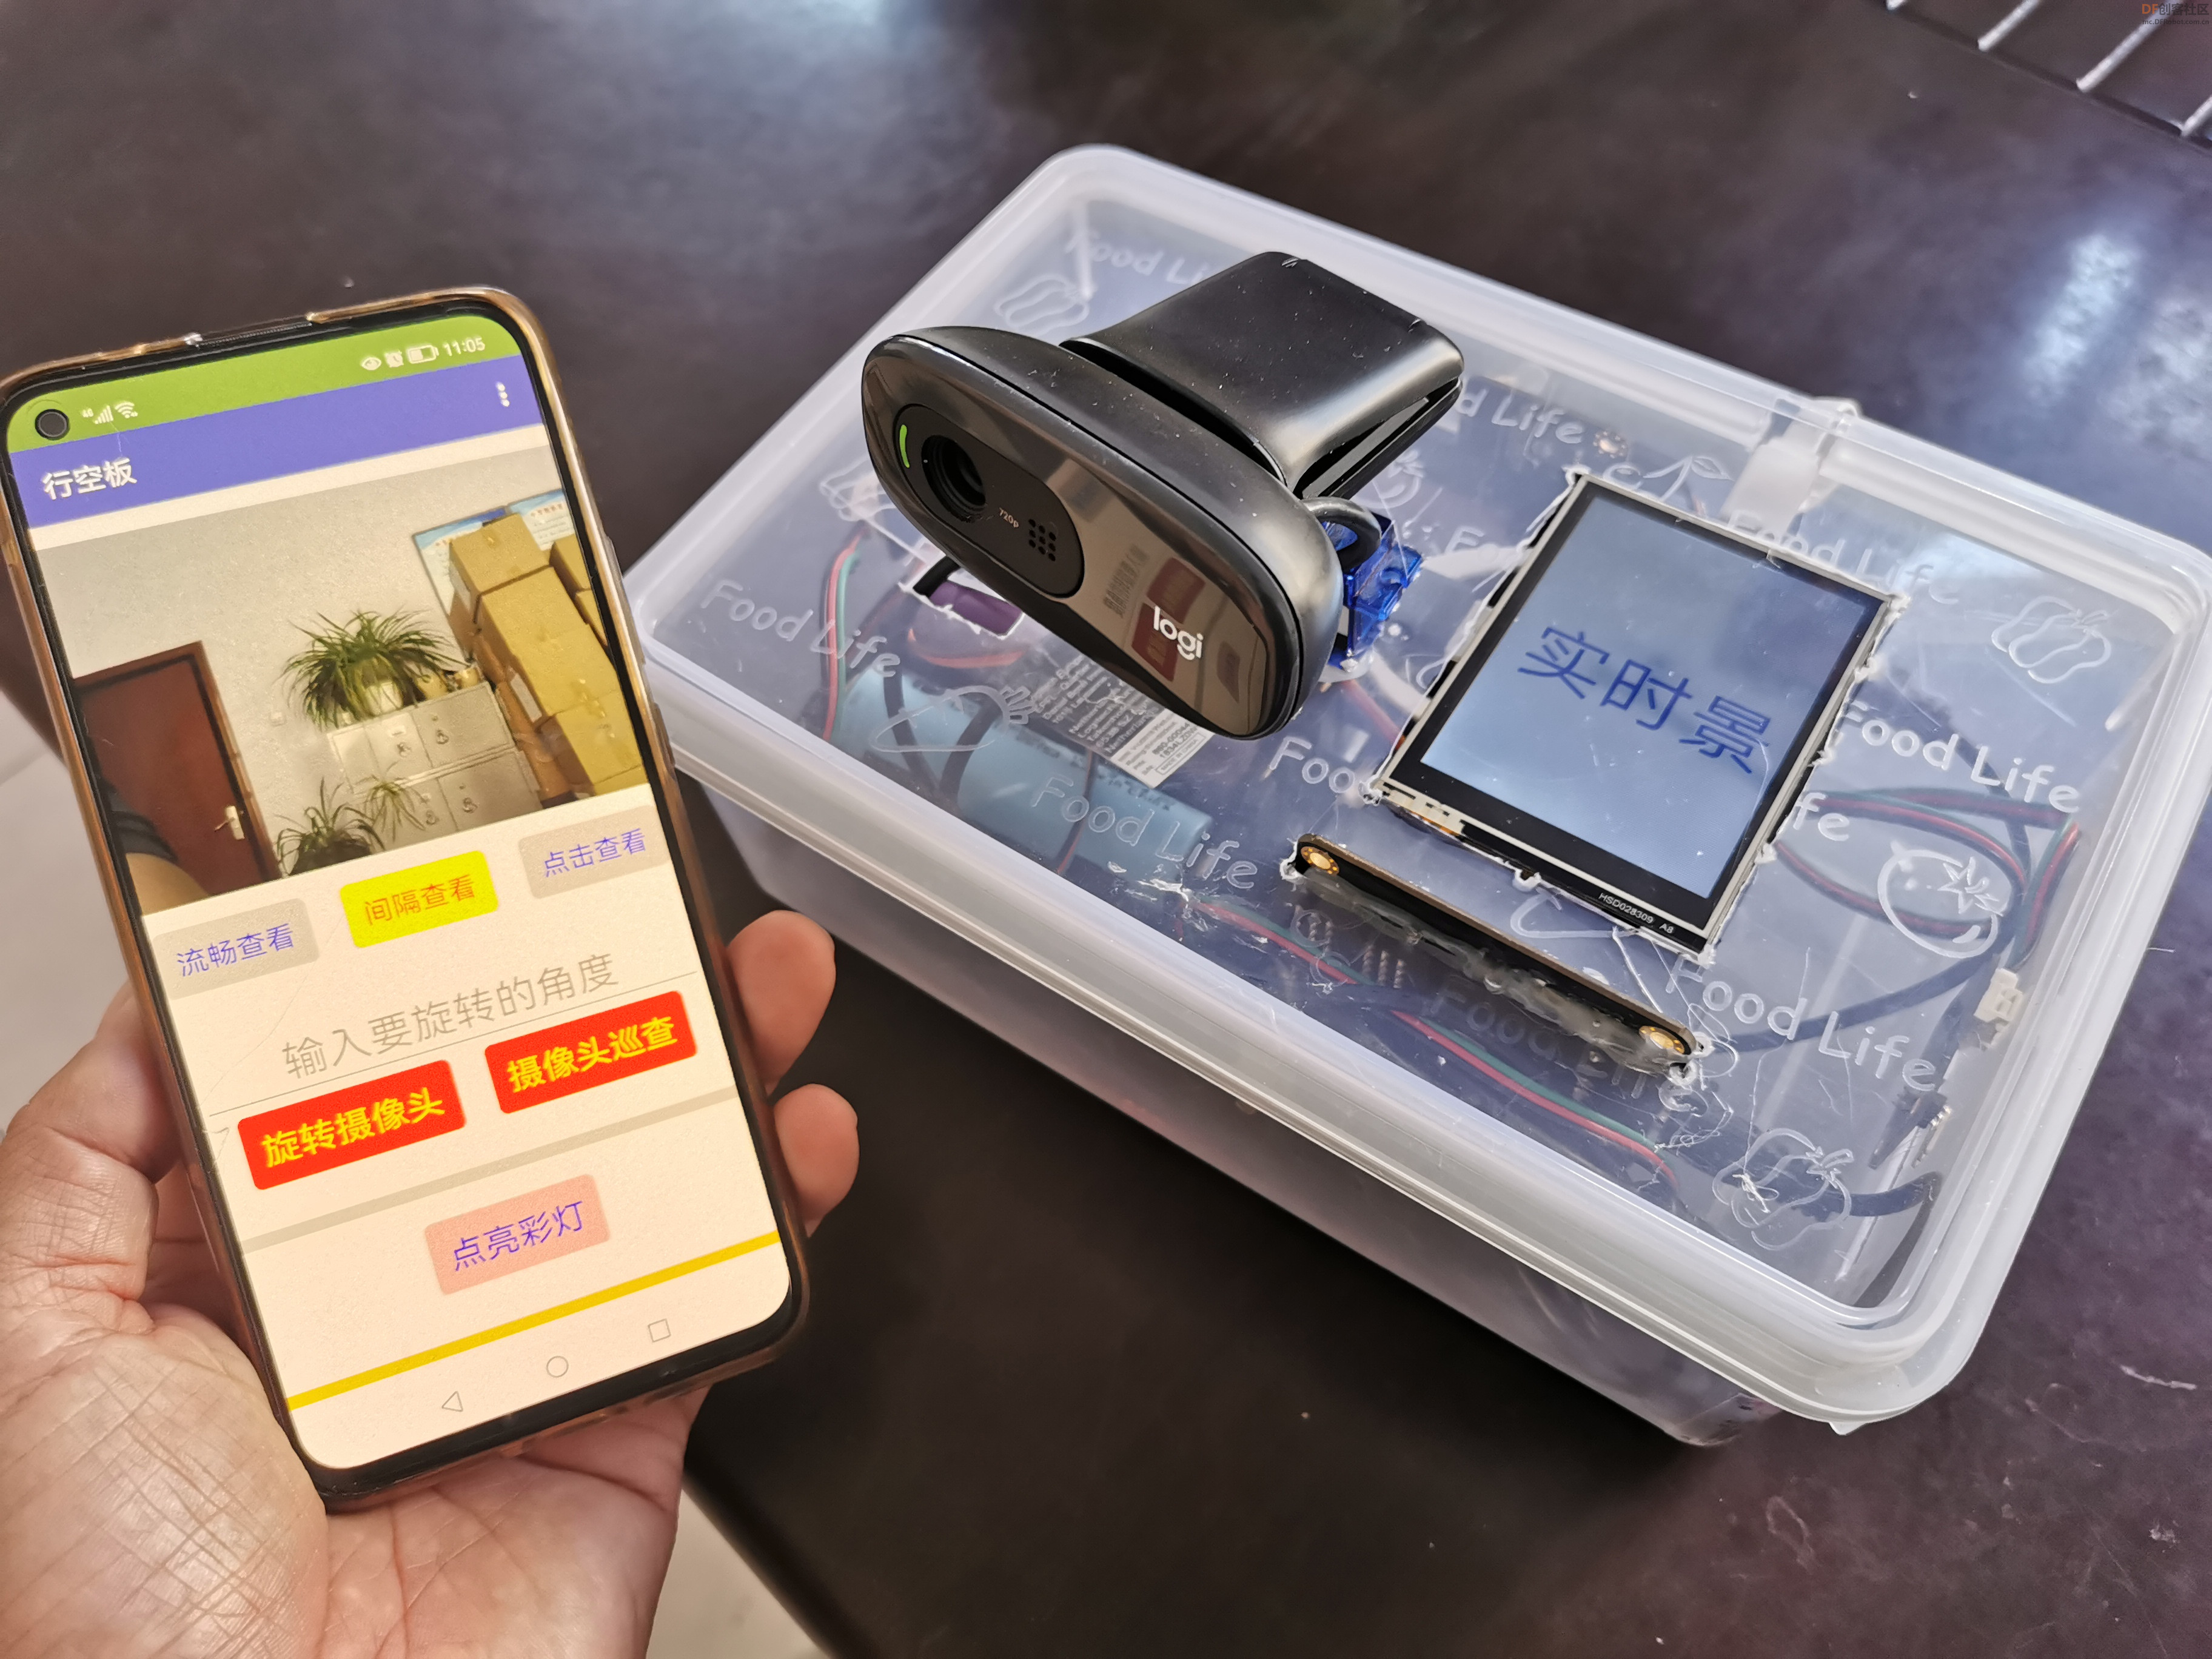
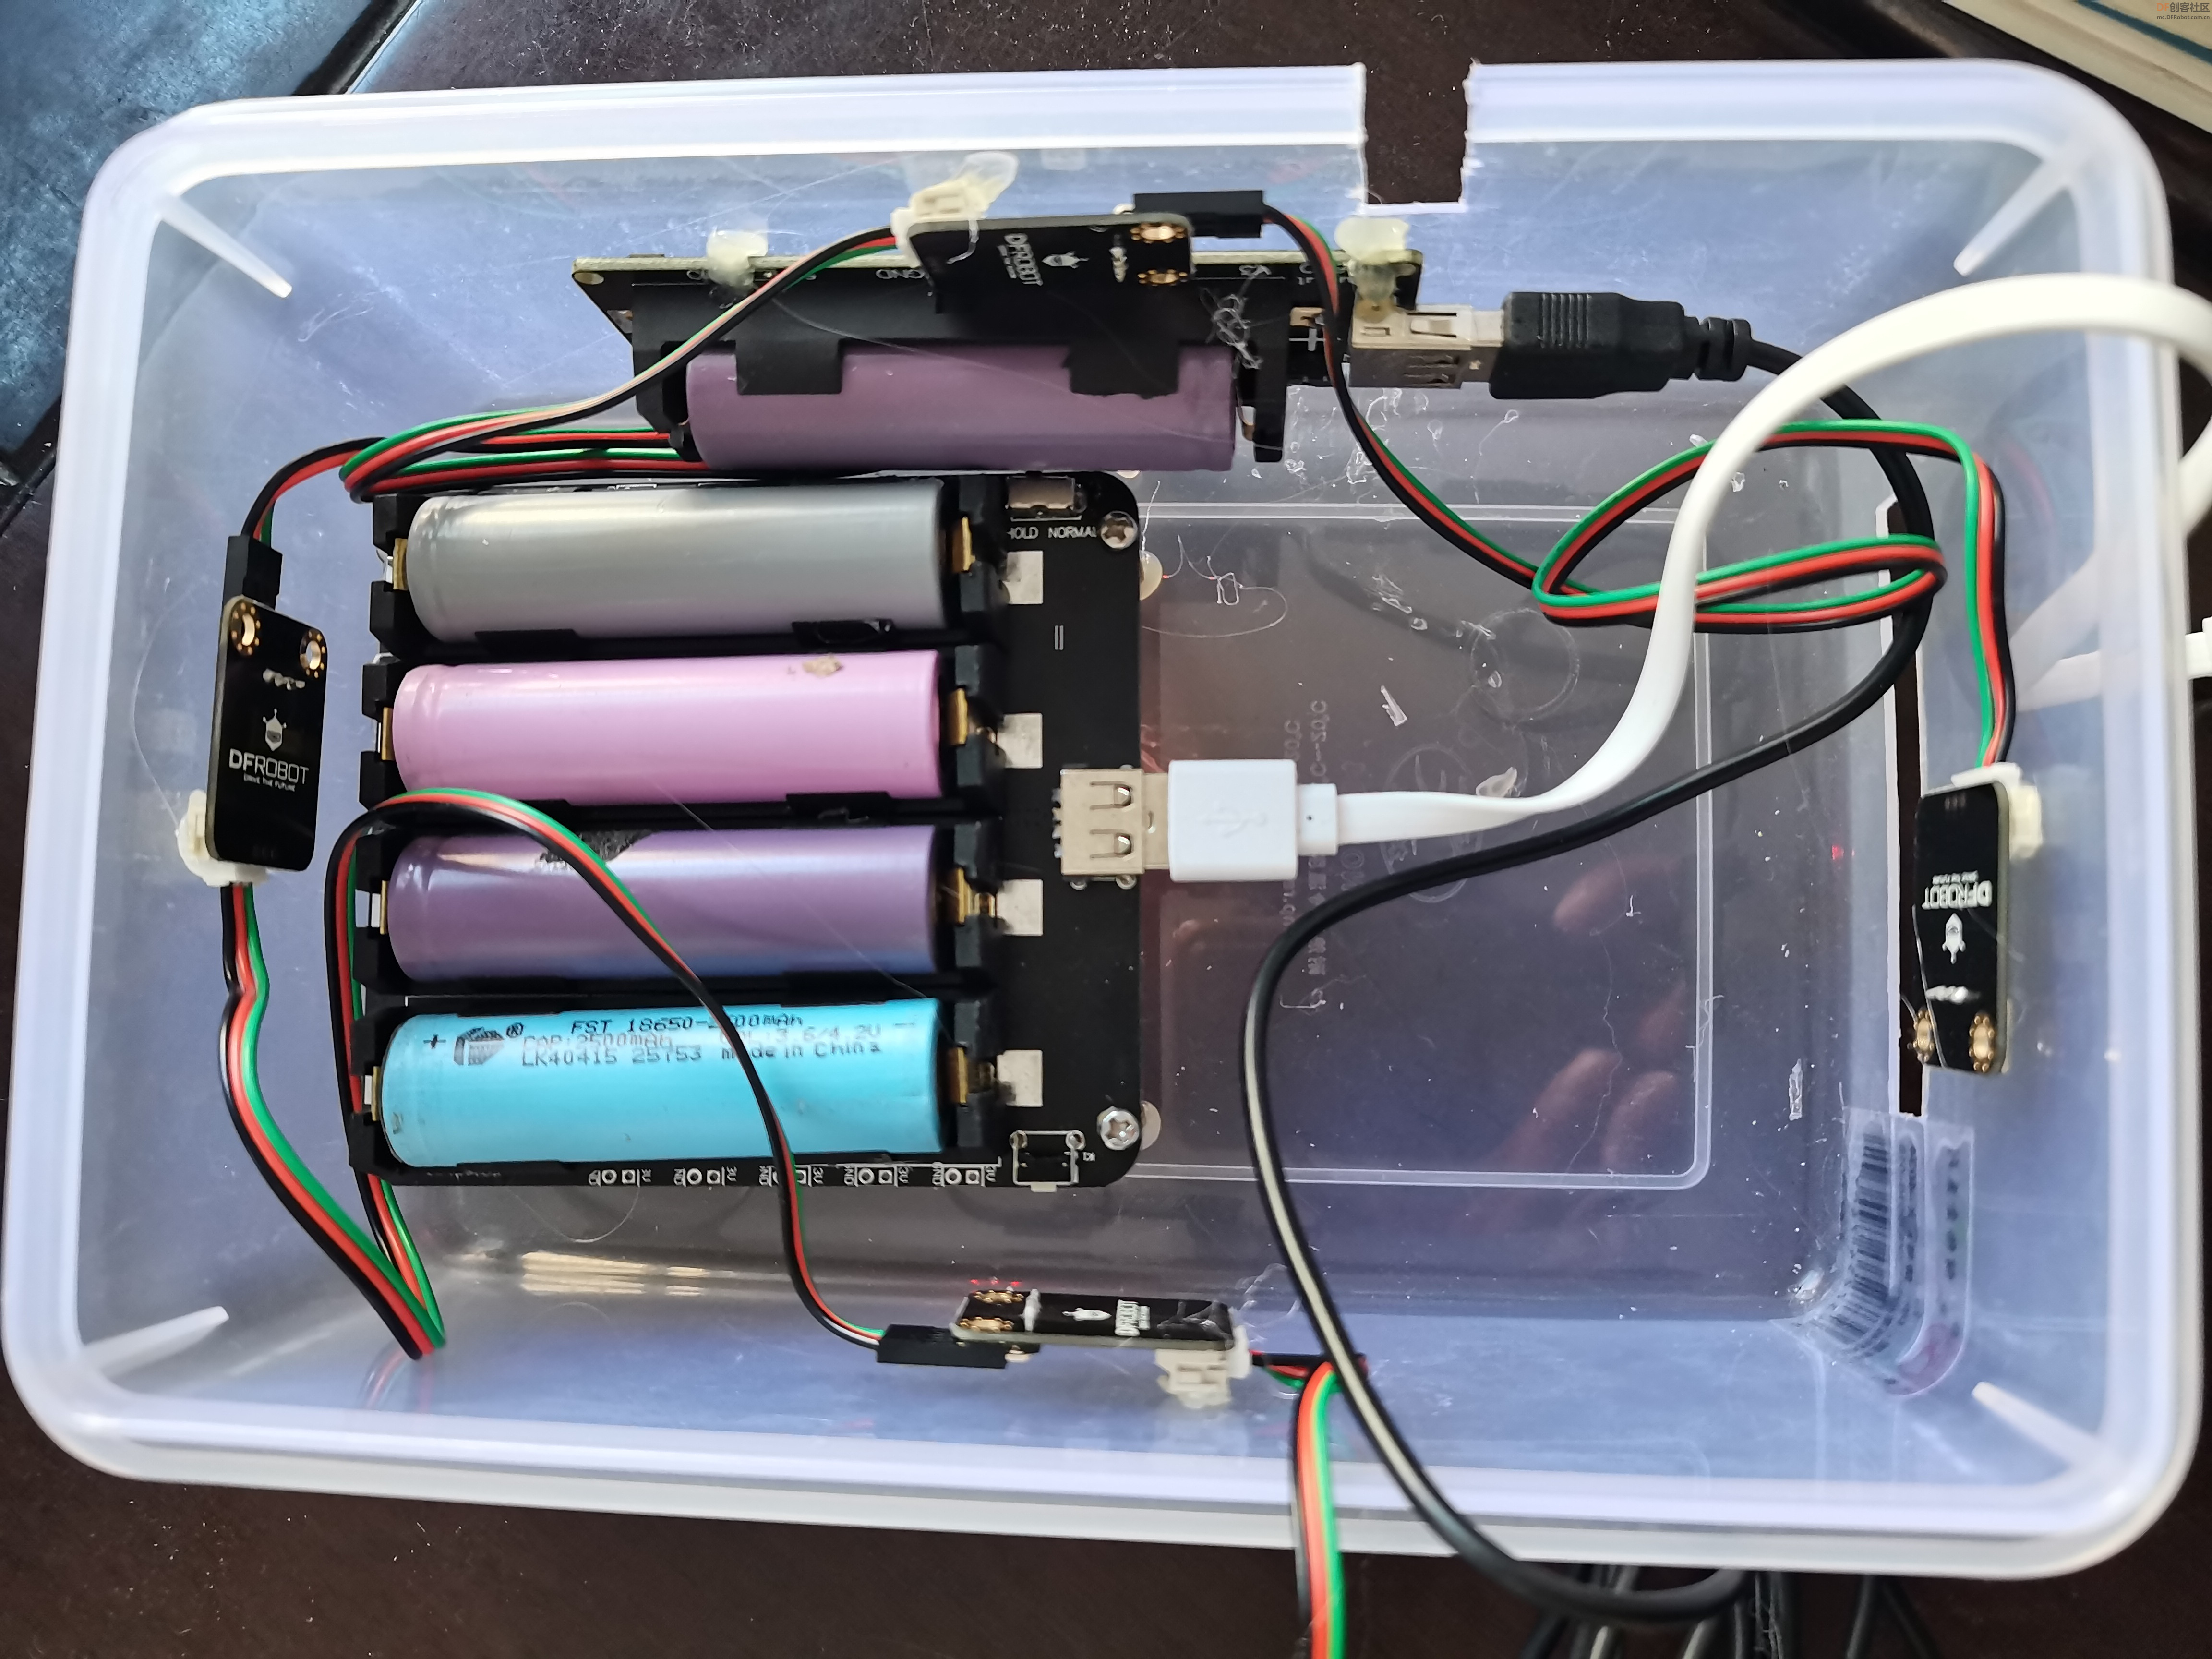
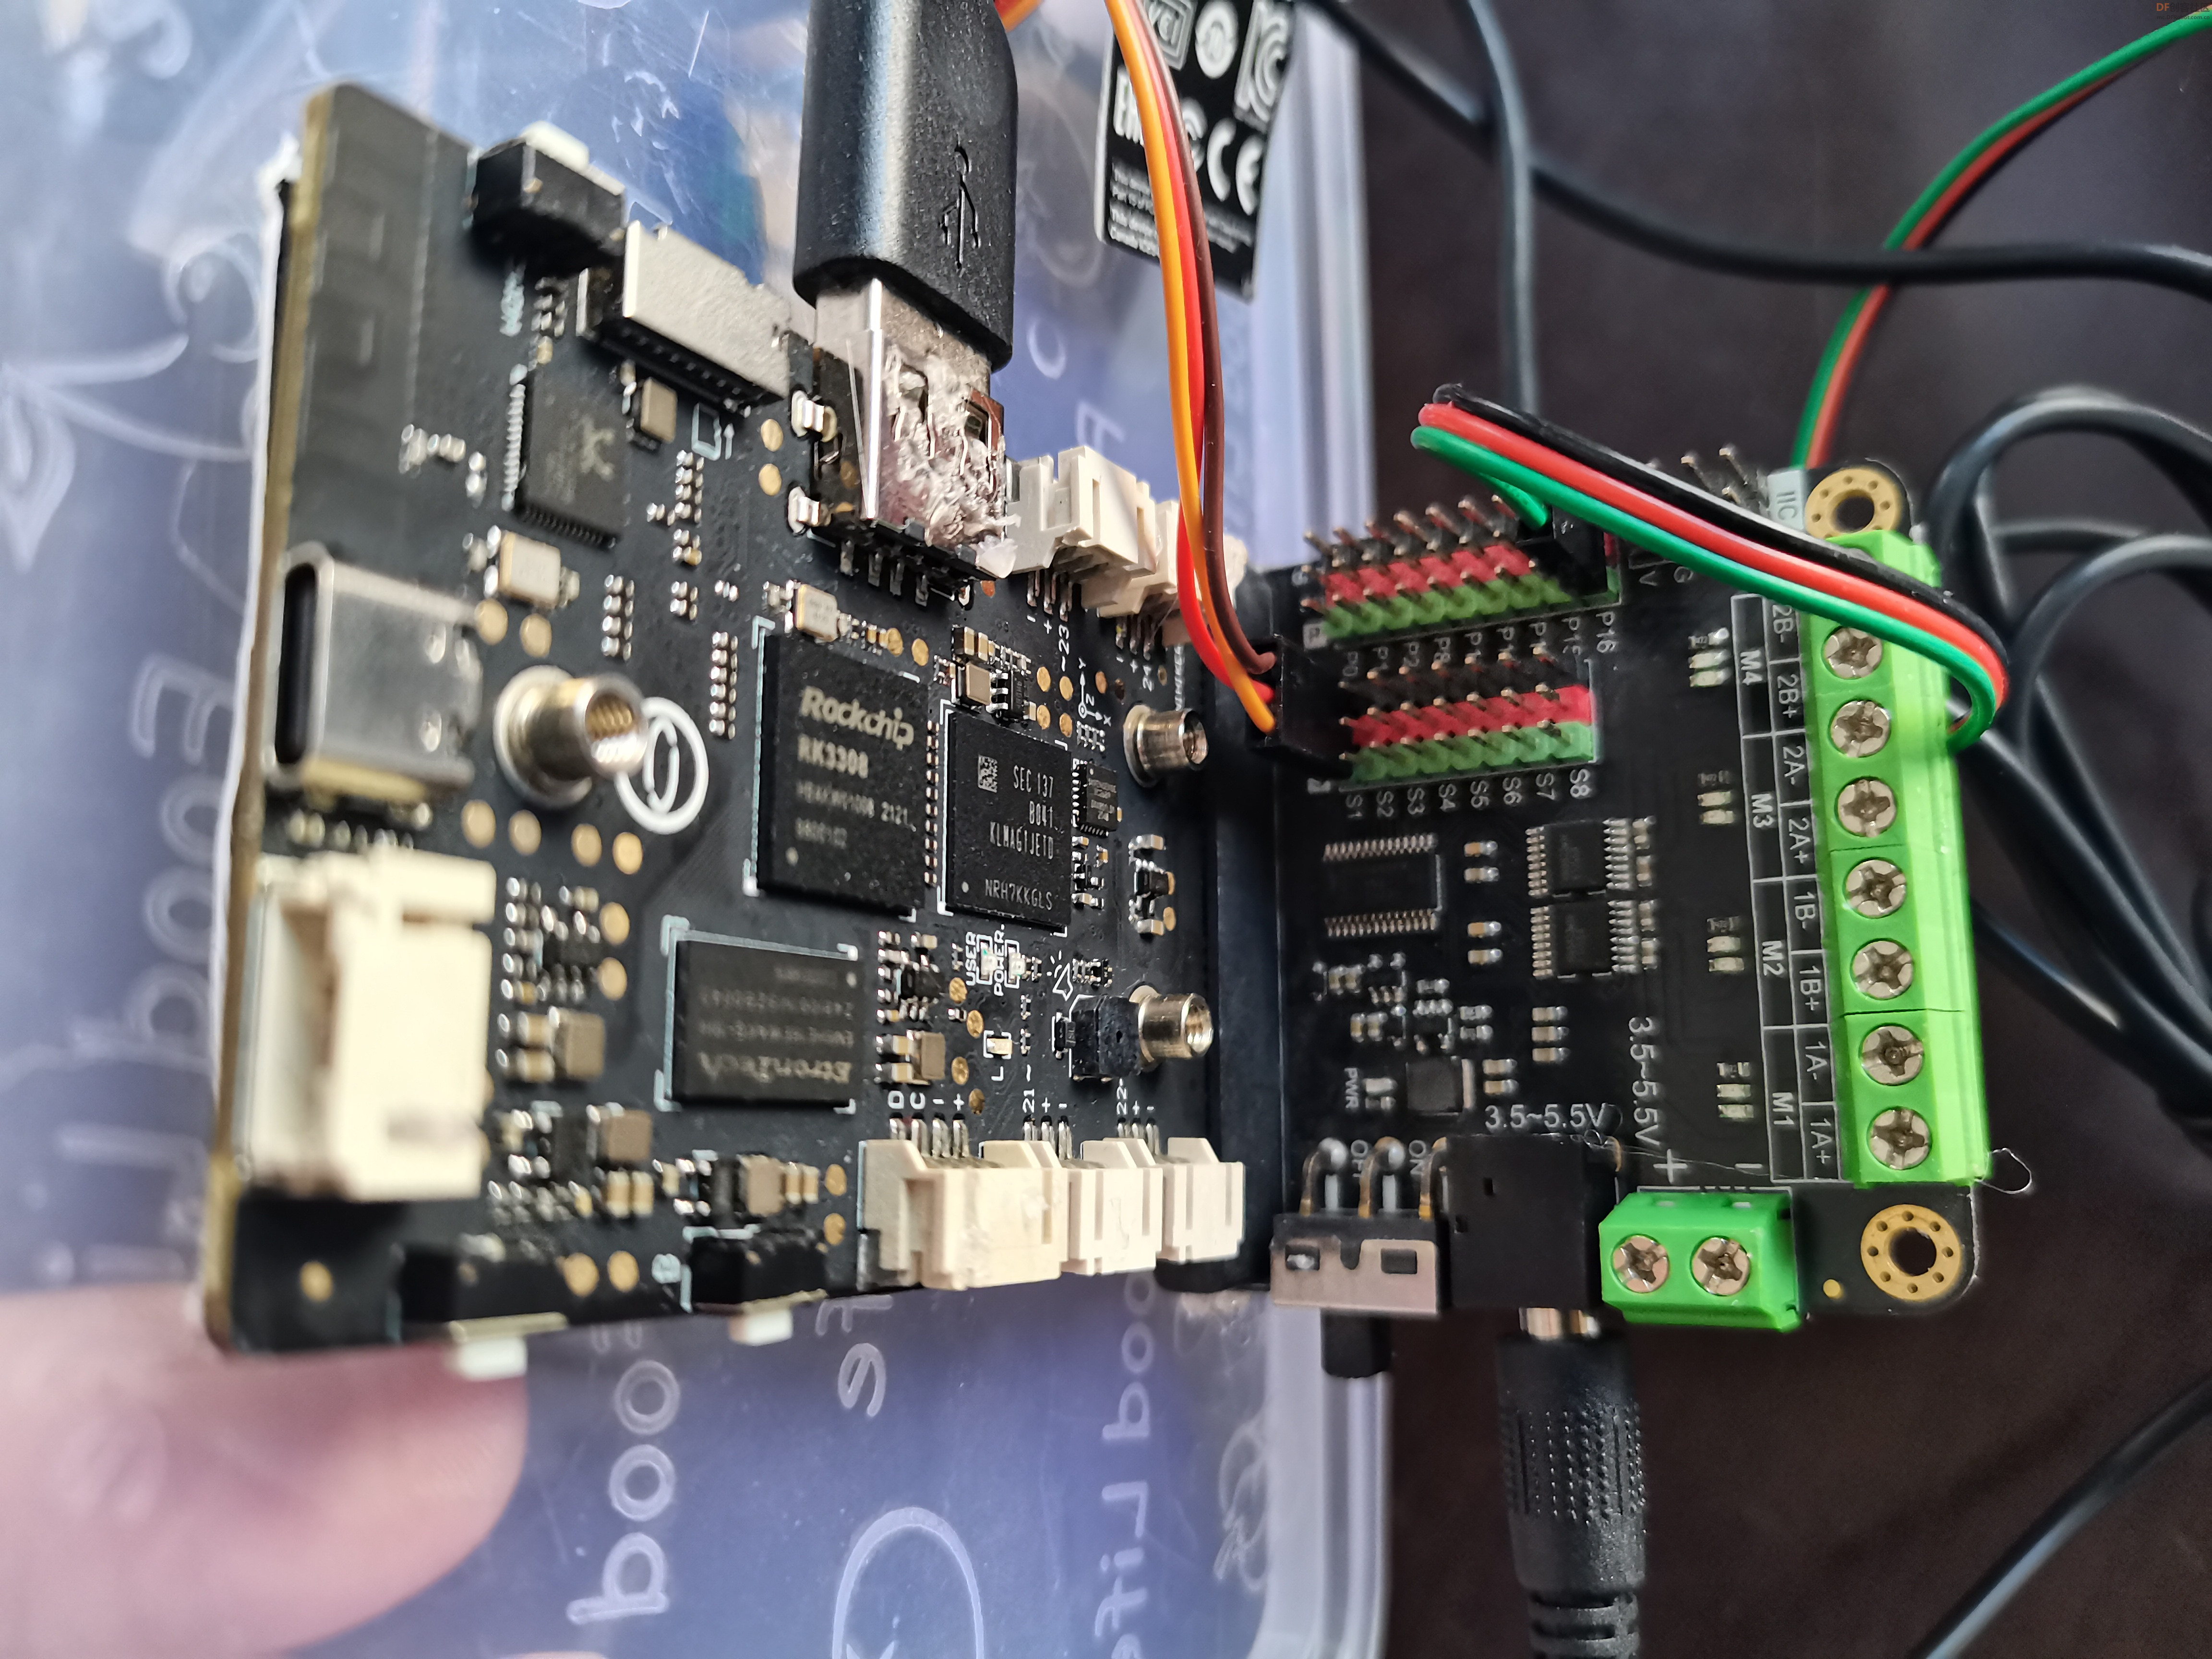
【硬件结构】
供电使用两个电池座,一个四节锂电池(输出5V 3A)给行空板供电,一个二节锂电池给扩展板供电,支持舵机(接S1引脚)和彩灯(接P16引脚)。
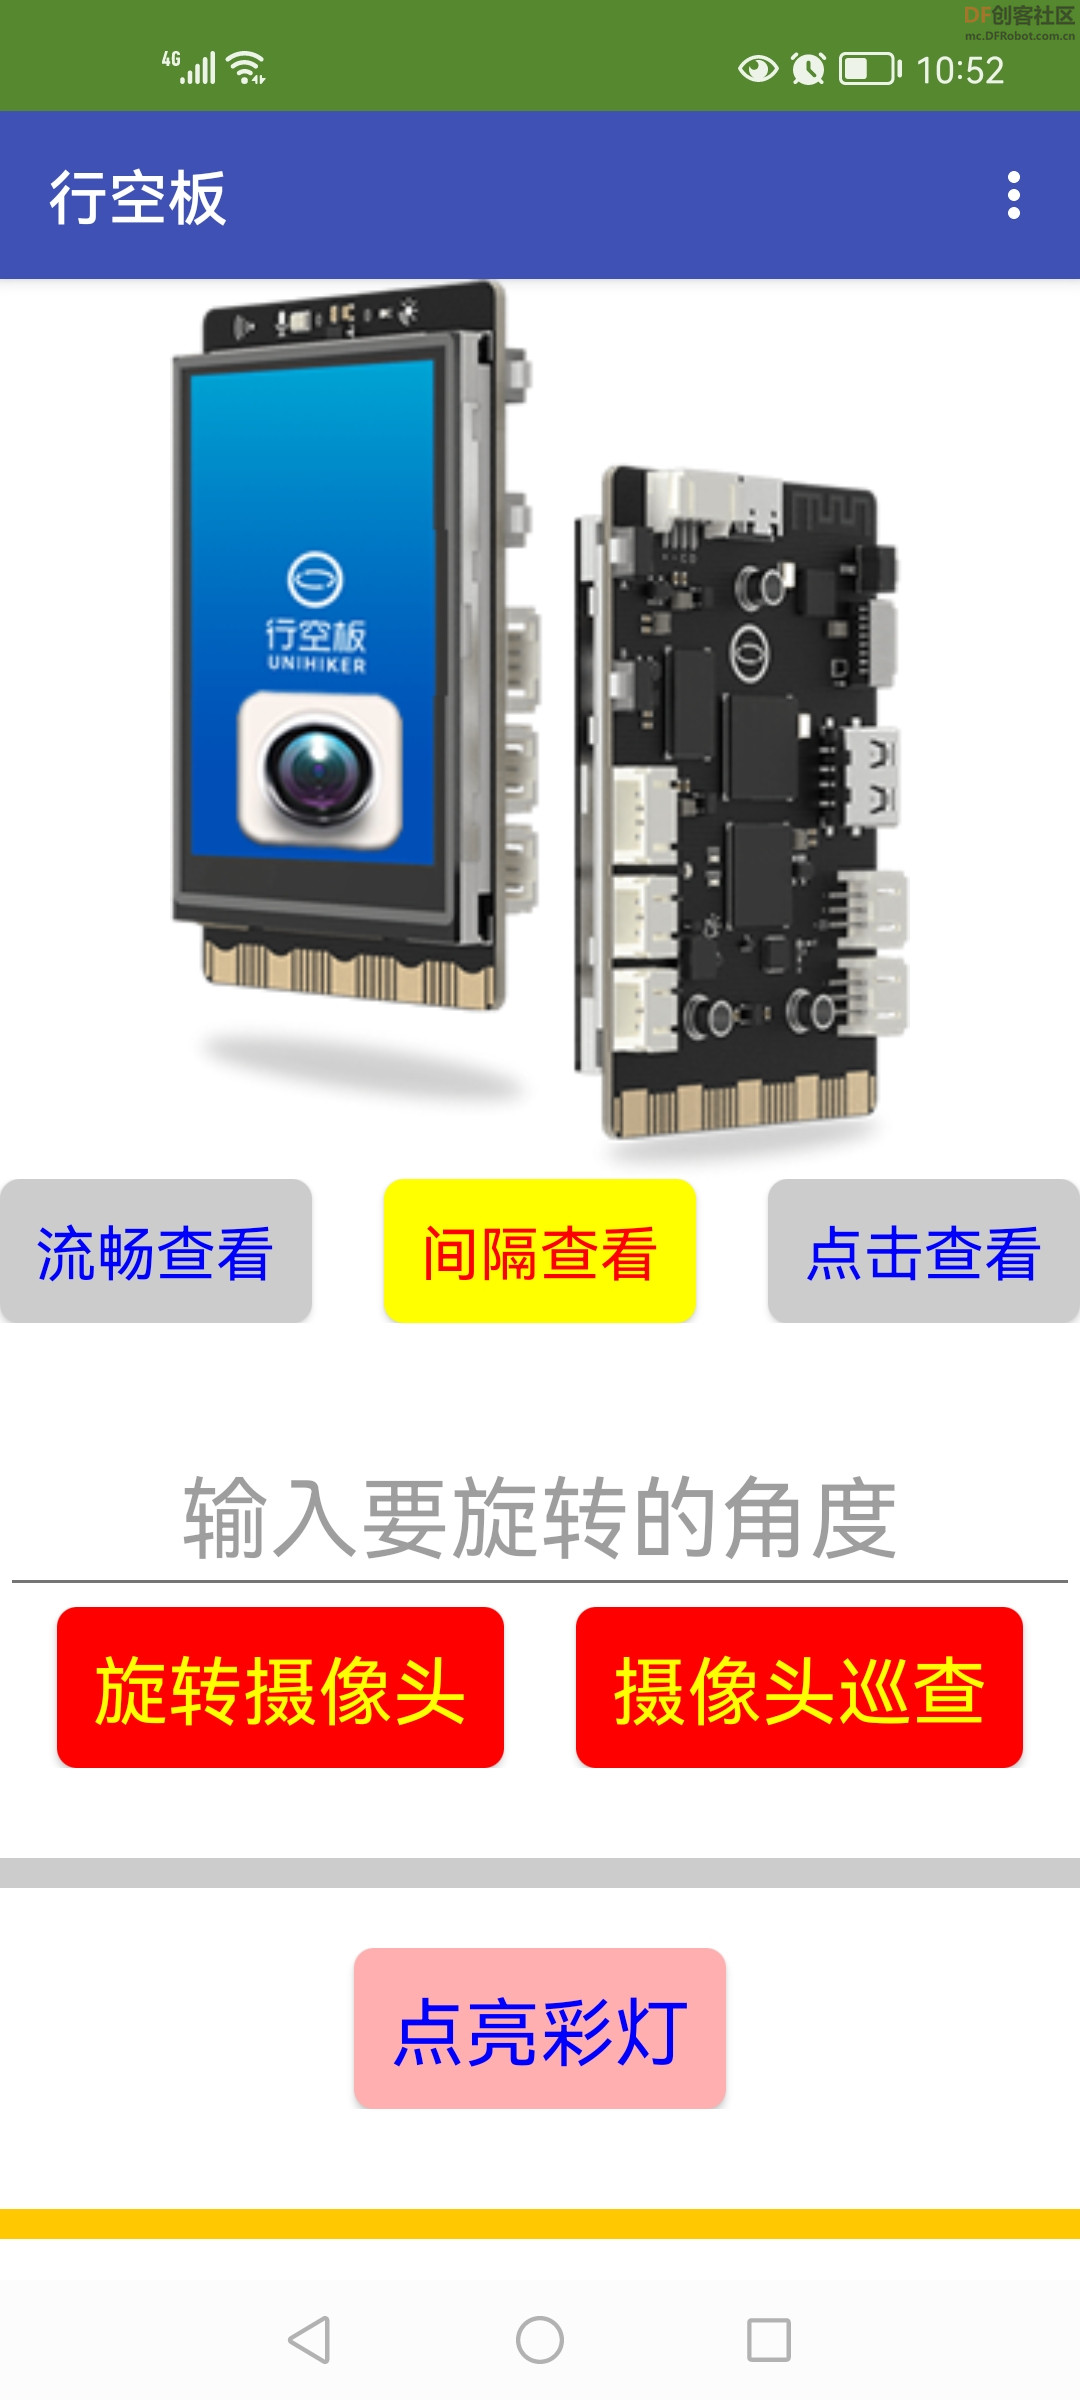
【程序设计——App Inventor2】
使用了MQTT物联网控件,配置Easy IOT相应参数。
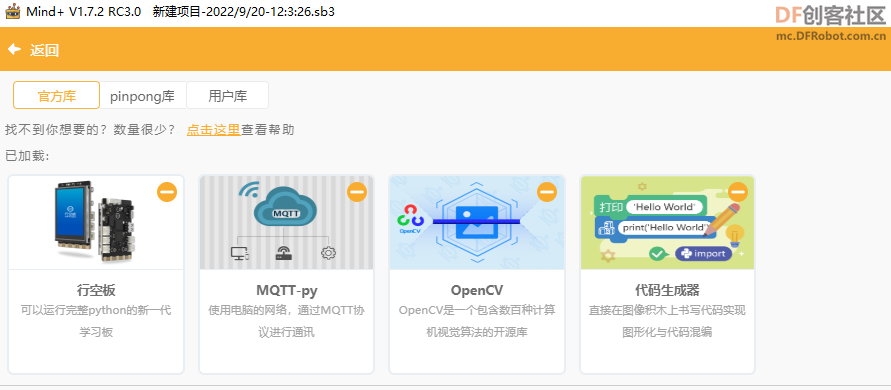
【程序设计——Mind+Python】
可在Mind+Python模式下加载以下扩展,协助完成以下代码编写。
【传送图像】
实现行空板向物联网平台发送base64编码后的图像。(行空板要连接Wifi)
-
- import base64
-
- import siot
- import time
- import cv2
- siot.init(client_id="",server="iot.dfrobot.com.cn",port=1883,user="X8jykxFnR",password="u8jskbFngz")
- siot.connect()
- siot.loop()
- siot.getsubscribe(topic="jBarN574g")
- siot.set_callback(on_message_callback)
-
- vd = cv2.VideoCapture()
- vd.open(0)
- while True:
- ret, img = vd.read()
- if ret:
- img=cv2.resize(img,(400,300))
- img=cv2.imencode('.jpg',img)[1]
- image_code=str(base64.b64encode(img))[2:-1]
- siot.publish(topic="tLm2XCm4R", data=image_code)
- time.sleep(0.04)
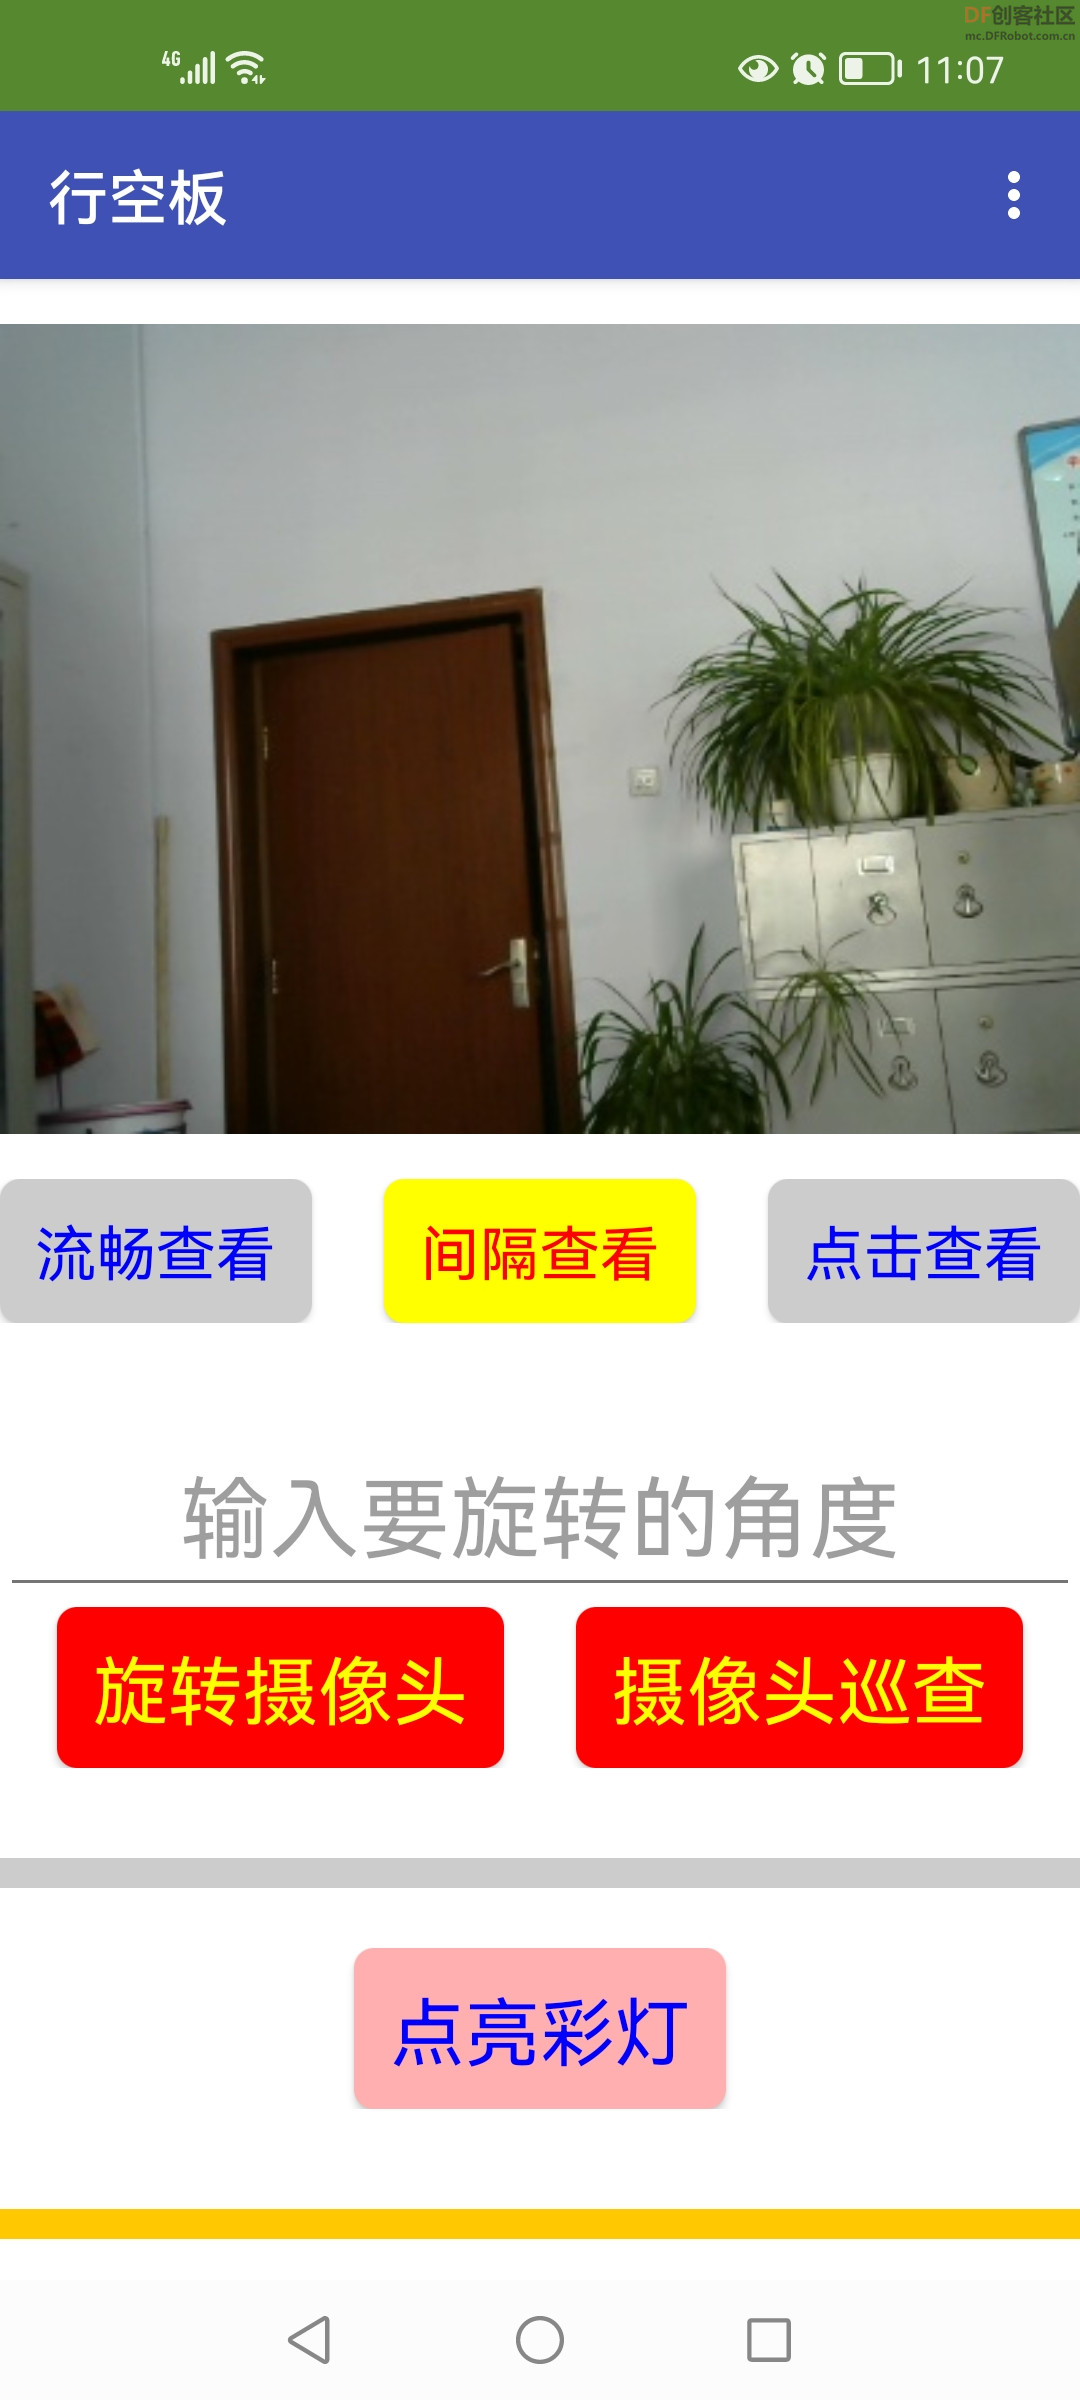
【查看方式】
实现“流畅查看”、“间隔查看”、“点击查看”三种查看方式,是为适应网络传输环境,Easy Iot物联网平台响应速度及信息量1万条的限制。但“间隔查看”、“点击查看”会因read()读出缓存问题,而可能看不到实时图像。解决方法见最后。
-
- # -*- coding: UTF-8 -*-
-
- # MindPlus
- # Python
- import base64
-
- import siot
- import time
- import cv2
- # 事件回调函数
- def on_message_callback(client, userdata, msg):
- global bs
- if (msg.payload.decode() == '1'):
-
- bs=1
- elif (msg.payload.decode() == '2'):
-
- bs=2
- elif (msg.payload.decode() == '3'):
-
- bs=3
-
- siot.init(client_id="",server="iot.dfrobot.com.cn",port=1883,user="X8jykxFnR",password="u8jskbFngz")
- siot.connect()
- siot.loop()
- siot.getsubscribe(topic="jBarN574g")
- siot.set_callback(on_message_callback)
-
- vd = cv2.VideoCapture()
- vd.open(0)
- time1=1
- bs=0
- currtime1=time.time()
- while not (vd.isOpened()):
- pass
- def getimg():
- ret, img = vd.read()
- if ret:
- img=cv2.resize(img,(400,300))
- img=cv2.imencode('.jpg',img)[1]
- image_code=str(base64.b64encode(img))[2:-1]
- siot.publish(topic="tLm2XCm4R", data=image_code)
-
- while True:
- if bs==1:
- time1=0.04
- if time.time()-currtime1>time1:
- currtime1=time.time()
- getimg()
- elif bs==2:
- time1=1
- if time.time()-currtime1>time1:
- currtime1=time.time()
- getimg()
- elif bs==3:
- bs=0
- getimg()
-
-
【传送信息】
修改程序,接收指令加信息,转成列表进行处理,以增加接收舵机角度信息。
-
- # -*- coding: UTF-8 -*-
-
- # MindPlus
- # Python
- import base64
-
- import siot
- import time
- import cv2
- # 事件回调函数
- def on_message_callback(client, userdata, msg):
- global bs,angle
- message=msg.payload.decode()
- message=message.split(",")
- if message[0] == '1':
-
- bs=1
- elif message[0] == '2':
- print(message[0])
- bs=2
- elif message[0] == '3':
-
- bs=3
- elif message[0] == '4':
- bs=4
- angle=int(message[1])
- siot.init(client_id="",server="iot.dfrobot.com.cn",port=1883,user="X8jykxFnR",password="u8jskbFngz")
- siot.connect()
- siot.loop()
- siot.getsubscribe(topic="jBarN574g")
- siot.set_callback(on_message_callback)
-
- vd = cv2.VideoCapture()
- vd.open(0)
- time1=1
- bs=0
- angle=90
- currtime1=time.time()
- while not (vd.isOpened()):
- pass
- def getimg():
- ret, img = vd.read()
- if ret:
- img=cv2.resize(img,(400,300))
- img=cv2.imencode('.jpg',img)[1]
- image_code=str(base64.b64encode(img))[2:-1]
- siot.publish(topic="tLm2XCm4R", data=image_code)
-
- while True:
-
- if bs==1:
- time1=0.04
- if time.time()-currtime1>time1:
- currtime1=time.time()
- getimg()
- elif bs==2:
-
- time1=1
- if time.time()-currtime1>time1:
- currtime1=time.time()
- getimg()
- elif bs==3:
- bs=0
- getimg()
- elif bs==4:
- print(angle)
-
-
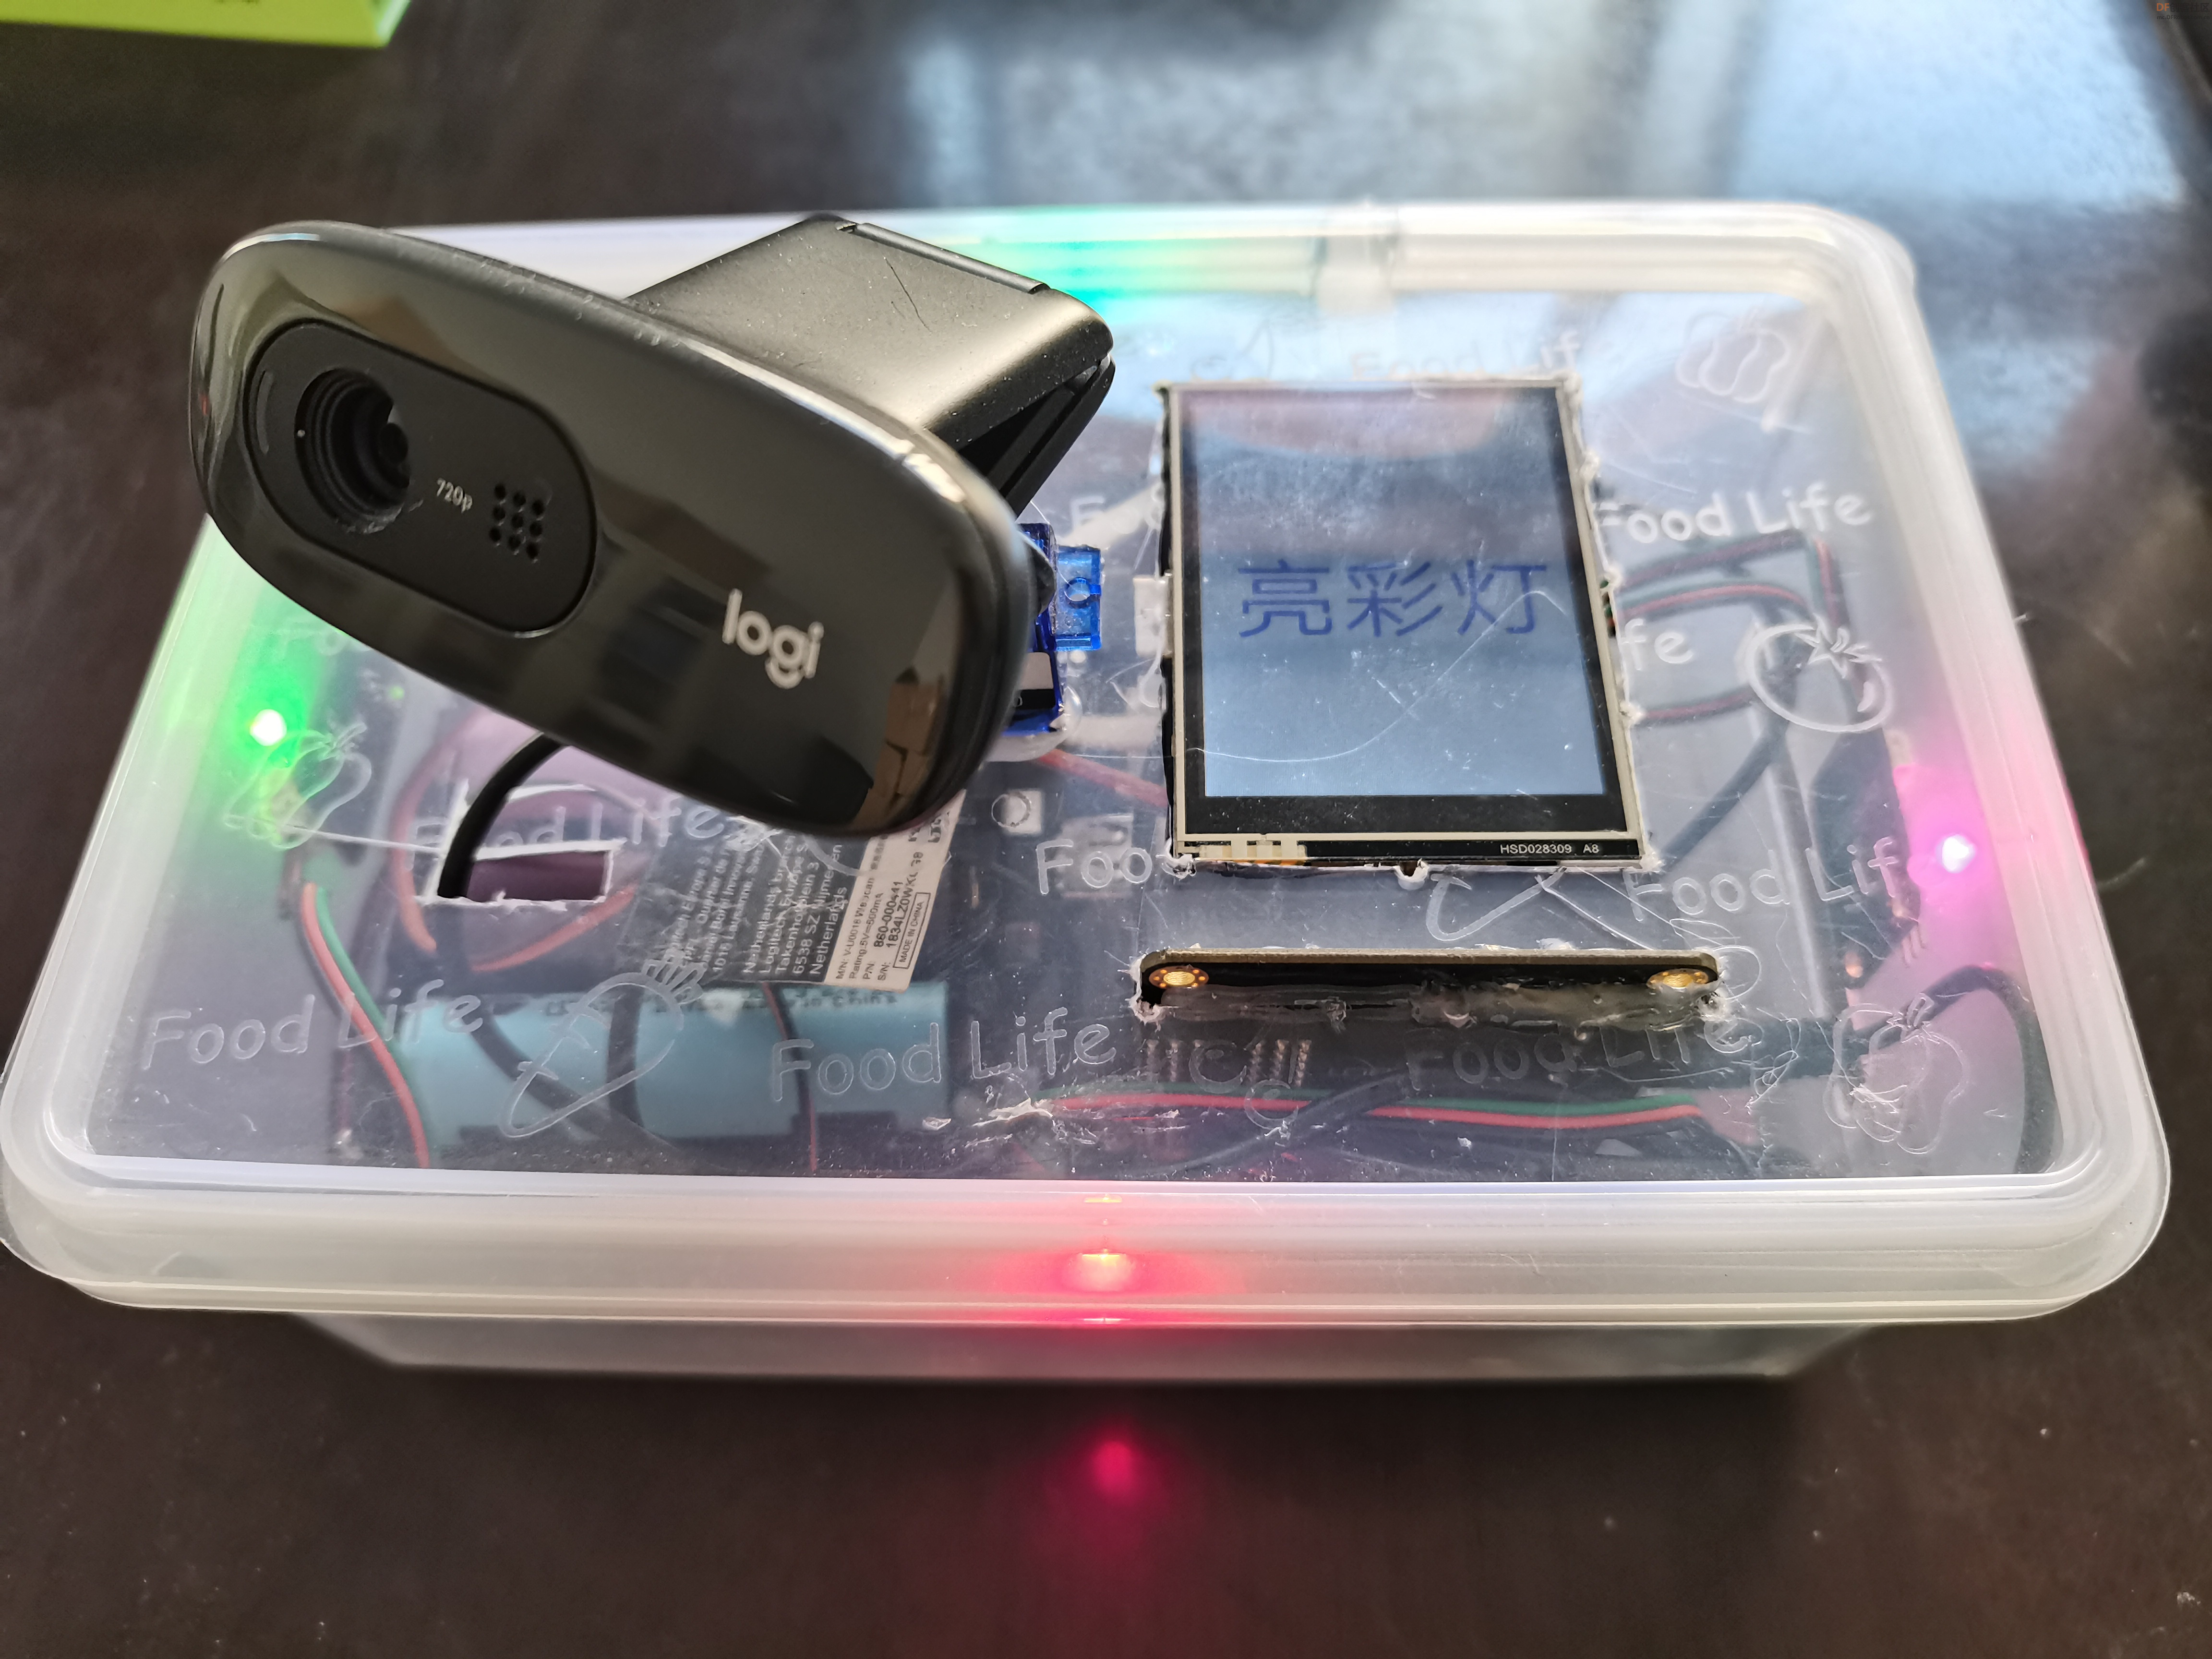
【摄像控制】
摄像头固定在舵机上,舵机连接在扩展板的S1引脚上,实现远程控制摄像头旋转。且增加行空板提示显示。
-
- # -*- coding: UTF-8 -*-
-
- # MindPlus
- # Python
- import base64
-
- import siot
- import time
- import cv2
-
- from pinpong.board import Board
- from microbit_motor import DFServo
- from unihiker import GUI
-
-
-
- # 事件回调函数
- def on_message_callback(client, userdata, msg):
- global bs,angle
- message=msg.payload.decode()
- message=message.split(",")
- if message[0] == '1':
-
- bs=1
- elif message[0] == '2':
-
- bs=2
- elif message[0] == '3':
-
- bs=3
- elif message[0] == '4':
- bs=4
- angle=int(message[1])
-
- elif message[0] == '5':
- bs=5
- siot.init(client_id="",server="iot.dfrobot.com.cn",port=1883,user="X8jykxFnR",password="u8jskbFngz")
- siot.connect()
- siot.loop()
- siot.getsubscribe(topic="jBarN574g")
- siot.set_callback(on_message_callback)
-
- vd = cv2.VideoCapture()
- vd.open(0)
- time1=1
- bs=0
- bs1=0
- bs2=0
- bs3=0
- angle=6
- angle_old=0
- step=5
- currtime1=time.time()
- while not (vd.isOpened()):
- pass
- def getimg():
- ret, img = vd.read()
- if ret:
- img=cv2.resize(img,(400,300))
- img=cv2.imencode('.jpg',img)[1]
- image_code=str(base64.b64encode(img))[2:-1]
- siot.publish(topic="tLm2XCm4R", data=image_code)
- Board().begin()
- S=DFServo(1)
- u_gui=GUI()
-
- pm=u_gui.draw_text(text="行空板",x=20,y=120,font_size=50, color="#0000FF")
-
-
- while True:
-
- if bs==1:
- if bs2==0:
- pm.config(text="实时景")
- bs2=1
- bs1=0
- bs3=0
- time1=0.04
- if time.time()-currtime1>time1:
- currtime1=time.time()
- getimg()
- elif bs==2:
- if bs3==0:
- pm.config(text="间隔景")
- bs3=1
- bs1=0
- bs2=0
- time1=1
- if time.time()-currtime1>time1:
- currtime1=time.time()
- getimg()
- elif bs==3:
- pm.config(text="定格景")
- bs=0
- bs1=0
- bs2=0
- bs3=0
- getimg()
- elif bs==4:
- if angle!=angle_old:
- pm.config(text="转定角")
- angle_old=angle
- S.angle(angle)
- time.sleep(1)
- time1=0.04
- bs1=0
- bs2=0
- bs3=0
- if time.time()-currtime1>time1:
- currtime1=time.time()
- getimg()
- elif bs==5:
- if bs1==0:
- pm.config(text="巡航转")
- bs1=1
- bs2=0
- bs3=0
- if angle>174:
- step=-5
- elif angle<6:
- step=5
- angle=angle+step
- S.angle(angle)
- time.sleep(1)
- getimg()
-
-
【点亮彩灯】
使用四个RGB LED模块串联接在扩展板P16引脚上。
-
- # -*- coding: UTF-8 -*-
-
- # MindPlus
- # Python
- import base64
-
- import siot
- import time
- import cv2
-
- from pinpong.board import Board,NeoPixel,Pin
-
- from microbit_motor import DFServo
- from unihiker import GUI
-
-
- NEOPIXEL_PIN = Pin.P16
- PIXELS_NUM = 4 #灯数
-
- # 事件回调函数
- def on_message_callback(client, userdata, msg):
- global bs,angle
- message=msg.payload.decode()
- message=message.split(",")
- np.clear()
- if message[0] == '1':
-
- bs=1
- elif message[0] == '2':
-
- bs=2
- elif message[0] == '3':
-
- bs=3
- elif message[0] == '4':
- bs=4
- angle=int(message[1])
-
- elif message[0] == '5':
- bs=5
- elif message[0] == '6':
- bs=6
- siot.init(client_id="",server="iot.dfrobot.com.cn",port=1883,user="X8jykxFnR",password="u8jskbFngz")
- siot.connect()
- siot.loop()
- siot.getsubscribe(topic="jBarN574g")
- siot.set_callback(on_message_callback)
-
- vd = cv2.VideoCapture()
- vd.open(0)
- time1=1
- bs=0
- bs1=0
- bs2=0
- bs3=0
- bs4=0
- angle=6
- angle_old=0
- step=5
- currtime1=time.time()
- while not (vd.isOpened()):
- pass
- def getimg():
- ret, img = vd.read()
- if ret:
- img=cv2.resize(img,(400,300))
- img=cv2.imencode('.jpg',img)[1]
- image_code=str(base64.b64encode(img))[2:-1]
- siot.publish(topic="tLm2XCm4R", data=image_code)
- Board().begin()
- S=DFServo(1)
- u_gui=GUI()
- np = NeoPixel(Pin(NEOPIXEL_PIN), PIXELS_NUM)
- pm=u_gui.draw_text(text="行空板",x=20,y=120,font_size=50, color="#0000FF")
-
-
- while True:
-
- if bs==1:
- if bs2==0:
- pm.config(text="实时景")
- bs2=1
- bs1=0
- bs3=0
- bs4=0
- time1=0.04
- if time.time()-currtime1>time1:
- currtime1=time.time()
- getimg()
- elif bs==2:
- if bs3==0:
- pm.config(text="间隔景")
- bs3=1
- bs1=0
- bs2=0
- bs4=0
- time1=1
- if time.time()-currtime1>time1:
- currtime1=time.time()
- getimg()
- elif bs==3:
- pm.config(text="定格景")
- bs=0
- bs1=0
- bs2=0
- bs3=0
- bs4=0
- getimg()
- elif bs==4:
- if angle!=angle_old:
- pm.config(text="转定角")
- angle_old=angle
- S.angle(angle)
- time.sleep(1)
- time1=0.04
- bs1=0
- bs2=0
- bs3=0
- bs4=0
- if time.time()-currtime1>time1:
- currtime1=time.time()
- getimg()
- elif bs==5:
- if bs1==0:
- pm.config(text="巡航转")
- bs1=1
- bs2=0
- bs3=0
- bs4=0
- if angle>174:
- step=-5
- elif angle<6:
- step=5
- angle=angle+step
- S.angle(angle)
- time.sleep(1)
- getimg()
- elif bs==6:
- if bs4==0:
- np.rainbow(0,3,0,0x0022FF)
- pm.config(text="亮彩灯")
- bs4=1
- bs1=0
- bs2=0
- bs3=0
- for i in range(3):
- np.rotate(1)
- time.sleep(0.2)
-
【解决问题】
使用Opencv读取实时视频流数据,做算法处理,因为算法本身处理速度有限,因此会产生每次读取到的帧不是当前帧的问题,体验很差。cv2.VideoCapture 的 read 函数并不能获取实时流的最新帧而是按照内部缓冲区中顺序逐帧的读取,opencv会每过一段时间清空一次缓冲区,但是清空的时机并不是我们能够控制的,因此如果对视频帧的处理速度如果跟不上接受速度,那么每过一段时间,在播放时(imshow)时会看到画面突然花屏,甚至程序直接崩溃,在网上查了很多资料,处理方式基本是一个思想
生产者消费者模式:
使用一个临时缓存,可以是一个变量保存最新一帧,也可以是一个队列保存一些帧,然后开启一个线程读取最新帧保存到缓存里,用户读取的时候只返回最新的一帧
-
- import cv2
- import queue
- import threading
-
- # 无缓存读取视频流类
- class VideoCapture:
-
- def __init__(self, name):
- self.cap = cv2.VideoCapture(name)
- self.q = queue.Queue()
- t = threading.Thread(target=self._reader)
- t.daemon = True
- t.start()
-
- # 帧可用时立即读取帧,只保留最新的帧
- def _reader(self):
- while True:
- ret, frame = self.cap.read()
- if not ret:
- break
- if not self.q.empty():
- try:
- self.q.get_nowait() # 删除上一个(未处理的)帧
- except queue.Empty:
- pass
- self.q.put(frame)
-
- def read(self):
- return self.q.get()
-
- cap = VideoCapture("rtsp://....")
- while True:
- frame = cap.read()
- cv2.imshow("frame", frame)
- if chr(cv2.waitKey(1)&255) == 'q':
- break
-
|


 沪公网安备31011502402448
 置顶卡
置顶卡 变色卡
变色卡 千斤顶
千斤顶 学习学习!
学习学习!

 活跃会员
活跃会员
 宣传大使
宣传大使
 牛X认证
牛X认证
 创客造
创客造
 编辑选择奖
编辑选择奖
 志“童”道合
 编辑选择奖
编辑选择奖
 编辑选择奖
编辑选择奖
 编辑选择奖
编辑选择奖
 编辑选择奖
编辑选择奖


