|
【项目背景】 在当今这个科技迅猛发展的时代,人工智能(AI)已经渗透到了我们生活的方方面面,从智能家居到自动驾驶,从数据分析到娱乐休闲。而“AI手相师”项目正是将AI技术与传统手相学相结合,为用户提供一种全新的娱乐体验。 手相学,作为一种古老的占卜艺术,一直吸引着对人类命运和性格的好奇。然而,传统手相学需要专业的手相大师进行解读,这不仅限制了其普及性,也增加了获取手相解读的难度。随着深度学习和图像识别技术的进步,我们有机会将这一传统艺术数字化,使其更加易于接触和理解。 【项目设计】 “AI手相师”项目利用行空板和摄像头捕捉用户的手掌图像,通过Python的OpenCV库进行图像处理和采集。结合讯飞星火认知大模型的图像理解功能,AI能够分析手掌的线条、形状和纹理,从而提供个性化的手相解读。这种解读不仅基于传统手相学的理论,还融入了现代心理学和行为学的研究成果,使得解读更加科学和有趣。 为了提升用户体验,项目还集成了语音合成功能,将AI生成的手相分析文本转换为自然流畅的语音。通过pyaudio库和wave库,这些语音信息可以通过蓝牙音箱播放,为用户提供一种更加沉浸式的体验。整个过程无需人工干预,用户只需简单操作即可获得专业的手相解读,极大地提高了娱乐性和便捷性。 “AI手相师”项目不仅是一种娱乐工具,它还可能激发人们对自我认知和个性探索的兴趣,为用户提供了一种全新的自我了解和娱乐方式。通过这种方式,我们希望能够将传统手相学的魅力以现代科技的形式传承下去,让更多人享受到科技带来的乐趣。 【项目硬件】 项目硬件:行空板、摄像头、蓝牙音箱、按钮、充电宝(电源)、手势提示板。 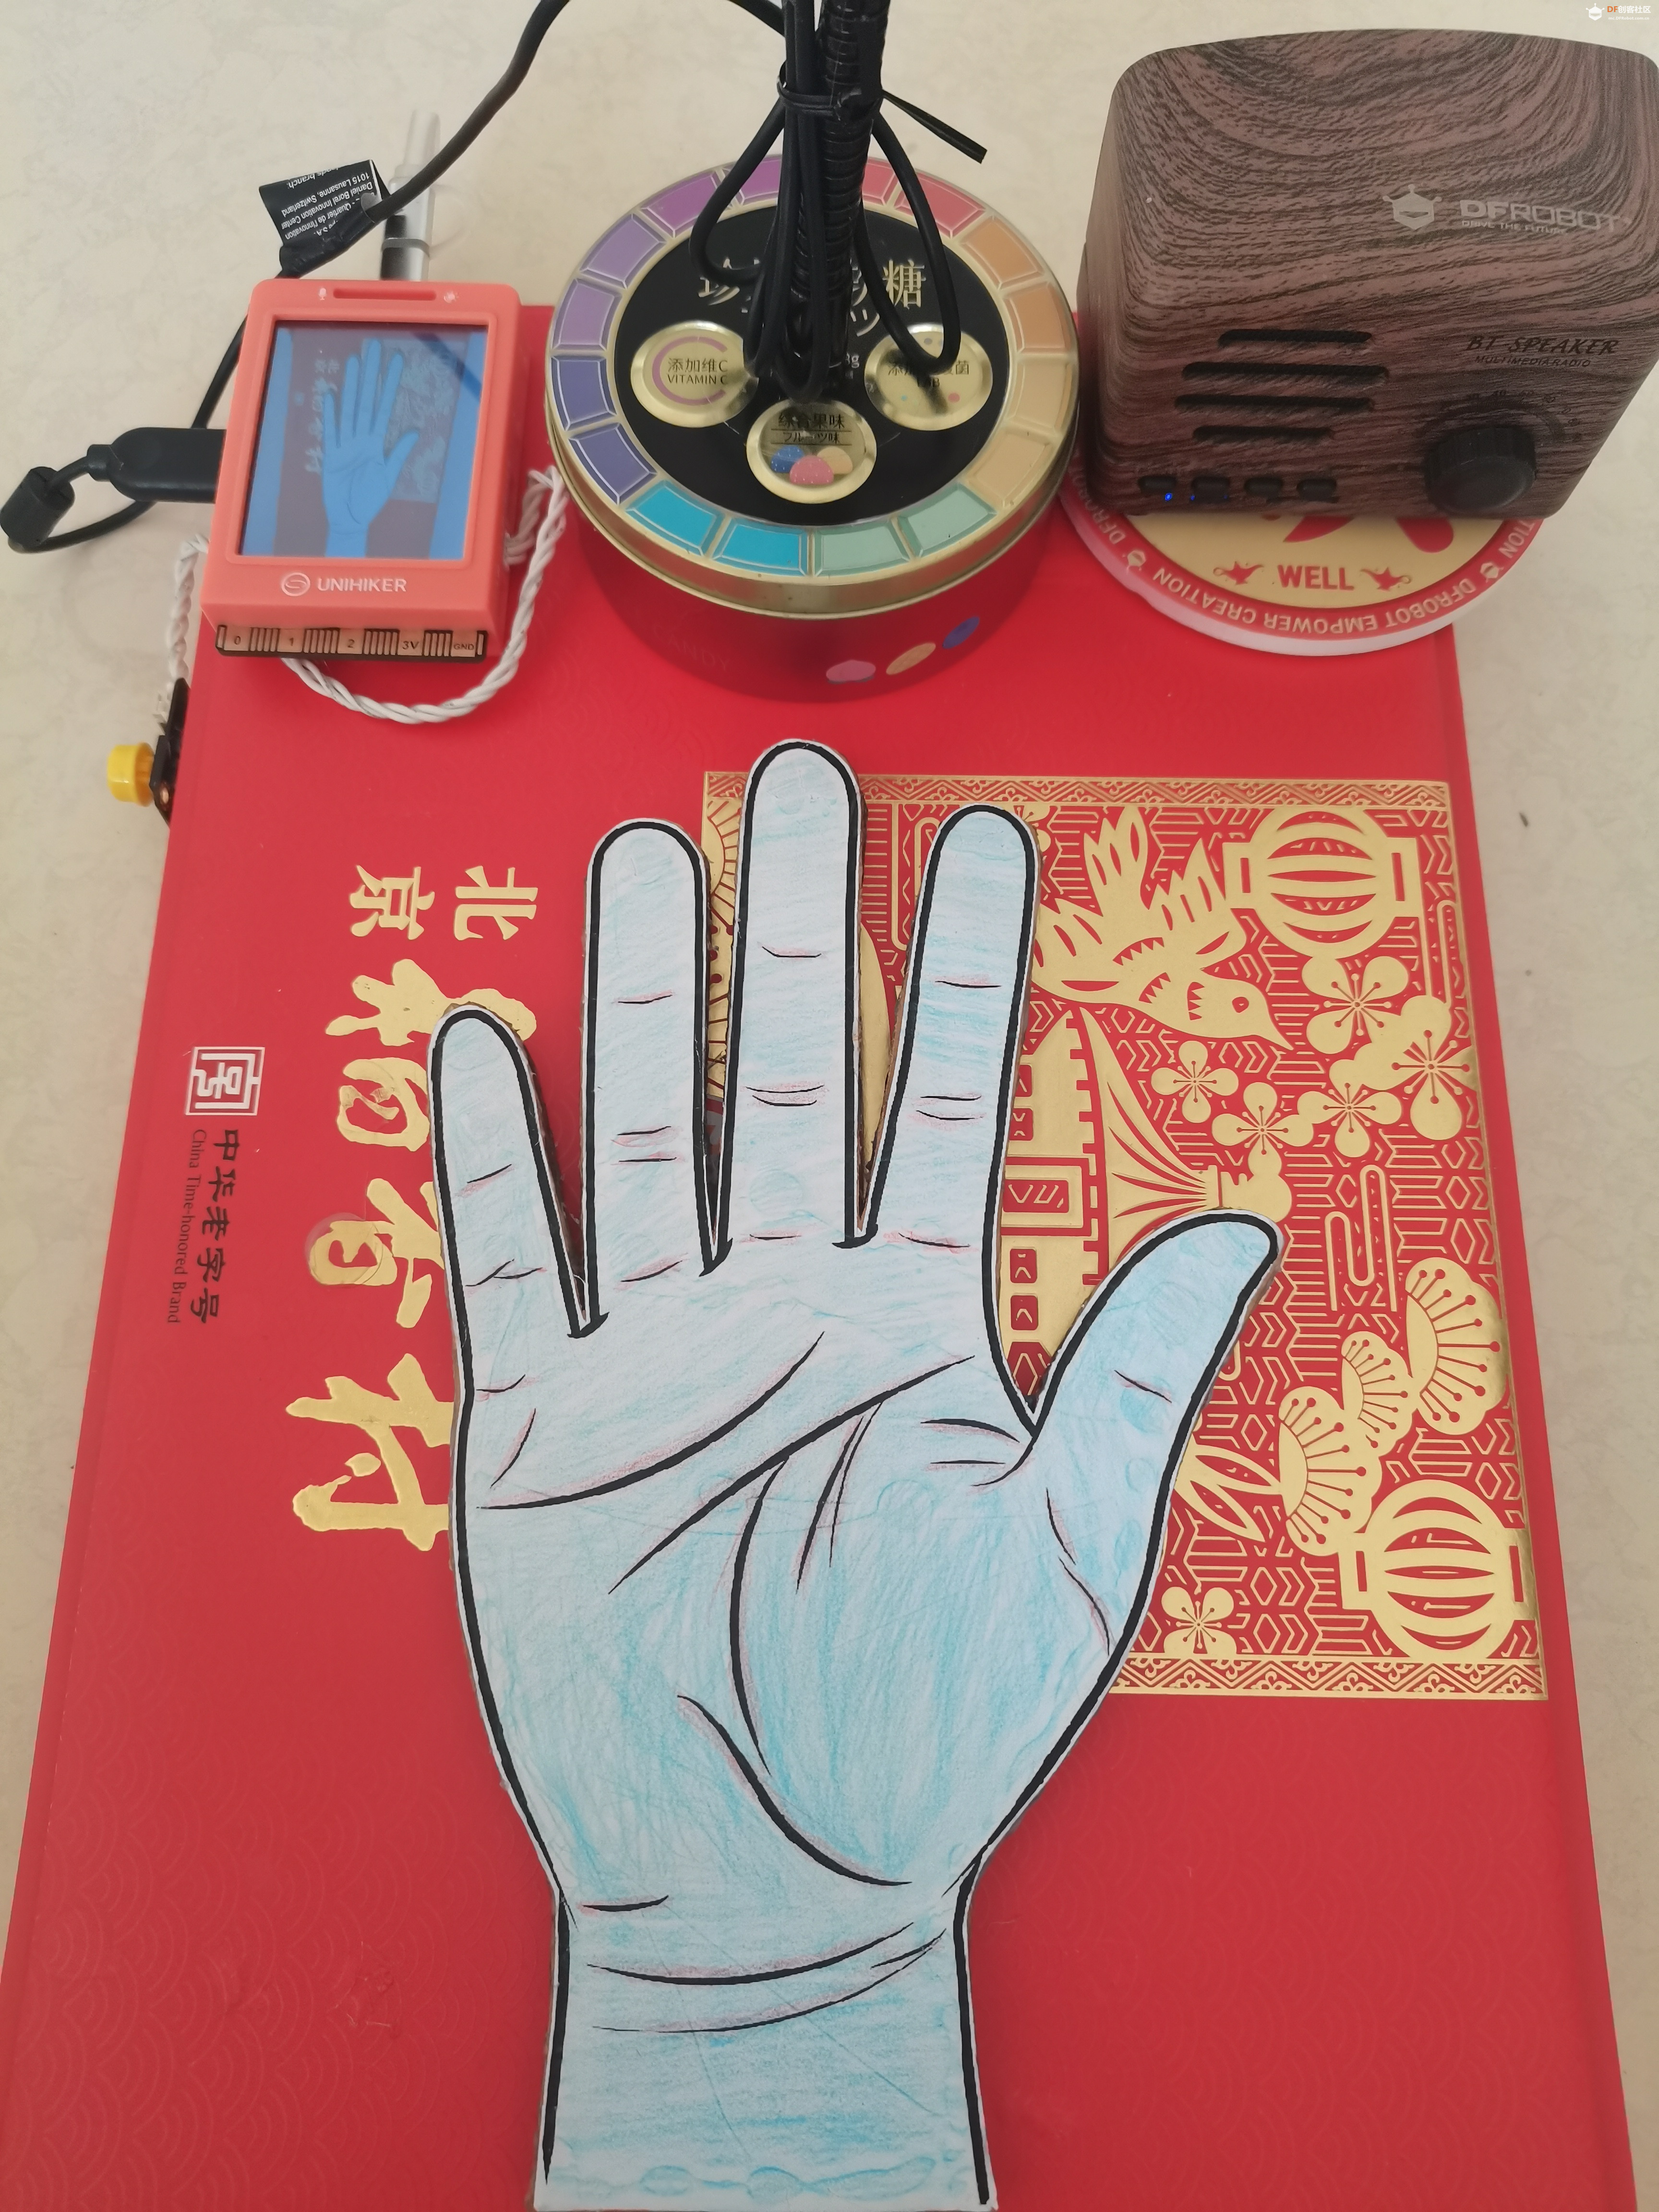
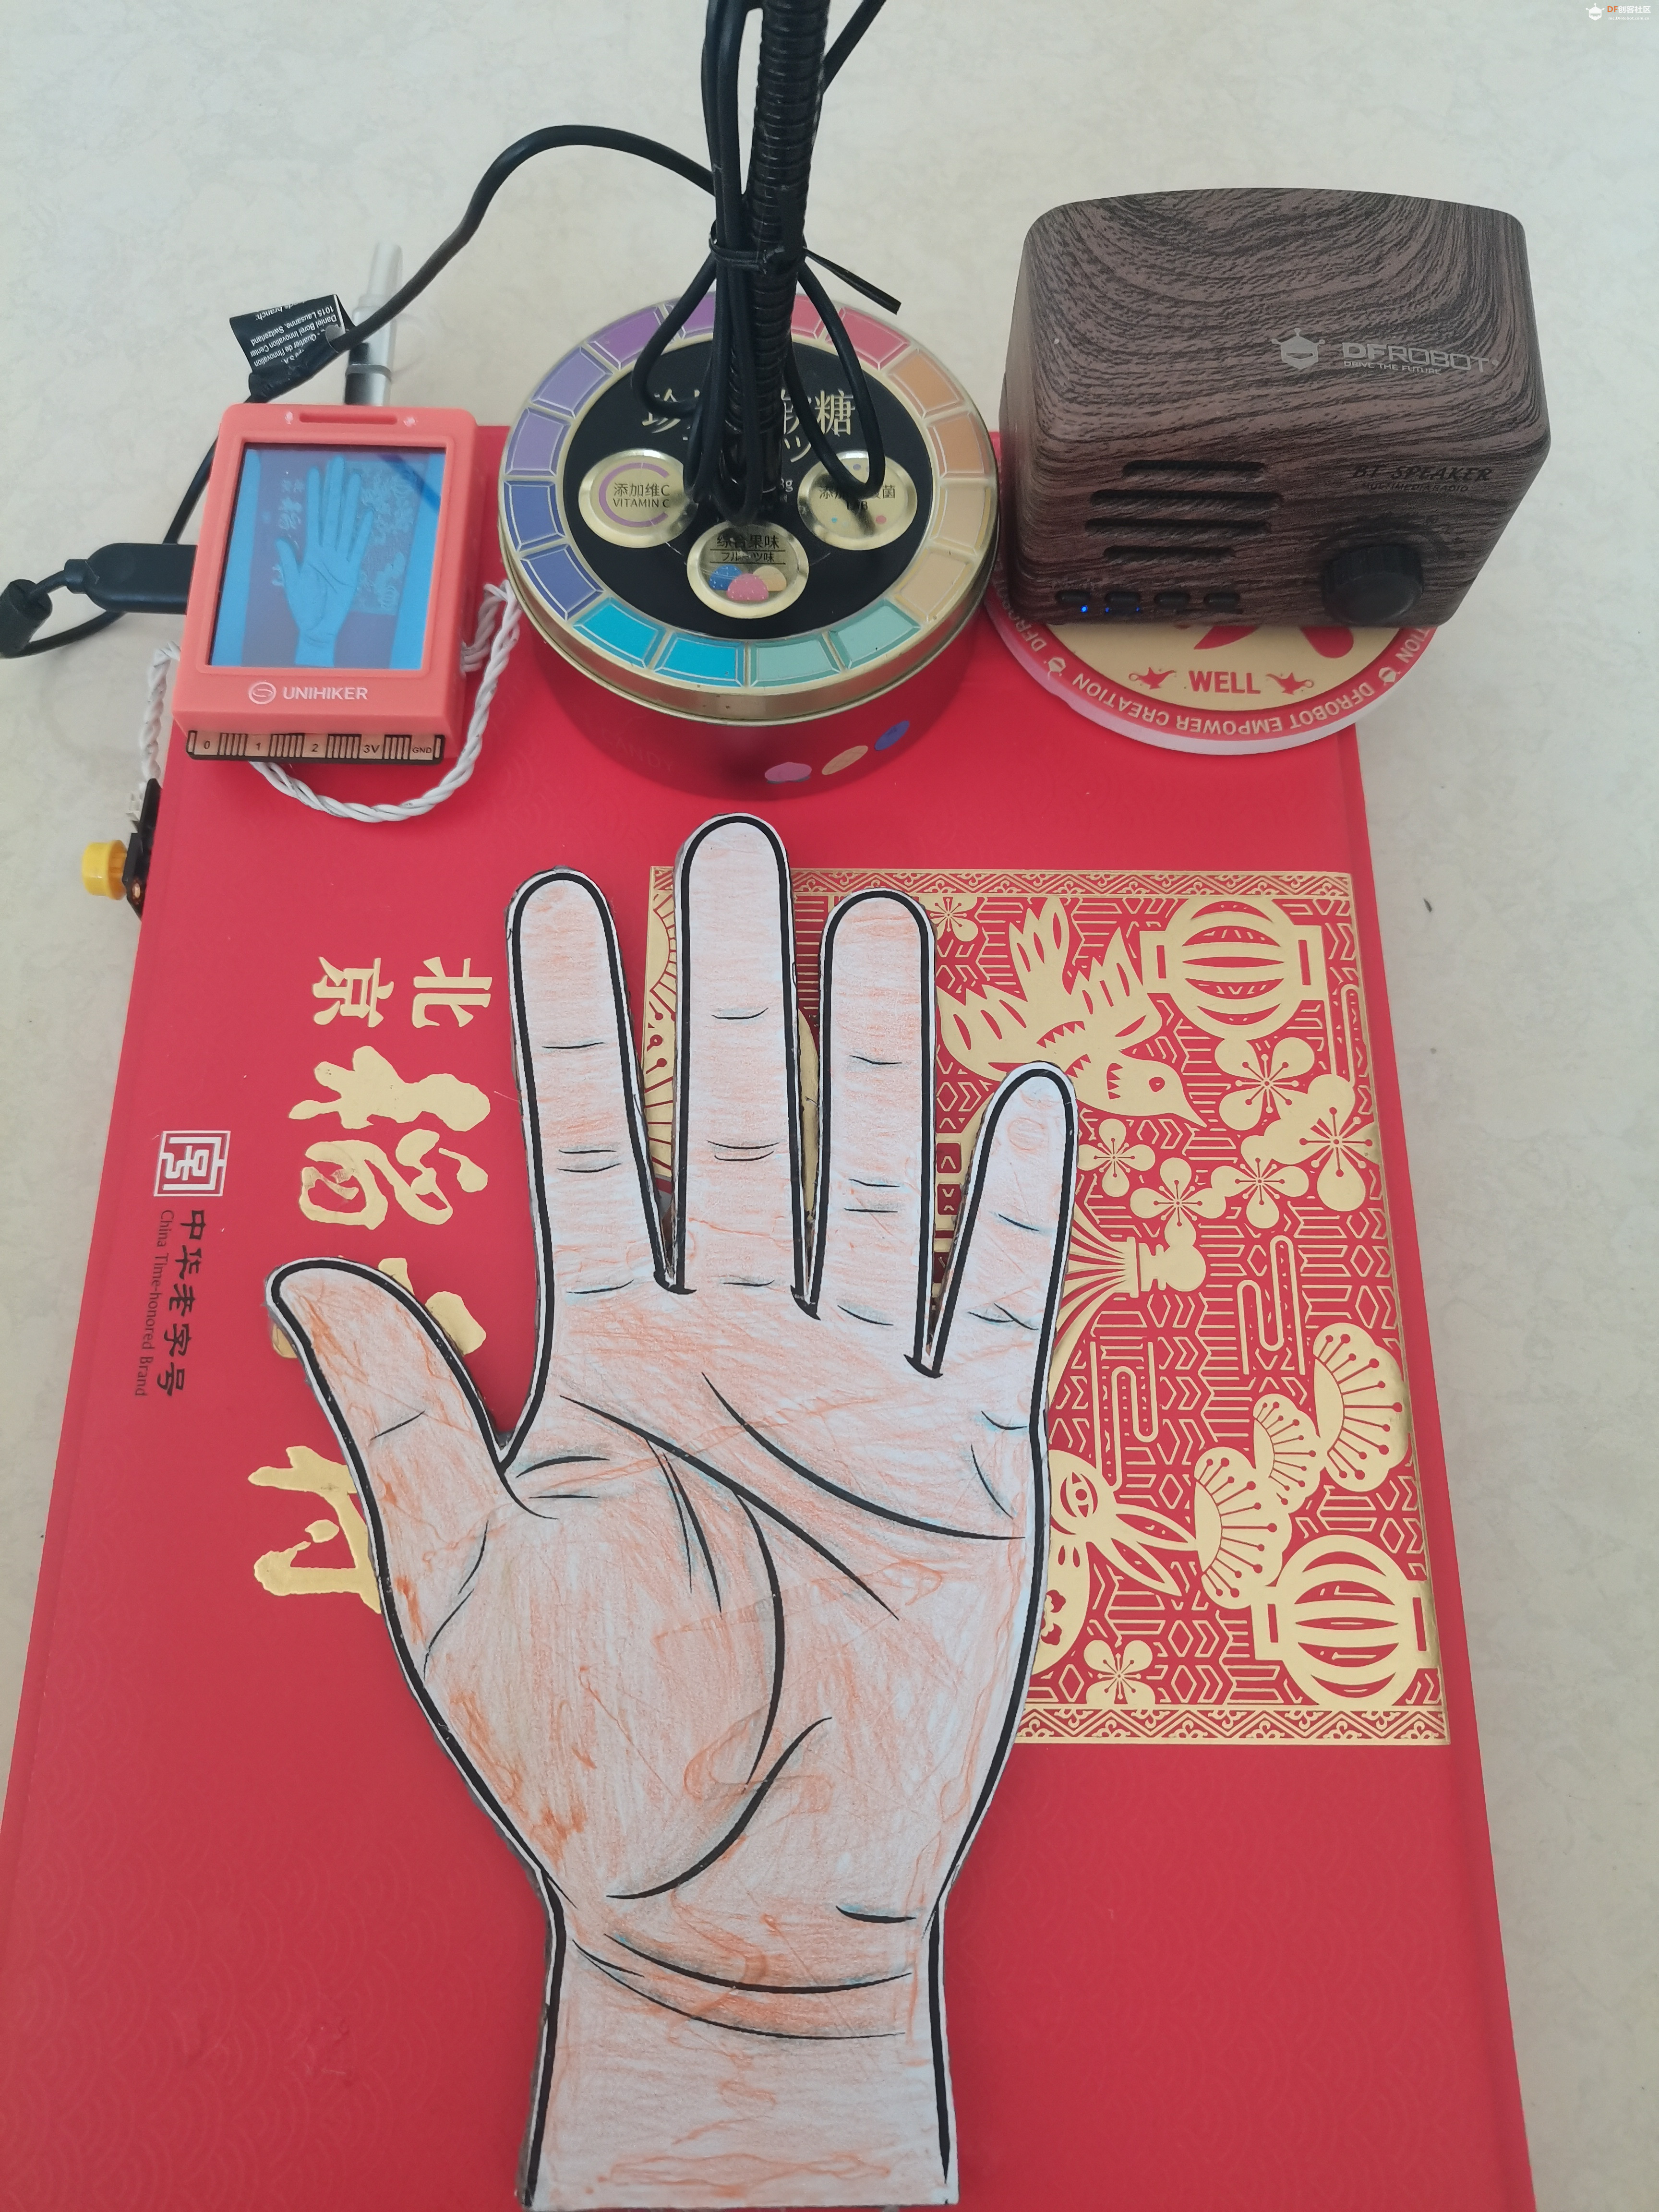
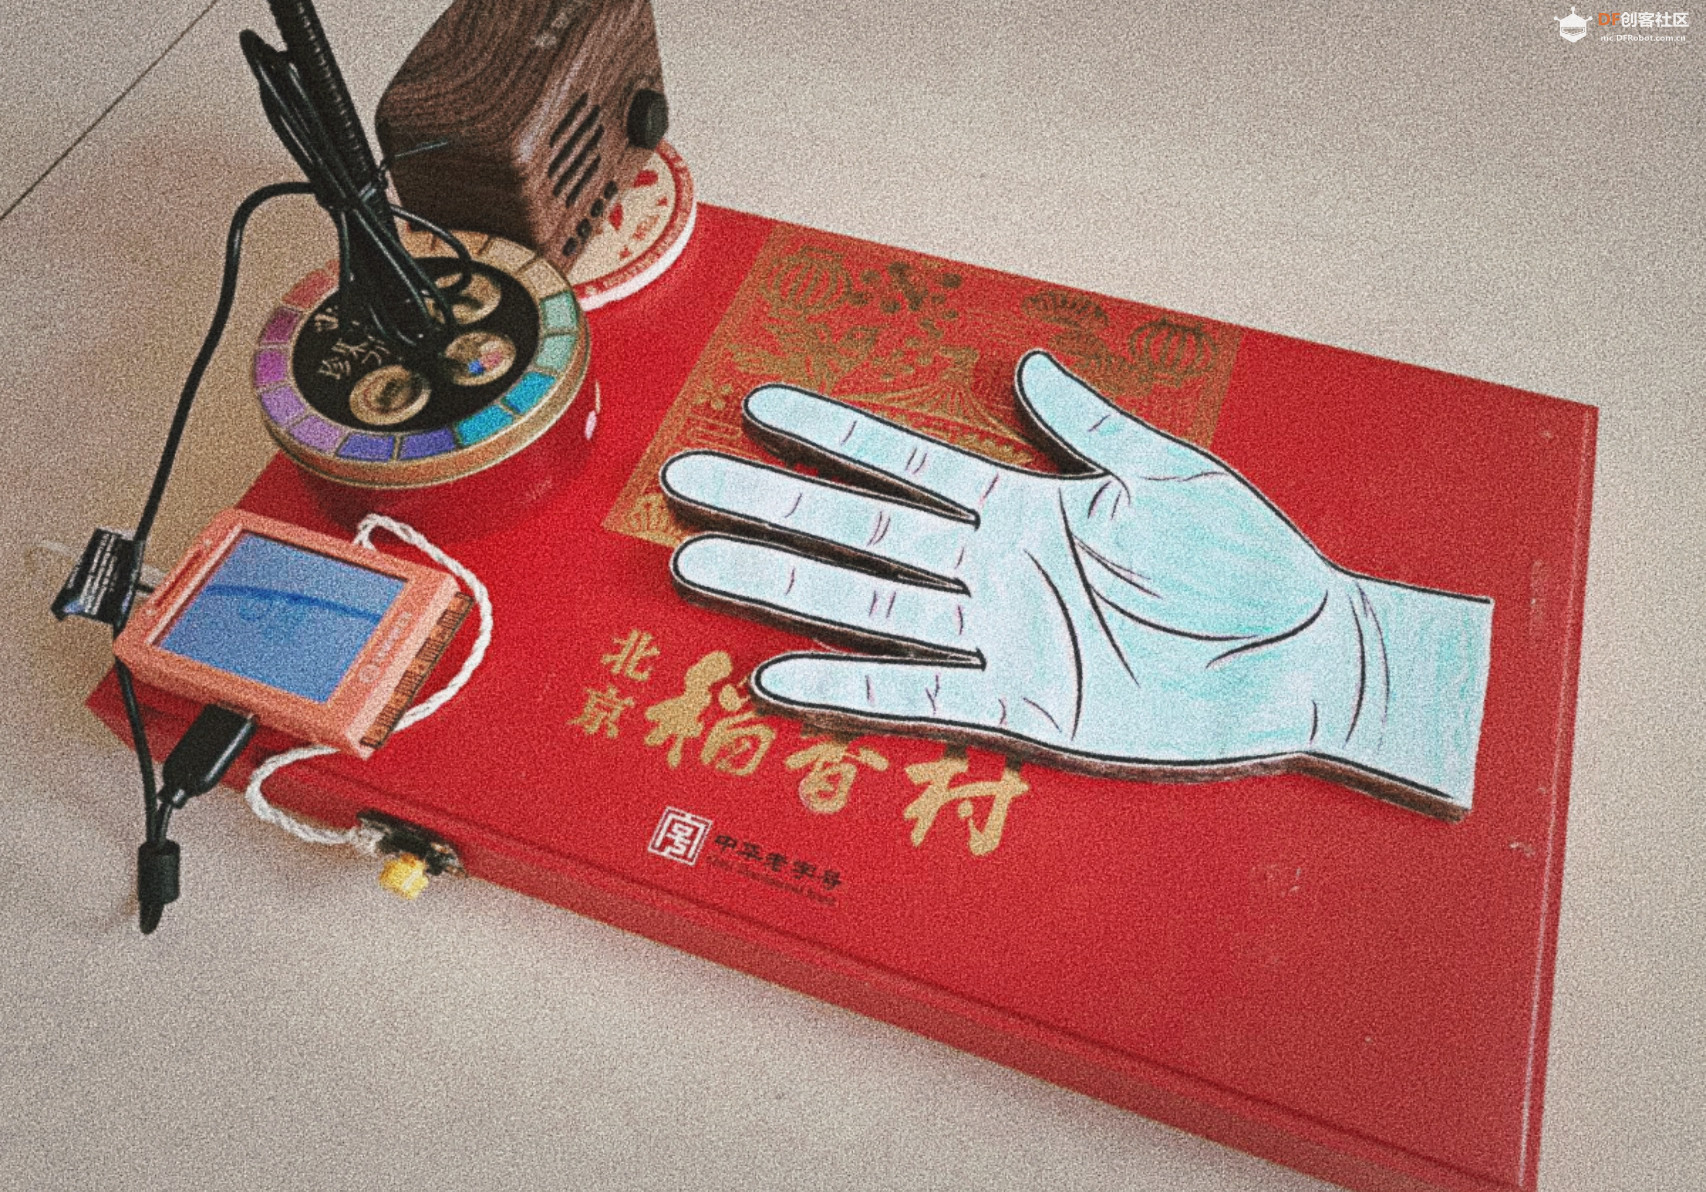
手势提示板分左右手 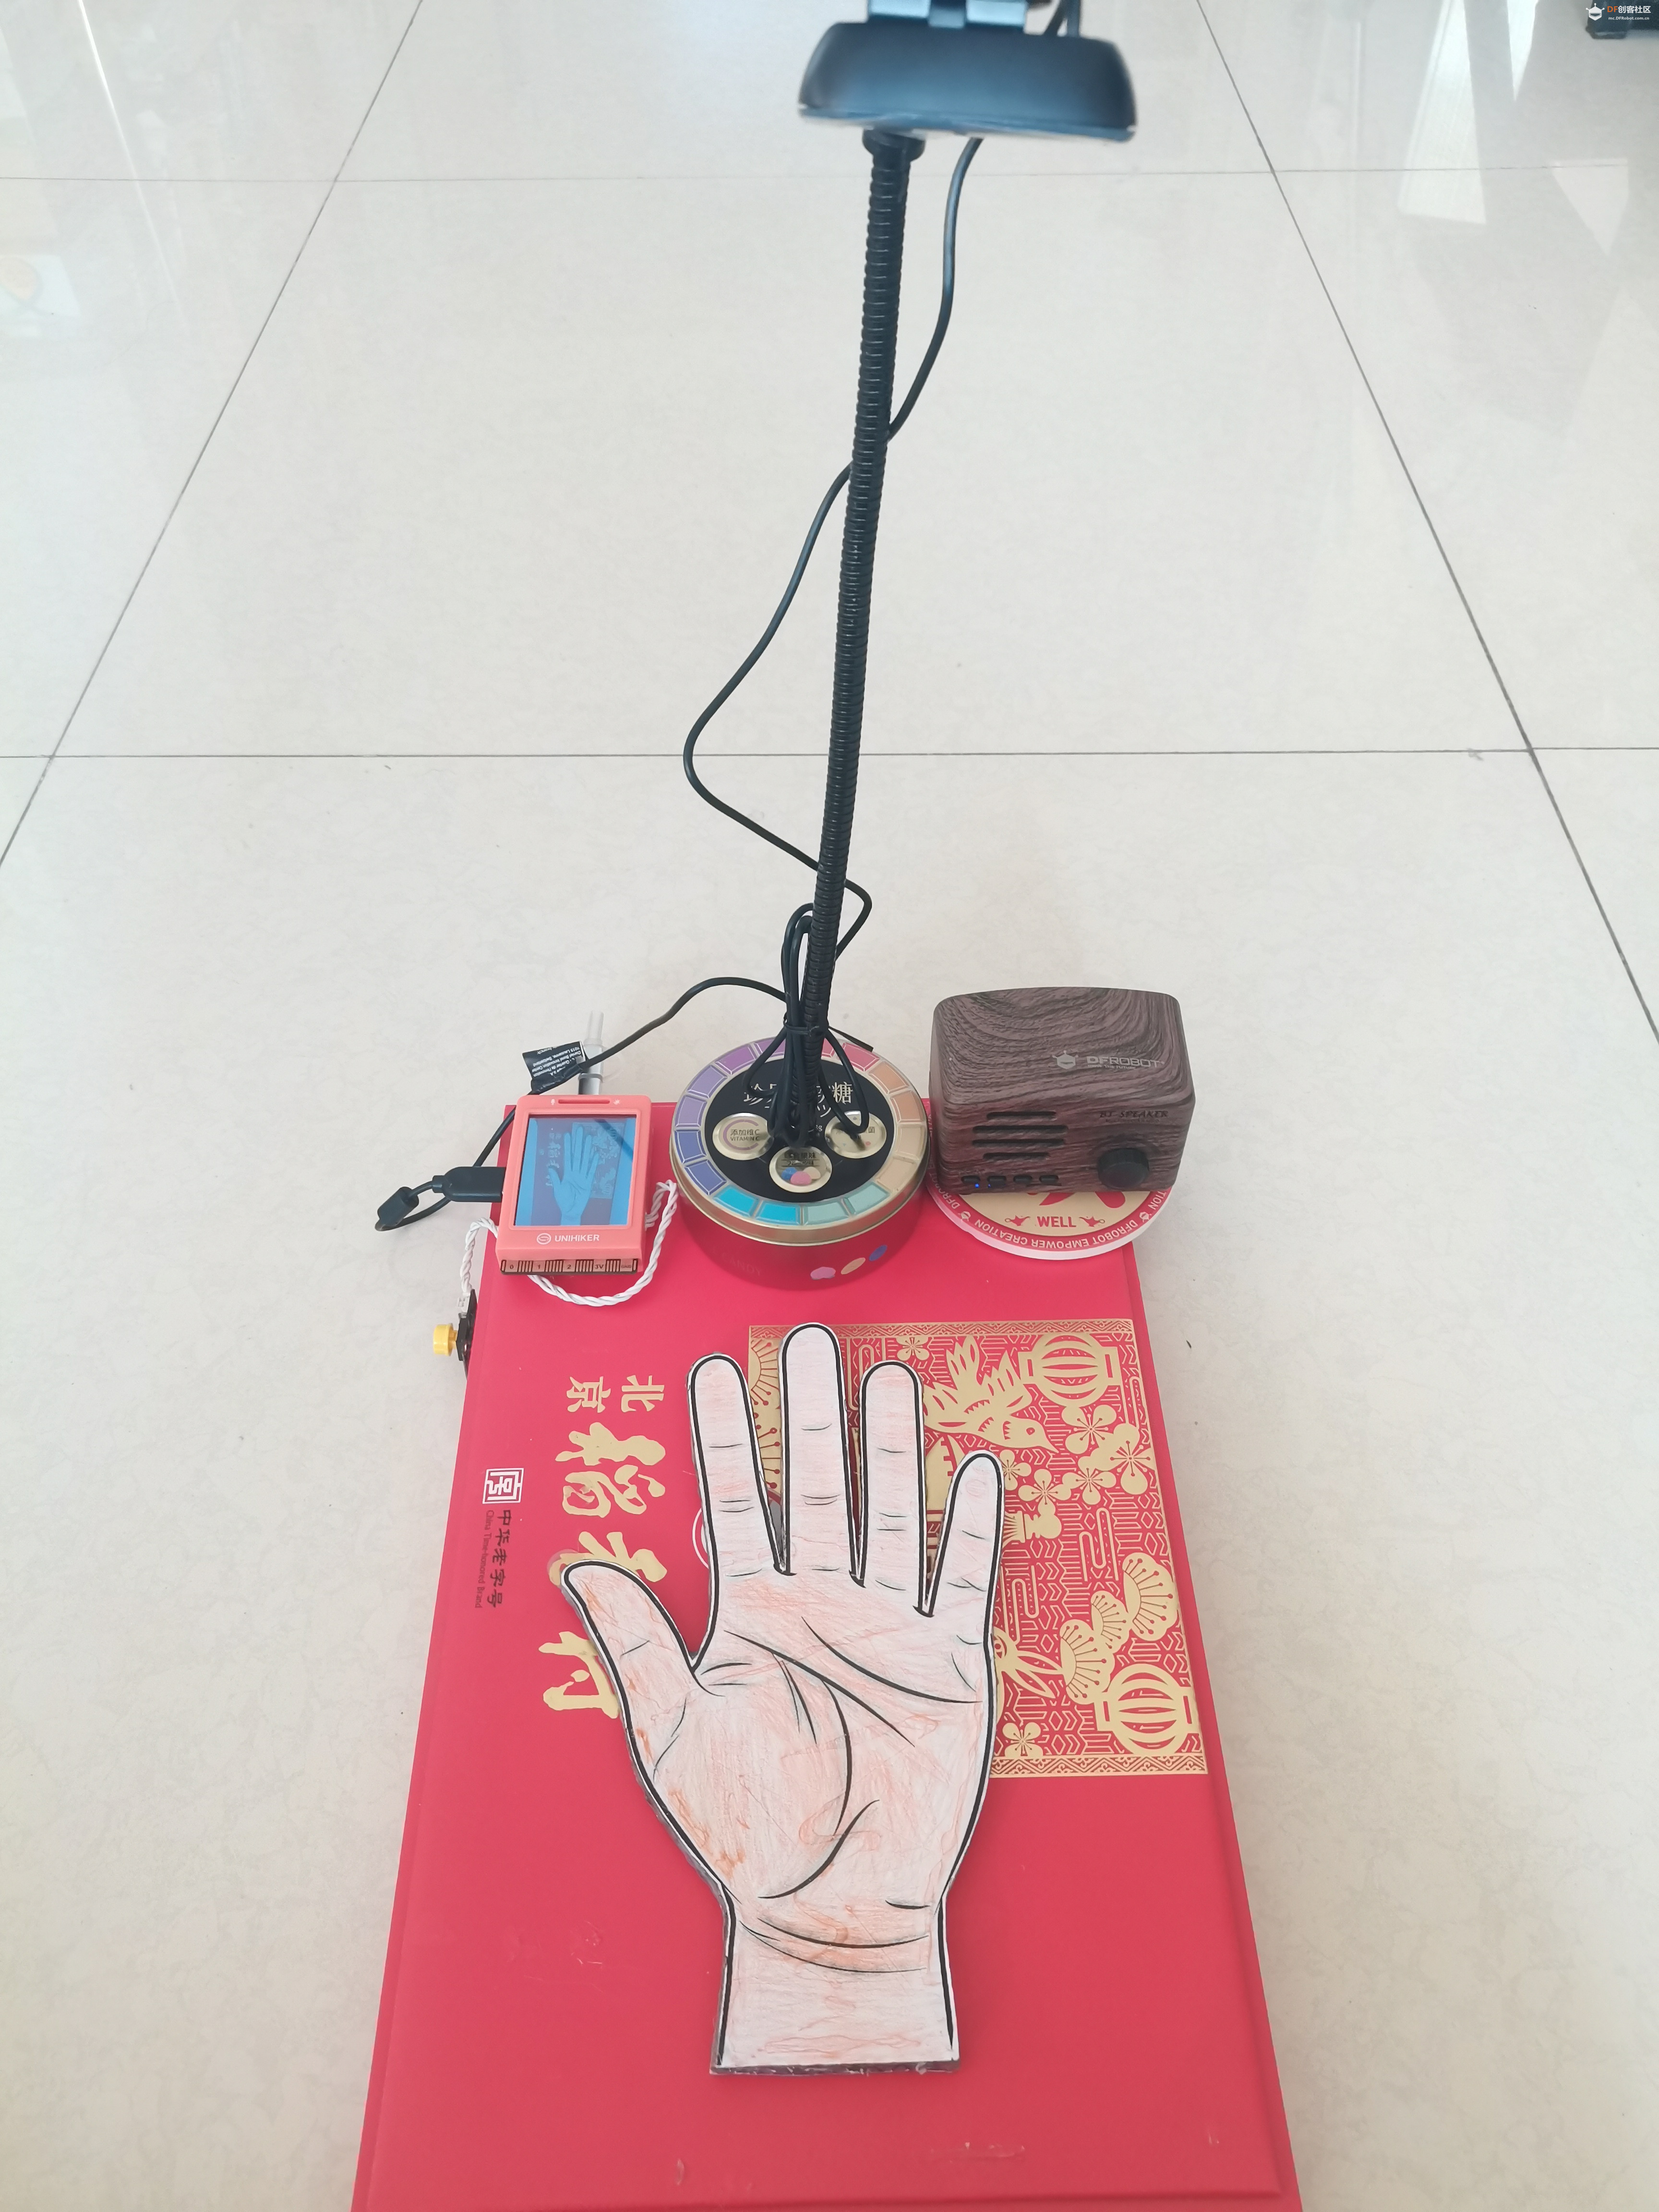
充电宝(电源)在底座里 【图像理解】 用户输入一张图片和问题,从而识别出图片中的对象、场景等信息回答用户的问题。https://console.xfyun.cn/services/image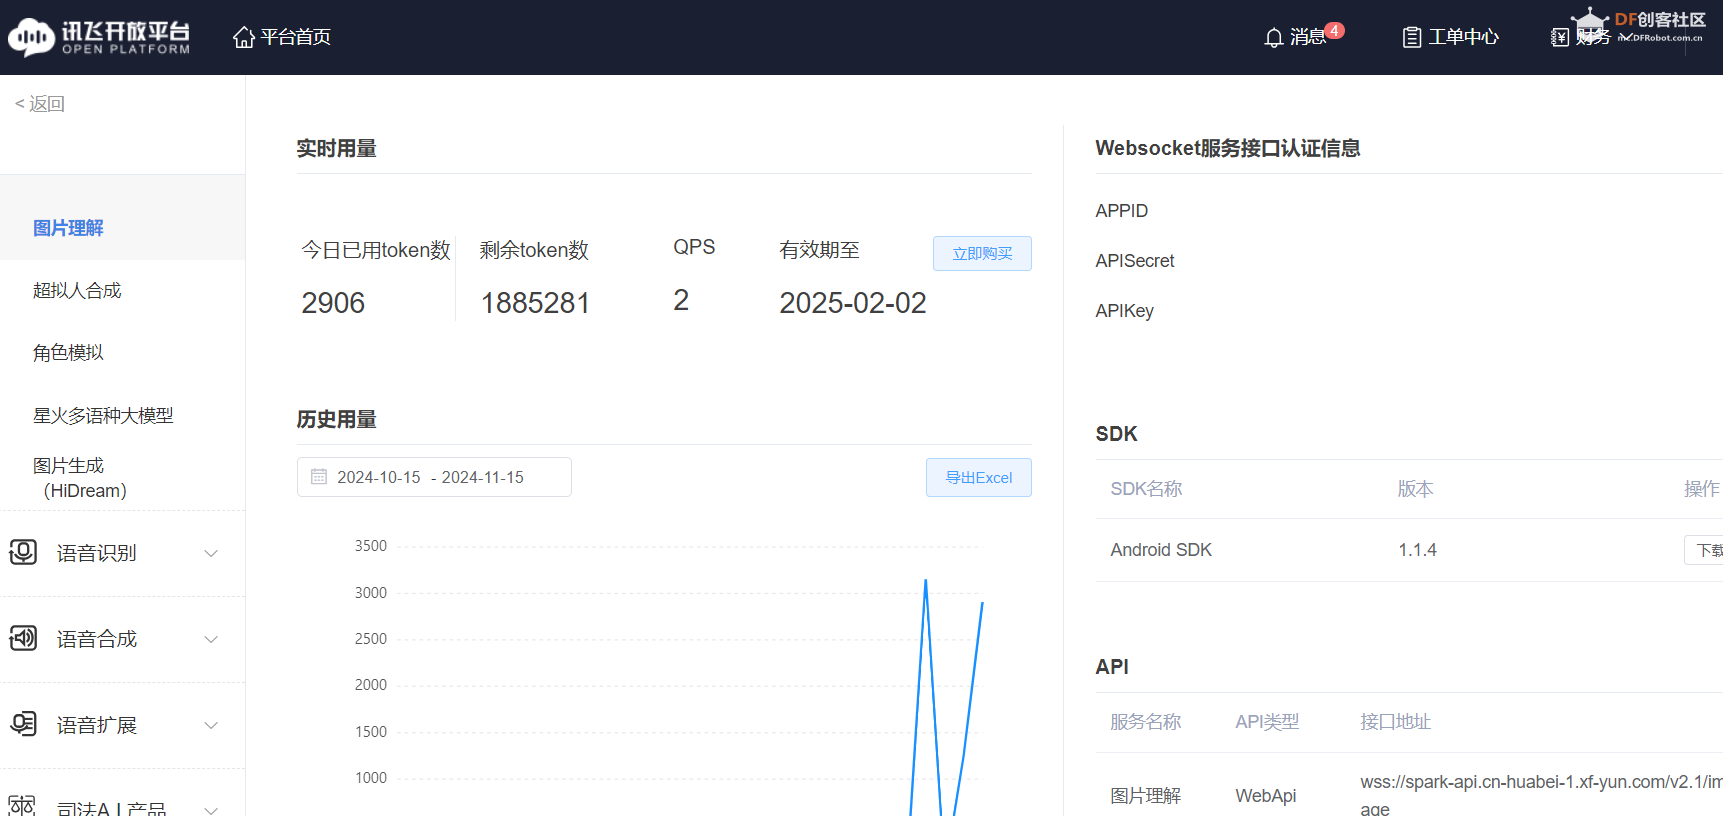
【程序代码】
1.图像理解这段Python程序,它利用WebSocket协议与讯飞星火认知大模型的图像理解服务进行通信。脚本的主要功能是读取本地存储的手掌图像,将其编码为Base64格式,并通过WebSocket发送到服务器进行手相分析。服务器处理后返回的分析结果以文本形式输出。此外,脚本还具备错误处理和连接管理功能,确保了与服务器通信的稳定性和安全性。
-
- import _thread as thread
- import base64
- import datetime
- import hashlib
- import hmac
- import json
- from urllib.parse import urlparse
- import ssl
- from datetime import datetime
- from time import mktime
- from urllib.parse import urlencode
- from wsgiref.handlers import format_date_time
- import websocket # 使用websocket_client
-
-
- appid = "**************" #填写控制台中获取的 APPID 信息
- api_secret = "***************" #填写控制台中获取的 APISecret 信息
- api_key ="*****************" #填写控制台中获取的 APIKey 信息
- imagedata = open("hand.jpg",'rb').read()
-
-
-
- imageunderstanding_url = "wss://spark-api.cn-huabei-1.xf-yun.com/v2.1/image"#云端环境的服务地址
- text =[{"role": "user", "content": str(base64.b64encode(imagedata), 'utf-8'), "content_type":"image"}]
-
-
-
- class Ws_Param(object):
- # 初始化
- def __init__(self, APPID, APIKey, APISecret, imageunderstanding_url):
- self.APPID = APPID
- self.APIKey = APIKey
- self.APISecret = APISecret
- self.host = urlparse(imageunderstanding_url).netloc
- self.path = urlparse(imageunderstanding_url).path
- self.ImageUnderstanding_url = imageunderstanding_url
-
- # 生成url
- def create_url(self):
- # 生成RFC1123格式的时间戳
- now = datetime.now()
- date = format_date_time(mktime(now.timetuple()))
-
- # 拼接字符串
- signature_origin = "host: " + self.host + "\n"
- signature_origin += "date: " + date + "\n"
- signature_origin += "GET " + self.path + " HTTP/1.1"
-
- # 进行hmac-sha256进行加密
- signature_sha = hmac.new(self.APISecret.encode('utf-8'), signature_origin.encode('utf-8'),
- digestmod=hashlib.sha256).digest()
-
- signature_sha_base64 = base64.b64encode(signature_sha).decode(encoding='utf-8')
-
- authorization_origin = f'api_key="{self.APIKey}", algorithm="hmac-sha256", headers="host date request-line", signature="{signature_sha_base64}"'
-
- authorization = base64.b64encode(authorization_origin.encode('utf-8')).decode(encoding='utf-8')
-
- # 将请求的鉴权参数组合为字典
- v = {
- "authorization": authorization,
- "date": date,
- "host": self.host
- }
- # 拼接鉴权参数,生成url
- url = self.ImageUnderstanding_url + '?' + urlencode(v)
- #print(url)
- # 此处打印出建立连接时候的url,参考本demo的时候可取消上方打印的注释,比对相同参数时生成的url与自己代码生成的url是否一致
- return url
-
-
- # 收到websocket错误的处理
- def on_error(ws, error):
- print("### error:", error)
-
-
- # 收到websocket关闭的处理
- def on_close(ws,one,two):
- print(" ")
-
-
- # 收到websocket连接建立的处理
- def on_open(ws):
- thread.start_new_thread(run, (ws,))
-
-
- def run(ws, *args):
- data = json.dumps(gen_params(appid=ws.appid, question= ws.question ))
- ws.send(data)
-
-
- # 收到websocket消息的处理
- def on_message(ws, message):
- #print(message)
- data = json.loads(message)
- code = data['header']['code']
- if code != 0:
- print(f'请求错误: {code}, {data}')
- ws.close()
- else:
- choices = data["payload"]["choices"]
- status = choices["status"]
- content = choices["text"][0]["content"]
- print(content,end ="")
- global answer
- answer += content
- # print(1)
- if status == 2:
- ws.close()
-
-
- def gen_params(appid, question):
- """
- 通过appid和用户的提问来生成请参数
- """
-
- data = {
- "header": {
- "app_id": appid
- },
- "parameter": {
- "chat": {
- "domain": "image",
- "temperature": 0.5,
- "top_k": 4,
- "max_tokens": 2028,
- "auditing": "default"
- }
- },
- "payload": {
- "message": {
- "text": question
- }
- }
- }
-
- return data
-
-
- def main(appid, api_key, api_secret, imageunderstanding_url,question):
-
- wsParam = Ws_Param(appid, api_key, api_secret, imageunderstanding_url)
- websocket.enableTrace(False)
- wsUrl = wsParam.create_url()
- ws = websocket.WebSocketApp(wsUrl, on_message=on_message, on_error=on_error, on_close=on_close, on_open=on_open)
- ws.appid = appid
- #ws.imagedata = imagedata
- ws.question = question
- ws.run_forever(sslopt={"cert_reqs": ssl.CERT_NONE})
-
-
- def getText(role, content):
- jsoncon = {}
- jsoncon["role"] = role
- jsoncon["content"] = content
- text.append(jsoncon)
- return text
-
-
- def getlength(text):
- length = 0
- for content in text:
- temp = content["content"]
- leng = len(temp)
- length += leng
- return length
-
-
- def checklen(text):
- #print("text-content-tokens:", getlength(text[1:]))
- while (getlength(text[1:])> 8000):
- del text[1]
- return text
-
- if __name__ == '__main__':
-
- #text.clear
- if 1:
- Input = "你是一位传统手相学大师,下面请分析这张手相图片。手相解读形成一段话。开头要这样说:从你的手相上可看出你的……"
- question = checklen(getText("user",Input))
- answer = ""
- print("答:",end = "")
- main(appid, api_key, api_secret, imageunderstanding_url, question)
- getText("assistant", answer)
- # print(str(text))
-
-
2.图像采集 这段Python脚本利用OpenCV库和Pinpong框架,通过连接到行空板的摄像头实时捕获视频流,并在一个名为“Mind+'s Windows”的窗口中显示。用户可以通过按下ESC键来终止视频捕获。此外,脚本还监测连接到Pin P21的数字输入信号,一旦检测到高电平信号,它会将当前的视频帧保存为“pic.png”图片文件。这个程序可以用于简单的图像捕获任务,例如在特定触发条件下自动保存摄像头的实时画面。
-
- # -*- coding: UTF-8 -*-
-
- # MindPlus
- # Python
- import cv2
- from pinpong.board import Board,Pin
- from pinpong.extension.unihiker import *
-
-
- Board().begin()
- p_p21_in=Pin(Pin.P21, Pin.IN)
- vd = cv2.VideoCapture()
- vd.open(0)
- while not (vd.isOpened()):
- pass
- cv2.namedWindow("Mind+'s Windows", cv2.WINDOW_NORMAL)
-
- BiaoShi = 0
-
-
- while True:
- if vd.grab():
- ret, img = vd.read()
- cv2.imshow("Mind+'s Windows", img)
- if cv2.waitKey(20) & 0xff== 27:
- break
- if (p_p21_in.read_digital()==True):
- BiaoShi = 0
- cv2.imwrite("pic.png", img)
-
3.音频播放
这段Python脚本通过pyaudio和wave库实现了WAV音频文件的播放功能。脚本定义了一个playwav函数,该函数接受一个WAV文件名作为参数。它首先使用wave库打开指定的WAV文件,然后创建一个pyaudio对象来处理音频流。接着,脚本根据WAV文件的属性(如采样宽度、通道数和采样率)配置音频流,并开始从文件中读取音频数据。数据以1024字节为单位读取,并通过音频流实时播放。当文件中的所有数据都被读取和播放后,脚本会停止音频流,关闭流,并终止pyaudio对象,从而完成整个播放过程。这个脚本为简单的音频播放提供了一个基础的实现框架。
-
- import pyaudio
- import wave
-
- # 打开WAV文件
- def playwav(wavname):
- wf = wave.open(wavname, 'rb')
-
- # 创建PyAudio对象
- p = pyaudio.PyAudio()
-
- # 打开流
- stream = p.open(format=p.get_format_from_width(wf.getsampwidth()),
- channels=wf.getnchannels(),
- rate=wf.getframerate(),
- output=True)
-
- # 读取数据
- data = wf.readframes(1024)
-
- # 播放
- while len(data) > 0:
- stream.write(data)
- data = wf.readframes(1024)
-
- # 停止流
- stream.stop_stream()
- stream.close()
-
- # 关闭PyAudio
- p.terminate()
4.完整程序-
- import _thread as thread
- import base64
- import datetime
- import hashlib
- import hmac
- import json
- from urllib.parse import urlparse
- import ssl
- from datetime import datetime
- from time import mktime
- from urllib.parse import urlencode
- from wsgiref.handlers import format_date_time
- import websocket # 使用websocket_client
- import sys
- sys.path.append("/root/mindplus/.lib/thirdExtension/nick-base64-thirdex")
- from df_xfyun_speech import XfTts
- import play
- import cv2
- from pinpong.board import Board,Pin
- from pinpong.extension.unihiker import *
- Board().begin()
- p_p21_in=Pin(Pin.P21, Pin.IN)
- appId = "****************"
- apiKey ="****************"
- apiSecret = "****************"
- options = {}
- business_args = {"aue":"raw","vcn":"x4_lingbosong","tte":"utf8","speed":50,"volume":50,"pitch":50,"bgs":0}
- options["business_args"] = business_args
- tts = XfTts(appId, apiKey, apiSecret, options)
- appid = "****************" #填写控制台中获取的 APPID 信息
- api_secret = "****************" #填写控制台中获取的 APISecret 信息
- api_key ="****************" #填写控制台中获取的 APIKey 信息
-
-
-
-
- imageunderstanding_url = "wss://spark-api.cn-huabei-1.xf-yun.com/v2.1/image"#云端环境的服务地址
- text =[{"role": "user", "content": "", "content_type":"image"}]
-
-
- bs=0
- class Ws_Param(object):
- # 初始化
- def __init__(self, APPID, APIKey, APISecret, imageunderstanding_url):
- self.APPID = APPID
- self.APIKey = APIKey
- self.APISecret = APISecret
- self.host = urlparse(imageunderstanding_url).netloc
- self.path = urlparse(imageunderstanding_url).path
- self.ImageUnderstanding_url = imageunderstanding_url
-
- # 生成url
- def create_url(self):
- # 生成RFC1123格式的时间戳
- now = datetime.now()
- date = format_date_time(mktime(now.timetuple()))
-
- # 拼接字符串
- signature_origin = "host: " + self.host + "\n"
- signature_origin += "date: " + date + "\n"
- signature_origin += "GET " + self.path + " HTTP/1.1"
-
- # 进行hmac-sha256进行加密
- signature_sha = hmac.new(self.APISecret.encode('utf-8'), signature_origin.encode('utf-8'),
- digestmod=hashlib.sha256).digest()
-
- signature_sha_base64 = base64.b64encode(signature_sha).decode(encoding='utf-8')
-
- authorization_origin = f'api_key="{self.APIKey}", algorithm="hmac-sha256", headers="host date request-line", signature="{signature_sha_base64}"'
-
- authorization = base64.b64encode(authorization_origin.encode('utf-8')).decode(encoding='utf-8')
-
- # 将请求的鉴权参数组合为字典
- v = {
- "authorization": authorization,
- "date": date,
- "host": self.host
- }
- # 拼接鉴权参数,生成url
- url = self.ImageUnderstanding_url + '?' + urlencode(v)
- #print(url)
- # 此处打印出建立连接时候的url,参考本demo的时候可取消上方打印的注释,比对相同参数时生成的url与自己代码生成的url是否一致
- return url
-
-
- # 收到websocket错误的处理
- def on_error(ws, error):
- print("### error:", error)
-
-
- # 收到websocket关闭的处理
- def on_close(ws,one,two):
- print(" ")
-
-
- # 收到websocket连接建立的处理
- def on_open(ws):
- thread.start_new_thread(run, (ws,))
-
-
- def run(ws, *args):
- data = json.dumps(gen_params(appid=ws.appid, question= ws.question ))
- ws.send(data)
-
-
- # 收到websocket消息的处理
- def on_message(ws, message):
- #print(message)
- data = json.loads(message)
- code = data['header']['code']
- if code != 0:
- print(f'请求错误: {code}, {data}')
- ws.close()
- else:
- choices = data["payload"]["choices"]
- status = choices["status"]
- content = choices["text"][0]["content"]
- #print(content,end ="")
- global answer
- answer += content
- # print(1)
- if status == 2:
- bs=1
- ws.close()
-
-
- def gen_params(appid, question):
- """
- 通过appid和用户的提问来生成请参数
- """
-
- data = {
- "header": {
- "app_id": appid
- },
- "parameter": {
- "chat": {
- "domain": "image",
- "temperature": 0.5,
- "top_k": 4,
- "max_tokens": 2028,
- "auditing": "default"
- }
- },
- "payload": {
- "message": {
- "text": question
- }
- }
- }
-
- return data
-
-
- def main(appid, api_key, api_secret, imageunderstanding_url,question):
-
- wsParam = Ws_Param(appid, api_key, api_secret, imageunderstanding_url)
- websocket.enableTrace(False)
- wsUrl = wsParam.create_url()
- ws = websocket.WebSocketApp(wsUrl, on_message=on_message, on_error=on_error, on_close=on_close, on_open=on_open)
- ws.appid = appid
- #ws.imagedata = imagedata
- ws.question = question
- ws.run_forever(sslopt={"cert_reqs": ssl.CERT_NONE})
-
-
- def getText(role, content):
- jsoncon = {}
- jsoncon["role"] = role
- jsoncon["content"] = content
- text.append(jsoncon)
- return text
-
-
- def getlength(text):
- length = 0
- for content in text:
- temp = content["content"]
- leng = len(temp)
- length += leng
- return length
-
-
- def checklen(text):
- #print("text-content-tokens:", getlength(text[1:]))
- while (getlength(text[1:])> 8000):
- del text[1]
- return text
-
- if __name__ == '__main__':
- vd = cv2.VideoCapture()
- vd.open(0)
- while not (vd.isOpened()):
- pass
- cv2.namedWindow("Mind+'s Windows", cv2.WINDOW_NORMAL)
-
- cv2.setWindowProperty("Mind+'s Windows", cv2.WND_PROP_FULLSCREEN, cv2.WINDOW_FULLSCREEN)
- img = cv2.imread("back.png", cv2.IMREAD_UNCHANGED)
- cv2.waitKey(1)
- Input = "你是一位传统手相学大师,下面请分析这张手相图片。手相解读形成一段话。开头要这样说:从你的手相上可看出你的……"
- #tts.synthesis("初始化完成", "chushihua.wav")
- #tts.synthesis("请将手平稳放好,正在拍照", "paizhao.wav")
- #tts.synthesis("拍照完成,正在分析中", "fenxi.wav")
- play.playwav("chushihua.wav")
- #text.clear
- while True:
- if vd.grab():
- ret, img = vd.read()
- cp_img = img.copy()
- cp_img = cv2.rotate(cp_img,cv2.ROTATE_180)
- cp_img = cv2.resize(cp_img,( 240, 320))
- cv2.imshow("Mind+'s Windows", cp_img)
- if cv2.waitKey(1) & 0xff== 27:
- break
- if (p_p21_in.read_digital()==True):
-
- play.playwav("paizhao.wav")
- ret, img = vd.read()
- cv2.imwrite("hand.jpg", img)
- imagedata = open("hand.jpg",'rb').read()
- play.playwav("fenxi.wav")
- bs=0
- text =[{"role": "user", "content": str(base64.b64encode(imagedata), 'utf-8'), "content_type":"image"}]
- question = checklen(getText("user",Input))
- answer = ""
- print("答:",end = "")
- main(appid, api_key, api_secret, imageunderstanding_url, question)
- getText("assistant", answer)
- while bs:
- pass
- print(answer)
- # print(str(text))
- tts.synthesis(answer, "speech.wav")
- play.playwav("speech.wav")
-
-
-
【演示视频】
|


 沪公网安备31011502402448